Lightroom Classic 11
Oct 30, 2021 10:40:37 #

bsprague wrote:
Yes. Around the 9 minute mark.
Oct 30, 2021 12:56:49 #
I'm using the latest Lr AND the latest IOS on an iMac PRO with a set of Monogram controls and I am a VERY happy camper. Just finished processing last night's football game with that gear. A pleasant experience, unlike the rain and cold weather last night! Best of luck.
Oct 31, 2021 01:05:30 #

bsprague wrote:
I did a search and I found only two Lightroom 11 topics. One was about compatibility with a Mac and the other had three posts about astrophotography.
I'm more than a bit excited with the now 3 day old update and am surprised that there is so little discussion here on UHH!
Along with Lightroom Classic, Adobe updated about everything else this week too!
Anybody else like what they see in the updates?
I'm more than a bit excited with the now 3 day old update and am surprised that there is so little discussion here on UHH!
Along with Lightroom Classic, Adobe updated about everything else this week too!
Anybody else like what they see in the updates?
YES! It is a game changer and is so easy to use.
Let me show an example. The image I am showing was taken with a Minolta 500mm Reflex Lens. This is a f8 mirror lens. And these lens are are known for not so pretty out of focus backgrounds. For this example, I pressed the mask button in the upper right (the round button with a dashed line around it). That starts the mask process and opens that box just to the left of the control panel.
First thing I did was press "Create new Mask" and one of my choices was to have it identify the subject which it did so perfectly. I named this "Subject" which you see. (You can call it anything you want)
Next, I went to the next level down and selected to invert which selected the background instead of the central subject. And I named this "Invented".
Now the panel is open with with all the adjustments which you see. And you can see all the various adjustments that I changed to bring that background out of focus and make it less obnoxious.
If I were to now press the "done" button, the mask window closes. If later, even years later, and I hit the mask button, it opens back up just as you see now, and I can remember all the changes I made.
In fact, all of the previous original types of masks would show up too.
Of course there is a lot more that can be done including multiple masks, intersections of masks and so on. Very powerful update. And we are told that there is more coming.
**************************** Adding another example ************************
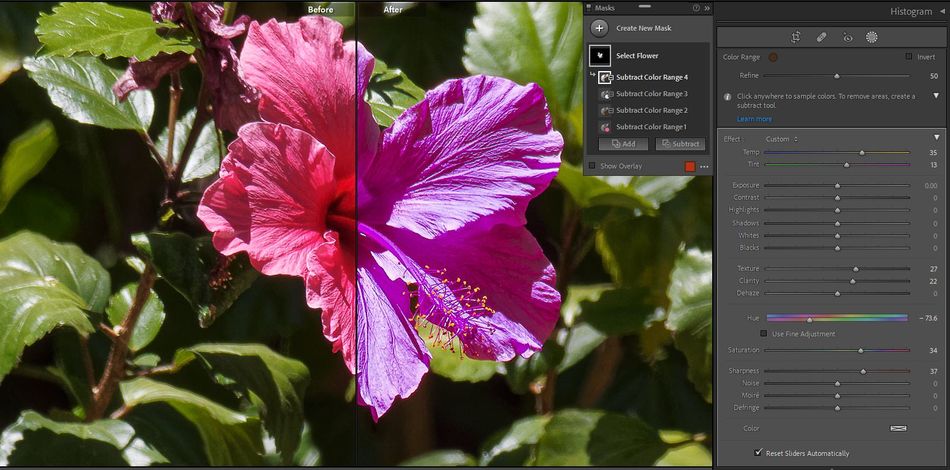
From this one, I selected a color range for the flower, but there was some spill over in other portions of the plant. Then I used Subtraction of color ranges three times to remove the other areas.
With the mask perfected, I played with changing its color.
***************************** One More ****************************************
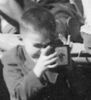
This time, using luminosity masks on a B&W image that was taken in IR with a 720nm filter


Oct 31, 2021 11:28:08 #
JimH123 wrote:
YES! It is a game changer and is so easy to use. ... (show quote)
Nice work Jim! Thanks for posting your work.
Nov 1, 2021 12:00:17 #
Used the subject masking feature. It's great, easy to use, and made it really easy for me to get better exposure balance in a photo with five people where the two in the foreground were overexposed (and selected automatically as the subject by the masking feature) and the remaining three, further away from the camera were underexposed. So the mask made it extremely easy (and fast) to differentiate the post-processing for the two different areas of the photo.
Nov 1, 2021 12:26:56 #
Robg wrote:
Used the subject masking feature. It's great, easy to use, and made it really easy for me to get better exposure balance in a photo with five people where the two in the foreground were overexposed (and selected automatically as the subject by the masking feature) and the remaining three, further away from the camera were underexposed. So the mask made it extremely easy (and fast) to differentiate the post-processing for the two different areas of the photo.
GREAT THOUGHT!!! Thanks!
Nov 1, 2021 16:49:50 #
bsprague wrote:
I did a search and I found only two Lightroom 11 topics. One was about compatibility with a Mac and the other had three posts about astrophotography.
I'm more than a bit excited with the now 3 day old update and am surprised that there is so little discussion here on UHH!
Along with Lightroom Classic, Adobe updated about everything else this week too!
Anybody else like what they see in the updates?
I'm more than a bit excited with the now 3 day old update and am surprised that there is so little discussion here on UHH!
Along with Lightroom Classic, Adobe updated about everything else this week too!
Anybody else like what they see in the updates?
Macbook Pro running Monterey-no issues. Need some time with the masking process and procedures. Cannot see an improvement in anything I tried.
Nov 9, 2021 10:28:33 #
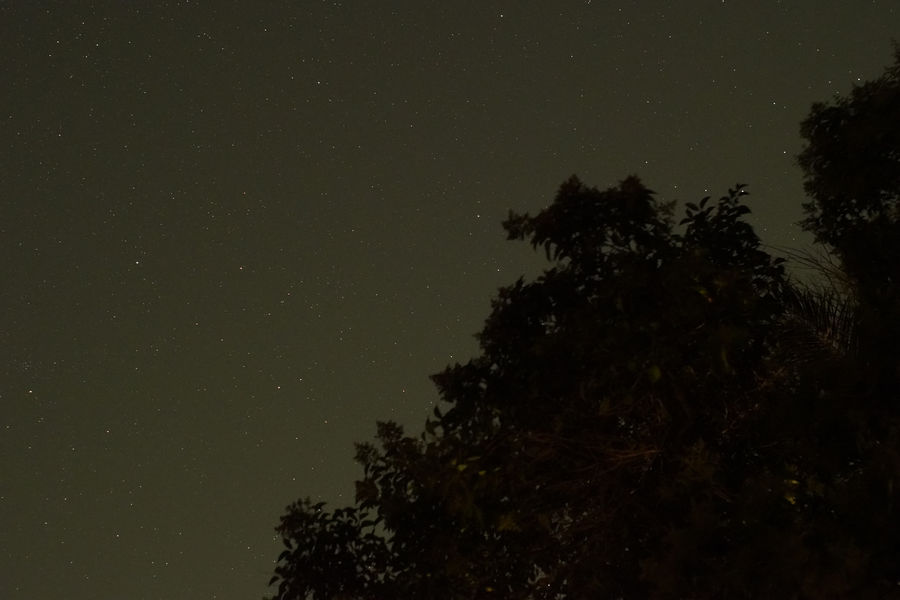
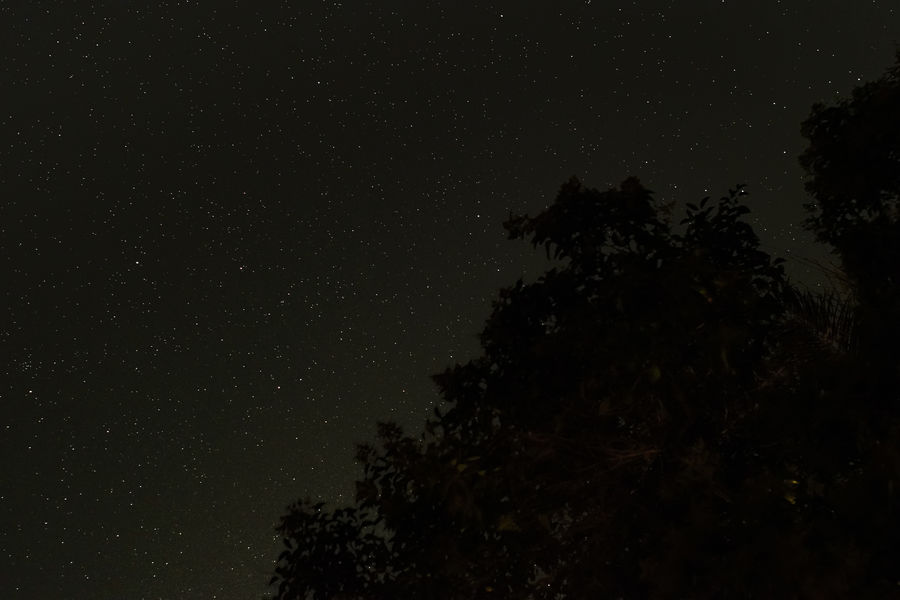
Showing the effect of Lightroom masking on the night sky with stars. Started by a luminance range on the sky background by magnifying and selecting a region with no stars. Then adjusted the range such that the whole sky was selected, but not the stars. I then darkened this selected region until the sky reached the darkness I wanted.
Next created a new mask with another luminance range, but I carefully selected a medium brightness star. Adjusted the slider until just stars were selected. Finally adjusted Texture and Clarity plus some sharpening to brighten the stars a bit.
Previously, I would have used a term called "stretching" in which the image is loaded into Photoshop and by playing with "curves" and "levels" would have attempted to stretch the stars brighter and the background darker with everything being affected including the tree in the foreground. The Lightroom Masking preserves things that were not wanted to be "stretched".
You will need to hit the download button to better see the effect since the stars are small and when downsized on the screen can't be seen as well.
The camera was a Sony A6600 with a 10 sec exposure at ISO 5000. The lens was an old Minolta Rokkor 28mm f2.5 lens. I failed to write down what f-stop setting was used. You can see here just how well this old vintage lens performed with the lack of CA, Coma and Astigmatism. I have newer lenses that wouldn't have rendered the image as well as this.
The tools keep getting Better!
Nov 13, 2021 19:38:19 #
bsprague wrote:
Everytime I look at a Loupedeck, I seem to think I need or want one!
If you are a Lightroom-centric user, then the Loupedeck + is the way to go. The CT is glitzy, but the interface is difficult to master. LD's recent software update fixed an error with the new Masking menu in LR.
If you want to reply, then register here. Registration is free and your account is created instantly, so you can post right away.