Rockin' What You Got Lesson 5
Jun 16, 2012 23:29:10 #

Im sure you are just like me and like to believe that it couldnt possibly be our fault that at photo comes out blurry, only sadly most of the time it isnt true. I was surprised at how often a blurry photo is caused by me not picking the right settings for the situation.
The following is some reasons why we might not be nailing our focus.
1. Shutter Speed
Our shutter speed is simply to slow. We want to make sure our shutter speed is at least two times the length of the lens that we are using. This will help minimize the blur caused by camera shake. For example if you are using the popular 50mm (which I used for all the samples posted in this lesson) we would want to keep our SS at a minimum of 160.
Sometimes if we are shooting a subject that is fast (bird in flight, toddler, and sports activity) we will get motion blur, to combat this we simply need to pick a faster shutter speed.
Toddlers and young children I try to keep my shutter speed over 1/250 of a second.
For Sports where I want to freeze the action I bump up my shutter speed to 1/500 of a second or even 1/1000 of second.
The only time we really dont need to worry about our SS is if we are using a tripod and the self timer or wireless trigger. Remember to turn of the IS for your lens and you should have no issue with camera shake at all (None moving subject).
Below is an example of how shutter speed can affect your focus. The first image was shot hand held at 1/800 of a second, the second was also hand held but this time the SS was .5 of a second. As you can see the camera shake was more noticeable in the second image.
http://i20.photobucket.com/albums/b220/ToadMum/7961fbc9.jpg
http://i20.photobucket.com/albums/b220/ToadMum/3542523c.jpg
2. Aperture
When we pick to narrow of a depth of field we are upping our chances for focus issues. Every lens has a sweet spot which is usually two stops higher than the widest opening. Test out your lenses to find out your happy place (ok stop laughing). Lots of people fall into the trap of shooting at the widest aperture their lenses will allow, thats great and is totally up to you just make sure if you are going to shot wide open you know how to handle it. The most common mistake in shooting wide open is being too close to your subject, step back!
Below is an example of how the aperture setting can affect your focus. The first image was shot with an aperture of f/1.8 the widest aperture my little 50 mm will allow. The second was shot at f/8.0. In the first image you can actually see how narrow my depth of field was.
http://i20.photobucket.com/albums/b220/ToadMum/9ad94e06.jpg
http://i20.photobucket.com/albums/b220/ToadMum/e16ce9a9.jpg
3. Focal Points
Picking the wrong focal point will also throw off your focus, so keep an eye on those little red dots. Actually grab your manual right now and find out how to turn your camera to single point focus, you will thank me for this later, I promise. With single point focus, you select where the focal point will be not the camera. See that little red dot light up when you push the shutter button down half way? That is where your focus is going to fall. Make sure you aim that little dot right where you want it. If you want to change your composition of your shot, then change your focal point accordingly and re-focus.
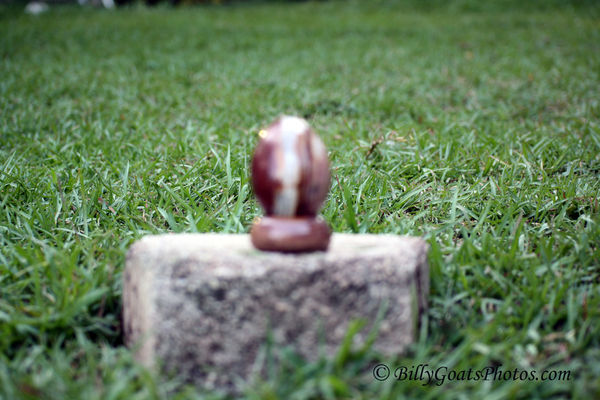
Below is an example showing how selecting the wrong focal point (or leaving your camera on auto) can affect your focus. The fist image I allowed the camera to pick the focal point and it chose the blade of grass in front of the domino. In the second image I selected center red dot and placed it just over one of the dots on the domino.
http://i20.photobucket.com/albums/b220/ToadMum/84d6ff96.jpg
http://i20.photobucket.com/albums/b220/ToadMum/8e469688.jpg
There are a couple of other things to consider when working on nailing focus:
Focus Modes:
One shot: Suited for still subjects, when you press the shutter button half way the camera will focus only once. Use this when you wish to try focusing and recomposing as well.
Al Servo: Suited for moving subject when the focusing distance keeps changing (them quick little toddlers come to mind). When you press the shutter button halfway, the camera will continually focus on the subject. Also great for sports.
Al Focus: Suited for still subjects which MAY start moving. When you press the shutter button halfway, the camera will focus only once unless the subject starts to move. Then it will automatically start using Al Serve mode.
Back Button Focusing (BBF)
Back button focusing is like the secret no one in high school would tell you about. Instead of pressing the shutter button half way down, you can assign your auto focus to a different button on the back of your camera. Some people (myself included) find this method helps with focusing tremendously. Check your manual for how to set this feature on your camera and play around with it see if its for you. There are also many, many tutorials on this subject on YouTube.
I find that using BBF is beneficial when shooting fast moving subjects (like them kids again) I set the auto focus mode to Al Serveo and hold my BBF button down and follow my subject until I am ready to take the picture. You are less likely to lose focus this way over trying to use one shot mode and taking your chances on catching your subject at the exact right time.
Other Misc. Info
You can get a photo in focus with any camera but you cant get every photo in focus with every camera. Are you lost? Let me explain . Some cameras have higher ISO capabilities than others and if you want to be able to control your shutter speed and aperture, you know from week 3s lesson that we will have to factor in our ISO settings.
Im sure everyone has a different opinion on the topic of lenses, but I am of the opinion that some lenses are just better than others when it comes to focusing. Some are sharper and some are quicker to find focus. Youll need to research to make your decision on which lenses to purchase based on your needs. Dont forget some lenses have IS (Image Stabilizer) build in to minimize camera shake.
Sometimes it will come down to just not having enough light to get your settings where you need them to be. Artificial lighting can be very helpful tool in this instance. Whether it be an external flash you bounce of the ceiling or a set of studio lights. The choice is yours as to whether you want to spend any money on artificial lighting to help you nail your focus.
Sometimes your camera has a hard time locking focus when there just isnt enough contrast. Just try to take a picture of a solid white subject, like an egg on a white background. Youll have a nearly impossible time. This normally isnt an issue when shooting people, just focused on their eyes. If there isnt enough contrast in our desired frame, its time to use Manual focus and trust your good old eyeballs.
Alternatively, if someone is wearing a high contrasting shirt, your focus might fall off their eyeball and onto the pattern instead of where you want it. Ask your subjects not to wear bold patterns close to the face or try if placed in that situation, switch to manual focus.
So now your most likely asking how do I know if my focus fell in the wrong place? the LCD screen on your camera is usually too small to see if your focus is off, so you can either wait till you get home to check or use the little magnifying glass button on your camera to zoom in and check.
Distance
Make sure you are not too close to your subject; your lens may have a hard time focusing where you want it. Take a step or two back and refocus. Its easier to crop a well focused image that try and sharpen a mess.
Sun/Light
If you are shooting into the sun, you may have a hard time getting your lens to focus as well. If this is the case, then you may have to switch to manual focus to get your camera to allow you to take the photo. The same problem may occur when you are dealing with a great deal of reflection coming onto you lens. It may be reflection from some water or window but whatever it is that is causing it, you will need to either move away or try that manual focus again.
Homework
For your homework/assignment, you might have to dig out your trusty camera manual (sorry).
#1 - Set up a stationary item and take a picture letting your camera pick the focal points.
#2 - using the same settings take the same picture but select a single focal point placed over what you think is the most important part of the image.
#3 - same picture again but this time drop your F/stop as wide open as it will go, adjust your settings to allow for correct exposure. make sure to also keep your SS above 200 (so you might have to adjust your ISO as well.
#4 - once again take the same picture up with a smaller aperture (larger f stop number), adjust your settings as before.
Now upload the images and take a look at your sharpness, what do you notice?
To find the previous weeks lessons:
Lesson 1: http://www.uglyhedgehog.com/t-41242-1.html
Lesson 2: http://www.uglyhedgehog.com/t-42355-1.html
Lesson 3: http://www.uglyhedgehog.com/t-44193-1.html
Lesson 4: http://www.uglyhedgehog.com/t-45521-1.html
The following is some reasons why we might not be nailing our focus.
1. Shutter Speed
Our shutter speed is simply to slow. We want to make sure our shutter speed is at least two times the length of the lens that we are using. This will help minimize the blur caused by camera shake. For example if you are using the popular 50mm (which I used for all the samples posted in this lesson) we would want to keep our SS at a minimum of 160.
Sometimes if we are shooting a subject that is fast (bird in flight, toddler, and sports activity) we will get motion blur, to combat this we simply need to pick a faster shutter speed.
Toddlers and young children I try to keep my shutter speed over 1/250 of a second.
For Sports where I want to freeze the action I bump up my shutter speed to 1/500 of a second or even 1/1000 of second.
The only time we really dont need to worry about our SS is if we are using a tripod and the self timer or wireless trigger. Remember to turn of the IS for your lens and you should have no issue with camera shake at all (None moving subject).
Below is an example of how shutter speed can affect your focus. The first image was shot hand held at 1/800 of a second, the second was also hand held but this time the SS was .5 of a second. As you can see the camera shake was more noticeable in the second image.
http://i20.photobucket.com/albums/b220/ToadMum/7961fbc9.jpg
http://i20.photobucket.com/albums/b220/ToadMum/3542523c.jpg
2. Aperture
When we pick to narrow of a depth of field we are upping our chances for focus issues. Every lens has a sweet spot which is usually two stops higher than the widest opening. Test out your lenses to find out your happy place (ok stop laughing). Lots of people fall into the trap of shooting at the widest aperture their lenses will allow, thats great and is totally up to you just make sure if you are going to shot wide open you know how to handle it. The most common mistake in shooting wide open is being too close to your subject, step back!
Below is an example of how the aperture setting can affect your focus. The first image was shot with an aperture of f/1.8 the widest aperture my little 50 mm will allow. The second was shot at f/8.0. In the first image you can actually see how narrow my depth of field was.
http://i20.photobucket.com/albums/b220/ToadMum/9ad94e06.jpg
http://i20.photobucket.com/albums/b220/ToadMum/e16ce9a9.jpg
3. Focal Points
Picking the wrong focal point will also throw off your focus, so keep an eye on those little red dots. Actually grab your manual right now and find out how to turn your camera to single point focus, you will thank me for this later, I promise. With single point focus, you select where the focal point will be not the camera. See that little red dot light up when you push the shutter button down half way? That is where your focus is going to fall. Make sure you aim that little dot right where you want it. If you want to change your composition of your shot, then change your focal point accordingly and re-focus.
Below is an example showing how selecting the wrong focal point (or leaving your camera on auto) can affect your focus. The fist image I allowed the camera to pick the focal point and it chose the blade of grass in front of the domino. In the second image I selected center red dot and placed it just over one of the dots on the domino.
http://i20.photobucket.com/albums/b220/ToadMum/84d6ff96.jpg
http://i20.photobucket.com/albums/b220/ToadMum/8e469688.jpg
There are a couple of other things to consider when working on nailing focus:
Focus Modes:
One shot: Suited for still subjects, when you press the shutter button half way the camera will focus only once. Use this when you wish to try focusing and recomposing as well.
Al Servo: Suited for moving subject when the focusing distance keeps changing (them quick little toddlers come to mind). When you press the shutter button halfway, the camera will continually focus on the subject. Also great for sports.
Al Focus: Suited for still subjects which MAY start moving. When you press the shutter button halfway, the camera will focus only once unless the subject starts to move. Then it will automatically start using Al Serve mode.
Back Button Focusing (BBF)
Back button focusing is like the secret no one in high school would tell you about. Instead of pressing the shutter button half way down, you can assign your auto focus to a different button on the back of your camera. Some people (myself included) find this method helps with focusing tremendously. Check your manual for how to set this feature on your camera and play around with it see if its for you. There are also many, many tutorials on this subject on YouTube.
I find that using BBF is beneficial when shooting fast moving subjects (like them kids again) I set the auto focus mode to Al Serveo and hold my BBF button down and follow my subject until I am ready to take the picture. You are less likely to lose focus this way over trying to use one shot mode and taking your chances on catching your subject at the exact right time.
Other Misc. Info
You can get a photo in focus with any camera but you cant get every photo in focus with every camera. Are you lost? Let me explain . Some cameras have higher ISO capabilities than others and if you want to be able to control your shutter speed and aperture, you know from week 3s lesson that we will have to factor in our ISO settings.
Im sure everyone has a different opinion on the topic of lenses, but I am of the opinion that some lenses are just better than others when it comes to focusing. Some are sharper and some are quicker to find focus. Youll need to research to make your decision on which lenses to purchase based on your needs. Dont forget some lenses have IS (Image Stabilizer) build in to minimize camera shake.
Sometimes it will come down to just not having enough light to get your settings where you need them to be. Artificial lighting can be very helpful tool in this instance. Whether it be an external flash you bounce of the ceiling or a set of studio lights. The choice is yours as to whether you want to spend any money on artificial lighting to help you nail your focus.
Sometimes your camera has a hard time locking focus when there just isnt enough contrast. Just try to take a picture of a solid white subject, like an egg on a white background. Youll have a nearly impossible time. This normally isnt an issue when shooting people, just focused on their eyes. If there isnt enough contrast in our desired frame, its time to use Manual focus and trust your good old eyeballs.
Alternatively, if someone is wearing a high contrasting shirt, your focus might fall off their eyeball and onto the pattern instead of where you want it. Ask your subjects not to wear bold patterns close to the face or try if placed in that situation, switch to manual focus.
So now your most likely asking how do I know if my focus fell in the wrong place? the LCD screen on your camera is usually too small to see if your focus is off, so you can either wait till you get home to check or use the little magnifying glass button on your camera to zoom in and check.
Distance
Make sure you are not too close to your subject; your lens may have a hard time focusing where you want it. Take a step or two back and refocus. Its easier to crop a well focused image that try and sharpen a mess.
Sun/Light
If you are shooting into the sun, you may have a hard time getting your lens to focus as well. If this is the case, then you may have to switch to manual focus to get your camera to allow you to take the photo. The same problem may occur when you are dealing with a great deal of reflection coming onto you lens. It may be reflection from some water or window but whatever it is that is causing it, you will need to either move away or try that manual focus again.
Homework
For your homework/assignment, you might have to dig out your trusty camera manual (sorry).
#1 - Set up a stationary item and take a picture letting your camera pick the focal points.
#2 - using the same settings take the same picture but select a single focal point placed over what you think is the most important part of the image.
#3 - same picture again but this time drop your F/stop as wide open as it will go, adjust your settings to allow for correct exposure. make sure to also keep your SS above 200 (so you might have to adjust your ISO as well.
#4 - once again take the same picture up with a smaller aperture (larger f stop number), adjust your settings as before.
Now upload the images and take a look at your sharpness, what do you notice?
To find the previous weeks lessons:
Lesson 1: http://www.uglyhedgehog.com/t-41242-1.html
Lesson 2: http://www.uglyhedgehog.com/t-42355-1.html
Lesson 3: http://www.uglyhedgehog.com/t-44193-1.html
Lesson 4: http://www.uglyhedgehog.com/t-45521-1.html
Jun 17, 2012 09:42:39 #

Very good information. Thank you. Now, I will see if I can put it to use. :-)
Jun 17, 2012 12:31:46 #

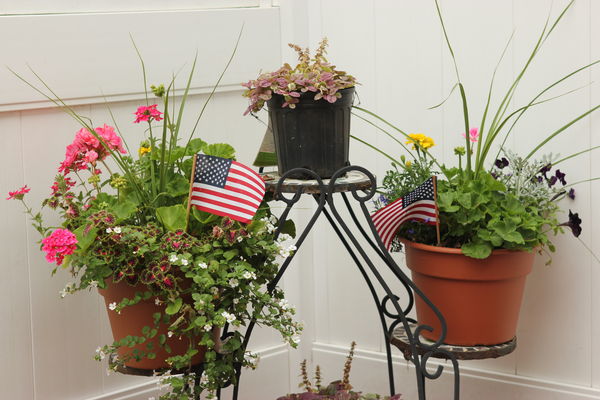
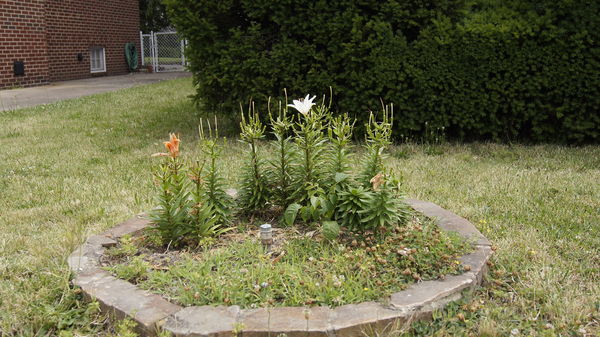
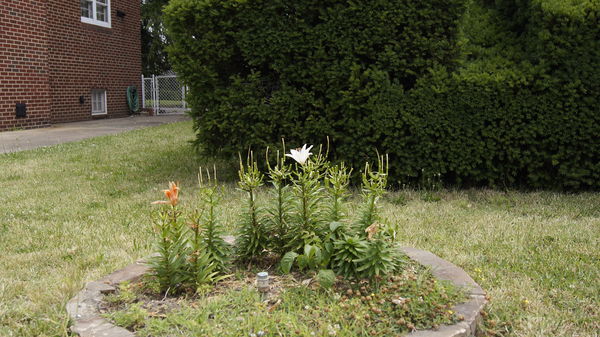
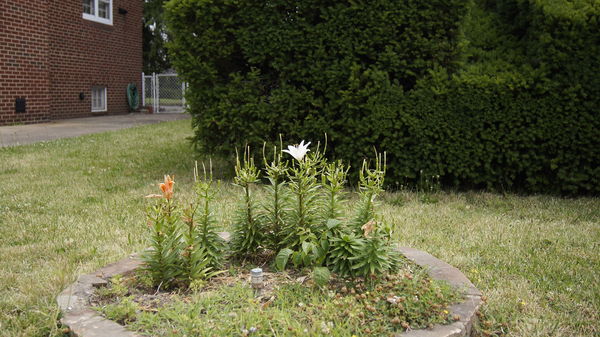
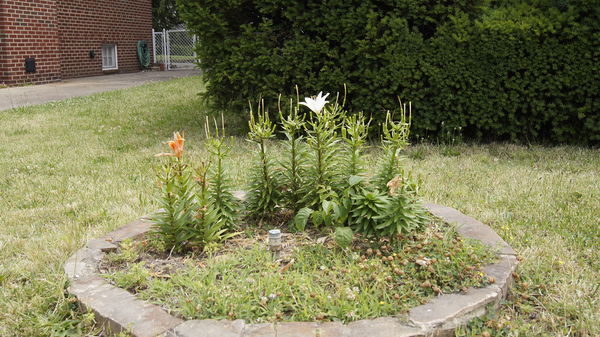
I don't see a big difference. I'm wondering if I shouldn't have shot with the white fence in the background. Any thoughts???
The auto focus shot is the last pic. I needed to delete and add it a second time so it now appears at the bottom.
The auto focus shot is the last pic. I needed to delete and add it a second time so it now appears at the bottom.
1/320 f/4 ISO 100 WB Cloudy focus on flag in left pot
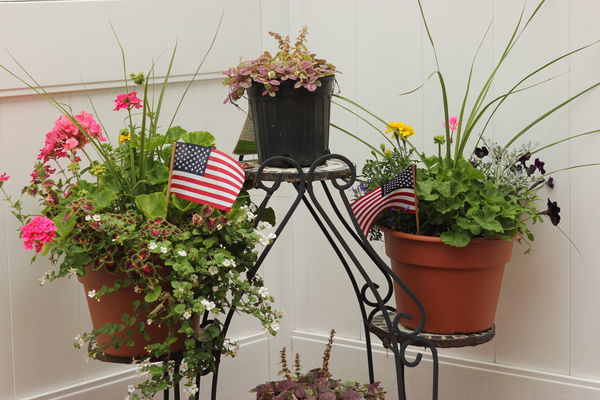
1/640 f/2.8 ISO 100 WB Cloudy focus on flag in left pot
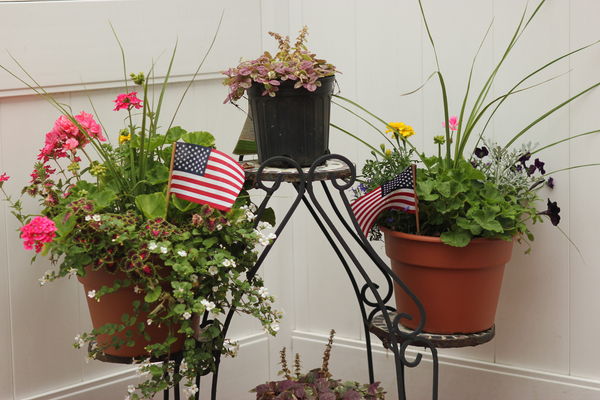
1/640 f/11 ISO 1600 WB Cloudy focus on flag in left pot
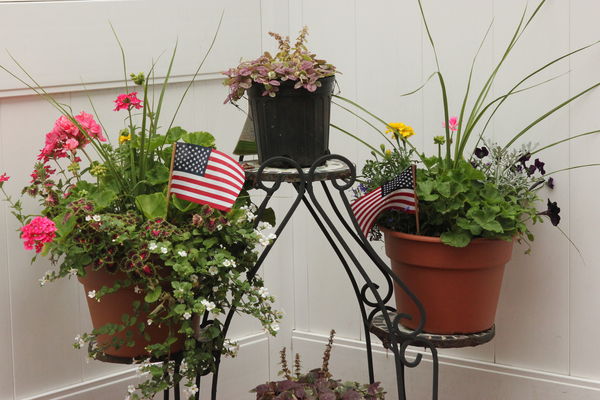
AF 1/320 f/4 ISO 100 WB Cloudy AF below flag in left pot
Jun 17, 2012 12:46:57 #

I'm finding that when the camera chose the focus points, about a dozen squares lit up and the camera gave me somewhat of an average focus so that everything was relatively in focus. When I selected a single point, the flower that I selected was in perfect focus, while everything else was a tad bit soft.
When I drop the aperture to it's lowest point, my DOF was greatly reduced and only the things closest to my center flower were in focus.
When I stopped down to f/8, more of the surrounding plants were in relative focus. :)
All shot at ISO 100
When I drop the aperture to it's lowest point, my DOF was greatly reduced and only the things closest to my center flower were in focus.
When I stopped down to f/8, more of the surrounding plants were in relative focus. :)
All shot at ISO 100
1/400 f/5.6
1/400 f/5.6
1/640 f/4
Jun 17, 2012 16:50:38 #
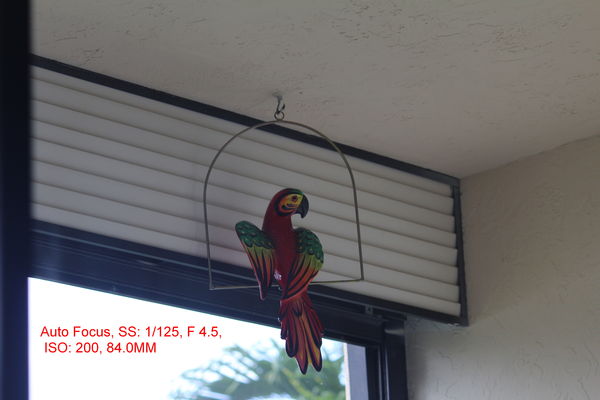
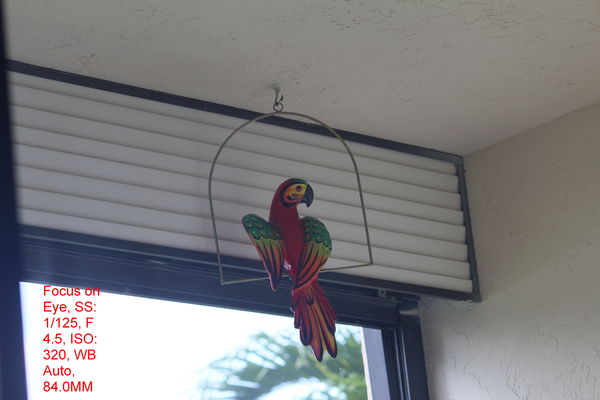
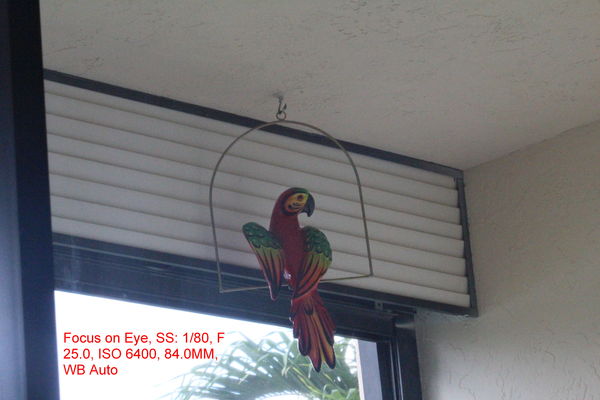
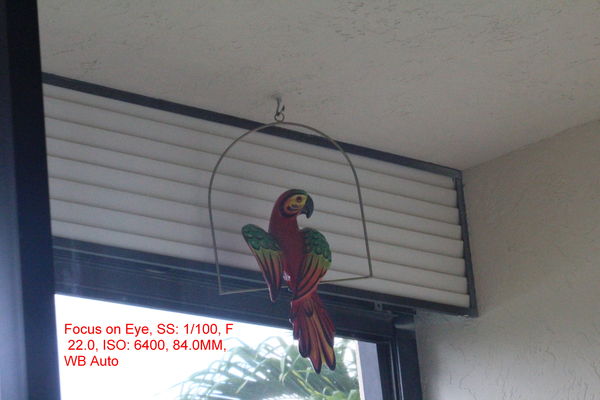
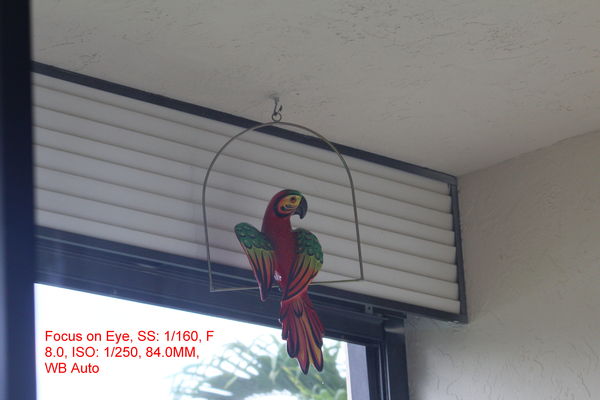
I focused on eye and the red boxes highlight the eye. The Auto Focus the red box is on the wing and belly. Not sure what I did wrong but not happy with any of the results.
Zuzanne
Zuzanne

Jun 17, 2012 17:32:19 #
Very helpful - thanks for the time and effort in compiling and writing it.
Jun 17, 2012 18:30:32 #

Here I go again! I'm screaming again. A lot to digest for me. I guess I have a mental block. BUT I'm trying. My first try, a bust. Blurry. Gotta work on this more.
Thanks again. I'm learning lots.
Thanks again. I'm learning lots.
Jun 17, 2012 18:43:10 #
olcoach
Loc: Oregon
Hi, I so appreciate these lessons. THANK YOU MWAC! Is there a way to record just the lessons w/o the reply's. Have fun and keep shootin'. Mike
Jun 17, 2012 20:26:38 #

MWAC, or anyone who can clear this up for me. Now that we are discussing focus, there is one thing that I have had a hard time getting through my thick skull ever since I became interested in photography again. For example; I am using a single point of focus ( Canon T2i ). I am taking a photo of a person, I have him in the center of the frame. I focus on his eye and continue to hold the shutter release dowm half way. Now I re.compose the frame so the person is moved more to the rule of thirds position. Tnen I push the shutter the rest of the way down. Did the "in focus" point follow me and stay on the eye or did it remain at the coordinates where I originally set it ? Sounds like a very basic question but it has never been clear to me.
Jun 17, 2012 20:48:29 #

Great lesson! You are right up there with Bryan Peterson and Scott Kelby in my eyes, MWAC. I've done a fair amount of reading on photography (my head knowledge is way ahead of my experience/ability), but your lessons have insights that are all new to me! My camera doesn't seem to have the back button capabilities yours does, but I still have so much to learn before I can justify an upgrade, so I'm fine with that. I hope you are saving your lessons, you are a natural born teacher - many thanks!
Auto Focus, f/4, 1/10 sec, ISO 400

Focus on girl's eyes, f/4, 1/10, ISO 400

f/2, 1/20 sec, ISO 400, Focus on girl's eyes

f/20, 2 sec, ISO 400, focus on girl's eyes

Jun 17, 2012 20:50:33 #
Capn Jack wrote:
MWAC, or anyone who can clear this up for me. Now ... (show quote)
Focus and re-comp! Yes your focus should remain on area you placed your original focus. There are a couple of factors that need to be taken into account but I'm on my cell phone and typing them would be difficult, I promise I'll get onto more detail tomorrow for you.
Jun 18, 2012 22:09:41 #

This may be posted twice???
I'm getting in on this late but am giving this one a try. I'm calling it "Cutty Sark on the rocks" :) It was a windy day and had to put the rock on the ship to hold it down.
#1 is on auto, #2 same settings but on spot focus (manual), #3 is on f 5.6, #4 on F 36. I added #5 two stops off 5.6 @ 7.1, then added #6 at f 25 just for kicks.
#1 auto, 1/250, f10, iso 100

#2 manual same as auto but spot focus.

#3 manual 1/800, f 5,6, iso 100

#4 manual 1/200, f 36, iso 800

#5 manual, 1/800 f 7.1, iso 100

#6 manual, 1/800, f 25, iso 1600

Jun 19, 2012 19:13:16 #
I am having a really hard time on this one. AS usual....
I don't see any difference in any of the pictures.
1st pic I let the camera focus
2nd pic I focused on the secoond vase.
3rd pic I opened up Fstop to 3.6
4th pic Ig the same as #4 at 1/5 for SS
[quote=MWAC]#1 - Set up a stationary item and take a picture letting your camera pick the focal points.
#2 - using the same settings take the same picture but select a single focal point placed over what you think is the most important part of the image.
#3 - same picture again but this time drop your F/stop as wide open as it will go, adjust your settings to allow for correct exposure. make sure to also keep your SS above 200 (so you might have to adjust your ISO as well.
#4 - once again take the same picture up with a smaller aperture (larger f stop number), adjust your settings as before.
Now upload the images and take a look at your sharpness, what do you notice?
F 8 ISO 1600 SS 1/4.5

F 8 ISO 3200 SS1/10

F3.6 ISO 3200 SS 1/160

F11 ISO 3200 SS1/5

Jun 19, 2012 20:11:03 #

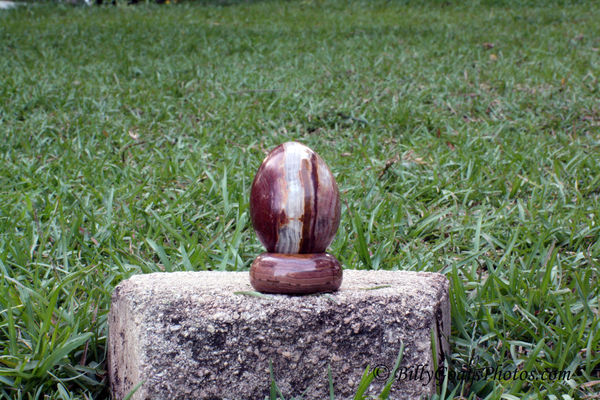
Decorative Egg that I picked up along the way in my journeys of life. Shot with a Canon EOS REBEL XS Hand Held; no tripod.
F/4.0, SS 1/60 Exposure Comp 0, ISO 200 All Focal points
F/4.0, SS 1/60 Exposure Comp 0, ISO 200 Center Focal points
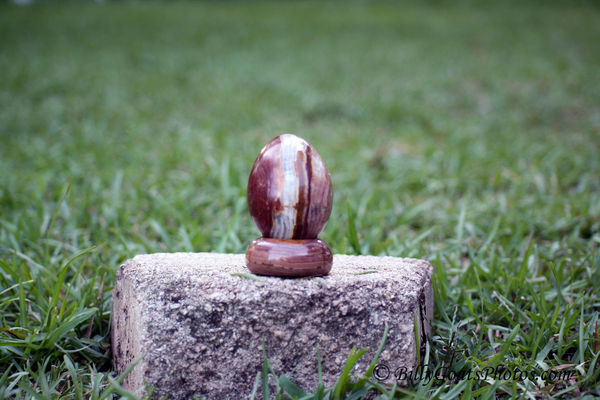
F/4.0, SS 1/200 Exposure Comp 0, ISO 400, Center Focal points
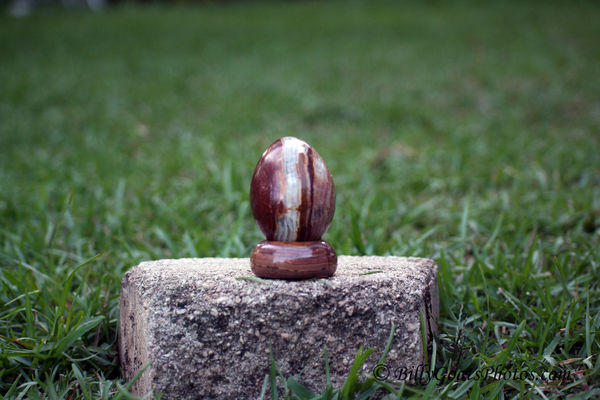
F/22.0, SS 1/8 Exposure Comp 0, ISO 800, Center Focal points
Jun 20, 2012 06:24:23 #
Should I be outside to complete the lesson?
Is there a certain mode to shoot in?
Is there a certain mode to shoot in?
If you want to reply, then register here. Registration is free and your account is created instantly, so you can post right away.