Free Transform help
Aug 9, 2014 10:56:27 #
Because I live about 20 miles from anywhere I can have a custom mat made I made a double mat in PS CS6. It's 16x20 outside with an 11x14 opening. I duplicated the layer & saved it as a tiff. Now I copy the image I want to mat & then paste it into the mat. Since most of my images are 11x14 it works perfectly. Sometimes the images are, for example, 13x16 or another odd size. By clicking on the top layered mat in the layers palate I can adjust the size of the opening using the free transform tool. My problem is that I don't know how to move only one side of the free transforn rectangle for fine mat opening adjustments to fit the image. When I move the right side the left side moves too. Same with top & bottom. I've tried the mouse & also the left/right arrows. I've tried holding down conrtol (windows 7) alt & shift in different combinations, but still can't move just one side of the rectangle (mat opening). Any suggestions after you have endured this l o n g email are greatly appreciated. Thanks in advance!
Aug 9, 2014 11:04:12 #

Aug 9, 2014 11:10:30 #
Instead of using free transform, use (regular) transform and then pick SKEW.
You can then move one side only.
You can then move one side only.
Aug 9, 2014 11:13:48 #
Aug 9, 2014 18:08:04 #
You can also just select the area you want to Transform. If you don't want one half of the area to be touched then just don't select it.
Aug 9, 2014 19:51:07 #
Without seeing your digital mat I'm not sure if my suggestion will help or not. First, if I understand correctly you are centering a photo inside 2 copies of your 20x16/14x11 mat. Then you adjust the size of the top copy of the mat with free transform to fit your image, leaving the outside dimensions @ 20x16.
Duplicating this method, when I alt-click on either the horizontal or vertical plane of the top copy of the mat, both sides move evenly toward the smaller "centered" image until they touch at the same time. Without alt-click the pixels are compressed in the direction of the first movement and you may have to make multiple adjustments to correct. Is this the problem you are having?
If the mat is not complex and uses layer styles for beveling and shadows, you could create a mat with an opening much smaller than any image you might use.
Then, using only one copy of the mat you can paste and center a photo. Next, make a selection the size of the photo (ctrl-click on the photo layer).
Finally, with the selection active, click on the mat layer and press delete (make sure it's not locked). The mat will be cut to fit the photo and the layer styles will be applied to the new opening.
Aug 9, 2014 20:25:28 #
Thank you. I will try your suggestion tomorrow & let you know if it works. All I want to be able to do is adjust the mat opening to fit the photo, not the photo to fit the mat opening. I think it's complicated because it's a double mat. Thanks for you effort.
Aug 10, 2014 14:17:06 #
dnathan wrote:
Because I live about 20 miles from anywhere I can ... (show quote)
I did this once, but can't remember how to do it. Would you mind posting the process you used to create the "mat"?
Aug 10, 2014 14:43:51 #
An easy way is to make an 11x14 (or whatever size you want the opening to be) go to edit>fill & choose black. 2)select all 3)copy. Copy & save it. Close it - don't save it. Repeat the process for the outside dimensions of the mat (16x20 or whatever) but leave it white. 1)paste the copied 11x14 onto it. 2)reduce the opacity of this top layer. 3)using the select tool (upper left), & select the now visible black layer under the white one. 4) click delete 5) bring the top layer to full opacity. Save it top desktop. lodd your photo, crop to 11x14, select & copy it. dele it from desktop. load the tif mat sandwich. paste the photo onto the mat. Free transform the top mat by selecting it first, then free transfom. Adjust the mat to fit the image. You will be able to leave a little black border aound the photo. It fools the eye (or the fool) into seeing a double mat. I've used my first designed mat the with with no problems. Don't know why I'm having a problem with the new mat that really does look like a double mat.
Aug 10, 2014 14:45:55 #
Aug 11, 2014 00:44:19 #
Try making a 16 x 20 image of your mat without the opening in the middle - then, just paste your 11 x 14, 13 x 16 or ? x ? image onto the 16 x 20 image. . . no need to 'adjust' the opening.
Good luck
Good luck
Aug 11, 2014 09:42:24 #
dnathan wrote:
An easy way is to make an 11x14 (or whatever size ... (show quote)
After reading your follow-up description of what you have been doing, you may wish to try the following:
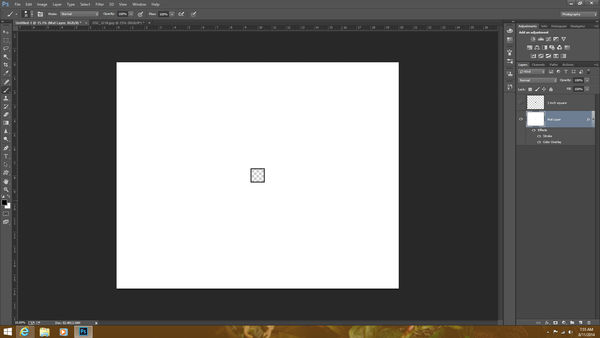
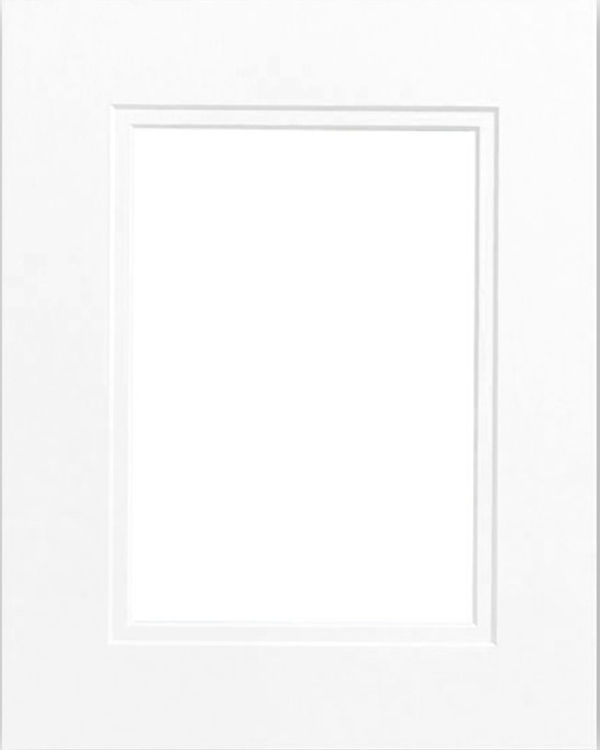
1. Create you 20in x 16in 300ppi white background and unlock the layer.
2. Using any method that suits you, cut a 1" x 1" square in the center of your layer. (I used a new 1x1 layer as a "cut pattern", and turned off layer after use)
3. Apply a "stroke layer style" to the mat layer using your desired width. (I used the "outside" option, color black and size of 20 pixels)
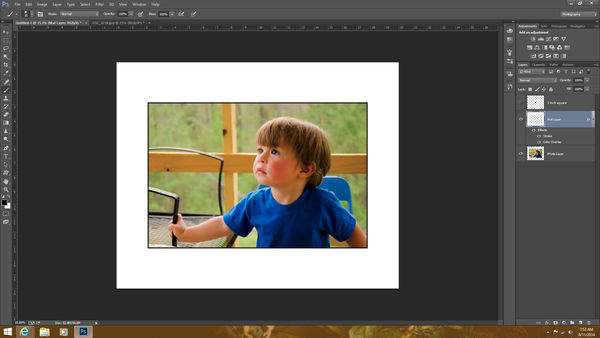
4. Paste your photo layer, move it beneath the mat layer and center the photo with the move tool alignment options if it did not paste in the center.
5. Ctrl-click the photo layer to make it a selection.
6. Click the mat layer to make it the active layer.
7. Press delete to cut a new hole in the mat the size of the photo on the layer below.
The photo appears and the stroke effect is automatically adjusted to match the new opening size. If you need to adjust the stroke size you can go back to the layer style options and do so. You can easily change the color of your mat or add texture by using additional layer style options as desired.
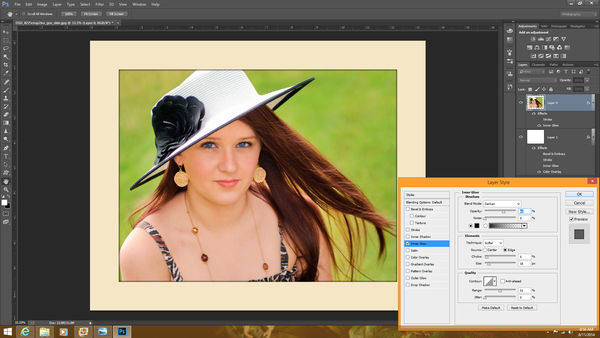
Edit: As always, there are many ways to accomplish a task in photoshop. An even faster way (sample 3) is to paste your image on top of your solid mat and apply a "stroke" or "inner glow" layer style to the photo layer. No need to cut or adjust the different layers... just paste and adjust layer styles as desired.
Aug 11, 2014 12:03:13 #
Thank you all for your input. They are all viable options. Since I am new to UHH if you would tell me how to upload an image for you to see I'll post the mat I'm having trouble with. I'm surre you'll be able to offer a solution so I can adjust that mat to fit different size photos while maintaining the 16x20 out dimensions.
Aug 11, 2014 13:01:16 #
dnathan wrote:
Thank you all for your input. They are all viable options. Since I am new to UHH if you would tell me how to upload an image for you to see I'll post the mat I'm having trouble with. I'm surre you'll be able to offer a solution so I can adjust that mat to fit different size photos while maintaining the 16x20 out dimensions.
Instead of using "Quick reply" at the bottom of your screen select "Reply" or "Quote Reply" from the message you want to respond. Below the message box select browse to find the image you want to upload. Navigate to and select an image. Tick/Check the store original box(if desired) and press the send button to upload. Do not press Preview or you will have to re-attach your upload image.
Aug 11, 2014 14:07:02 #
I'm trying to upload the mat image. I choose file, copy & paste the mat into the white opening to the left of "choose file" & click send. I get an error message that no image has been chosen. Thanks.
If you want to reply, then register here. Registration is free and your account is created instantly, so you can post right away.