Editing advice/portrait photos
Aug 12, 2013 12:17:56 #
Vhopkins25
Loc: Michigan
Audi57 wrote:
Hi, if you were to shoot in RAW you would have a lot more control in editing of all your photographs.
I knew that about RAW... and I have attempted some photos in RAW... just don't feel I'm quite ready for it yet.
Aug 12, 2013 12:37:45 #

A homemade reflector could work, depending on the material used. Syl Arena recommends foam core board. You may wish to consider a ready-made reflector.
Here's an example (but many others exist):
http://www.bhphotovideo.com/c/product/358614-REG/Impact_R1342_Reflector_Disc_White.html
We photographers have to learn how to control light and to adjust our shooting to fit the lighting conditions.
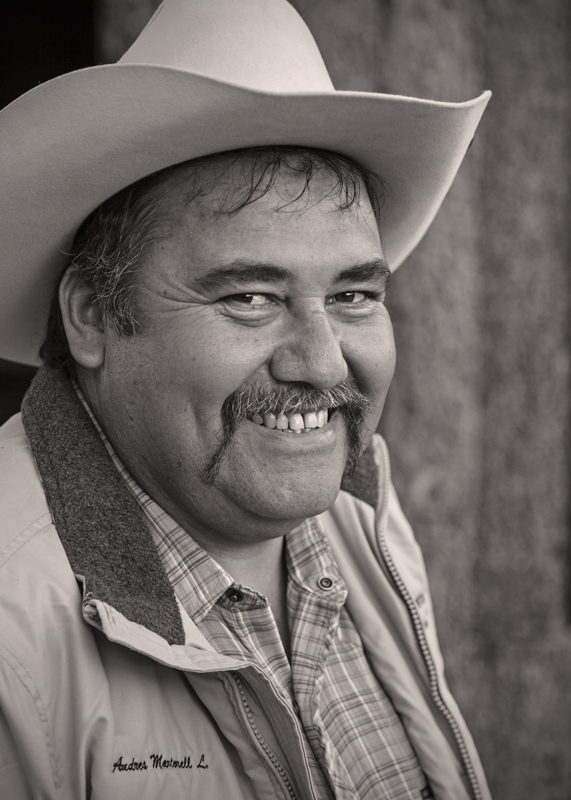
The image below, again I shot it in open shade -- a very flattering kind of natural lighting. By the man turning his face toward the camera, the direction of the light produces some contrast, albeit soft contrast. Note that I did some editing in Photoshop, mainly to reduce the brightness of the top part of his hat, which distracted.
Here's an example (but many others exist):
http://www.bhphotovideo.com/c/product/358614-REG/Impact_R1342_Reflector_Disc_White.html
We photographers have to learn how to control light and to adjust our shooting to fit the lighting conditions.
The image below, again I shot it in open shade -- a very flattering kind of natural lighting. By the man turning his face toward the camera, the direction of the light produces some contrast, albeit soft contrast. Note that I did some editing in Photoshop, mainly to reduce the brightness of the top part of his hat, which distracted.
Vhopkins25 wrote:
It's official, everyone is better at editing than I am! I love it!
Mexican Man, Baja California
Aug 12, 2013 13:43:28 #
Vhopkins25 wrote:
The best way is to get it right in camera and not in post processing. There are a lot of things you can not "remove" in post processing.Hello everyone, br br I am terrible at editing an... (show quote)
Aug 12, 2013 13:47:28 #
Vhopkins25
Loc: Michigan
speters wrote:
The best way is to get it right in camera and not in post processing. There are a lot of things you can not "remove" in post processing.
I do agree with that. I do try my best to capture photos that wouldn't *need* to be edited.... But at the moment, I'm just messing around, practicing, and attempting to learn.
Aug 12, 2013 13:48:57 #
Victoria, forget about editing until you've got things right in cameras, no amount of editing will fix an image that's flawed to begin with.
Rpavich was correct in his assessment that you need to concentrate on choosing the best exposure settings and then on nailing focus, after that you can edit to correct small flaws.
The Sony a230 is a neat little camera with a CCD sensor, that's good and bad; the Sensor is very sharp but being CCD is not good at higher ISO's, try and keep below iso400, iso800 in a pinch. Also, if your kit lens is the older 18-70mm, it gives it's best at f/5.6 or f/8 depending on the focal length. I would suggest you go into (A)perture priority mode and choose f/5.6, that will keep your shutter speed up and reduce the chance of camera shake (remember to have SSS active).
After that, choose "centre weighted" or "spot" metering and select "spot" focus (the centre cross focus point is the most accurate). Practice nailing focus on the eyes, it's commonly held that a Portrait is useless if the eyes out of focus.
Fill flash and reflectors are tools that you can explore as your expertise improves. You might also consider joining a camera club.
Aug 12, 2013 14:25:34 #
Vhopkins25
Loc: Michigan
All REALLY great points. Thank you so much! I will search for a camera club today.... I think it's something I would really benefit from. Thanks for the insight on f stop. I will definitely be working on that, and focusing on the eyes, in my portraits.
Peekayoh wrote:
Victoria, forget about editing until you've got th... (show quote)
Aug 12, 2013 14:26:20 #
Vhopkins25
Loc: Michigan
Love that photo you shared, also. It's definitely the quality I am aiming for!
Peekayoh wrote:
Victoria, forget about editing until you've got th... (show quote)
Aug 12, 2013 16:09:32 #
Vhopkins25 wrote:
Hello everyone, br br I am terrible at editing an... (show quote)
OK, these are my attempts, in Photoshop you can sharpen an image simply using an high pass filter and change the blending mode to either overlay, soft or hard light, generally I prefer overlay. Sorry if you can't understand all of that but you can go into Lightroom 4 tutorials on YouTube, here's a link to one:-
http://www.youtube.com/watch?v=BwWlxBF-vxs
no.1
no. 2
Aug 12, 2013 16:22:55 #

Vhopkins25 wrote:
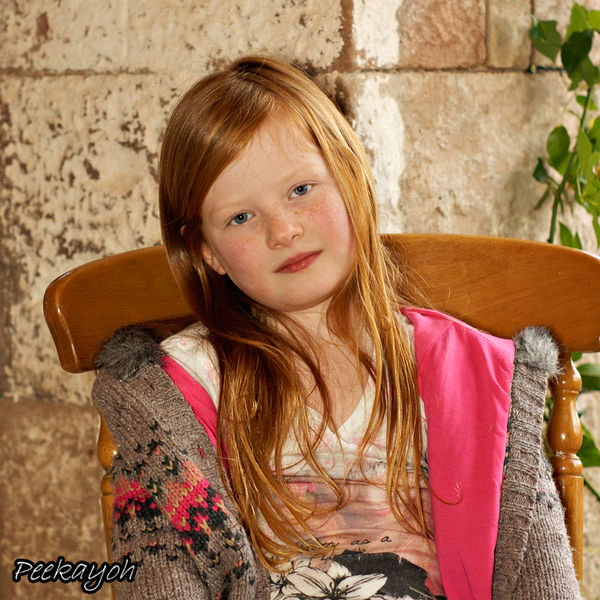
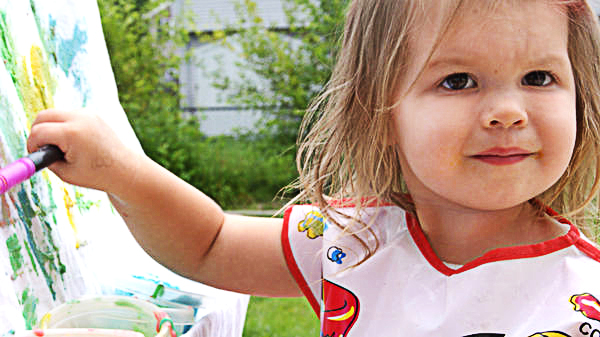
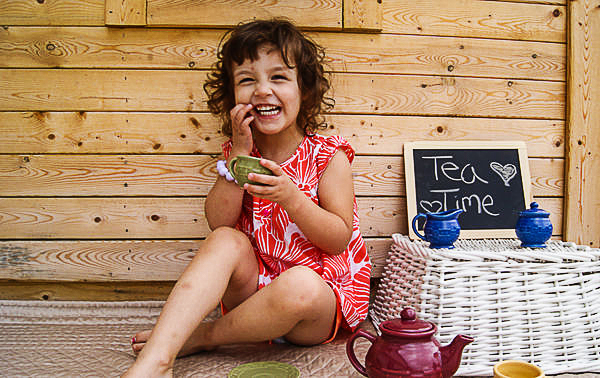
ok.... here are just two that I found right away... their faces are dark.... losing detail... "underexposed" if you will.... not sure how to fix it without it ruining their face!
They look good to me! And I like the composition of both of them too. There are those who would say crop closer, but I like them with a little space.
Next time, I would focus/expose on the centre of the face (ideally an eye), hold the button half down, recompose and shoot. Apologies as that doesn't answer the current question, what to do about these two images! So just enjoy them as they are!
Aug 12, 2013 16:27:00 #
Now the skin tones look a blotchy red hue -- not natural or flattering to the kids.
Producing a natural-looking skin tone presents one of the bigger challenges in doing photography.
Film-era photographers papered over the problem by using filters to orange up or redden skin tones, giving a pseudo-natural skin tone. The public has been conditioned to this false look.
Digital photographers have far more control to achieve natural-looking skin tones, but they follow the film-era crowd which still
influences the appearance of skin tones in photographs. They slap on a filter to redden or orange up skin tones, as if desirable.
Do a search on natural looking skin tones to find a process for doing this adjustment.
Aug 12, 2013 16:27:01 #
Aug 12, 2013 16:29:28 #
Vhopkins25
Loc: Michigan
Mousie M wrote:
They look good to me! And I like the composition of both of them too. There are those who would say crop closer, but I like them with a little space.
Next time, I would focus/expose on the centre of the face (ideally an eye), hold the button half down, recompose and shoot. Apologies as that doesn't answer the current question, what to do about these two images! So just enjoy them as they are!
Next time, I would focus/expose on the centre of the face (ideally an eye), hold the button half down, recompose and shoot. Apologies as that doesn't answer the current question, what to do about these two images! So just enjoy them as they are!
Thank you!! I appreciate it. I wouldn't say they are terrible photos... but definitely need some work and I am so ready to learn. thank you for the focus comment... I have NO idea how I haven't learned to do that yet but by golly, I WILL get there!
Aug 12, 2013 16:30:36 #
ronwande wrote:
The images are both quite contrasty. Focus seems ... (show quote)
No - not got it right. The first one too washed out, and the second (tea party) sharpened too much so that it does not look natural any more. (Apologies for being blunt)
Aug 12, 2013 16:30:54 #
Vhopkins25
Loc: Michigan
Thank you! I will look that up... so far, I have not ventured into filters or anything like that..... but I will definitely take a look into it
anotherview wrote:
Now the skin tones look a blotchy red hue -- not n... (show quote)
Aug 13, 2013 00:35:39 #

Vhopkins25 wrote:
ok.... here are just two that I found right away... their faces are dark.... losing detail... "underexposed" if you will.... not sure how to fix it without it ruining their face!
Please forgive me for fixating on such a minor detail, but I think your first photo requires cropping before anything else is done. That's all I did here:
Cropped

If you want to reply, then register here. Registration is free and your account is created instantly, so you can post right away.