Shooting birds is challenging. Let's take this in steps.
First, let's get your exposure correct. All three of your images appear to be very under-exposed. And you've got several other closely related questions or issues.
ISO and Image NoiseYou mention "ISO goes too high and you end up with too much image noise"... by which I suspect you have Auto ISO on. Simple solution... TURN OFF AUTO ISO! Auto ISO is very over-used these days and really serves no purpose shooting in this sort of situation. When used in conjunction with M or manual mode, Auto ISO is just another, new form of auto exposure. It is no longer manual mode. If combined with other auto exposure modes such as aperture priority, shutter priority or program, Auto ISO makes them "auto-auto" modes. Who knows what might happen!
I'm not sayin' Auto ISO isn't useful in some situations. It is. Personally I would use it almost exclusively with M... but recognizing that it's no longer manual when using Auto ISO. And, photographing birds outdoors really isn't one of those situations where Auto ISO has much purpose.
It also will help minimize noise if you avoid under-exposure. When you under-expose (as your images appear to be) then push the exposure up in post-processing, that tends to amplify noise even more. Sometimes it's better to slightly over-expose (just +1/3 or at most +2/3 stop... but it depends on the camera)... then pull the exposure back down, to minimize noise.
Accurate Exposure Unless you have terribly intermittent clouds, where the lighting is changing rapidly, I would recommend you try to use full manual (M) exposure mode. On a bright sunny day, ISO 400, f16 and 1/400 should give you a correct exposure for most things (note: see below). This is called the "Sunny 16 rule"... where the on a bright sunny day, at f16 aperture, for shutter speed you can use the reciprocal of your ISO (1/400 and 400, in this case).
You can vary from these settings easily... 1/800 and f8 will give you the same exposure while upping your shutter speed to better freeze motion. f5.6 and 1/1600 gives more of the same and may do a better job isolating the subject against a blurred background, if that's what you want (how strong the blur depends upon distances and lens focal length, too). Early morning or late afternoon, you'll need to give a little more exposure. Learn to read your camera's histogram and use it... or get a handheld incident light meter and use it properly, to really nail exposure in practically any situation.
The reason for using M mode is because a bright sky often fools a camera in any auto exposure mode into doing massive under-exposure. Locking in your exposures with M will prevent this... So that's what I'd recommend using as much as possible. Take some test shots, make some adjustments, then just check every so often during the day and tweak your settings if lighting conditions change.
Now, because with BIF you'll commonly be photographing the shadow side of your subject, you'll typically need to open up the aperture one stop or halve the shutter speed, to increase the exposure of that shaded portion of the bird. This will often cause the bright background (the sky) to go too bright in your image. If that's a problem, in post-processing select the sky and reduce it's brightness. Again, it's usually better to pull down over-exposure, than it is to push up under-exposure.
There ARE times when it's necessary to use an auto exposure mode (aperture priority, shutter priority or program). For example, if your subject is moving in and out of shadows, or if clouds are momentarily covering the sun, you have two choices. You can set up in manual for one lighting condition or the other and then only shoot the subject when it's in that light. Or you can use an AE mode so that the camera will shift it's exposure from one condition to the other.
However, once in any AE mode you have another problem. Typically when you're photographing a bird in flight against the sky... It's often the shadow side of the bird against a much brighter background. Someone suggested, and I agree, that you then should use some plus (+) exposure compensation... probably at least one full stop. However, it may vary a little more or less and you'll need to learn to see what's needed and adapt the settings. For example, a white or light colored bird will require more + EC, while a black or dark toned bird will require less (although your background is still so bright as to likely still need some + EC, even with a dark toned subject).
You'll also have to decide whether to use a fast shutter speed to freeze movement, or use a slower one to get some motion blur. Set a higher ISO and/or use a larger aperture if you want a faster shutter speed... and vice versa. Experiment!
Lens focal length and camera formatThe next challenge will be filling the viewfinder as much as possible with a smaller subject at some distance from the subject. You'll need as long a focal length lens as you can get your hands on and will find manageable in the field. There's a saying among birders that there's no such thing as a "long enough" lens. In other words, if you have a 300mm, you'll find lots of times you wish you had a 400mm. If you have a 400mm, you'll find yourself wanting a 500mm... or 600mm... or 800mm... etc. At some point, though, there are diminishing returns on longer focal lengths because shooting too distant subjects is difficult and shooting through too much atmosphere often degrades images a lot.
Frankly, a 250mm lens on a full frame camera is not long enough for much bird photography. I shoot with Canon, but I believe your FX camera switches itself to a DX mode where it "self crops" the sensor to be fully compatible with any DX lenses fitted to the camera. This will also radically reduce the resolution of the camera. Instead of the 24MP you get with FX, once a DX lens is fitted to it you are now using a 10MP camera. You've lost nearly 60% of the camera's imaging capabilities, in effect. You either need a much longer focal length FX lens on your D750, or need to instead use that 55-250mm lens on a DX camera (where 250mm still might not be enough). On your FX D750, a 400mm lens would be the equivalent to 250mm on a DX camera.
Full frame cameras are great and everybody seems to think they need one these days. However, one of the negatives of FX is that you need much longer focal length, which in turn means a bigger, heavier and far more expensive lenses to take full advantage of the camera format. Often this requires a big, solid and expensive tripod setup, too. These are some of the additional "hidden" costs of "going full frame"... Though the FX image quality can be great if you go all in for the gear and deal with the size and weight issues.
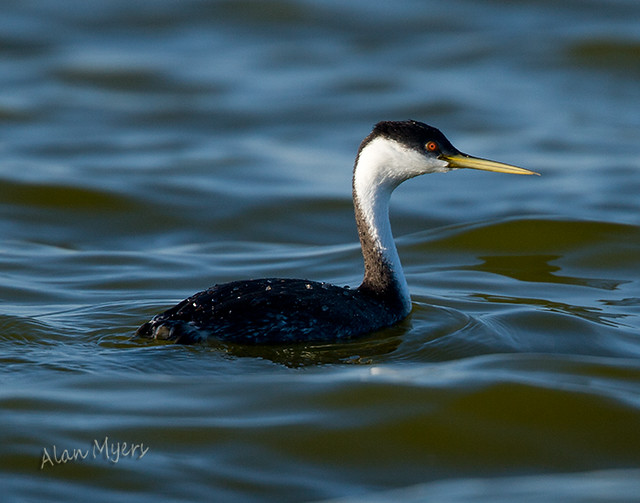
Often for portability and lower cost, with minimal loss of image quality, a crop sensor DX camera is a better choice. Sometimes you need all you can get both from the lens and from the camera... Following shot of a Western grebe was done with a 500mm lens, 1.4X teleconverter, and an APS-C crop camera (1.6X)... All together, equivalent to an 1120mm lens on your FX camera...
 Auto focus speed and tracking
Now, I don't shoot with Nikon gear. I use Canon. So I can't say which Nikon camera or which lenses might be the best for birds in flight (BIF). But for fast moving subjects like those you ideally need a fast focusing lens AND a camera that's both fast focusing and excellent at focus tracking moving subjects. Not using Nikon myself, I just don't know how well either your lens or your camera meet these criteria.
With the right gear and proper exposure settings, you still need to set up and use autofocus correctly. For moving subjects, you need some form of continuous focus (I think Nikon might call it AF-C). I would also usually pre-select and use a single AF point. That will be the best way to keep the AF point right where it needs to be (often on the bird's head or eye). Back Button Focusing is a popular sports shooter technique that works very well for any moving subject, including birds in flight.
It is possible to use multi-point AF (which senses movement and auto detects the subject) when shooting against a very plain background such as a blue or evenly overcast sky. Some very distant background detail also usually isn't a problem. However, a more detailed, closer background or shooting past any obstructions between you and the subject, using a multi-point focus mode can easily end up the with the camera focusing the lens somewhere other than on the subject. If using larger apertures (f4 or better, say), using multi-point AF also can end up focusing on the closest wingtip of a bird flying by, so that the birds head and body, and certainly the farther wingtip, are out of focus due to shallow depth of field. Usually focusing right on the bird's head or eye is necessary when using fairly large apertures.
AF can usually tracks subjects moving across the frame in front of you pretty well, though the faster they are (and closer, which amplifies apparent speed), the more it might be challenged. AF can struggle with subjects coming right at you or flying directly away from you.
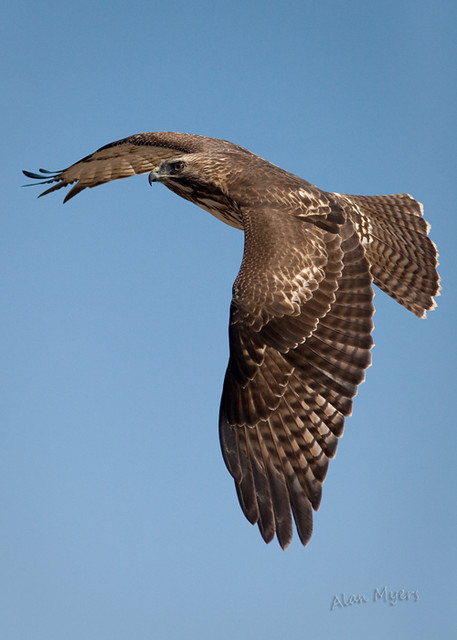
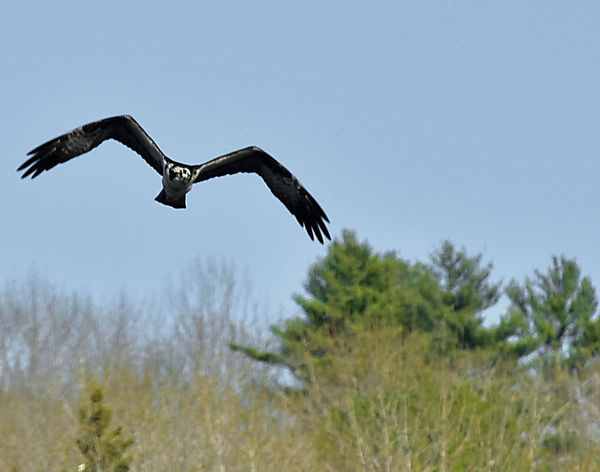
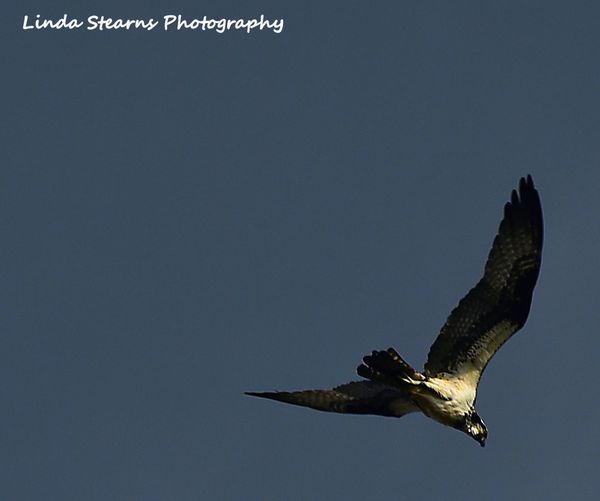
But, you also can make do with what you've got and TAKE A LOT OF SHOTS! I was out doing some scenic shots, when I noticed a Redtail hawk hinting in a field. There were lots of people nearby, but it was ignoring them, so I figured it might be a good photo op and switched to a the longest tele I had in my bag at the time... a 300mm on the full frame camera I had with me (not my choice for fast moving subjects, due to it's slower AF that's not as good tracking). This bird ended up being very cooperative, was moving from perch to perch looking for prey, working it's way around the same area repeatedly. So I set up in the middle, where I thought I'd get some good angles... Over the next 45 minutes the bird continued this circuit and giving me opportunities for shots time and time again. I probably took 200 shots... and got about 4 or 5 "keepers"! This is one of my favorites...
 Getting close enough
The next thing you need to do is get close to your subject, as I was fortunate to do above. This can be challenging and may require a lot of patience (to get shots of the mating ritual of a bird of paradise for the Planet Earth series, some of the videographers sat in a blind in the jungle for something like 40 days before finally getting what they wanted). Learn stalking skills, though they won't do you a lot of good with raptors, who have incredible vision, hearing and sensitivity to movement. Heck, they can spot a field mouse hiding under a clump of grass from a half mile! What chance do you have to hide from them! Try using a blind and attractants (food, decoys, calls) to bring them to you. Also study their habits and look for some that are more acclimated to human presence. Hungry birds often will take more risks and come closer, too...
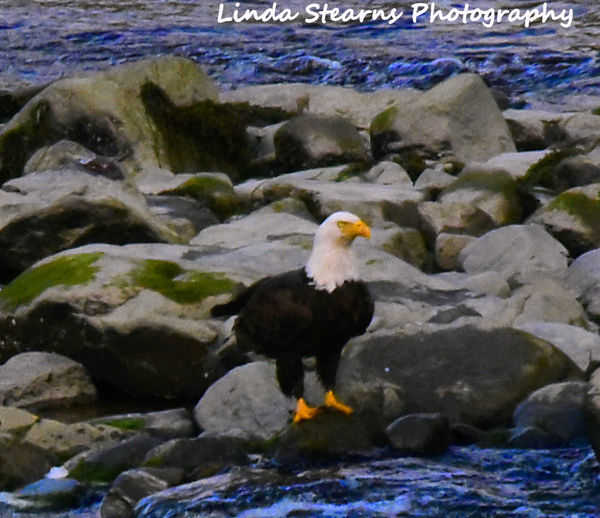
Birds and other wildlife also are most active early or late in the day... nicely coinciding with the "golden hours" of photography. Plus you often can use your car as a blind, of sorts. Birds and other wildlife making their living near roadways will commonly ignore cars, though the moment you step out they'll take off. This was shot out a my car window...
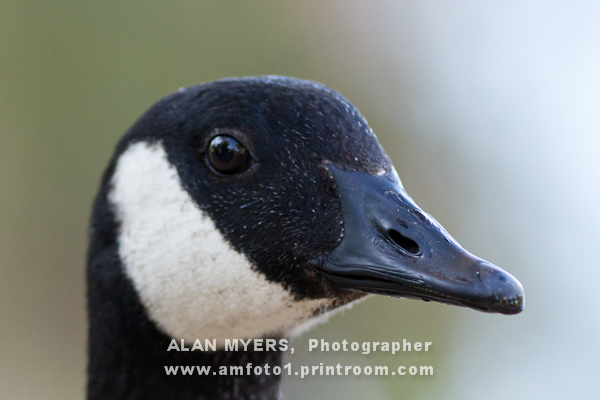
I like to set up near a local stream, where various birds come to fish. It's adjacent to a rather busy road, the sound of which conveniently covers any noise I make, plus birds tend to ignore some slight movement. Another site I like is a busy park with several lakes and streams... and a wide variety of birds who largely ignore all the people. In fact, a lot of them come looking for handouts. Right after taking this "portrait" of a Canada goose, it pecked at my hand and camera hoping something was edible...
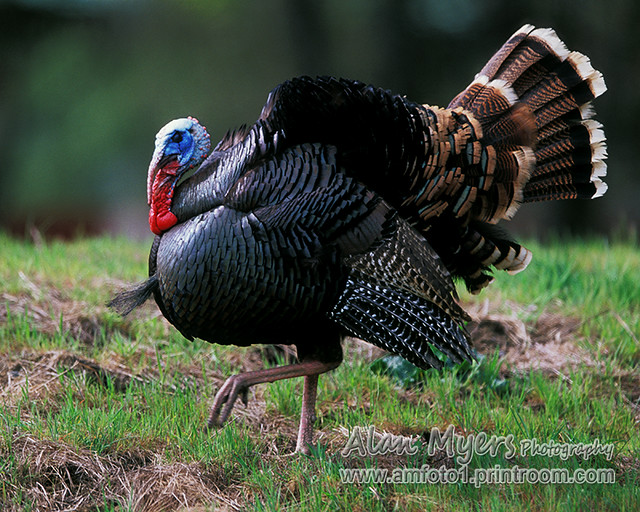
One other location I recommend with some reservations is a golf course. There is often wildlife on golf courses and they are acclimated to people being around. One course I play has a resident den of foxes, a lot of wild turkey and, at one hole in particular, a small town of ground squirrels. Another has a resident herd of black-tail deer, wild boar, even the occasional bobcat and mountain lion. Yet another couple courses I've played in S. Carolina had a lot of alligators. Birds of all types at all of them, too.
The tricky thing about golf courses is it's best to go to courses you know and you either have to know the game itself or take along a driver who does... You don't want to become another "hazard" on the course, get in the way of play, or, worse, get hit by a golf ball! And you'll usually need to make arrangements, get permission and pay a little for access (rent a golf cart).
I was going to go shoot the foxes at one of my local courses, but last time I was there they were shedding the nice fluffy winter coats and looked rather scruffy. Maybe next year, I was too late this Spring!
Other handy stuffFor the above shot of the Redtail hawk, I was very lucky.... it's rare that you get to shoot the "sunny side" of a bird in flight. For that reason, something you might find helpful is a flash. Now, you might think... who needs flash in daylight? Or, won't the flash scare the critters away? Actually, I probably use flash more in daylight than indoors or in low light situations. FILL flash is all that's needed, which is dialed down a lot to about minus one and half stops or more below ambient light. This makes for a very brief, low-power flash, that most animals will ignore. Perhaps because they're accustomed to lightning and sunlight glinting off water and other shiny surfaces, most don't startle at the brief pop of a flash. The noise most flashes make when they fire or while recharging might be an issue... but the light itself usually isn't.
Fill flash also has much more "reach" than full flash. But sometimes a useful accessory when working with telephotos is a flash extender, such as the Better Beamer. This positions a Fresnel lens in front of the flash that concentrates it's output, giving additional reach equivalent to two or three additional stops. These extenders are for use with 300mm or longer lenses (200mm on a DX camera). Any shorter focal length will show vignetting. When I use a flash, I also generally put it on a bracket off to one side and above the lens axis, to eliminate or reduce eyeshine issues (same as redeye in people... but different critters may show green, other colors or just white, instead of red like humans). I use an off-camera shoe cord to attach the flash.
Another useful accessory, a circular polarizing filter may be helpful when shooting BIF against the sky... deepening the blue of the sky and reducing the tendency to over-expose. You'll have to weigh using one against the loss of one to two stops light (depending upon the setting). Also, once you've set it for one orientation, you'll want to stick with that... or will need to reset the filter if you change from landscape to portrait or vice versa.
When using a larger lens, it can get heavy while waiting and cumbersome to use. A monopod can help a lot with moderate size lenses... if using one, it can be a lot faster and easier if it's fitted with a monopod head, which just allows for tilting the camera and lens upward or downward a bit, as needed. Rotating (panning) and changing orientation... you're on your own for that.
If using a really large, heavy lens, a tripod can be invaluable. For moving subjects, a gimbal head is ideal. These are used "loose" a lot... allowing you to track moving subjects both along the panning axis and the tilting axis... yet still supported. Best setups and lenses can be adjusted to near perfect equilibrium, where even very large, heavy gear moves easily and smoothly at the touch of a finger.
Finally... is your computer monitor calibrated? I ask because your sample images are quite dark. Many computer monitors are way too bright for photo editing, at their usual settings. As a result, when editing and adjusting your images, the monitor can fool you into making them way too dark. A good calibration device and software suite can help you set the brightness, as well as optimize the color balance of your monitor. I use a Datacolor Spyder... but, among others, X-Rite ColorMunkin and Pantone Huey are two other similar and popular devices used for monitor calibration.
Hope this helps!
Shooting birds is challenging. Let's take this in ... (
