Posts for: JimH123
Nov 25, 2023 16:26:41 #
gwilliams6 wrote:
Hey I dont doubt your scientific knowledge. But un... (show quote)
No, I don't have any insider access. But the term CMOS, Complementary Metal Oxide Semiconductor, is used in just about every digital design these days, including ASICs and Custom ICs, etc. And people have been calling the Camera Sensors as CMOS Sensors. But the name CMOS is hardly limited to sensors. In fact, I would be surprised if the new global shutter uses any technology other than CMOS. See: https://en.wikipedia.org/wiki/CMOS
We will eventually find out more about these new global sensors.
One CMOS advantage that is advantageous to cameras is that CMOS circuitry, with its complementary FETs, is also low power in which it only draws current during the switching state.
The name CMOS Sensor was created as a name to call it as it was replacing the CCD sensor. It used CMOS type technology, so the name CMOS Sensor was created even though CMOS was used for just about all digital designs. It looks like the name Global Shutter Sensor is what is sticking right now, but who knows, perhaps some other name will come along further down the road. But there is a very good chance that this new sensor is also a CMOS sensor.
It will be interesting to see how the design is implemented. But I suspect that Sony is going to hide that as long as they can so as not to give Canon some hints to help them with their own design. The real secret sauce to be discovered in the Global Shutter Sensor is how they have implemented a way to preserve dynamic range and to limit noise. Any competent electrical engineer ought to be able to design something that can capture all pixels in parallel. But preserving Dynamic Range and reducing noise and preserving IQ - these are the areas a competitor would most want to know how Sony did what they did. And I am sure that they used some very ingenious tricks.
Nov 24, 2023 22:17:33 #
JohnSwanda wrote:
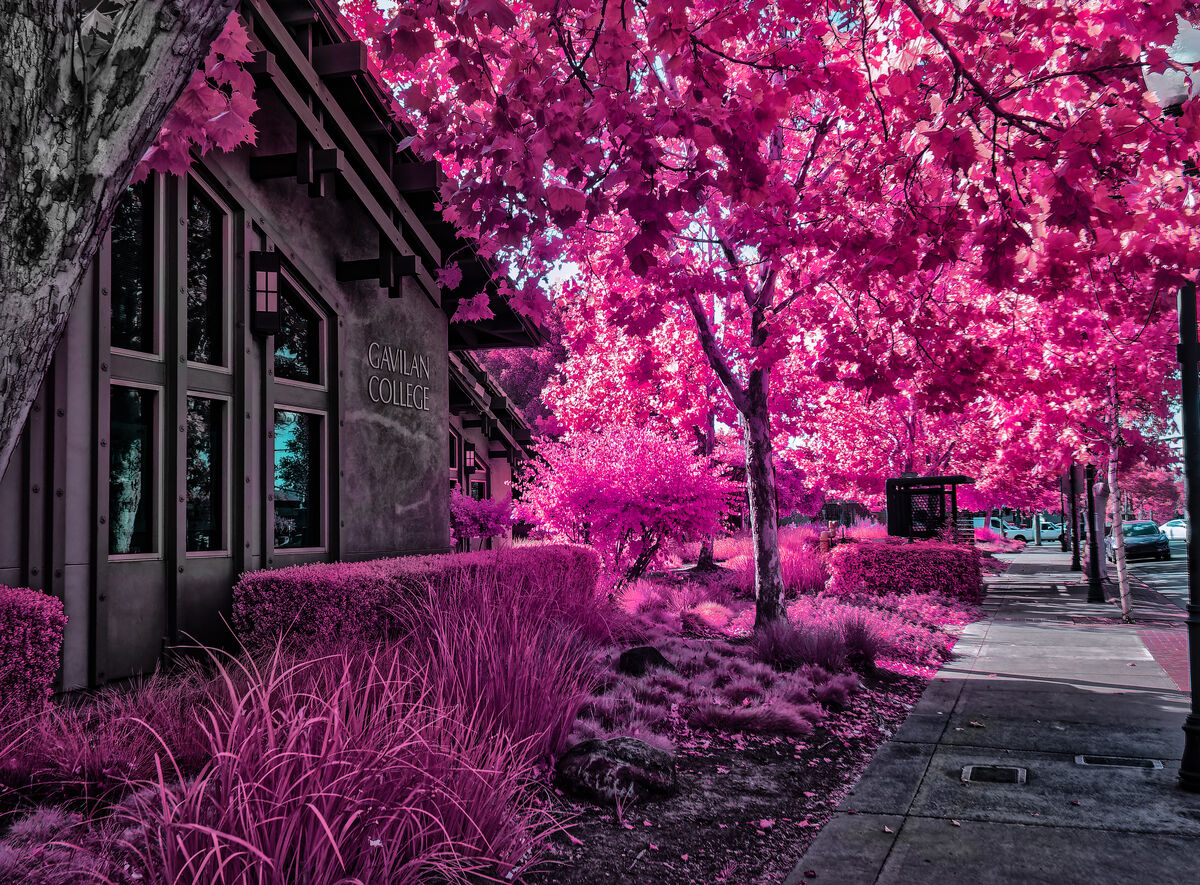
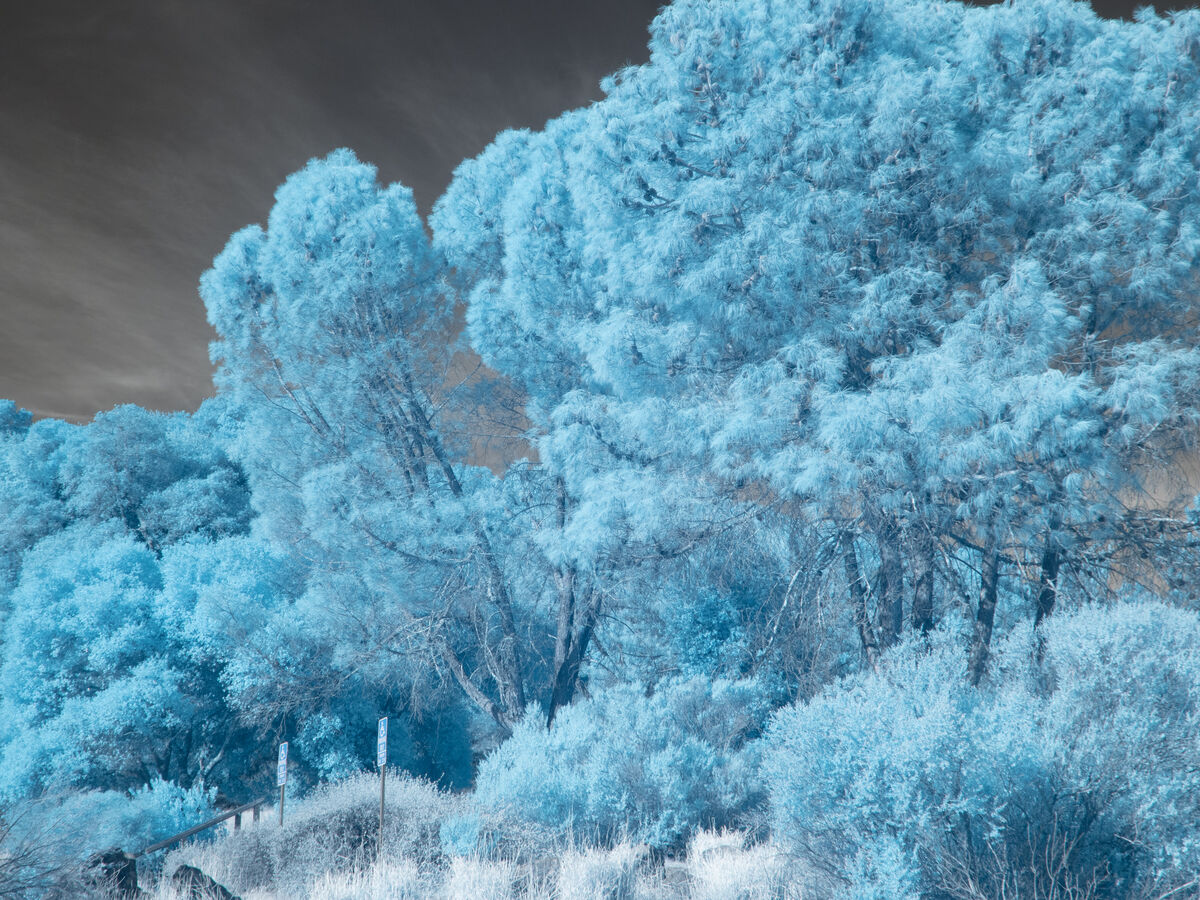
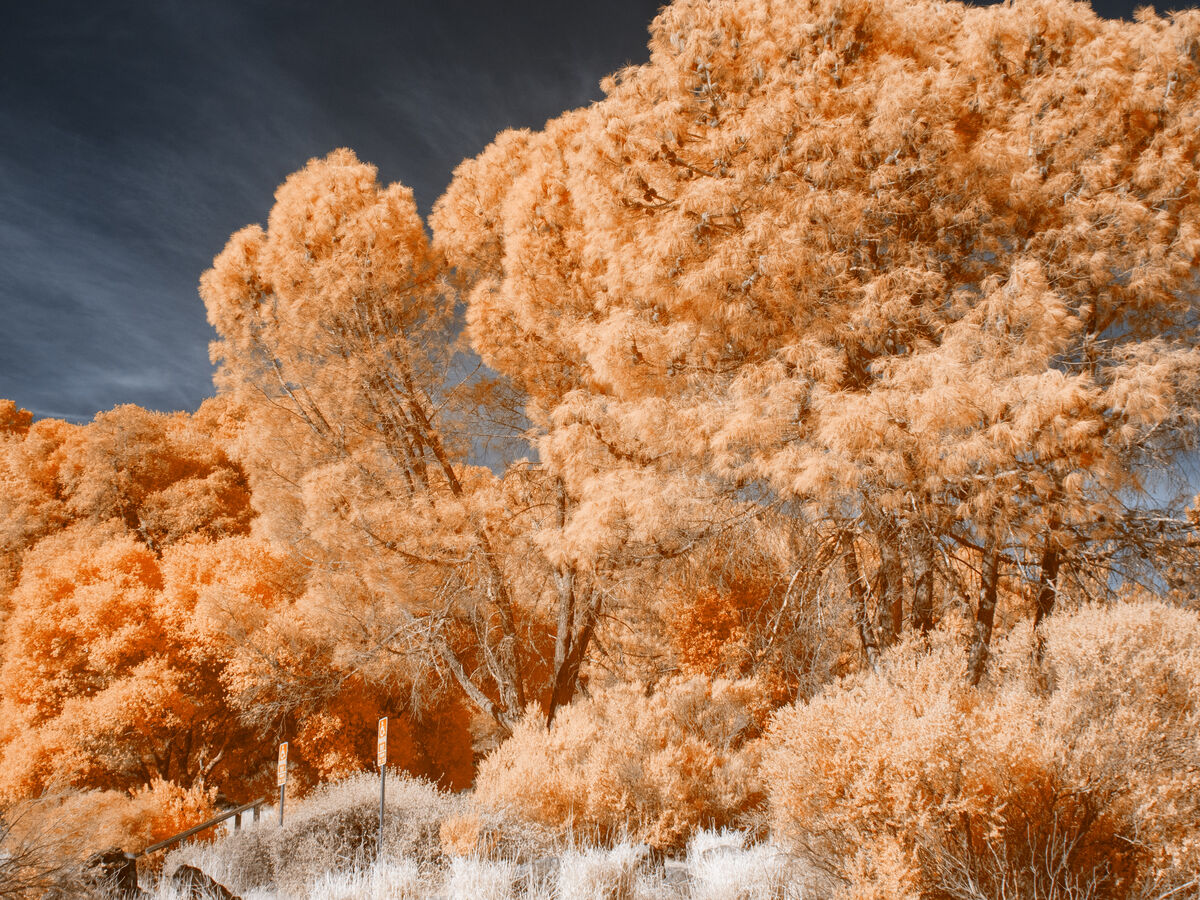
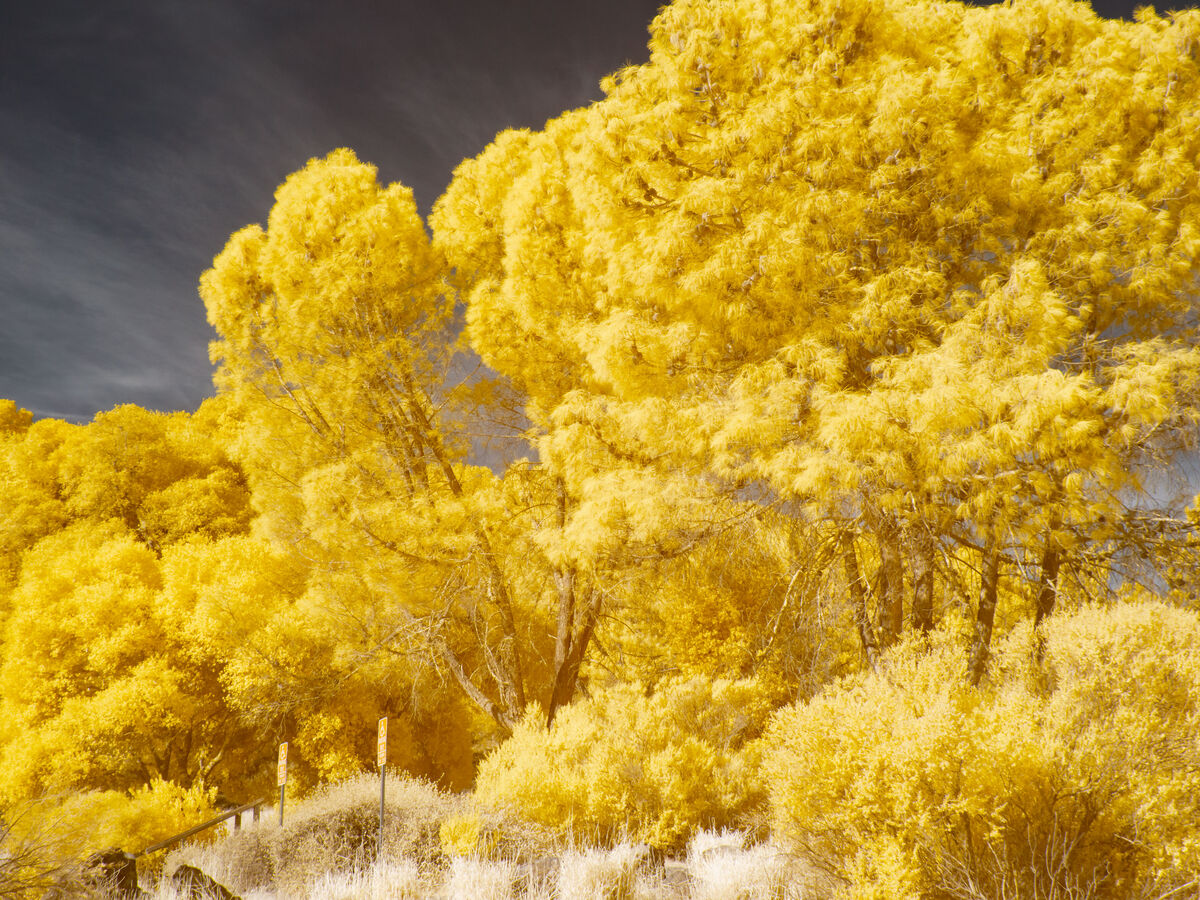
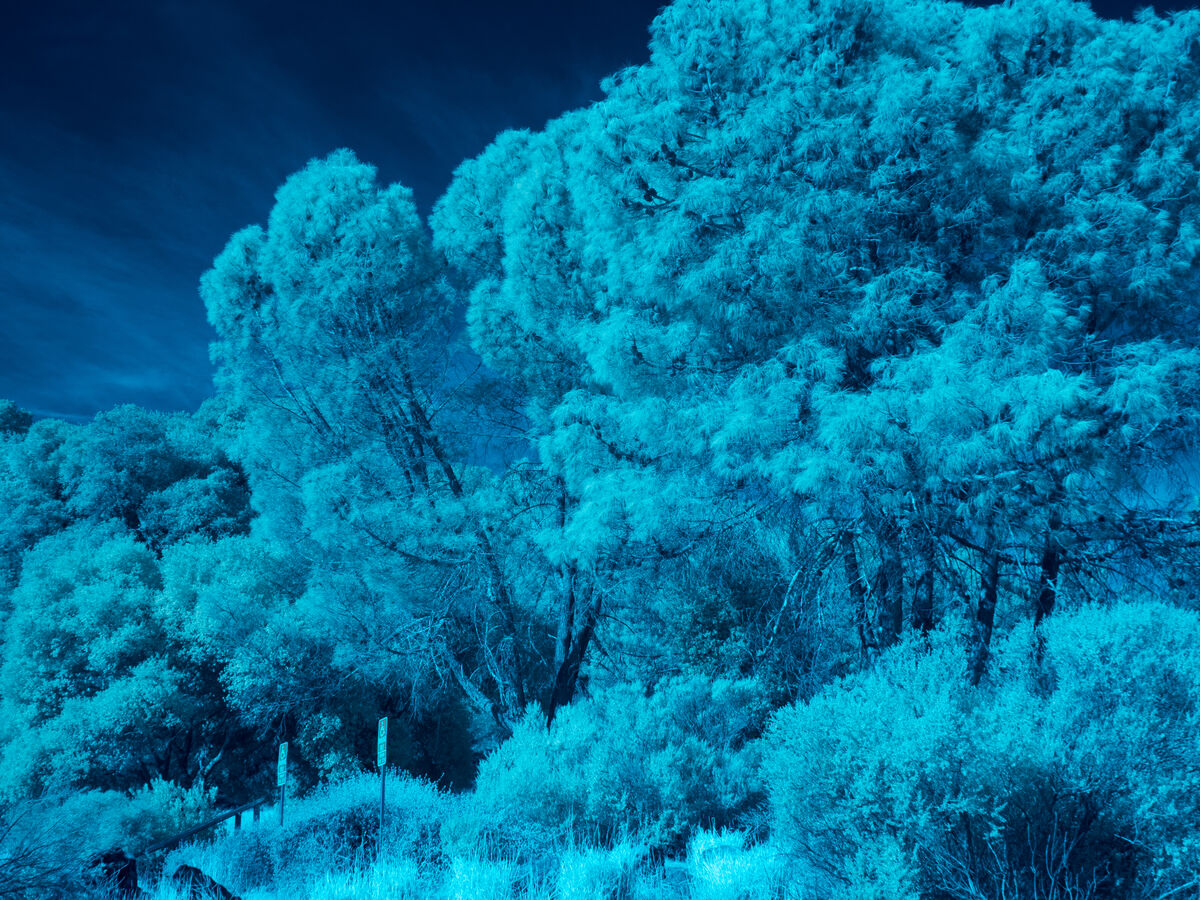
The thing I don't care for in these LUT processed IR images is there is really only one color to the foliage in all of them. Nice bright colors, but I like more variety in the color in my IR work. These are shot with a 665 filter and red/blue channel swap, and then just working with saturation to bring out each color present in the capture.
Good point. Separating the colors and then changing them is quite a difficult task. It's easy to change global colors. But for local colors, they need to be masked (not easy with vegetation) and individually tweaked. I don't have a clue as to how to make this easy.
The attached image is a global color. I can swing the color anywhere I want to go with it. But to pick out certain plants and change just that plant, I just don't know how to do this.
Nov 23, 2023 23:57:17 #
In continuing a comparison in processing in Lightroom vs processing in DxO Photolab 7, the comparison isn't even in the same league. I have been comparing image after image, and it isn't even close. DxO Photolab 7 is easier to setup for IR Editing, Easier to use, and most of all, gives superior results.
Consider this one using a 630nm filter.
First image is Lightroom, and I had to really work at it to get this.
Second image is DxO Photolab 7, and I just did my 4 step approach using the same LUT file.
Now I could have matches yellow color in DxO to more closely match the Lightroom Yellow. But I happened like the Photolab 7 Yellow better, but I had full control over the result.
Now there is still use for Lightroom. I can export the DxO image to Lightroom and to use other tools that Lightroom offers. But DxO is certainly processing the results in the initial conversion better.

Nov 23, 2023 11:12:36 #
topcat wrote:
I tried, but I could not follow it. I will have to try again
It's very intensive. Have to follow every single instruction. When I went back to add the Infrared Creative cube files, I had to still follow instructions line by line. And by now, I'm sure I have already forgotten how to do it.
Nov 23, 2023 02:02:50 #
gwilliams6 wrote:
The Art of Photography:
Sony A9 III :: Global Shutter is REAL
https://www.youtube.com/watch?v=T9XI0KdTGCs
Cheers
Sony A9 III :: Global Shutter is REAL
https://www.youtube.com/watch?v=T9XI0KdTGCs
Cheers
Good presentation. But he is a little mixed up on the term CMOS. Yes, all the other sensors being produced now except for a few remaining CCD specialty designs, are made with CMOS transistors, CMOS being the construction process for the transistors, and they are being called CMOS sensors. But the Global Shutter can also be made with the same CMOS transistors, but with additional circuitry around them to capture the charge on each pixel simultaneously and to hold that charge value until the camera can grab that information.
Yes, the global sensor captures all pixels in parallel. But the camera can't read all that data in parallel, so it reads it in successive reads until all the data has been presented to the camera. This happens very rapidly, but this part is not parallel. And this can still be designed with CMOS transistors. And it has to happen very quickly for the camera to capture at 120 fps. In fact, at 120 fps, the sensor has to be ready to capture the next image in 8.33 ms. So, capture in parallel, and hand off all that data within 8.33 ms which has to also include the time to reset the sensor to make it ready for another capture. And also, to be included is the fact that the camera has to be able to process all that data to be ready for the next capture. Of course, they get around this by buffering up the information where a buffer is filled and once full, it can't collect any more until space is made available. Which makes me wonder what fps rate can the camera run at that the buffer empties at the same speed it is filling with so that the buffer is never filled to capacity?
I personally have no pressing need for a camera this fast. But I do appreciate what a game changer this is, and read and watch everything that is made available for this new camera. Eventually, we will get the actual spec's, and down the road farther, the costs will come down, and the design perfected to correct the current deficiencies. But it sure is fun to see the progress.
A parallel story to this is non-volatile memory. I remember in the early 80's, we used EPROMs and I remember they came in 2K x 8, and then 4K x 8, and bigger and bigger as time went on. They had that little window on the top of the package to erase them under UV light! Then came Flash memory, which at the time we used EPROM, it was thought that maybe Flash memory was too difficult to manufacture! But they figured it out, and it went through the same growing process. I was involved with both NOR and NAND type memories. NOR was smaller, but could be randomly accessed and was popular for BIOS memory in PCs. NAND was read a page at a time, first ones were only 512 bytes, and was popular in most other designs. The first ones were slow and didn't hold much data. But they got much faster and got much bigger as time went on. Having been retired for 7 years now, I can only guess what they are now! The growth of memory is one of the developments that unlocked the growth of everything that used the memory.
Nov 23, 2023 00:52:51 #
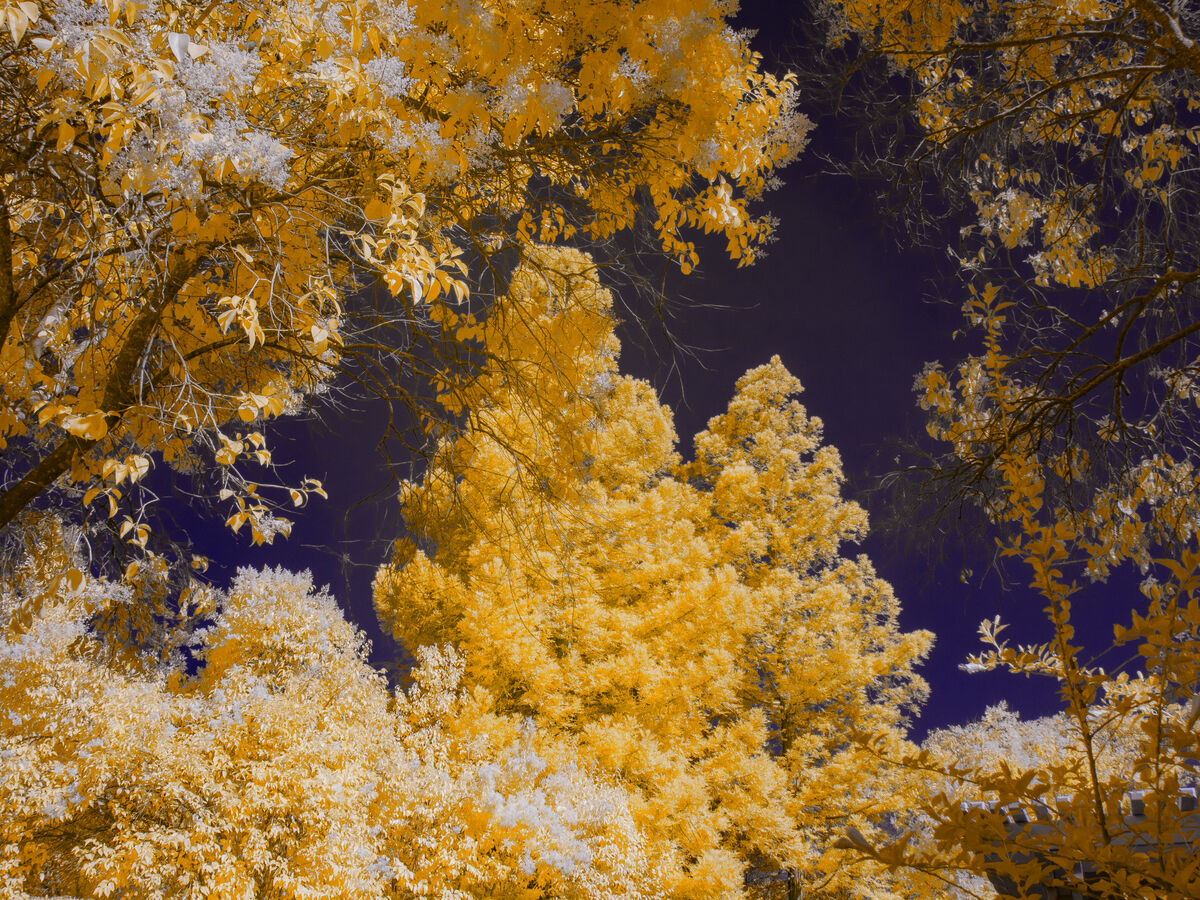
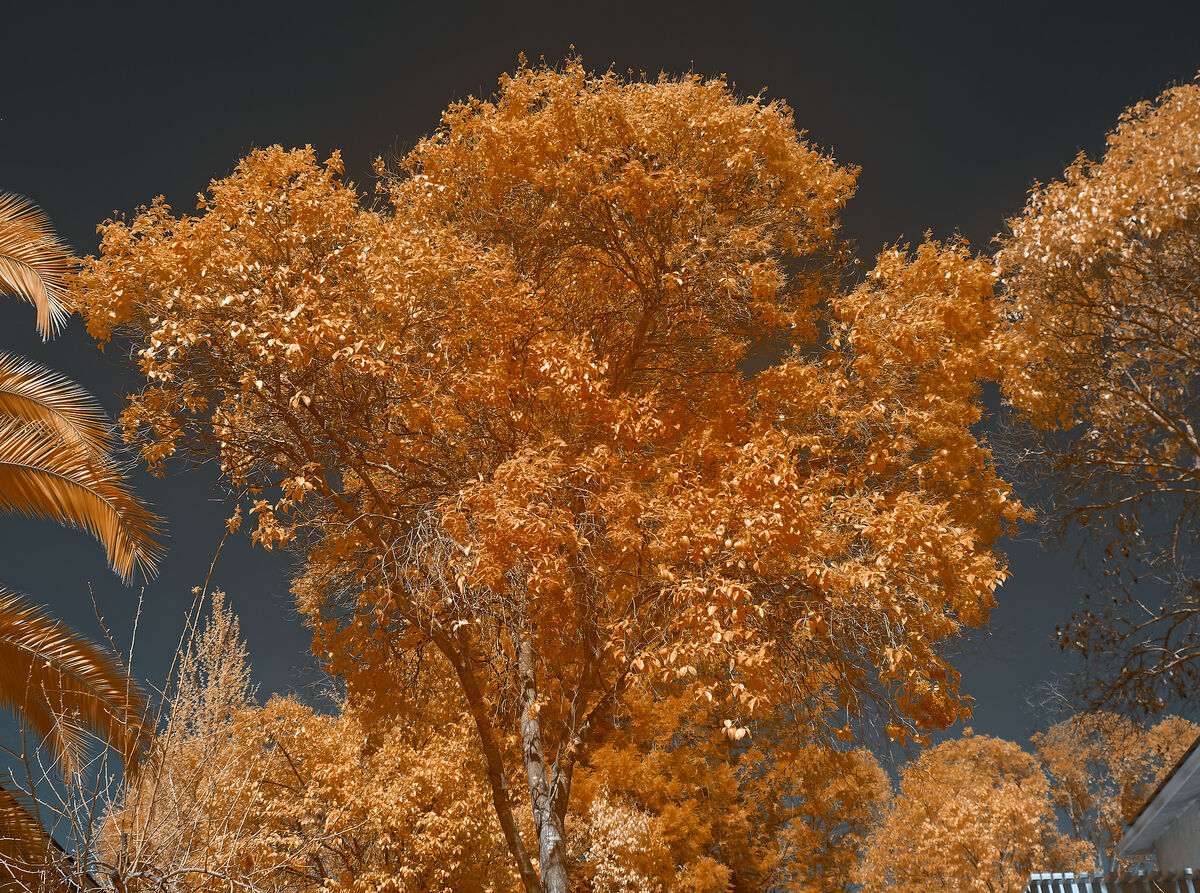
After getting used to processing RAW infrared images in DxO Photolab 7, I have come to the conclusion that it does a superior job compared to using Lightroom. Of course, I may way to do additional processing by exporting it to Lightroom to do things DxO can't do such as masking.
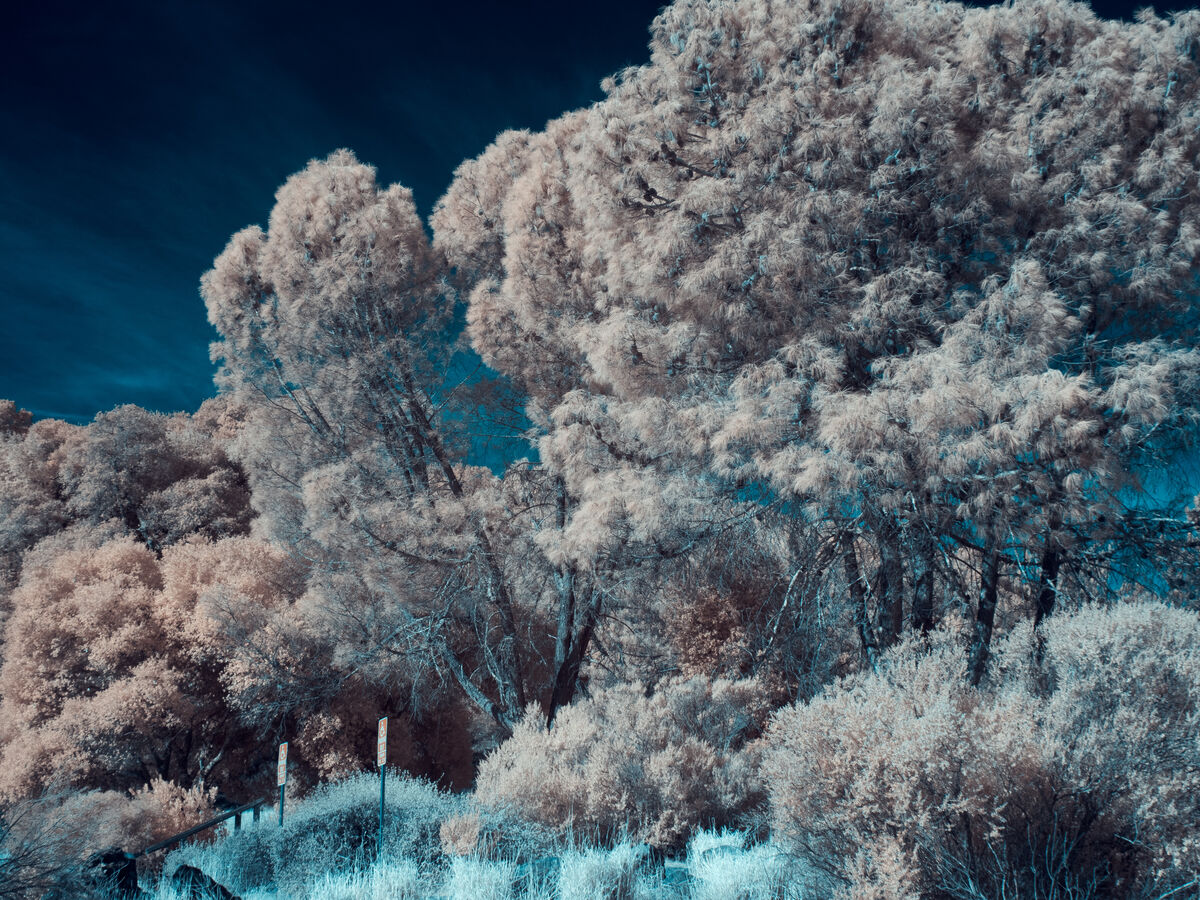
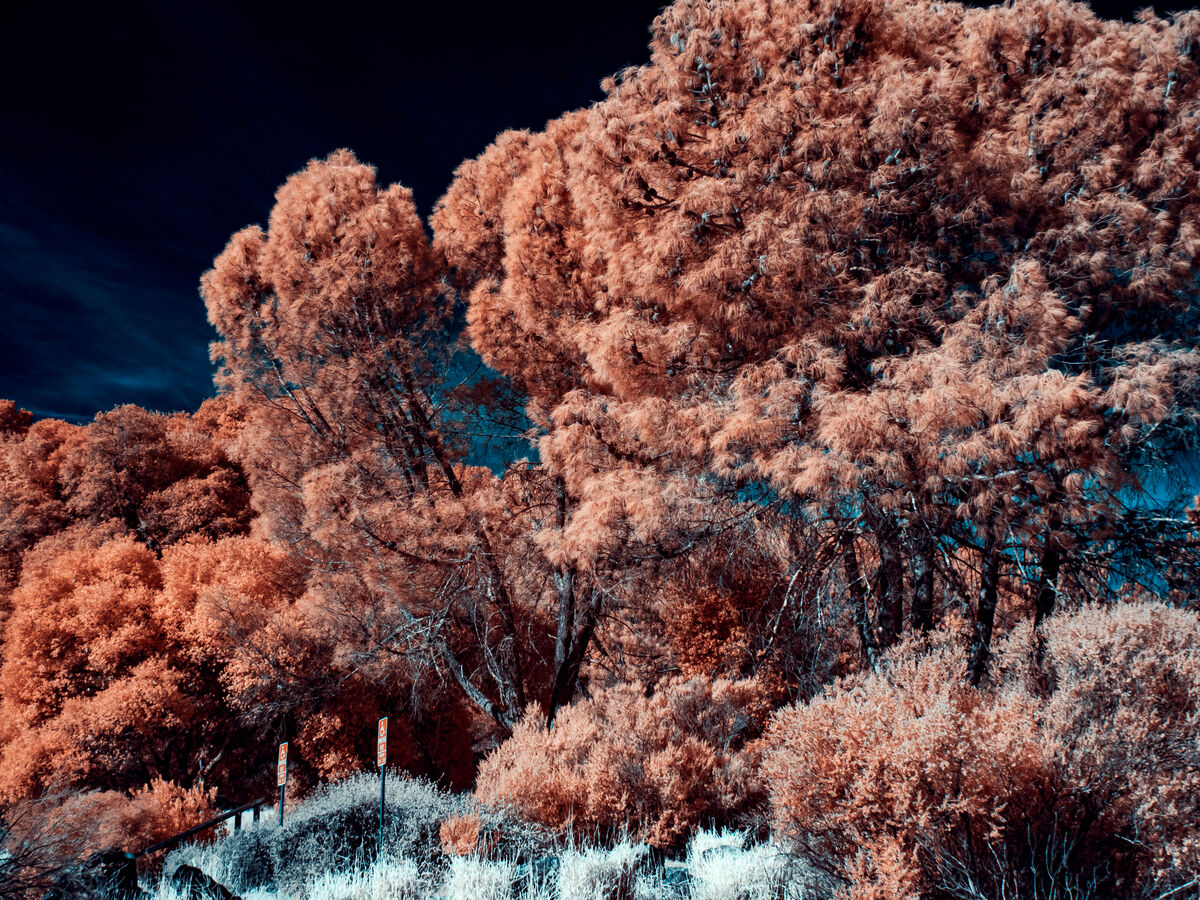
The first image, using a 630nm filter, was processed using Lightroom. The leaves on this tree are very thick and the top surface is quite shiny. The undersides of the leaves are much darker. Also, the leaves are shaped like taco shells where each side curls up a bit. Lightroom struggled to properly handle this problem.
Not so with DxO. It handled the bright portions and dark portions of the leaves without any problem at all. Plus, it managed to keep the sky at a constant level. And the processing was very easy to do on additional images and no fiddling around to get the look I wanted.
My DxO process was this:
1. Select either the -50K or -100K DCP profile.
2. Find a place to do a white balance.
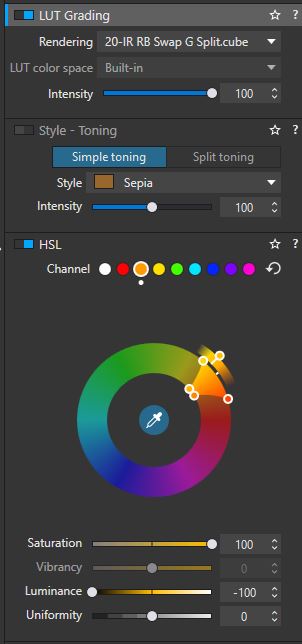
3. Select a suitable LUT Rendering. For these, I used one that swapped Red and Blue and then split the green and added it to both the red and blue channels leading to this color.
4. Next I went to HSL placed the eyedropper on a leaf that offered a good target. Once selected, I adjusted the hue slightly to get the color I wanted, and then played with Saturation and Luminance to get the look I wanted.
In addition, I had access to tools like Deep Prime and it's variants for noise reduction plus all the other good tools that come with DxO Photolab.
The first image, using a 630nm filter, was processed using Lightroom. The leaves on this tree are very thick and the top surface is quite shiny. The undersides of the leaves are much darker. Also, the leaves are shaped like taco shells where each side curls up a bit. Lightroom struggled to properly handle this problem.
Not so with DxO. It handled the bright portions and dark portions of the leaves without any problem at all. Plus, it managed to keep the sky at a constant level. And the processing was very easy to do on additional images and no fiddling around to get the look I wanted.
My DxO process was this:
1. Select either the -50K or -100K DCP profile.
2. Find a place to do a white balance.
3. Select a suitable LUT Rendering. For these, I used one that swapped Red and Blue and then split the green and added it to both the red and blue channels leading to this color.
4. Next I went to HSL placed the eyedropper on a leaf that offered a good target. Once selected, I adjusted the hue slightly to get the color I wanted, and then played with Saturation and Luminance to get the look I wanted.
In addition, I had access to tools like Deep Prime and it's variants for noise reduction plus all the other good tools that come with DxO Photolab.

Nov 22, 2023 18:53:37 #
topcat wrote:
I have trouble loading the ,CUBE files. I can't load them as actions.
For Lightroom, which includes Adobe Camera RAW, I posted a link earlier which had a link to how to do this for Lightroom. It is quite detailed and should be printed in order to follow it step by step. Rob Shea also posted a video which goes through it step by step too. I struggled to get it done correctly and finally got it. Once installed. It stays installed after all updates. And once installed, it is even better than the actions.
Nov 22, 2023 17:39:29 #
Note: I sent a message last night to Rob Shea, and he did respond and said that looking into DxO Photolab 7 is something he ought to do now that it can use LUTs directly.
Also mentioned dcp profiles he supplied with the Infrared Profile Pack were tested in DxO Photolab 4.
See: https://blog.robsheaphotography.com/infrared-profile-pack/
This in turn points here: https://blog.robsheaphotography.com/infrared-profile-pack/#editors
With this information, I took the .dcp files for the two modified cameras that I have, added them to DxO Photolab 7.
In DxO Photolab 7, under the Color/B&W Rendering section is a place to install DCP profiles. For Adobe, I had already downloading the ones I needed at: C:\Users\%userprofile%\AppData\Roaming\Adobe\CameraRaw\CameraProfiles\
In this section of DxO, you can choose DCP Profile and beneath it is a field called rendering and in there is a button to import a DCP Profile. In my case with two modified cameras, I had to do this 4 times - both a -50 and a -100 option for each camera.
Now that it is working in DxO Photolab, here are my findings. It works well in DxO and gives me great control on color control. But I also find that I can't depend on it to do finishing work. Thus it makes sense to export the DxO result to Lightroom where there are other tools to perfect the end result.
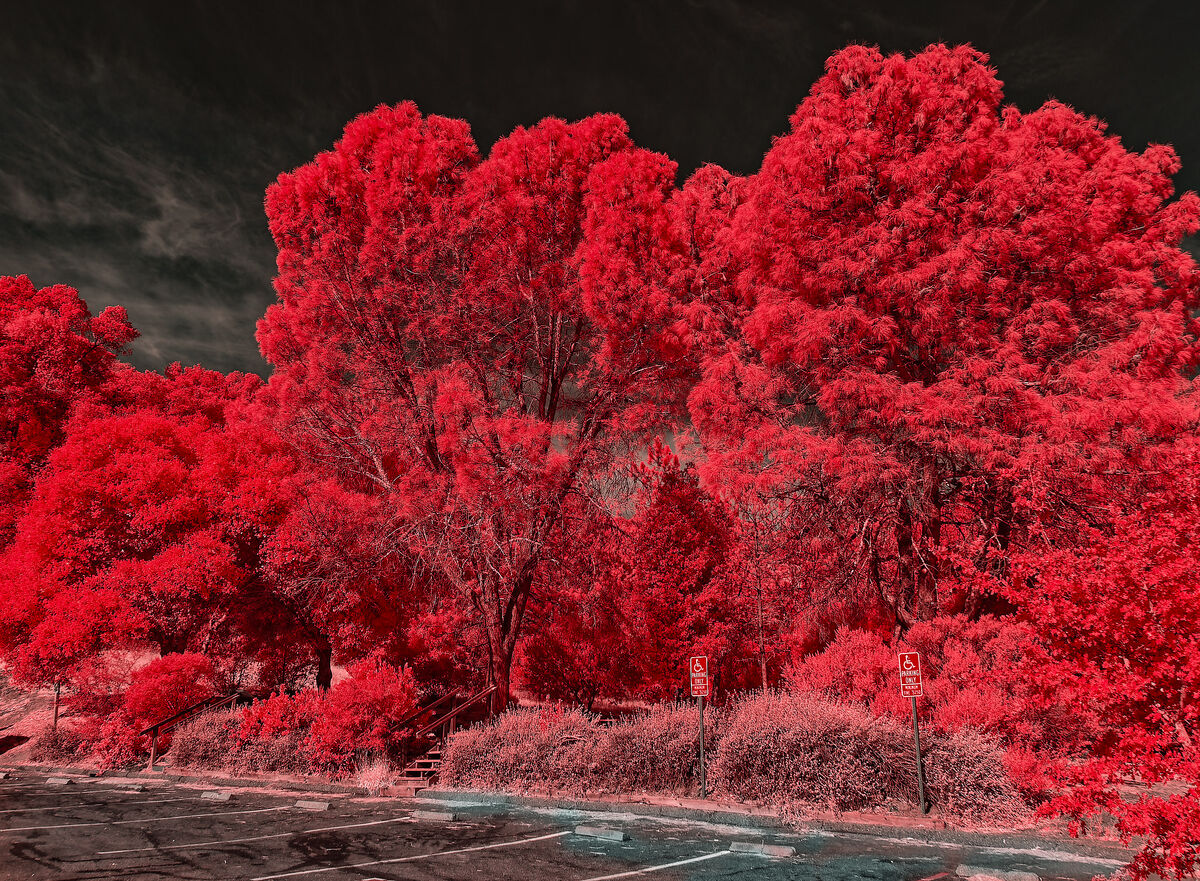
Attached are two images. The first is done only with DxO. Great control over colors. I could have chosen other colors if I wanted to. But the masking tools I like to use in Lightroom aren't there, so further detail stuff is lacking. If you look at the blacktop, you can see I started desaturating the pink coloring of the surface, and then got distracted and forgot to come back and finish the job. I had started using a masking brush for that in Lightroom.
The second image is another case where I only used Lightroom and made use of masking tools to control the final look. The masking tools allow the use of brushes to saturate or less saturation as needed as well as other tools to choose from. DxO can export to Lightroom in order to take advantage of these tools.
Also mentioned dcp profiles he supplied with the Infrared Profile Pack were tested in DxO Photolab 4.
See: https://blog.robsheaphotography.com/infrared-profile-pack/
This in turn points here: https://blog.robsheaphotography.com/infrared-profile-pack/#editors
With this information, I took the .dcp files for the two modified cameras that I have, added them to DxO Photolab 7.
In DxO Photolab 7, under the Color/B&W Rendering section is a place to install DCP profiles. For Adobe, I had already downloading the ones I needed at: C:\Users\%userprofile%\AppData\Roaming\Adobe\CameraRaw\CameraProfiles\
In this section of DxO, you can choose DCP Profile and beneath it is a field called rendering and in there is a button to import a DCP Profile. In my case with two modified cameras, I had to do this 4 times - both a -50 and a -100 option for each camera.
Now that it is working in DxO Photolab, here are my findings. It works well in DxO and gives me great control on color control. But I also find that I can't depend on it to do finishing work. Thus it makes sense to export the DxO result to Lightroom where there are other tools to perfect the end result.
Attached are two images. The first is done only with DxO. Great control over colors. I could have chosen other colors if I wanted to. But the masking tools I like to use in Lightroom aren't there, so further detail stuff is lacking. If you look at the blacktop, you can see I started desaturating the pink coloring of the surface, and then got distracted and forgot to come back and finish the job. I had started using a masking brush for that in Lightroom.
The second image is another case where I only used Lightroom and made use of masking tools to control the final look. The masking tools allow the use of brushes to saturate or less saturation as needed as well as other tools to choose from. DxO can export to Lightroom in order to take advantage of these tools.

Nov 22, 2023 17:00:41 #
topcat wrote:
What do you do with these .cube files?
Are you referring to how to install them. And that depends on what RAW editor you are going use them with. In the last post I made in this thread, just before your post are three links to look at.
Or are you referring to what specific use you make use of these? In that case, Rob Shea never revealed that. So I thought some ways to try them and that is what you see earlier in this thread.
Rob Shea simply calls them Infrared Creative, which I take to mean that you just take a chance and try using them. I have only tried 3 of the 12 so far, and don't know what awaits me in the other 9!
Nov 22, 2023 02:25:42 #
No instructions for this have been produced that I have been able to find. So, I had to jump in blind. One of the new things added into DxO Photolab 7, which I just updated using the Black Friday pricing, is the ability to use LUTs, and in fact, use custom LUTs (actually the .CUBE files) from Rob Shea that weren't supplied with the original 17.
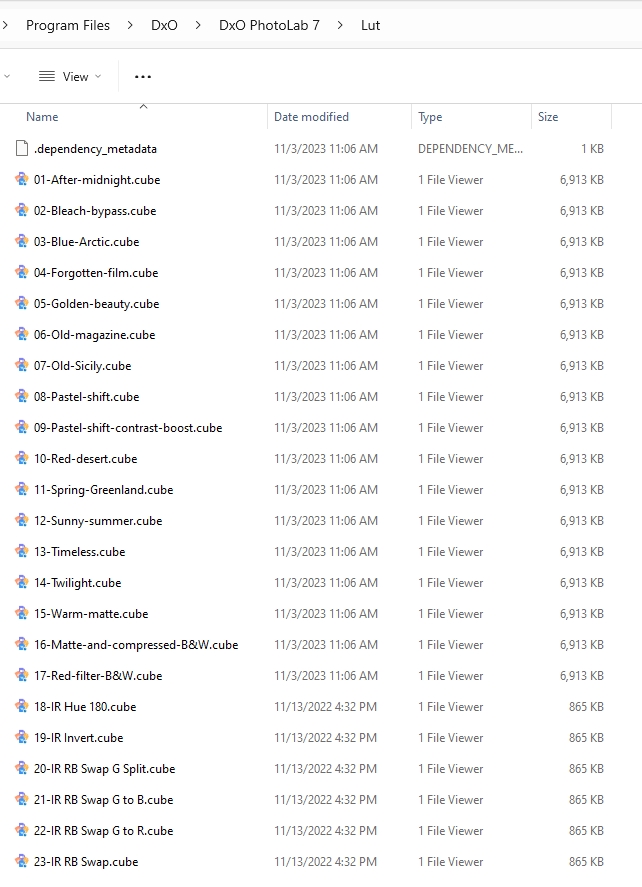
The first image is the list of the 17 DxO supplied LUTs (actually .CUBE files). These reside in a subdirectory cleverly called "Lut". Need to close down DxO and then relaunch it after copying the files.
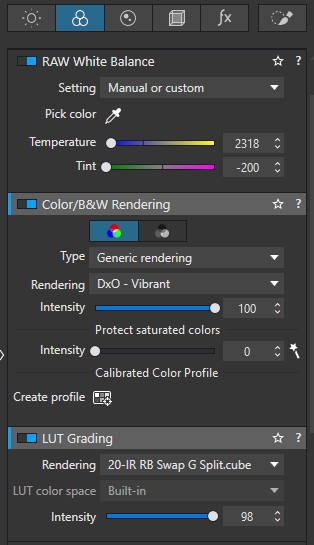
The 2nd image shows where I make use of these in DxO.
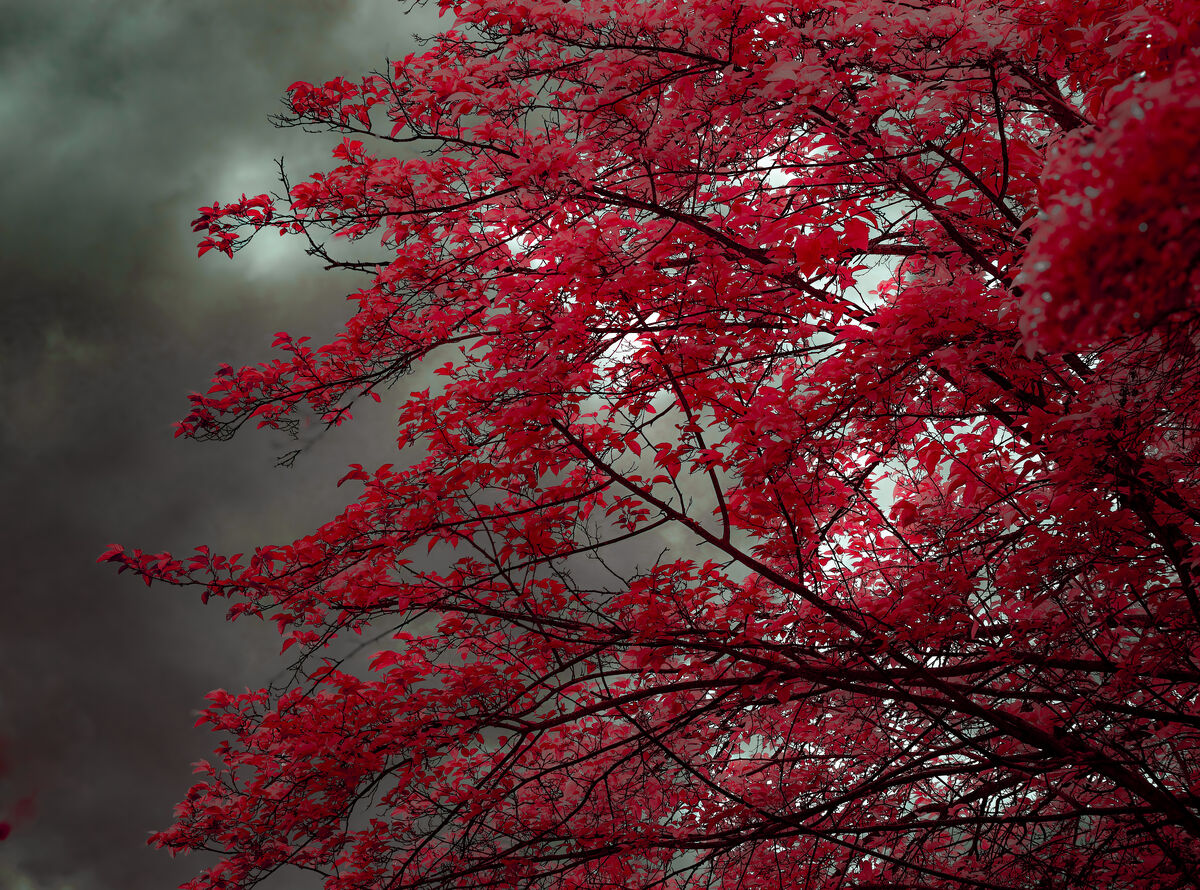
And finally the 3rd image is my first try of an image shot using a 720nm filter. I wasn't sure exactly what I was doing, and first attempted a White Balance on the lighter part of the sky. Surprisingly, it achieved White Balance with the Temp. Slider pegs to the far left.
Next I chose a Rob Shea LUT to swap Red & Blue and to then move 50% of Green to Red and Blue. Then did another White Balance on the lighter part of the sky.
Then I got busy adjusting things in the Sections Color/B&W Rendering and in LUT Grading without a clue as to what I was really doing. And somehow, I produced this result!
Probably need to encourage Rob Shea to give this a try and to produce some IR instructions for using these capabilities in DxO Photolab 7. In particular, I don't yet know how to deal with the large swings needed for the color temperature.
The first image is the list of the 17 DxO supplied LUTs (actually .CUBE files). These reside in a subdirectory cleverly called "Lut". Need to close down DxO and then relaunch it after copying the files.
The 2nd image shows where I make use of these in DxO.
And finally the 3rd image is my first try of an image shot using a 720nm filter. I wasn't sure exactly what I was doing, and first attempted a White Balance on the lighter part of the sky. Surprisingly, it achieved White Balance with the Temp. Slider pegs to the far left.
Next I chose a Rob Shea LUT to swap Red & Blue and to then move 50% of Green to Red and Blue. Then did another White Balance on the lighter part of the sky.
Then I got busy adjusting things in the Sections Color/B&W Rendering and in LUT Grading without a clue as to what I was really doing. And somehow, I produced this result!
Probably need to encourage Rob Shea to give this a try and to produce some IR instructions for using these capabilities in DxO Photolab 7. In particular, I don't yet know how to deal with the large swings needed for the color temperature.
LUTs - 1 to 17 supplied by DxO, 18 - 23 copied in from Rob Shea's IR LUTs
Here is where I adjust White Balance and select a LUT
My first attempt
(Download)
Nov 20, 2023 17:52:34 #
dpullum wrote:
I was referring to the Shea LUT you downloaded.
When I originally downloaded Rob Shea's Infrared LUT Pack V2, there were all the normal ones I would expect in a directory called Infrared Color Swap with all the combinations of channel mixing and -50K and -100K options. But they were .CUBE files which needed to be processed with a procedure on his website to become LUT files.
But some editors can use these .CUBE files direct as mentioned in the first link.
https://blog.robsheaphotography.com/infrared-profile-pack/#installation
but more detailed instructions here (with video):
https://blog.robsheaphotography.com/2021/08/15/update-color-infrared-luts.html
and these detailed instructions for Lightroom (The process is not that straightforward, and for those that can't follow detailed instructions, they may not complete this process successfully)
https://blog.robsheaphotography.com/2020/06/29/lightroom-lut.html
And there are Action Files included too for Photoshop. I find I can use either, depending on my current mood.
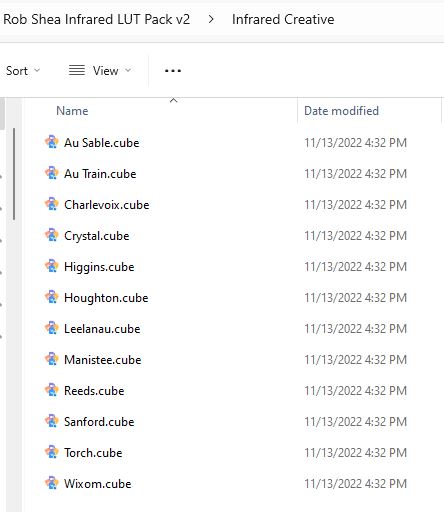
But there was also a separate group called Infrared Creative which contained even more .CUBE files, as you can see in the attached screenshot. There was never any mention of these extras. But recently, I saw him in a YouTube video mention these extras (sorry - I have forgotten which video), and he said to try them for greater creativity. So, I processed them the same as I had done the other .CUBE files.
Nov 19, 2023 08:38:56 #
dpullum wrote:
Jim great show and tell but what is the Net reference. Please.
I don't understand your question?
Nov 18, 2023 15:28:26 #
And another example using the Creative IR LUT Crystal. Again, the color is off into another direction.
Nov 18, 2023 15:23:49 #
Attaching another example using the Creative IR LUT called Au Train
Nov 18, 2023 15:04:40 #
We have received a lot of instruction from Rob Shea on how to use his Infrared LUTs, but he also supplied a number of Infrared Creative LUTs with absolutely no instruction. I decided to look at them. Included in this set are: Au Sable, Au Train, Charlevoix, Crystal, Higgins, Houghton, Leelanau, Manistee, Reeds, Sanford, Torch and Wixom. 12 of them in total. But not a word on how to use.
I labeled each image to show what I did. One of the 12 LUTs listed above is called "Torch" and I will end with that one. Each of the 12 has a different color flavor that can be coaxed out of it. I rather like how it turned out.
Give it a try.
.
I labeled each image to show what I did. One of the 12 LUTs listed above is called "Torch" and I will end with that one. Each of the 12 has a different color flavor that can be coaxed out of it. I rather like how it turned out.
Give it a try.
.
The RAW file with a 590nm filter being used
(Download)
A -50K offset applied and then a white balance on the wispy clouds
(Download)
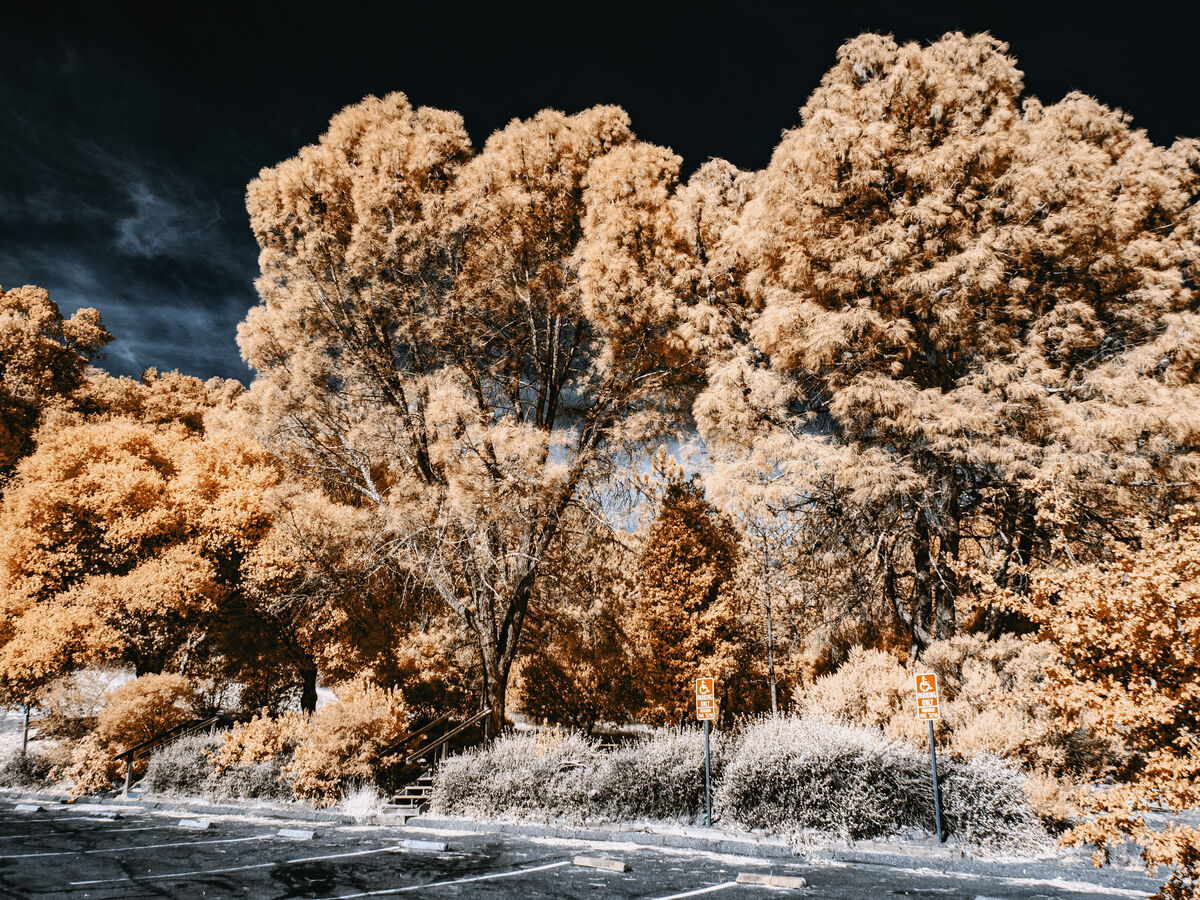
The a LUT applied to swap Red / Blue channels and to then split the Green 50/50 to Red and Green channels.
(Download)
Or if you didn't like the previous one, we can do just a Red / Blue channel swap.
(Download)
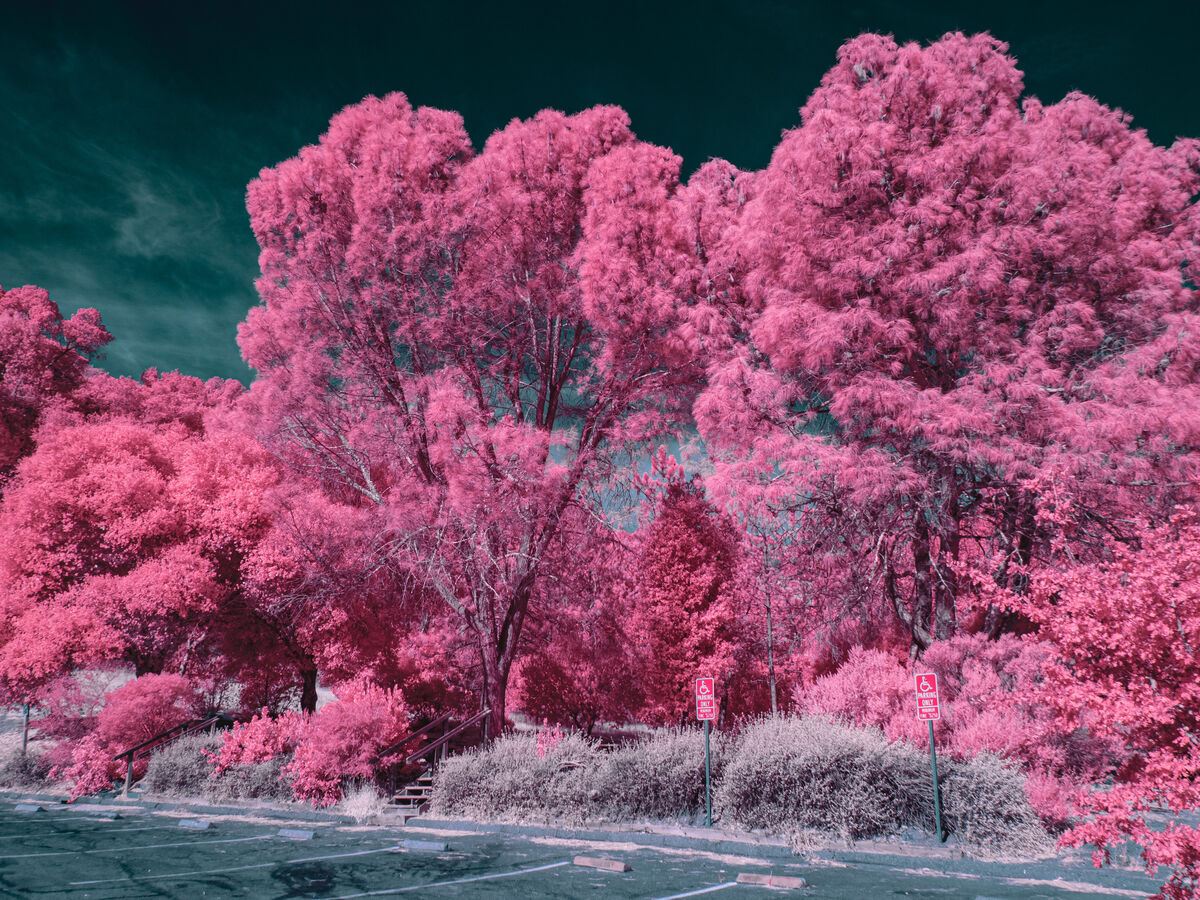
Now, let's try one of the Creative IR LUTs. Started by doing a reset on the image, and then choosing the Torch LUT
(Download)
Next, a White Balance on the wispy clouds
(Download)
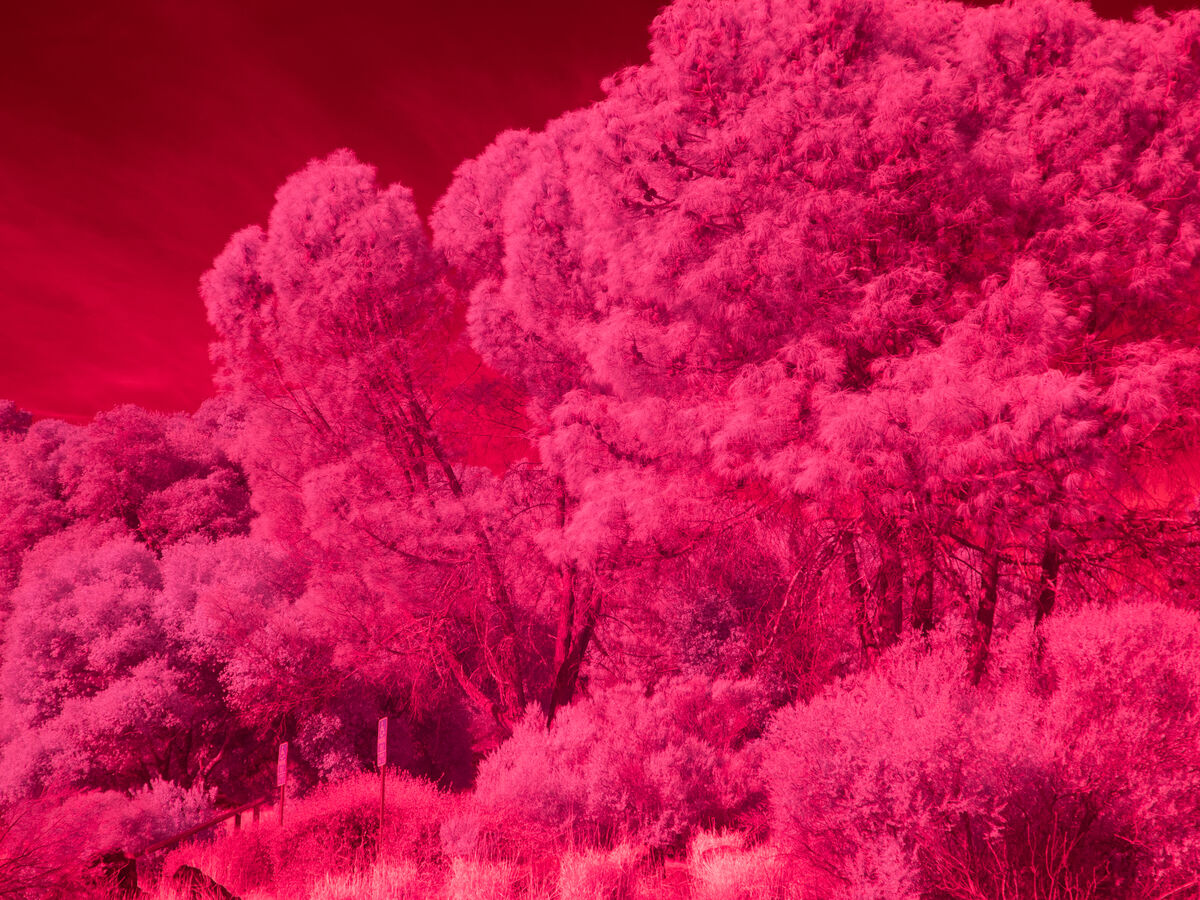
Finally, some fine tuning Dehaze, Clarity and a few other Lightroom sliders, created this entirely different look.
(Download)