Posts for: SalvageDiver
Oct 29, 2017 11:47:46 #

Oct 29, 2017 10:45:07 #
I think more trees are better. I see them as your main subject. With all the oranges and gold in the trees, I would use HSL to deepen the blue in the sky.
Love the trees
Mike
Love the trees
Mike
Oct 29, 2017 10:37:13 #
I like these images. I don't subscribe to the idea that photography should be realistic and natural, accurately match the scene. I view it as an art to manipulate for a desired effect, just as many very famous painters in history have done for centuries. For example, a couple of painters I like very much, Albert Bierstadt and Tom Kincade, paint very beautiful images, but nowhere near reality.
However, each judge brings in his own personal preferences and biases. A good judge will attempt to set those aside and see the aesthetics and artistry of each image. But you never know.
I think your images are very artistic. IMO, the images could be strengthened with some light dodging and burning. I think the colors are OK, except the last one.
The last one is OK except for your attempt to blue the sky (which I think may have been blown out). The trees along the skyline are blue. I would have been less aggressive, trying to exclude the trees in your mask.
Good luck in your contest.
Mike
Oct 29, 2017 10:00:56 #
Very nice. I love the colors on the black background.
Mike
Mike
Martin wrote:
Playing around with creative ideas....
Oct 29, 2017 09:55:40 #
Yes, I like the crop and theme in this image. In my opinion, the image could be more powerful if: 1) you removed some of the negative space on the right, probably using a tighter crop and 2) adding more contrast. Not to much though, since a baby's picture should still have that soft glow to it.
What I might have done differently with the camera is either open the aperture slightly of focus stacked to get more of the face into focus. In this edit, only half the face is in focus. The other half, including the nose, is a little soft for my taste. If the eyes had been open, that may have change my opinion.
However, it's a great image that I think the child's family will cherish forever.
Mike
MaggieManchester wrote:
Does this crop and edit work?
Oct 28, 2017 11:55:35 #
Lot's of good information here. In addition to all the good advise here, I would also take multiple shots as close together as possible, for insurance. In many cases there's going to be the closed eyes, poor expression or head turn in a group image. With multiple images, you (or somebody) can correct for many of those problems. I know you said that you're not great with PP, but if you have the additional images, somebody may be able to help.
I'm currently helping a friend composite together multiple group images into a clean single image by choosing the best images for each individual. Both of us are pure amateurs. In our case, it was a reunion, the group consisted of about 40 ex-military people, slightly unruly with alcohol (not drunk though) and he had the best camera. Fortunately, his wife took multiple shots. Every shot had problems, but the composite is coming out quite good. There were other mistakes, but they're covered in others advice and recommendations here.
Hopefully everyone in the group picture will be happy with their image in the group. Enjoy.
Mike
Resqu2 wrote:
Going to a FD dinner at my Dept. and they ask me t... (show quote)
Oct 28, 2017 11:02:35 #
Beautiful image. Love this part of the country. I agree, the download is a must to fully appreciate this image.
greymule wrote:
Download is a must.
Oct 28, 2017 10:55:00 #
Hi,
When you crop you always end up with less pixels. If I understand your question correctly, you should crop to your 'desired' image or print ratio. If you only resize but to a different image ratio, you could risk distorting your image.
When do I crop? ... it depends. When there's a clear horizon or other features that are naturally straight, I will usually crop right away. However, if there is something bothering me or I see a better composition as I edit I may crop in the middle or at the end. In any of the cases, the image quality isn't affected by the order of the crop. Some PP may be affected, such as vignetting, if I crop to late in my edit.
For myself, the final image ratio is based on the final composition and its final resting place, i.e. a 4x6 slot in a photo album or a standard sized picture frame.
Mike
gvarner wrote:
When do you straighten a photo - during RAW editing or after? I use Elements 14 and can do it either way. Regardless of when I do it I end up with photo dimensions that are not the same as the original. My D7000 native format is 4x6. Should I resize it to a 4x6 ratio or just crop it to that? Thanks in advance for the advise.
Oct 27, 2017 14:02:29 #
Hi Jules,
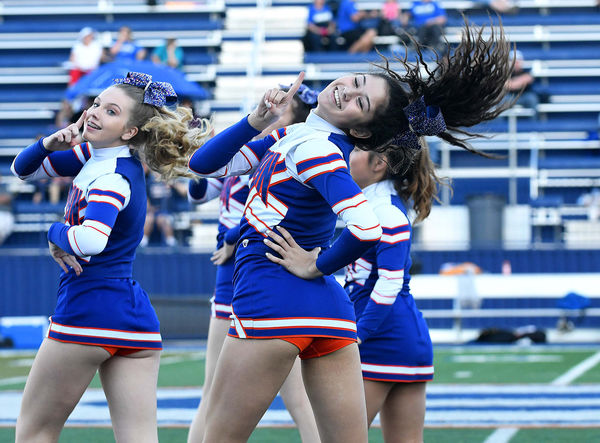
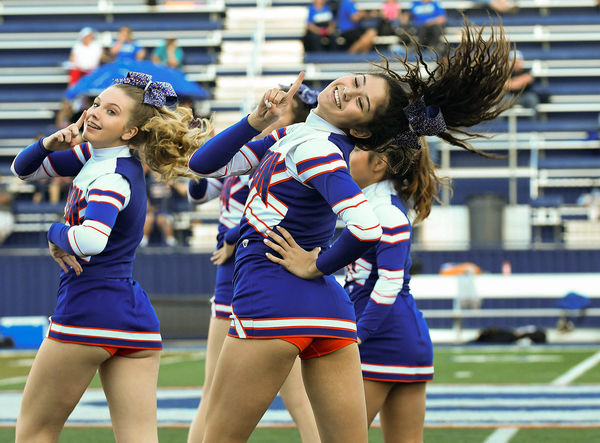
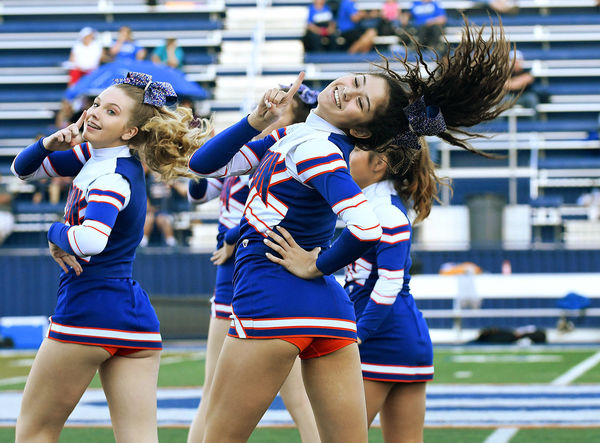
You can always uses curves or other color correction methods to manually adjust your color balance. However here are a few quick methods for auto white balancing your images in photoshop. There may be many other mthods, but this is how I do it when not doing white balance manually.
The first image is your original image.
The second image used the auto feature in ACR. I selected "Auto" instead of the default "As Shot" in the White Balance adjustment. I also reduced the exposure slightly since some of the whites were blown out.
The third image uses an inversion method. Copy the image to a new layer. Invert the image and blur the image using the average blur. This is basically the color that's missing from your image that gives the total image a neutral (gray) cast. Select the blend mode for this layer to "overlay" or "soft light" to remove the color cast. For this image, I used "overlay".
The fourth image uses the gray eye dropper in curves adjustment window. Create a new 50% gray fill layer above your image and select the difference blend mode. Find a black area on the image. Anywhere where the colors are the same (i.e. no difference between layers), the image will be black. Turn off the gray fill layer. Using the gray eyedropper from the curves adjustment window, select the gray area (black when the fill layer is on). Note: you can use the white and black eyedroppers to set your white and black points, but not necessary for white balance. With the gray eyedropper, I selected the center of the gray [trash can?] directly behind the girls.
It may sound complicated, but its really not. When you do it once, it's easy after that.
Here are examples of each method.
Hope this helps.
Mike
Jules Karney wrote:
i have photoshop cs6.
This photo is not the correct color. What can I do in Photoshop to correct this?
Thank you in advance for your advice and comments.
Jules
This photo is not the correct color. What can I do in Photoshop to correct this?
Thank you in advance for your advice and comments.
Jules

Oct 27, 2017 11:52:26 #
Very nice capture. Its on my bucket list to visit.
greymule wrote:
Cool place, now part of Bears Ears
Please download for maximum viewing.
Please download for maximum viewing.
Oct 27, 2017 11:10:39 #
Beautiful images. This is one of our favorite area to play in.
Oct 26, 2017 12:30:09 #
good luck, that's always the most difficult part
Oct 26, 2017 11:22:59 #
Very nice work. This one is my favorite.
gmcase wrote:
Thank you. Here's another. Don't recall exactly but I believe it has 7 images.
Oct 26, 2017 10:55:19 #
Hi Gitchigumi,
As one who had scanned many negatives and slides, I ultimately had to resolve this very question. The responses you received are spot on. Pixel resolution and optical resolution are very different, just as in cameras. For example, if you had a 50mp camera will a poor lens or poor focusing system, you'll get a large but blurry file. Here is a very good site that explains the differences and provide test results on a variety of flatbed and film scanners, including the LS9000.
http://www.filmscanner.info/en/NikonSuperCoolscan9000ED.html
Mike
Gitchigumi wrote:
(Sorry, the title got messed up) This relates to digital scanners... Service vendors offer 3,000 to 5,000 dpi resolution when scanning slides or negatives. And, yet, there are flat bed scanners that claim 9600 dpi. So, how can dedicated slide scanning equipment not offer as high a resolution? Or, are not all dpi claims reporting "apples to apples"?
Oct 23, 2017 13:56:46 #
HaHaHahahahaha.....