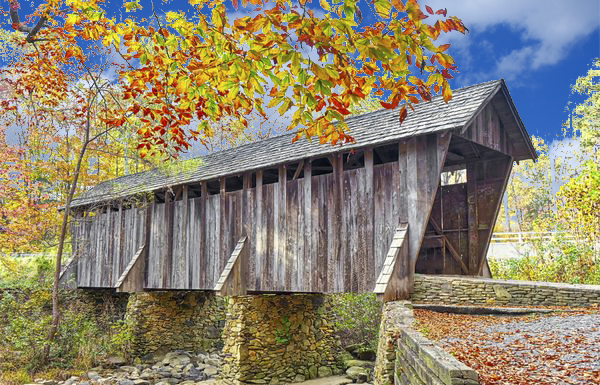
How do you guys change the sky in a complex photo
Dec 6, 2017 09:40:26 #
I did this one in about 30 min using a Luminosity mask and then changing its contrast before applying it to your picture. I did it all in Photoshop. It would look a lot better if I was using a high resolution image. It has taken me a year to get a decent handle on masking. The examples that are shown on line and in YouTube make it look so easy but the examples are never complex and therefore misleading as how simple they are to use. Experience this the only way to do what you want. Get Photoshop and then keep learning a bit at a time and you'l get the results you want. Take small steps otherwise it will become overwhelming.
Dec 6, 2017 09:41:04 #
Changing the sky or any background is very easy with On 1 one stroke. the program comes with many skys or you can use your own. I suggest that you look at their website and view the lessons on this or any subject.
Dec 6, 2017 10:04:10 #

After looking at this entire thread my question is, Haven't you guys heard of Blend modes such as Darken?
What about Blend-If?
This is a a 2 minute job.
What about Blend-If?
This is a a 2 minute job.
Dec 6, 2017 10:09:27 #
Fotoartist wrote:
After looking at this entire thread my question is, Haven't you guys heard of Blend modes such as Darken?
What about Blend-If?
This is a a 2 minute job.
What about Blend-If?
This is a a 2 minute job.

Dec 6, 2017 10:52:03 #
sailor2545
Loc: Victoria, BC
On1 2018 raw trial will do it in a few minutes
tomad wrote:
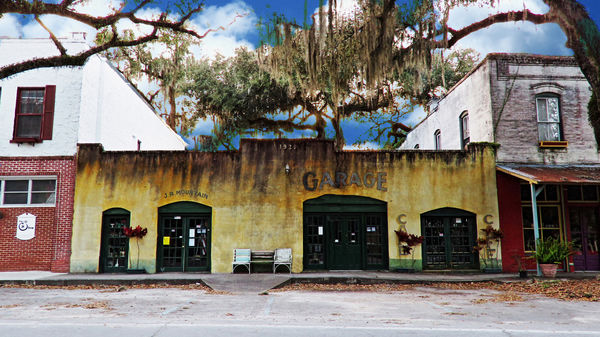
Hey pp experts, I have a photo that has a white (... (show quote)
Dec 6, 2017 11:16:20 #
I used to take a blue filter and place it in front of the lens half way up in front of the lens- also bought a graduated blue filter and put it on the camera- you can adjust the picture through the camera also. Canon does it in the software of the camera also. Darkening the shot in PP helps sometimes. Just put the filter in your shirt pocket then it's there when needed.
Dec 6, 2017 11:46:54 #
Dec 6, 2017 11:54:19 #
tomad wrote:
Try putting clouds behind the trees. Find a sky that matches up enough so you get some blue sky and some clouds where you need themHey pp experts, I have a photo that has a white (... (show quote)
Dec 6, 2017 12:05:32 #

Dec 6, 2017 12:35:08 #
If you have Lightroom, my suggestions would be as follows:
1.) use the brush tool to select the sky
2.) use the dehaze control and see what happens
3.) if necessary, adjust the controls for blue color (hue, saturation, and lumiance) for additional changes.
1.) use the brush tool to select the sky
2.) use the dehaze control and see what happens
3.) if necessary, adjust the controls for blue color (hue, saturation, and lumiance) for additional changes.
Dec 6, 2017 12:45:24 #

dave.m wrote:
If I knew how to insert images in the text as I went along this would be easier!
I agree ... does anyone know how to do that !
Thanks for the write up and images.
Dec 6, 2017 12:56:39 #
Sometimes this works, sometimes not but give it a try... Replace sky thru trees tutorial. Based on Photoshop.
Open Picture you are working on. Open separate photo with replacement sky. Select all. Edit-Copy. Or Do a selection; then copy & paste over original.
Paste over original... Select Darken... adjust opacity.
choose colors Black and White on left menu. (Ctrl D)
Open Gradient tool: Linear Foreground to transparent
Draw straight line over sky are going upward
adjust capacity again
You may need to make some adjustments but this should get you close.
Good Luck
Dec 6, 2017 12:58:13 #

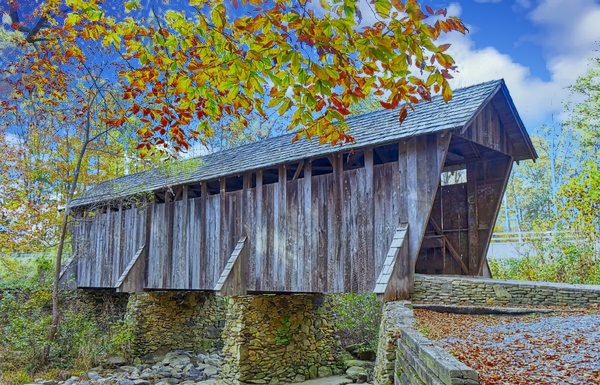
That photo looks like the covered bridge near Asheboro. It washed away a few years ago,but much of the timber was recovered and the bridge reconstructed. I was here before and after and the rebuild crew did an amazing job!
Dec 6, 2017 13:02:09 #

tomad wrote:
Ok, but I want to learn by doing it myself so I'm looking for suggestions of the best way(s) to do it. I don't just want someone to do it for me... 
Although the original photo would have been a better starting point, I took a screenshot and put it through Landscape Pro Studio. Total editing time: about 2 minutes.
Dec 6, 2017 13:02:57 #
bpulv
Loc: Buena Park, CA
YeloCab1 wrote:
Try putting clouds behind the trees. Find a sky that matches up enough so you get some blue sky and some clouds where you need them
Was that photo done in PS or something else? How did you outline the layer mask with the sky so that it would not look faked and how long did that take?
If you want to reply, then register here. Registration is free and your account is created instantly, so you can post right away.