Sunset Photos
Mar 11, 2017 16:59:31 #

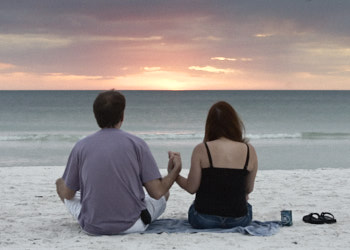
Here are two photographs I took last fall while in Sarasota, FL. and no I don't know who the couple is. They wanted to remember the sunset so I just did it and gave the pic to them the following day as a favor. They just wanted a picture but it was so boring I had to tell them to at least sit correctly and hold hands to give some meaning to the shot.
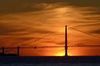
A silhouette shot can be very nice. My wife used this one I took as here Facebook icon, (Pic 1).
*ISO 400, f/6.3, 1/3200 sec, 70mm, Manual Setting, Zero EC, Hand Held, No modifyers or fill light used, minor post editing.
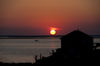
Other times people want know it was them watching the sunset, (Pic 2).
*ISO 2500, f/6.3, 1/125, 70mm, Manual Setting, Zero EC, No modifyers or fill light used, minor post editing.
(With post editing you can increase the sunset coloration in the sky the water colors, just about anything in the pic!)
Either way you're likely to like what is captured, it just depends on what you or they want.
Generally a lower ISO will give you a silhouette being the sensor is not as responsive. (see Pic #1) You can throw in a fill light but often the photos just don't look natural. Other things like having light modifier(s) to reflect like a fill light work better since it's going to be a similar white balance. Then again you can hope and pray for other natural lighting that will reflect of the sand like a light modifier in the case of a beach shot.
Using a higher ISO will generally let the sensitivity of the sensor capture more local light and that will give the pic a natural look. If you have extra photo goodies at your disposal and KNOW how to use it/them, by all means do. For most of my shots I don't carry extra things so I "run what I brung" so to speak.
*(Please note the 2nd picture of the couple came after three attempts to perfect it. The 1st one came from my 1st shot.)
Another thing, when doing sunset shots, use the manual mode. When you use a semi-auto like Av or Tv, and Program or (gulp) the Auto setting, your camera will be fooled and give you something you often don't like.
A silhouette shot can be very nice. My wife used this one I took as here Facebook icon, (Pic 1).
*ISO 400, f/6.3, 1/3200 sec, 70mm, Manual Setting, Zero EC, Hand Held, No modifyers or fill light used, minor post editing.
Other times people want know it was them watching the sunset, (Pic 2).
*ISO 2500, f/6.3, 1/125, 70mm, Manual Setting, Zero EC, No modifyers or fill light used, minor post editing.
(With post editing you can increase the sunset coloration in the sky the water colors, just about anything in the pic!)
Either way you're likely to like what is captured, it just depends on what you or they want.
Generally a lower ISO will give you a silhouette being the sensor is not as responsive. (see Pic #1) You can throw in a fill light but often the photos just don't look natural. Other things like having light modifier(s) to reflect like a fill light work better since it's going to be a similar white balance. Then again you can hope and pray for other natural lighting that will reflect of the sand like a light modifier in the case of a beach shot.
Using a higher ISO will generally let the sensitivity of the sensor capture more local light and that will give the pic a natural look. If you have extra photo goodies at your disposal and KNOW how to use it/them, by all means do. For most of my shots I don't carry extra things so I "run what I brung" so to speak.
*(Please note the 2nd picture of the couple came after three attempts to perfect it. The 1st one came from my 1st shot.)
Another thing, when doing sunset shots, use the manual mode. When you use a semi-auto like Av or Tv, and Program or (gulp) the Auto setting, your camera will be fooled and give you something you often don't like.
Pic 1

Pic 2
Mar 11, 2017 18:29:52 #
I totally agree with the need for silhouettes in all sunsets. I have a app that can tell you the exact time and direction the sunrise, sunset, moon rise moon set is. Check it out. David
http://photoephemeris.com/
The Photographers Ephemeris
http://photoephemeris.com/
The Photographers Ephemeris
Mar 11, 2017 20:51:06 #
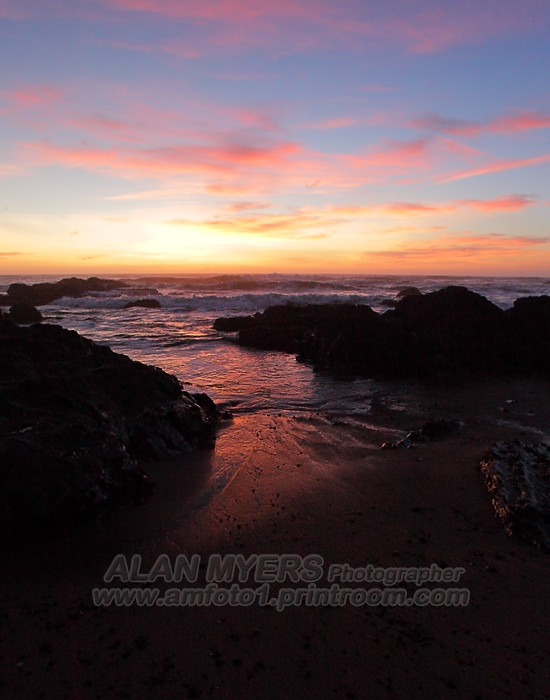
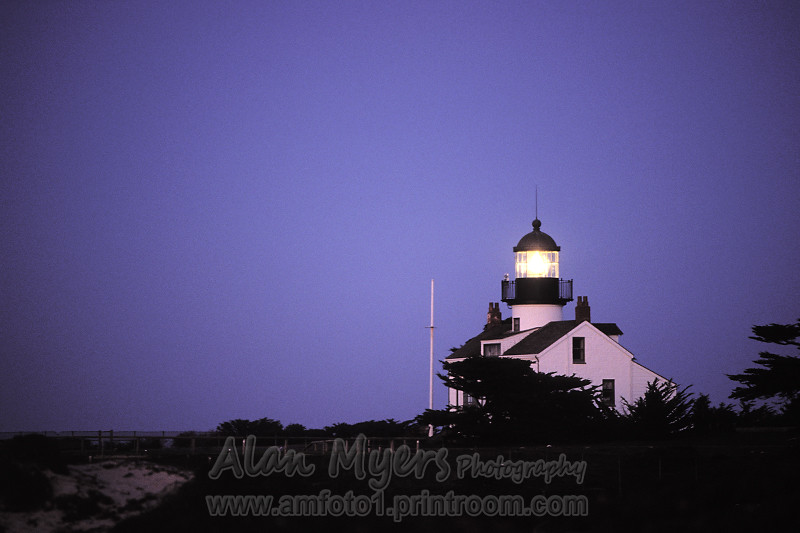
You need to decide what to expose for. Do you want the sun to be a ball, or do you want it blown out? Do you even want it in the frame, or do you juts want the colorful sky? Do you care if there is detail in the foreground, or as been suggested, do you want silhouettes? I've gotten good results exposing for the sky, not including the sun. I've also gotten good results exposing for the foreground, and underexposing by two or three stops and keeping a little detail. And remember, the light changes, and the exposure changes, almost by the minute. Also, the best color may be fifteen minutes after the sun goes down, or even more.
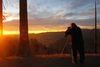
These are actually sunrises, but the principle is the same.
These are actually sunrises, but the principle is the same.
Mar 11, 2017 21:47:52 #
Looking through the responses, I was surprised I didn't see anyone recommending bracketing exposures, especially since the OP is a beginner. I would even recommend a 5 stop range. That way he can see the effect of under and overexposure and start to learn what he prefers.
Mar 12, 2017 01:13:00 #
JohnSwanda wrote:
Looking through the responses, I was surprised I didn't see anyone recommending bracketing exposures, especially since the OP is a beginner. I would even recommend a 5 stop range. That way he can see the effect of under and overexposure and start to learn what he prefers.
There is a time and a place for bracketing. Sunsets/rises are pretty fast but not that fast! It's over used in my opinion. Too many photographers use bracketing when they really should be manually changing the settings. It basically results in the same output but they'll learn a bunch more manually doing it!
Mar 12, 2017 01:16:20 #
amfoto1
Loc: San Jose, Calif. USA
It's very difficult to recommend exposure settings... and for that reason I was going to recommend bracketing, such as John suggested above. In fact, sunrises and sunsets are one of the few times I bracket, because it's really difficult to come up with a "right" exposure. I use either full or 2/3 stop bracketing increments and take 3 to 5 shots, whenever time allows. I don't like to bracket due to all the extra shos and because I normally can come up with accurate enough exposure.... but sunrises and sunsets are an exception. a camera will want to massively under-expose, so generally I will do most of my bracketing to the + side. But, the earlier point about making silhouettes is a good one... and that might call for slight - side exposure.
Other suggestions:
Shoot RAW. That gives you much more latitude to make exposure corrections and other adjustments in post-processing, which are very likely to be needed. In addition to exposure... there often is veiling flare causing loss of contrast and reduced color saturation. Those can be corrected in post-processing, which is always better done from a RAW file, than from a JPEG.
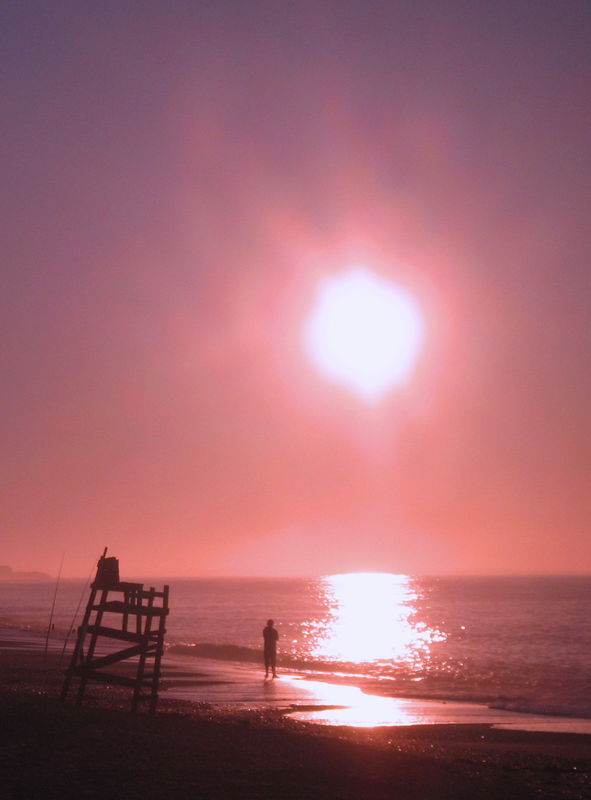
Remove any and all filters from your lens and make sure your lens is clean. This is to minimize flare, some of which is possible in spite of all the precautions... But a filter and/or dust or smears on a lens will make matters worse. If you must use a filter (such as blowing sand or near splashing surf), be sure to use a high quality, multi-coated one to minimize image problems. Following image was deliberately shot with a circular polarizing filter, as a test:
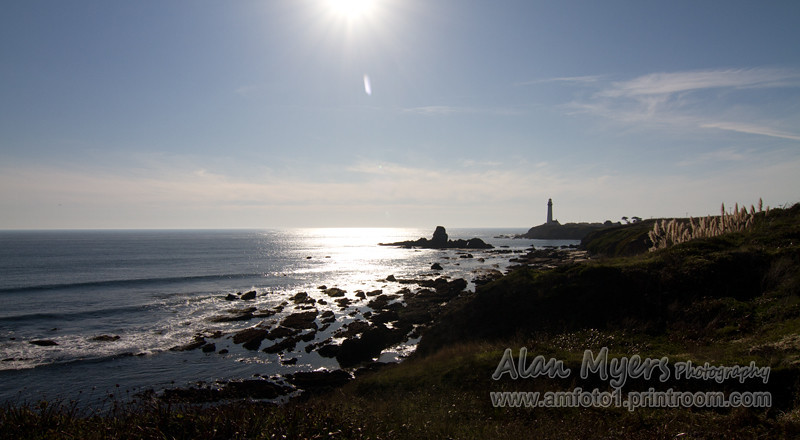
Even with a very high quality, multi-coated filter, there as signiificant veiling flare and ghost flare artifacts caused by the filter. The image also was under-exposued. It took some post-processing work to recover contrast and color saturation, to retouch away the ghost flare issues (most of which aren't obvious at Internet resolution and sizes), and to fix some chromatic aberration....
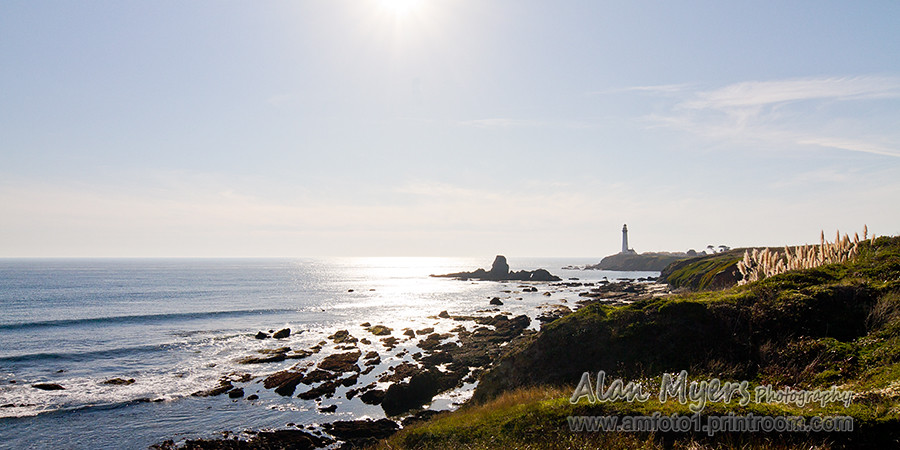
In fact, the worst kind of filter to use when shooting directly at the sun is a multi-layer, such as the circular polarizer I used above. With additional glass/air boundaries of that type of filter, it's even more likely to cause additional flare problems than a filter using only a single layer or glass (such as a "protection"/UV or Neutral Density filter). But, further, a polarizer has maximum effect when the camera and lens are aimed 90 degrees from the light source. Pointing right at the light source is actually 0 degrees, where the filter will have almost no polarizing effect anyway. So it's doing no good, while doing harm in other ways. The image below was shot without any filter, for the above reasons...
I also didn't want a polarizer to reduce reflections off the wet sand and rocks in the above image. That's another consideration, since reflections will often be an inherent part of sunrise/sunset shots.
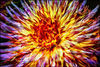
Experiment with different lenses and different apertures. Some lenses can produce a "star" effect around specular highlights such as the sun or reflections. Usually those are strongest and clearest at smaller apertures. The number of points on the star is determined by the number of blades in your lens aperture. For example 6-blade and 8-blade apertures will create a 6-point and 8-point star, respectively. For some reason I really don't fully understand, odd number of blades cause twice the number of points on a star... for example 5-blade, 7-blade and 9-blade apertures will create 10-point, 14-point and 18-point stars, respectively.
To have control over whether or not a star will appear in the image (if a lens will do it), as well as to control depth of field, I will usually use with aperture priority auto exposure or manual exposure (with or without Auto ISO). To me, the aperture is the most important consideration, for these types of shots. Sometimes a certain shutter speed is wanted, too, though.
Finally, things change fast so don't dawdle. Get your shots quickly! But also don't be too quick to pack up and leave. Often some of the best shots and and the most dramatic light occur immediately after the sun has set. The opposite is true for sunrises, get there early and be prepared for pre-dawn drama.
I agree! Also be sure to look behind you, where some interesting things might be happening.
Other suggestions:
Shoot RAW. That gives you much more latitude to make exposure corrections and other adjustments in post-processing, which are very likely to be needed. In addition to exposure... there often is veiling flare causing loss of contrast and reduced color saturation. Those can be corrected in post-processing, which is always better done from a RAW file, than from a JPEG.
Remove any and all filters from your lens and make sure your lens is clean. This is to minimize flare, some of which is possible in spite of all the precautions... But a filter and/or dust or smears on a lens will make matters worse. If you must use a filter (such as blowing sand or near splashing surf), be sure to use a high quality, multi-coated one to minimize image problems. Following image was deliberately shot with a circular polarizing filter, as a test:
Even with a very high quality, multi-coated filter, there as signiificant veiling flare and ghost flare artifacts caused by the filter. The image also was under-exposued. It took some post-processing work to recover contrast and color saturation, to retouch away the ghost flare issues (most of which aren't obvious at Internet resolution and sizes), and to fix some chromatic aberration....
In fact, the worst kind of filter to use when shooting directly at the sun is a multi-layer, such as the circular polarizer I used above. With additional glass/air boundaries of that type of filter, it's even more likely to cause additional flare problems than a filter using only a single layer or glass (such as a "protection"/UV or Neutral Density filter). But, further, a polarizer has maximum effect when the camera and lens are aimed 90 degrees from the light source. Pointing right at the light source is actually 0 degrees, where the filter will have almost no polarizing effect anyway. So it's doing no good, while doing harm in other ways. The image below was shot without any filter, for the above reasons...
I also didn't want a polarizer to reduce reflections off the wet sand and rocks in the above image. That's another consideration, since reflections will often be an inherent part of sunrise/sunset shots.
Experiment with different lenses and different apertures. Some lenses can produce a "star" effect around specular highlights such as the sun or reflections. Usually those are strongest and clearest at smaller apertures. The number of points on the star is determined by the number of blades in your lens aperture. For example 6-blade and 8-blade apertures will create a 6-point and 8-point star, respectively. For some reason I really don't fully understand, odd number of blades cause twice the number of points on a star... for example 5-blade, 7-blade and 9-blade apertures will create 10-point, 14-point and 18-point stars, respectively.
To have control over whether or not a star will appear in the image (if a lens will do it), as well as to control depth of field, I will usually use with aperture priority auto exposure or manual exposure (with or without Auto ISO). To me, the aperture is the most important consideration, for these types of shots. Sometimes a certain shutter speed is wanted, too, though.
Finally, things change fast so don't dawdle. Get your shots quickly! But also don't be too quick to pack up and leave. Often some of the best shots and and the most dramatic light occur immediately after the sun has set. The opposite is true for sunrises, get there early and be prepared for pre-dawn drama.
peterg wrote:
When taking sunsets, remember to look behind you where there may be other great photo opportunities.
I agree! Also be sure to look behind you, where some interesting things might be happening.
Mar 12, 2017 01:17:04 #

This is a good opportunity to tell you to buy Bryan Peterson's book "Understanding Exposure." Not only does it have the very thing you are asking about in it, it has lots of other things you're going to need also. It's a wise investment of a small amount of cash.
Mar 14, 2017 02:10:46 #
When any part of the sun is visible you will generally want to underexpose relative to the camera's indication of exposure. And you can shoot at base ISO of 100. Definitely experiment with f stop and shutter speed. If there are objects in the close foreground you want sharp and in silhouette you'll need a smaller f stop such as f11. Otherwise aperture is less critical. Once the sun actually sets you should probably go to ISO 200 and keep experimenting. Unless you are going to shoot into or almost to blue hour you don't need a tripod, a possible exception being if you are using long telephoto focal lengths. That's another thing I don't recall anyone else mentioning, experiment with focal lengths. Sunrises and sunsets can be successful either as wide shots including much of the sky, or as extreme telephoto shots with a huge sun dominating the frame, and everything in between. They are rarely successful without something interesting in the foreground, whether in silhouette or not.
Mar 14, 2017 07:49:10 #
Dun1
Loc: Atlanta, GA
One thing that also may be helpful, is a golden hour calculator, here is a link to one
http://www.cambridgeincolour.com/tutorials/sunrise-sunset-calculator.htm
http://www.cambridgeincolour.com/tutorials/sunrise-sunset-calculator.htm
Mar 14, 2017 08:44:40 #
rpavich wrote:
This is a good opportunity to tell you to buy Bryan Peterson's book "Understanding Exposure." Not only does it have the very thing you are asking about in it, it has lots of other things you're going to need also. It's a wise investment of a small amount of cash.
Quite right. I like his tutorials.
If you want to reply, then register here. Registration is free and your account is created instantly, so you can post right away.