F4 lens too slow for the full moon tonight?
Nov 15, 2016 11:57:04 #
Gene51 wrote:
F4, 1/160, ISO 100 - 600mm F4 on a D800. Your foca... (show quote)
That's a stunning photo!
Nov 15, 2016 12:06:32 #

Gene51 wrote:
F4, 1/160, ISO 100 - 600mm F4 on a D800. Your foca... (show quote)
ALL shots of the Moon are highly dependent on the quality and quantity of the atmosphere you are shooting through - which accounts for the variances in exposures ....
Nov 15, 2016 12:19:20 #
Gene51 wrote:
F4, 1/160, ISO 100 - 600mm F4 on a D800. Your foca... (show quote)
I will tonight as it works perfectly for exposure
Nov 15, 2016 12:24:07 #

I think that if you use program priority, auto ISO and above all center POINT metering the camera software should figure it out.
Nov 15, 2016 12:30:37 #
imagemeister wrote:
ALL shots of the Moon are highly dependent on the quality and quantity of the atmosphere you are shooting through - which accounts for the variances in exposures ....
As well as the Moons distance - which also varies ....from month to month.
Nov 15, 2016 13:05:45 #
It depends on how dark the landscape is, what time of day. It would be very difficult to have the landscape and moon both properly exposed when it gets dark. And yes, a manual exposure much less than the camera would do for itself is required. Also, I would spot focus on the moon for best detail on trimming.
Nov 15, 2016 14:32:31 #

WoodnMetalGuy wrote:
No, I would think F4 would be fine. You'll want to use settings as you would for a sunny day, as the moon is bright. Typically there is a tendency to overexpose, leading to a blank white disc. Is that the symptom you're having? -- Dave
I shot last night and the night before: ISO 160, f8, 1/125. That was the base, I went up and down on those parameters, but just 1-2 stops. All the images came out fine, but best were as stated. The only touchy one was focus. Most lenses focus to "infinity". You'd think that would work, but it doesn't. The marked infinity is a hair past the lens's idea of perfect focus. Because I had an adapter for my 400mm, the focus magnifier (focus assist) didn't work, but the peaking levels made a perfect yellow circle.
I love my a6300 more and more each day.
Nov 15, 2016 15:06:06 #
Reinaldokool wrote:
I shot last night and the night before: ISO 160, f... (show quote)
All my long lenses have a range for infinity to allow for temperature variations. I just focus on the edge and lock focus and it comes out just fine. Don't really care where the scale says it is as long as it is in focus.
Nov 15, 2016 15:23:48 #
amfoto1
Loc: San Jose, Calif. USA
Annie B wrote:
Unfortunately 70mm is the longest focal length I have. I did think about using my 28mm or 55mm primes on my A6300. The pictures I took were of the bright moon in landscape backgrounds. I knew I wasn't going to get much detail I just wanted it to be sharp. Thought it would look cool against the trees and the buildings
This is difficult to capture... virtually impossible in a single shot. The dynamic range of a night scene versus the near daytime brightness of the moon is way, way beyond what any camera can capture!
The best way to expose for the moon itself is to switch your camera to fully manual exposure, then use a "Lunar 11" setup. This means setting f11 aperture, the ISO of your choice, then a shutter speed that's the reciprocal of the ISO (in other words, for ISO 100 use 1/100 shutter speed.... or for ISO 200 use 1/200... etc.) This gives one stop more exposure than the "Sunny 16" rule to make a fully manual setting in broad daylight. The moon is reflecting sunlight, but some light is always lost to absorption, a little more is lost to the distance, and some more to the light passing through the atmosphere.
You might "bracket" with a few shots under and over that exposure setting, to be sure you get one or more shots that are "just right". You can vary the exposure for the bracket shots however you wish by changing ISO, aperture or shutter speed... with some minor limitations. If it were me, I'd probably bracket in 2/3 stops.... such as f11, f9, f7.1 (two "clicks" = 2/3 stop on my camera, when working in the dark). But if you prefer to take more shots in 1/3 stop increments or your camera is set up in half stops, those would work fine, too. If you prefer to leave the aperture set, you could do the same with shutter speeds: such as 1/100, 1/60, 1/40 (2/3 stop increments). Or, if you started with a higher ISO (and a correspondingly faster shutter speed) and you would prefer to leave both aperture and shutter the same, and just change your ISO to take the "bracketed" shots: such as ISO 400, 250 and 160 (also 2/3 stop increments).
One thing you need to watch out for is too slow a shutter speed. The moon actually moves faster than we think. To avoid "subject motion blur" don't use any slower than 1/15... actually 1/30 or faster is better. That shouldn't be a problem, though, even ISO 100 will make you use a relatively high shutter speed (even 1-1/3 stop "over" when bracketing still ends up using 1/40).
Also beware of using too small an aperture, which causes an effect called "diffraction" that robs fine detail from images. With a digital camera that has an APS-C size sensor, f5.6 and f8 are pretty "safe", f11 will start to show just a little effect.... f16, f22 or smaller should be avoided. With a full frame sensor camera, f11 is generally safe... f16 will lose a little to diffraction... f22 and smaller is best avoided.
Now, to get the foreground detail - trees, buildings and such - make a second exposure at much different settings. You'll need much longer exposure for this... or considerably higher ISO... or larger aperture... or a combination of two or all three. It's really hard to recommend what to use, so much is dependent upon ambient light conditions, whether it's twilight or fully night, any other light sources, etc. All I can do is suggest you experiment. It might be possible to do with fully manual settings, or with some form of auto exposure... though auto might try to overexposure. Take multiple shots at different settings... some more bracketing, in other words.
In this second shot the moon will inevitably be massively over-exposed. So you'll need to combine the "correct" portion from each image later in post-processing. It should be pretty easy to do so, with the sky is pitch black or nearly so. Just copy the portion of the shot showing the "correctly exposed" moon and paste that onto the image that was exposed for the foreground (or vice versa).
I'd suggest using a tripod. It also can help to use Live View (or whatever your camera manufacturer calls it) and might be best to focus manually. On most cameras you can zoom in to check focus, in Live View. Using Live View also flips up the camera's mirror out of the way, preventing some internal camera vibrations that can effect images like this. It also can be helpful to use a remote release or use the camera's self-timer, so you aren't touching the camera at the instant of exposure, possibly bumping it (though it won't be too big a concern with a 70mm lens... any "camera shake" won't show the same way it would with a 700mm or 1000mm lens rig!)
Finally, you might want to shoot RAW, assuming that's possible with your camera. RAW images have more "adjustability" for exposure and white balance, later in post-processing, if needed. JPEG files don't have nearly as much latitude to make those sorts of adjustments.
Note: Are you familiar with Ansel Adams' "Moonrise Over Hernandez, New Mexico"? That was supposedly done in a single film exposure, but was actually taken right at sunset, while the last rays of the sun were still on the foreground scene and clouds in the sky. Adams said that the light changed so fast he didn't have time to take a second shot (working with a sheet film camera).
Nov 15, 2016 16:06:16 #
amfoto1 wrote:
This is difficult to capture... virtually impossib... (show quote)
3 shot in camera HDR +- 5EV on day BEFORE the full moon (Sun night) - at dusk- with some still available daylight - and yes, I know the Moon is washed out - but this gives you an idea of what is possible. The middle exposure was 1/8 @f5 ISO 200, shot as JPEG and PP in Elements 9 - and yes, there is some motion blur. Next time the middle exposure will be 1/20.

Nov 15, 2016 16:55:39 #
Nov 15, 2016 18:09:32 #
I shot the supermoon with my Nikon 200-400 mm F4 lens WITH a tc1.4 attached making the lens over 500mm in length and a F5.6
My shots were in manual mode, at ISO 100, shutter 1/100 and f9. My moon is nice and bright, sharp and crisp. The moon was actually 3 stops brighter that it usually is when I shoot moonshots here in south Florida.
My shots were in manual mode, at ISO 100, shutter 1/100 and f9. My moon is nice and bright, sharp and crisp. The moon was actually 3 stops brighter that it usually is when I shoot moonshots here in south Florida.
Nov 15, 2016 18:20:50 #

The lens is not too slow, the focal length is way too short. You are using a wide angle lens, but you need a telephoto. You need a 300mm lens to put on your camera. If your camera has a 2x crop factor that will give you an equivalent of 600 mm. You could shoot at f5.6, iso-100, then start your exposure around 1/250th and change the exposure time until you get a good contrasty view on your live view screen. Making the exposure time shorter (eg. like 1/500) will make your picture and details darker. Keeping your iso at 100 will give you the best detail and least noise. If you get a good shot you can crop it to make the moon bigger in the pic.
Annie B wrote:
I tried taking some full moon pics last night as a trial run with my 16-70 f/4 lens. I could not get a good picture no matter what settings I tried... Is the f4 lens too slow to take these kind of pictures?
Nov 15, 2016 18:36:38 #
Gene51 wrote:
F4, 1/160, ISO 100 - 600mm F4 on a D800. Your foca... (show quote)
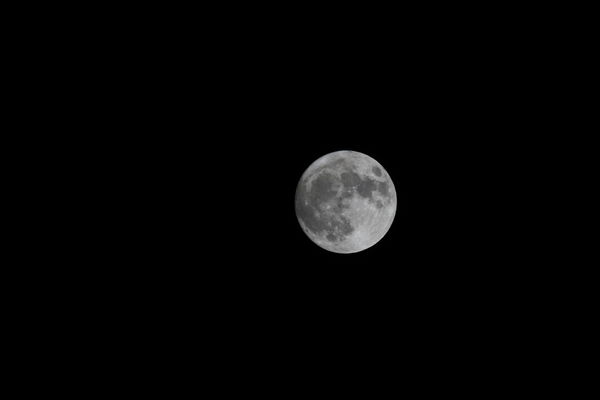
You asked for sunny 16 shot, well here it is.
I did not do ISO 100 at 1/100 I shot is at ISO 200 at 1/200 at f16. It came out perfectly, did not have to calculate the distance to the moon and sun, or bracket 15 stops each way or hold my ears just right. Just simply snapped a couple of shots off that work just fine. It was very simple and works for me each time.
So I would say your camera is totally screwed up if it can't handle doing this.
Nov 15, 2016 18:39:49 #

Architect1776 wrote:
You asked for sunny 16 shot, well here it is.
I did not do ISO 100 at 1/100 I shot is at ISO 200 at 1/200 at f16. It came out perfectly, did not have to calculate the distance to the moon and sun, or bracket 15 stops each way or hold my ears just right. Just simply snapped a couple of shots off that work just fine. It was very simple and works for me each time.
So I would say your camera is totally screwed up if it can't handle doing this.
Very well done....
What's the old saying??....KISS.... Keep It Simple Stupid...
If you want to reply, then register here. Registration is free and your account is created instantly, so you can post right away.