Snow Photography
Dec 16, 2015 15:50:56 #

rpavich wrote:
Now I'm truly embarrassed at my post. Very much so... (show quote)
RP - no need to be embarrassed. A minor misunderstanding.
Just so you know I am not making this stuff up - here is something I just read from Sekonic's own pages:
"Advantages of Reflected Spot Measurements
Some reflected meters, known as spot meters, have the ability to take reflected readings of tiny areas of a subject from the camera position. Spot metering is an ideal solution in a lot of special situations where incident readings are impossible and normal reflected readings are unreliable. These include scenes with distant subjects, backlight, an extreme brightness range, highly reflective surfaces, or a main subject in motion.
Spot metering an 18% gray midtone area allows you to make an exposure that will record detail, tonality, and color accurately. Once you get accustomed to reading scenes, youll be able to tell which subject areas have an average reflectance, and even in the most contrasty situations, youll be able to take spot readings from critical areas. For example, by taking a spot reading of a tall, green saguaro cactus (a medium-toned subject) in the middle of a bright, sandy desert, youll get an accurate reading of the important subject area. Spot meters also allow you to average readings from several brightness areas within a scene."
http://www.sekonic.com/classroom/meteringtechniques/benefitsofincident.aspx
I rarely use the camera's matrix metering systems - they are unreliable :)
Take a look at my stuff and you'll see if what I am saying makes sense:
https://www.flickr.com/photos/gene_lugo/
Dec 16, 2015 15:57:32 #
Always a pleasure to have Gene51 and his experience and same goes for Rpavich. You guys always draw my attention and respect. Thanks a bunch!
Dec 16, 2015 16:14:04 #

Gene51 wrote:
RP - no need to be embarrassed. A minor misunderst... (show quote)
Will do. I'm sure now that I just got lucky.
Thanks again and yes, I'll take a look at your flickr. :)
Dec 16, 2015 16:35:58 #
boberic wrote:
As meters read every thing as neutral grey (18%) m... (show quote)
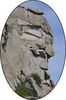
Or, with somehing like this barn you can spot meter on the wood.
Dec 16, 2015 16:35:59 #

Canonman333 wrote:
I'm visiting friends who live in a remote area whe... (show quote)
Your meter is seeing the snow as 18% grey, compensate for the exposure error by increasing the exposure by 2 1/2 to 3 1/2 stops and shoot in manual mode. Always be aware of the suns direction as it can fool the meter as well. Just hang in there and all will come to fruition.
Dec 16, 2015 16:41:40 #
Lionel1954 wrote:
Your meter is seeing the snow as 18% grey, compensate for the exposure error by increasing the exposure by 2 1/2 to 3 1/2 stops and shoot in manual mode. Always be aware of the suns direction as it can fool the meter as well. Just hang in there and all will come to fruition.
With most DSLRs it isn't necessary to use Manual Exposure. You just up the EV for what you want. No need to stick your finger in the metering electronics.
Dec 16, 2015 16:58:21 #
Morning From Australia Canonman
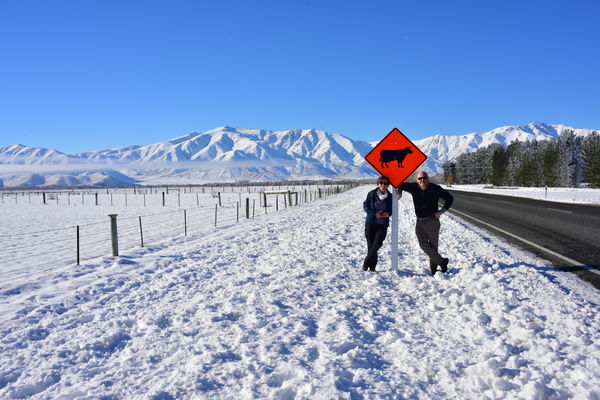
I have attached a shot (one of hundreds) taken in New Zealand in June this year - You can review the exif dat which will show my setting - think it was one stop over - but was shot with a small 28-200 Nikor lens nothing special
Steve
I have attached a shot (one of hundreds) taken in New Zealand in June this year - You can review the exif dat which will show my setting - think it was one stop over - but was shot with a small 28-200 Nikor lens nothing special
Steve
Dec 16, 2015 16:59:16 #
You're right in what your saying but advantage of using manual gives just a little more fine tuning of the image.
Dec 16, 2015 18:50:15 #

"Buy yourself and inexpensive incident meter, use it to set your camera's manual exposure, and shoot."
Pavich is spot-on!
The equivalent is using a decent reflective meter and an 18% gray card - used correctly, you get results identical to,those of the incident meter.
Dave in SD
Pavich is spot-on!
The equivalent is using a decent reflective meter and an 18% gray card - used correctly, you get results identical to,those of the incident meter.
Dave in SD
Dec 16, 2015 18:56:07 #
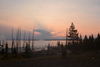
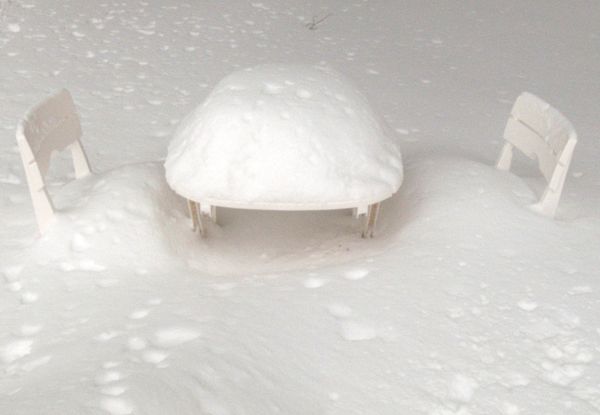
I agree with the folks who have said to compensate by increasing the exposure by two stops. You won't go far wrong. This is an example of one I shot last winter in Boston using this technique. Works for me.
Glad I shot it when I did. A few days later, it was completely covered by another 2 foot storm.
Dec 16, 2015 18:59:55 #
Not so sure about this. The incident meter only knows how much light is hitting the subject. It doesn't know what the subject is. So you end up compensating anyway, by either tweaking the meter setting or with the camera.
Dec 16, 2015 19:11:37 #
Dec 16, 2015 20:07:18 #
Canonman333 wrote:
I'm visiting friends who live in a remote area whe... (show quote)
If it is a sunny day (blue sky), turn around, away from the sun and take a metering of the blue sky. You can also take a metering of your hand, but the blue sky has advantages!
Dec 16, 2015 21:32:55 #
The great responses and examples in this thread are why I love photography - sometimes I learn something new, either directly from a respondent, or indirectly by fact checking or testing with my camera a proposed idea. Either way, it's learning and learning is always good. The other great thing is to see how others get it done. The examples are great.
RP - keep up the magnificent portraiture - you clearly have more than just a "knack" for storytelling with your images. Thanks for making that work available on Flickr for all of us to see.
RP - keep up the magnificent portraiture - you clearly have more than just a "knack" for storytelling with your images. Thanks for making that work available on Flickr for all of us to see.
Dec 17, 2015 00:33:32 #
amfoto1
Loc: San Jose, Calif. USA
The "problem" is that your camera's meter is reflective type, meaning that it reads the light being reflected off the subject(s). The camera's system interprets everything as "average gray", so in a bright white scene it's going to underexposure. How much depends upon how bright the scene is... it's a lot different on an overcast day or in shade, than it is on a cloudless, sunny day... and it's different early in the morning or late in the afternoon, than it is at midday. (Note: You'd have the opposite problem if shooting an unusually dark subject, such as a black bear in a coal mine. The camera will want to over-expose.)
As you can see from the previous responses, there are several ways to deal with this: exposure compensation, bracketing, or by using a different type of light meter.
To really "nail it" with exposure compensation, you can learn to judge the scene and set the amount of compensation by eye. Depending upon you, this can be pretty accurate... or a bit spotty in results.
Bracketing is also a bit hit and miss. For a snow scene, I migth do both some compensation and some bracketing... say three shots +1, +1.5 and +2. One of those should be pretty close.
I agree with a previous post that, used right, an incident meter is probably the most accurate way to arrive at an accurate exposure. This type meter measures the light falling onto the subject, instead of what's being reflected off it. So it's not influenced by the tonality of the subject. This type meter can't be built into a camera to provide auto exposure, unfortunately. When you use one, it's pretty obvious why (normally you point it toward the light source, instead of toward the subject).
If you only have a reflective meter (such as the camera's), you also can use an 18% gray target (some say 15% gray, if you want to split hairs). There are "gray cards" for this purpose, as well as other types of targets (I use a Lastolite EZ Balance folding target that also serves to set custom white balances). As some suggested, it's also possible to use the palm of your hand... it's probably one stop lighter than 18% gray (that's almost always true, with most people).
Be it a gray card or your palm or some other type of target, it's important it be oriented to the light source the same way as your subject when you take the meter reading.
All these can be used in Manual exposure mode. Or, if using some form of auto exposure, most cameras have AE Lock that can be used to hold an exposure setting for a short period of time (the Canon cameras I use hold it for 16 seconds... check what your cameras do).
Actually with purely manual exposure you can probably use the "Sunny 16" and "Shady 8" rules pretty accurately, too. These simply say that for any given ISO, on a sunny day you should set f16 aperture and a shutter speed that's the reciprocal of the ISO. For example, if using ISO 500, set 1/500 shutter speed. If using ISO 100, use 1/100. Etc.
Shady 8 applies to deep shade or an overcast day and f8 simply opens up the aperture to give two stop more exposure. Lighter shade might only need f11.
You can vary these as needed. For example, ISO 500, f8 and 1/1000 give the same exposure as ISO 500, f16 and 1/500, say if you wanted a faster shutter speed or a larger aperture for some reason.
No, you don't.
Well, you might tweak exposure slightly over or under if you want to render more of a high key or silhouette effect, or some variation of these. But it's usually far less tweaking and compensation than is needed with reflective metering.
But an incident meter that's properly calibrated and used correctly will give you a very accurate reading. You do have to take into account what you're photographing.... For example, if you are shooting cows standing out in a sunlit field, you don't want to be taking a meter reading while standing in the shade. Or, if you are shooting the shady side of a sunlit subject, the meter should be used so that it's reading similar shade. Basically, if possible walk up to the subject and point the incident meter back toward the camera. This also works when using manual flash or studio strobe lighting, if you have a means of tripping the lights from the meter (most flash/incident meters have a PC socket for this purpose, and some can be fitted with radio modules).
As you can see from the previous responses, there are several ways to deal with this: exposure compensation, bracketing, or by using a different type of light meter.
To really "nail it" with exposure compensation, you can learn to judge the scene and set the amount of compensation by eye. Depending upon you, this can be pretty accurate... or a bit spotty in results.
Bracketing is also a bit hit and miss. For a snow scene, I migth do both some compensation and some bracketing... say three shots +1, +1.5 and +2. One of those should be pretty close.
I agree with a previous post that, used right, an incident meter is probably the most accurate way to arrive at an accurate exposure. This type meter measures the light falling onto the subject, instead of what's being reflected off it. So it's not influenced by the tonality of the subject. This type meter can't be built into a camera to provide auto exposure, unfortunately. When you use one, it's pretty obvious why (normally you point it toward the light source, instead of toward the subject).
If you only have a reflective meter (such as the camera's), you also can use an 18% gray target (some say 15% gray, if you want to split hairs). There are "gray cards" for this purpose, as well as other types of targets (I use a Lastolite EZ Balance folding target that also serves to set custom white balances). As some suggested, it's also possible to use the palm of your hand... it's probably one stop lighter than 18% gray (that's almost always true, with most people).
Be it a gray card or your palm or some other type of target, it's important it be oriented to the light source the same way as your subject when you take the meter reading.
All these can be used in Manual exposure mode. Or, if using some form of auto exposure, most cameras have AE Lock that can be used to hold an exposure setting for a short period of time (the Canon cameras I use hold it for 16 seconds... check what your cameras do).
Actually with purely manual exposure you can probably use the "Sunny 16" and "Shady 8" rules pretty accurately, too. These simply say that for any given ISO, on a sunny day you should set f16 aperture and a shutter speed that's the reciprocal of the ISO. For example, if using ISO 500, set 1/500 shutter speed. If using ISO 100, use 1/100. Etc.
Shady 8 applies to deep shade or an overcast day and f8 simply opens up the aperture to give two stop more exposure. Lighter shade might only need f11.
You can vary these as needed. For example, ISO 500, f8 and 1/1000 give the same exposure as ISO 500, f16 and 1/500, say if you wanted a faster shutter speed or a larger aperture for some reason.
aellman wrote:
Not so sure about this. The incident meter only knows how much light is hitting the subject. It doesn't know what the subject is. So you end up compensating anyway...
No, you don't.
Well, you might tweak exposure slightly over or under if you want to render more of a high key or silhouette effect, or some variation of these. But it's usually far less tweaking and compensation than is needed with reflective metering.
But an incident meter that's properly calibrated and used correctly will give you a very accurate reading. You do have to take into account what you're photographing.... For example, if you are shooting cows standing out in a sunlit field, you don't want to be taking a meter reading while standing in the shade. Or, if you are shooting the shady side of a sunlit subject, the meter should be used so that it's reading similar shade. Basically, if possible walk up to the subject and point the incident meter back toward the camera. This also works when using manual flash or studio strobe lighting, if you have a means of tripping the lights from the meter (most flash/incident meters have a PC socket for this purpose, and some can be fitted with radio modules).
If you want to reply, then register here. Registration is free and your account is created instantly, so you can post right away.