Haze across reflection.
Oct 26, 2014 06:32:27 #
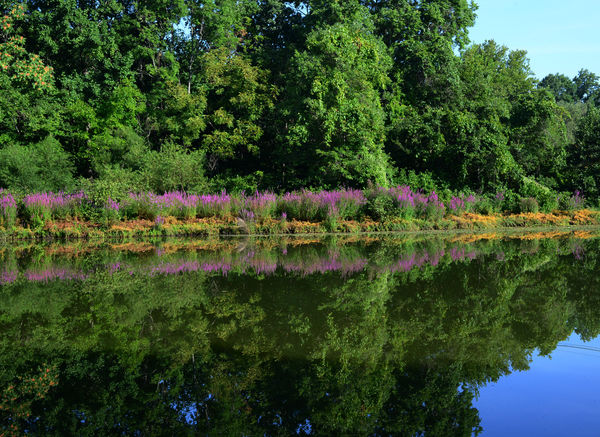
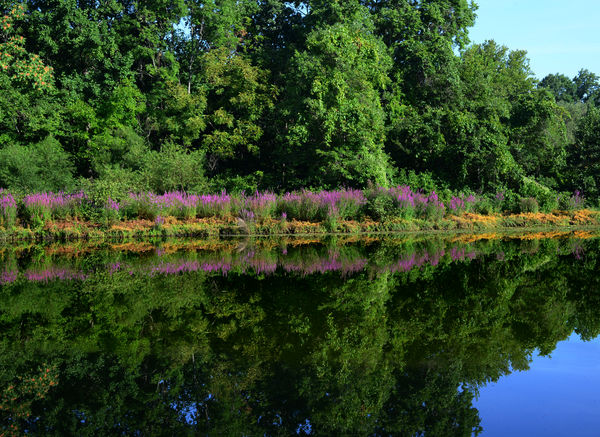
I really would like to make a large format print from this pic. After viewing it closey, there appears to be a dull area across the reflection halfway up the tree line. Can anyone help me with this? Thank you in advance for any help or suggestions. Ray
Oct 26, 2014 07:13:56 #
rrayr2002 wrote:
I really would like to make a large format print from this pic. After viewing it closey, there appears to be a dull area across the reflection halfway up the tree line. Can anyone help me with this? Thank you in advance for any help or suggestions. Ray
I am no expert in pp but if you have lightroom try the graduated filter across the bottom to lighting it up. Some one here who has a lot more talent than me may have another idea. Good luck! :-D :?
Oct 26, 2014 07:25:29 #
I do have Lightroom 5, but I am really at the very beginning of the learning curve. I do have Photoshop Elements 10 and Paintshop Pro. Also Nikon Capture NX2
Oct 26, 2014 08:48:26 #

Try selecting the darkened area with a fairly well-feathered (about 50) adjustments brush set to Auto Mask, and be sure to start off with the brush properly in the dark area so that it knows it's the dark stuff you want to select. I would include the blue water in the bottom right corner, because the brush will probably pick up the bits of blue reflections in amongst the reflection of the trees, so you'll want all of the blue reflections to come out looking similar. Once selected, use Shadows to lighten that area. You'll probably find that you don't need anything else, but if you did you could include a slight brightening using the Exposure slider.
Don't be too worried about the brush overrunning into the brighter reflections a little, because if you use just the Shadows slider, it won't have much of an effect on the brighter area. Most of the overrun would be feathered anyway, reducing the impact of the adjustments.
I see there are hazy bits amongst the reflections. Personally I wouldn't worry too much about that, but if you do decide to do something about it, limit it to very modest adjustments. A touch of Contrast, Clarity and a little extra sharpening all applied locally with the brush would probably sort it, or reduce it to a negligible level. In fact, if you're going to give the main edit (i.e. the whole picture) some contrast, clarity and sharpening, you might find that it's enough to reduce the haze to an unnoticeable level.
Oct 26, 2014 10:10:28 #

rrayr2002 wrote:
I really would like to make a large format print from this pic. After viewing it closey, there appears to be a dull area across the reflection halfway up the tree line. Can anyone help me with this? Thank you in advance for any help or suggestions. Ray
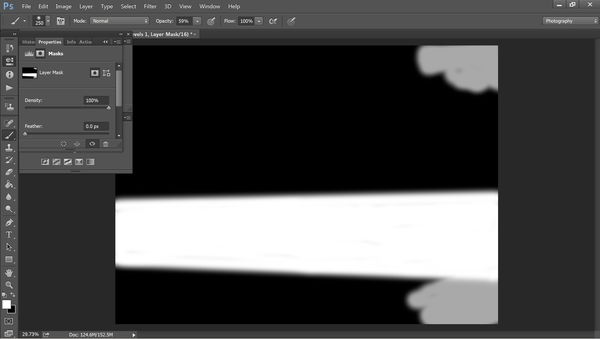
Process...
This works will all Adobe products.
Create a level layer with a white mask
On the mask paint two wide bands that go across the water reflections. One on the left to to check the green, one on the right to check the sky reflection.
Adjust the level mid tones. The two bands you created are what you use to adjust for tonality match.
Once that is to your satisfaction, erase the two bands.
Invert the mask so that is black.
Select a wide brush (450) adjust feathering to the maximal. Opacity 100%
Click on on the upper water edge so that no more then 1/4 of the brush covers the non reflection area. Position the paintbrush one the right side. Shift click when you are at the location you need (still 1/4 coverage).
Repeat the same operation on the lover darker limit. Maintain the 1/4 overlap)
Select the mask (Alt-click) paint the area between the two white lines.
Alt-Click to deselect the layer.
Change the paintbrush opacity to +-60%. Paint over the sky area in one single stroke.
Adjust level again so that the correction fully matches your changes.
You are done.
I can post the TIFF result instead of the 50% PNG.

Oct 26, 2014 10:54:23 #
Rongnongno wrote:
Process... br i color=navy This works will all A... (show quote)
Please post the TIFF result. That looks pretty good to me. Thanks
Oct 26, 2014 11:19:22 #
Oct 26, 2014 12:20:21 #

rrayr2002 wrote:
I really would like to make a large format print from this pic. After viewing it closey, there appears to be a dull area across the reflection halfway up the tree line. Can anyone help me with this? Thank you in advance for any help or suggestions. Ray
I wouldn't worry about it. Isn't it just that the lower portion of the water might have been shaded by something like a building or something and that part wasn't?
In any case; I would leave it.
Oct 26, 2014 13:13:07 #
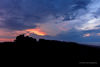
Here's another, also removed the power line reflection on the water. right side.
Oct 28, 2014 21:00:30 #
rrayr2002 wrote:
I really would like to make a large format print from this pic. After viewing it closey, there appears to be a dull area across the reflection halfway up the tree line. Can anyone help me with this? Thank you in advance for any help or suggestions. Ray
Open in camera raw and use the adjustment brush. I have had PS for years and never knew about the adjustment brush until Scott Kelby posted a thing about it. If you have LR5 you should have camera raw.
If you want to reply, then register here. Registration is free and your account is created instantly, so you can post right away.