Saved another throw-away.
Jan 10, 2014 10:27:13 #

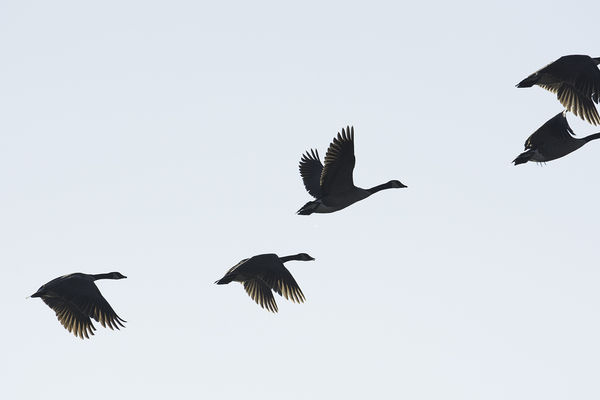
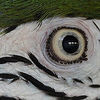
I was mucking with this image, as I have found some uses for my throw-away images. I liked the highlighted features in the wings, so I didn't toss this one. The first shot shows what I started with. Enjoy.
Jan 10, 2014 10:43:08 #

Jan 10, 2014 10:49:19 #
Jan 10, 2014 10:59:15 #

Jan 10, 2014 11:05:19 #
Jan 10, 2014 13:00:37 #
"I was mucking with this image, as I have found some uses for my throw-away images."
Bozsik just proves: When you have the 'EYE', there ain't no such thing as a throw-away
Bozsik just proves: When you have the 'EYE', there ain't no such thing as a throw-away
Jan 10, 2014 14:55:52 #
Wow, that is beautiful. Your bird shots showed beautiful wings and you made them into art. Love it.
Jan 10, 2014 14:57:09 #

Jan 10, 2014 15:46:41 #
Jan 10, 2014 20:06:17 #
daninr8 wrote:
Love it. What did you do to get it that way?
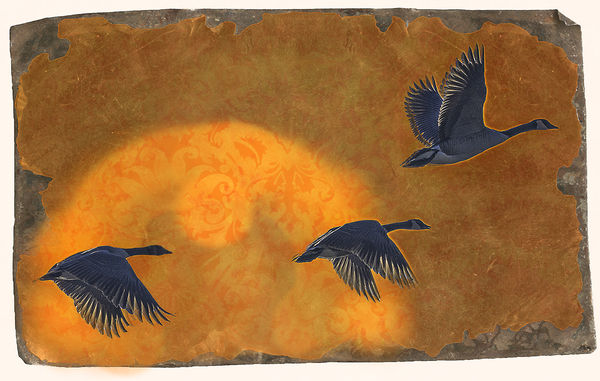
I used three programs. From LR, I opened the image in CS6.
1. Cropped the image area with cropping tool.
2. Made duplicate layer to work on.
3. I selected the sky with the magic wand tool set in contiguous mode on the new layer. I usually turn off the bottom (original layer so as not to tamper with it accidentally).
3. Using the content aware too,l I eliminated any items in the sky eg., loose feathers, wter dropplets, background objects, etc. It was already pretty clean, so it wasn't too difficult.
4. Inverted the selection for the sky to select the geese. Exported image into OnOne Effects in suite 8.
5. Pulled up HDR filter and tweeked the geese to my liking with the sliders.
6. Added a new layer in OnOne, and added the texture mask with the color and frame I wanted.
7.Painted out the filter for the mask over the geese.
8. Brought it back into CS6 to clean up any extra artifacts an/or shapes generated by the filters.
9. Used very soft brush to lighten the orange background to have the sunset effect.
10. Optimized it for the web in Tony Kuyper web sharpening actions.
11. Posted it here for you to see.
12. Hopefully answered your question adequately. :thumbup: ;-)
Jan 10, 2014 20:07:41 #
Aldebaran wrote:
I love the backgrund and the effect of the wings. Good job,
Thank you. The texture was one supplied from the OnOne suite. I am glad you think I used it wisely.
Jan 10, 2014 20:09:36 #
Linda From Maine wrote:
You are having way too much fun, Boszik :) Love it!
I am. It is a whole new venue for me. I have never been in the artistic realm before. But I am wading into it hopefully not in over my head as yet.
Jan 10, 2014 20:10:02 #
Jan 10, 2014 20:13:09 #
Jan 10, 2014 20:13:09 #
oldtigger wrote:
"I was mucking with this image, as I have found some uses for my throw-away images."
Bozsik just proves: When you have the 'EYE', there ain't no such thing as a throw-away
Bozsik just proves: When you have the 'EYE', there ain't no such thing as a throw-away
Hey oldtigger it has open my eyes for sure. I am going through older images in search of ones to play with. So far, I have found the images with the least amount of background distractions are working for me. They just seem to clean up a bit better in the end..
If you want to reply, then register here. Registration is free and your account is created instantly, so you can post right away.