I am disappointed in the digitizing; sometimes but these may be ok
Feb 5, 2024 15:02:04 #
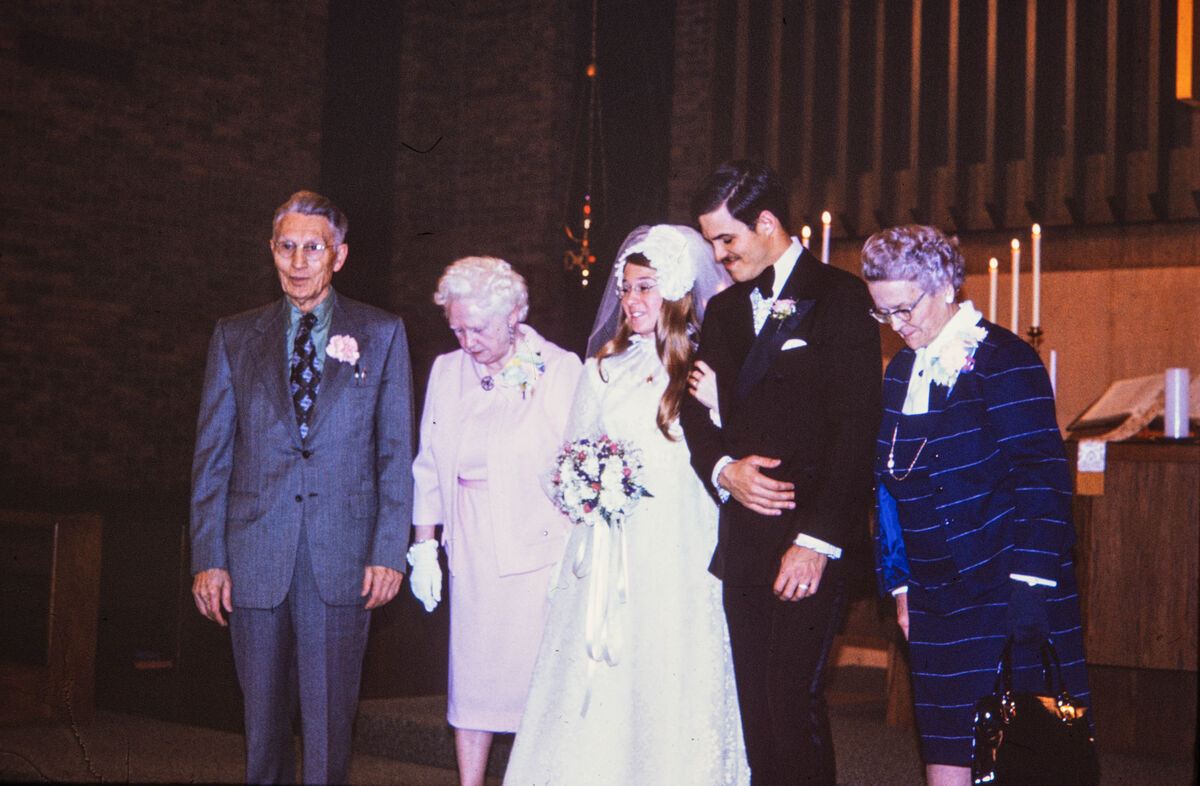
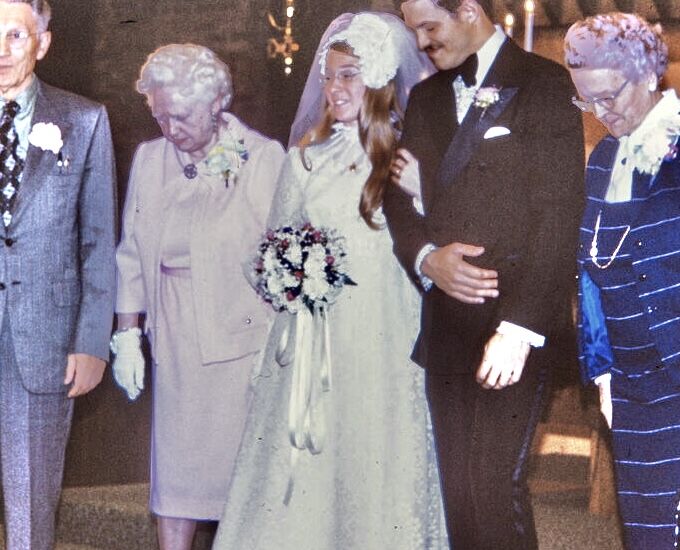
I have a thousands of ektacrome and kodachrome slides that I am copying with a Nikon D850, a ES-2 and a AF-S MicroNIKOR60 mm 1.28 G ED. The originals were spot with a Pentax spotmatic from 1973 to about 1980. Some digitised images are not as great as hoped. I postprocessed the NEF using Lrc. That said the wedding shot may print well as a 8x10. The original was taken March 3, 1973
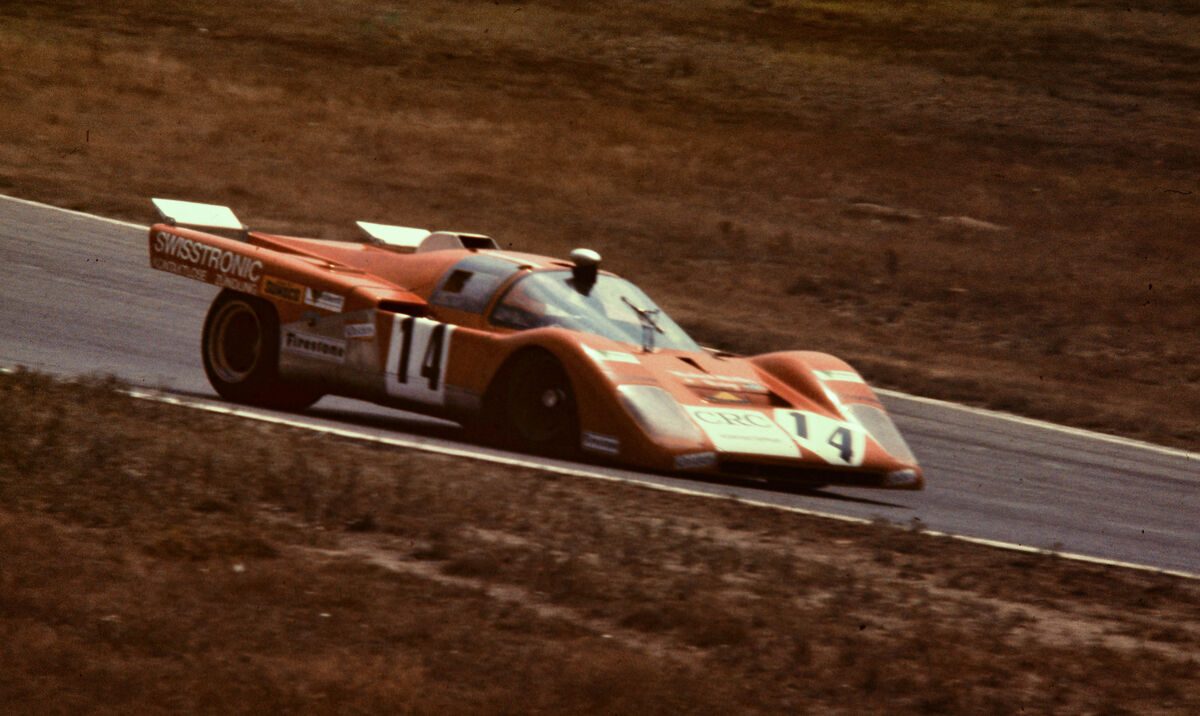
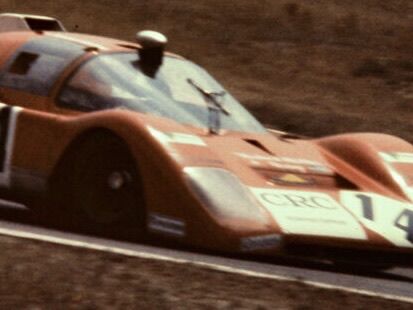
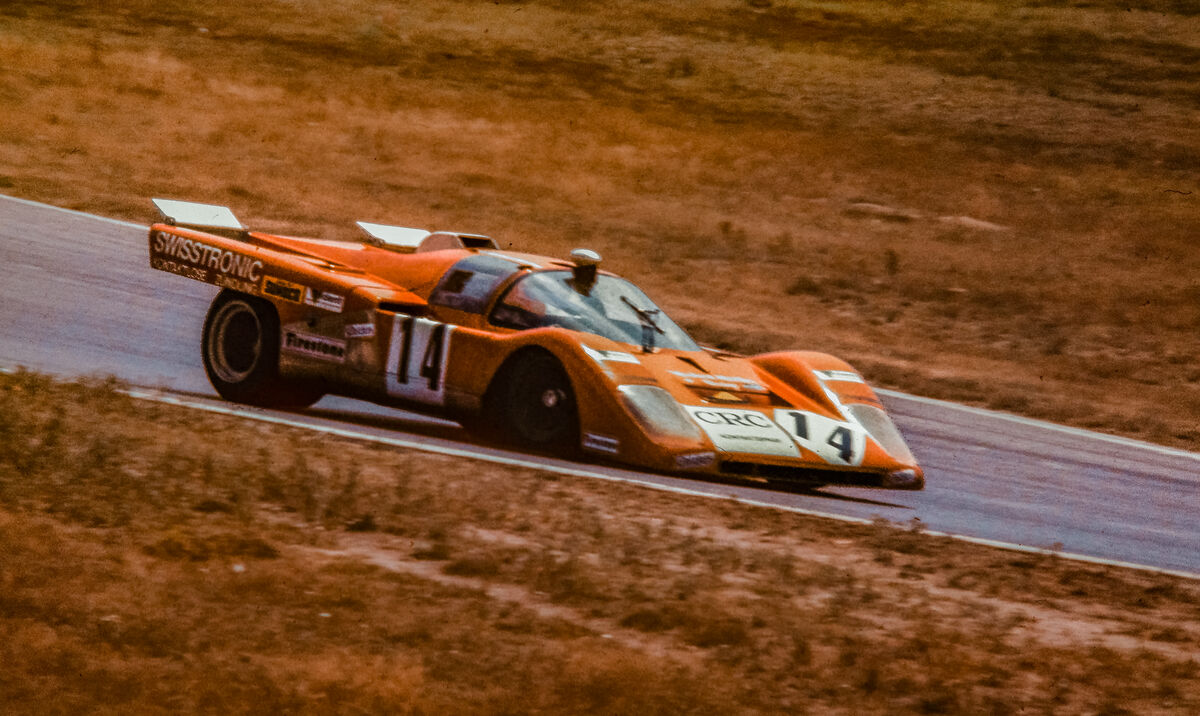
The race car was shot using ektacrome. At Hockenheim track in 1973 or 1974. This shot took a little tweaking to get the high light exposure under control
Comments please
The race car was shot using ektacrome. At Hockenheim track in 1973 or 1974. This shot took a little tweaking to get the high light exposure under control
Comments please
Feb 5, 2024 16:09:18 #

I had 1500 old slides photographed-to-digital in a similar manner by a professional slide service. What I learned is that the old slides colors faded (oxidized?). A few seemed extreme, leaving just a reddish black and white kind of look. Others came up more of a muddy green color and some were bluish. (The color digitized jpegs were right on what the slides were showing)
Except in the most extreme cases I could do a pretty good job of restoring the jpegs in Lightroom. In fact on the very first pass I believe the contrast control stretched the color graph and got most of them well done without having to struggle with the other color adjustments.
Except in the most extreme cases I could do a pretty good job of restoring the jpegs in Lightroom. In fact on the very first pass I believe the contrast control stretched the color graph and got most of them well done without having to struggle with the other color adjustments.
Feb 5, 2024 16:39:37 #
If youre not copying to raw files, please just ignore the info below.
With no useful info about the originals what can anyne advise ? The posted examples look awful but maybe they are admirable rescues of nearly hopeless originals. Main impression is of excess contrast in both.
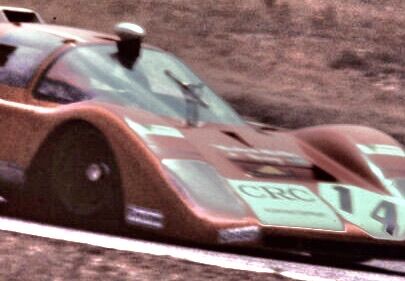
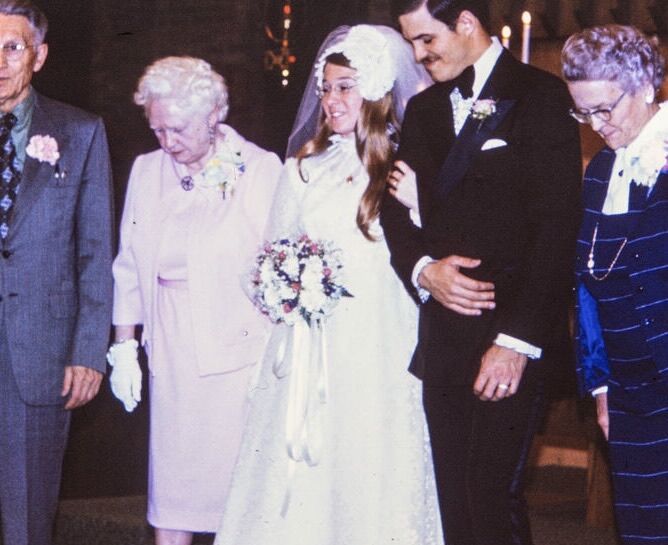
The posted jpegs can easily look somewhat better (attached) just by editing whats been posted. Therefor, a much better result would derive from editing at the source.
With no useful info about the originals what can anyne advise ? The posted examples look awful but maybe they are admirable rescues of nearly hopeless originals. Main impression is of excess contrast in both.
The posted jpegs can easily look somewhat better (attached) just by editing whats been posted. Therefor, a much better result would derive from editing at the source.
minimal color and brightness edits
(Download)
section of original
(Download)
found some tone hidden in hilitea and shadows
(Download)
section of original
(Download)
Feb 5, 2024 17:22:13 #
Copied slides frequently show problems. The most likely problem is dust on the slide. Slides are not always stored in ideal environments. The wedding shot appears to have a bit of chromatic aberration, but still it looks good for a 50 year old slide.
Don't let the quality dissuade you from copying the rest of them (at least the good ones that have some meaning to the family). Once they're digital they can be shared easily and you can also use them to learn postprocessing techniques that will improve the image. Family shots should have some sort of documentation attached to them. 50 years from now the wedding shot will probably be viewed by the descendants of the happy couple, but it is likely they will not be around to identify the others in the photo. You can write on the back of a print, but digital images need a different technique.
I am a proponent of saving family history through photos. I am fortunate enough to have family photos dating back to around 1870. I am also fortunate enough to be in a family who thought enough of family history to identify the people in the photos (for the most part) and even had an aunt who wrote up the family history back to the early 1800s. I have a box of old photos. Some of the photos have writing on the back with identification and sometimes dates. Some of the photos have nothing to tell me who they are of. Sometimes I can identify people in one photo from the identification on another photo but there still too many unidentified people in the photopile. I suspect they are ancestors, but I can't tell for sure.
With digital images there are several ways to include documentation that will carry through to digital copies. A jpg can have metadata that includes comments and keywords, but there are too many people who don't know what metadata is, let alone viewing it. You can add text to an image, but that impacts the artistic qualities of the image. I think the best way to share your family photos is through a PDF file. You can mix text and images, and a PDF file can be viewed easily with freely available software.
There are other ways, too. Adding Documentation to Family Photos
PS: Current family history is just as important as the old family history. The only problem with current family history is that there are SO many more photos to choose from.
Feb 5, 2024 20:22:10 #
User ID
thanks your comment were helpful. I did process the raw image and neither slide was very good.
Maybe the focus was off; but I was looking at the image on a large asus hi res monitor and manually adjusted the focus as sharp as I could although many times there are highlights at edges at the sharpest effort. Also the wedding shot was under exposed.
I am using live view and have the jpeg setting to vivid. I will change that to neutral. I may need to turn "show highlights" off.
I have noticed that the digital copy sometimes does not look as good as the original. I need to figure things out; as it appears you got better results from a poor copy than I did the original.
As to the car is was quite away off and I did crop. Even my efforts were better than the orginal.
Feb 6, 2024 05:20:13 #

home brewer wrote:
... Some digitised images are not as great as hoped....
Very often one of the problems with slides and colour negatives is that age can skew the colours, but it's often in a simple way that's not too hard to fix. For example your #1 has an excess of magenta/purple which can be reined in, and it looks like #2 might be lacking green or blue. Sometimes the WB correction tool in Lr can point you in the right direction. The HSL tool will allow you to add saturation/brightness to some colours and to desaturate or darken others, as required. Tint-shifting individual colours is another possibility.
I can understand your desire to use a lot of contrast but it can result in darks that are too dark. The usual answer is to lift the Blacks slider. Don't worry about holding on to a black point. Just do it by eye (because the eye is the ultimate determinant). If the Whites and Highlights sliders aren't enough to subdue the highlights to your liking, apply a further reduction in Highlights via the Adjustments brush, applied globally if necessary. (To get quick global coverage use a large brush with no feathering and with Auto Masking switched off). If one application isn't enough, right-click on the button for that selection and select "Duplicate". Do that more than once if necessary. Remember that all of the adjustments applied via the brush up to that point will be duplicated, so use the Duplicate command when you have only Highlights adjustments applied.
I would recommend avoiding the Clarity slider, or possibly using it at the very end of the edit to add minor tweaks (very minor).
If you didn't make good use of the Masking slider in the Details section, you should have. You want to keep the sharpening away from the noise. Hold down the Alt button (Option in a Mac) as you apply the masking so that you can see what's being excluded and included. You want the sharpening limited to the main edges and excluded from the smooth areas, which will allow you to use generous amounts of sharpening. Applying basic global sharpening or sharpening without masking will aggravate the noise.
Because the focus isn't too sharp you'll want to use a high Radius value, and keep the Details slider well to the left, again to avoid sharpening the noise.
Feb 6, 2024 07:12:11 #
billnikon
Loc: Pennsylvania/Ohio/Florida/Maui/Oregon/Vermont
home brewer wrote:
I have a thousands of ektacrome and kodachrome sli... (show quote)
A scanner will do a much better job. And they are not that expensive. You should try one.
Feb 6, 2024 09:00:56 #
billnikon wrote:
A scanner will do a much better job. And they are not that expensive. You should try one.
I tried my scanner on slides but got less than desirable results. I found a slide copier that screwed onto a 50mm lens that worked well so that's what I used.
But the scanner IS useful to have for prints. And with a flatbed scanner you can remove the cover and lay an album on the scanner and scan several prints at once. And a scanner is useful for copying documents for digital storage. I recommend having a scanner in your repertoire.
I bought the scanner for a particular job. When the job was done I figured I'd just put it into storage. After I did that, I had to take it out of storage about a month later. It has been in use sporadically for about 3 decades now.
Feb 6, 2024 10:57:58 #
R.G. wrote:
Very often one of the problems with slides and col... (show quote)
Long post and I can agree with maybe half of it. Dont know if you ever made your living at copying, but I have. Yet I would *never* post that much detailed instruction cuz its just not realistic to micro manage someone remotely via text. Thaz why theres video.
Anywho I have only two major disagreements:
1• Clarity is a very useful and effective broad adjuster. No reason to advise avoiding it.
2• No real reason for such concern with noise. Copy work is done at low ISO. If you actually meant the film grain, that grain *makes* the image. Attempting to "heal" it is destructive. Just embrace it. Its no flaw in a copy image.
Feb 6, 2024 12:23:23 #
therwol
Loc: USA
billnikon wrote:
A scanner will do a much better job. And they are not that expensive. You should try one.
I've done it both ways. If you have a good setup, decent camera with a macro lens and a good light source, it's a wash. The Nikon ES-2 adaptor takes care of alignment issues.
Feb 6, 2024 12:51:01 #

home brewer wrote:
I have thousands of Ektachrome and Kodachrome slid... (show quote)
home brewer!
With your setup, a little bracketing of the exposures might help with blown-out highlight detail! From experience, it's easier to bring up detail in shadows than blown highlights. As you probably noticed, with old Ektachromes, the first color layer to fade and affect the color balance is magenta. This is caused primarily by poor processing and storage conditions. I know because I owned and ran a custom color lab for 40 years, from 1968 to 2008 when I retired.
Recently, from my portrait and model shooting days, my Ektachrome slides of that time still retain the freshness of the times I shot them. I also found images of my 1964 World's Fair Exhibition in Flushing, NY shot on Kodachrome, again, as fresh as the day they were photographed.
My story! Back in the early days of Photoshop (90s), my lab was an early adopter and we offered photo retouching and restoration among our many services. We were doing airbrushing and other retouching on prints anyway for models, actors and product photography. I and my staff restored tens of thousands of images for my customers and larger companies such as the NY Opera Company where I restored and inkjet printed old images from their archives.
Your main issues will definitely require the use of software, many of which now offer simplified ways of improving and restoring old images. This is in contrast to using high-ended Photoshop and masking and selecting areas to improve as we did back in the day. An alternate might be Photoshop Elements, a simplified and less expensive alternative to regular Photoshop. Nowadays, most of the newer software offers AI as a feature to improve your images but it wouldn't hurt to learn basic editing techniques such as density, contrast, gamma, color balance and cropping.
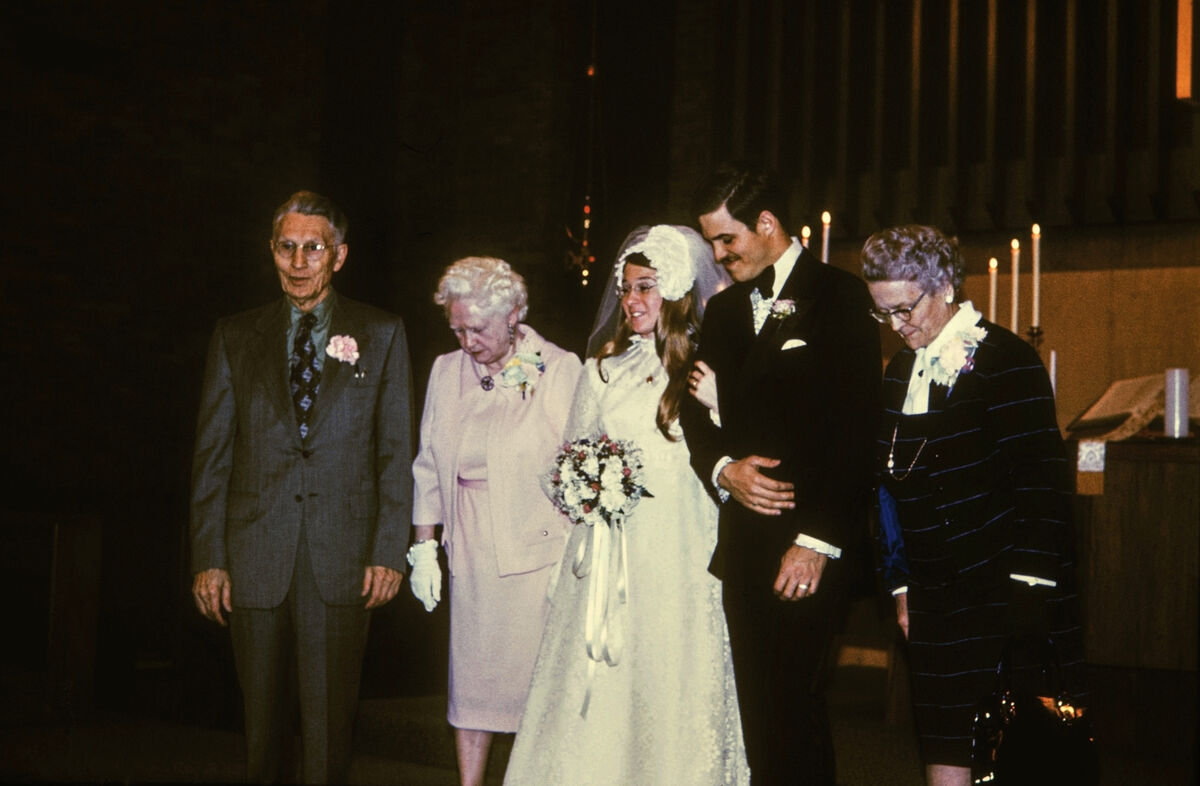
To improve your wedding photo, I used a free basic raw image viewer called FastStone It allows many of the basic techniques I spoke about but only does so, globally. It doesn't allow doing things to smaller areas via selecting and masking, in which case you can use an external program such as PS, Elements or any other program.
With your image, I played with "Adjust Lighting," which allows you to pick up detail in the highlights, then "Adjust Color," to improve the skin tones and eliminate the overall magenta color cast. I then used "Reduce Noise" and "Sharpen." I also used the "Clone and Heal" tool to remove the artifacts and black spots. Finally, I tickled the image with "Adjust Levels." I did a "Quick and Dirty" restore of your image in about 12 minutes. A better piece of software (more expensive) would show faster and better results (!?). Each of your original image scans will require different steps and time.
An alternative is to use an image restoration website. I notice that they are reasonable (generally) in cost but I am not familiar with the quality of their work. A test or two would allow you to see the results.
For Free services: https://listoffreeware.com/best-free-websites-to-restore-old-photos-online/
You can Google "Paid" services (this post was originally rejected for posting a link as SPAM)!
I have no affiliation with any service or company mentioned!
Be well! Happy New Year (Chinese)!
Ed
Feb 6, 2024 12:55:43 #
User ID wrote:
.... Clarity is a very useful and effective broad adjuster. No reason to advise avoiding it.
Small amounts can be useful but overdoing it is one of the quickest ways to harshness. And if you add Clarity then add contrast on top of that, the combination can produce diffuse haloing (which is unwanted and also looks unnatural). Most of the boosting (vividness) should be done by other means (and done first). That way the Clarity won't be overdone or cause diffuse haloing. Maybe you have a high tolerance of harshness. I wouldn't assume that the OP shares that preference, especially considering that these are family photos.
User ID also wrote:
.... that grain *makes* the image. Attempting to "heal" it is destructive. Just embrace it....
The grain makes the image? That's a very subjective opinion. Not everybody wants grain or finds it nostalgic. In any case, adding sharpness to grain (or noise) aggravates it. It wouldn't take much sharpness to produce an unpleasant gritty, oversharpened look. I doubt if that's what the OP is looking for.
Feb 6, 2024 14:01:32 #
Maybe not a perfect colour correction but brighter than the original. Lr's WB correction tool seemed to think that huge amounts of magenta were needed, probably because the white areas all had a slight green tint. I decided to go with my own interpretation of what's needed.
.
.
Feb 6, 2024 16:49:17 #
JeffL
Loc: New Jersey
I have been using an Epson Perfection V600 Photo Scanner, which can digitize photos, slides and negatives. Combined with the Silverfast software, it does remarkable work. The software helps correct the color cast from old slides and negatives. I've done about 1,000 slides and at least 2,000 negatives, and an equal number of photos. Time consuming, but the scanner and software make it relatively easy.
Feb 6, 2024 16:49:22 #

R.G. wrote:
Maybe not a perfect colour correction but brighter than the original. Lr's WB correction tool seemed to think that huge amounts of magenta were needed, probably because the white areas all had a slight green tint. I decided to go with my own interpretation of what's needed.
.
.
Looks blazingly fast even in a stills shot

If you want to reply, then register here. Registration is free and your account is created instantly, so you can post right away.