Digitizing hard copy photos for photo show
Nov 3, 2022 09:40:48 #
petego4it
Loc: NY
I need to digitize hard copies of 7 decades+ of photos for a life retro slide show backed by appropriate music probably with Photopia. Have D850 camera, tripod, lenses (Nikkor macro or Zeiss--tips? assume F8?). But not: good set up to flatten (use glass plate?) and assembly line like take. Considerations to discard otherwise good shots? Many will be from our old photo books, don't want to destroy; best repro lighting? then best ways, if need be, to tweak, smooth shots and SS impact helps; plan to use Adobe LRC edits or possibly PS? How long max? Many thanks!
Nov 3, 2022 09:52:00 #
petego4it wrote:
I need to digitize hard copies of 7 decades+ of ph... (show quote)
There are companies which will do that for you. I used one with excellent results, but it's been 10 years ago, so I don't remember them to recommend. I only had maybe 150 photos of all sizes, but that was more than I wanted to tackle. They put the files on a CD, but I didn't ask for a slide show - that you could yourself.
Loren - in Beautiful Baguio City
Nov 3, 2022 10:17:29 #
petego4it wrote:
I need to digitize hard copies of 7 decades+ of ph... (show quote)
Use a scanner. Much less hassle than using a camera.
Nov 3, 2022 10:37:50 #
I have an Epson scanner that is fantastic for unmounted photos. The challenge comes from book mounted or framed photos. Unless you want to do a lot of potentially damaging work, it is easier to take a snapshot with either a camera with a macro lens or a smartphone. There are "scanner" apps for phones to try, but I've done OK with just the camera app.
The biggest challenge for the snapshots is to minimize reflections. One solution is to get a pair of LED floodlights and figure out a light stand so that the lights point to the subject picture at opposing 45 degree angles.
The biggest challenge for the snapshots is to minimize reflections. One solution is to get a pair of LED floodlights and figure out a light stand so that the lights point to the subject picture at opposing 45 degree angles.
Nov 3, 2022 10:50:16 #

jcboy3 wrote:
Use a scanner. Much less hassle than using a camera.
THIS ^^^^^ THIS ^^^^^ THIS ^^^^
Nov 3, 2022 11:19:32 #
CHG_CANON wrote:
THIS ^^^^^ THIS ^^^^^ THIS ^^^^
Not if is framed, mounted, in an album or part of a photo book!
Nov 3, 2022 11:37:23 #

Using a scanner is your best bet for a "production line" setup. This will keep prints flat, there will be no issues with glossy prints and you can make any correction in density, contrast, and saturation in post-processing.
If you prefer to use your camera, especially with prints that won't find in the scanner, my preferred setup is using cross-polarization, that is polarization filters on your ligh and a CPL filter on the lens.
The polarization filters for the ligh are made of acetate and are available for various sources including Rosco. The ones I use are mounted on cardboard with index marks to insure that are placed in the correct direction over the lights. You can use electronic flash, incandescent, or LED light sources in standard reflectors.
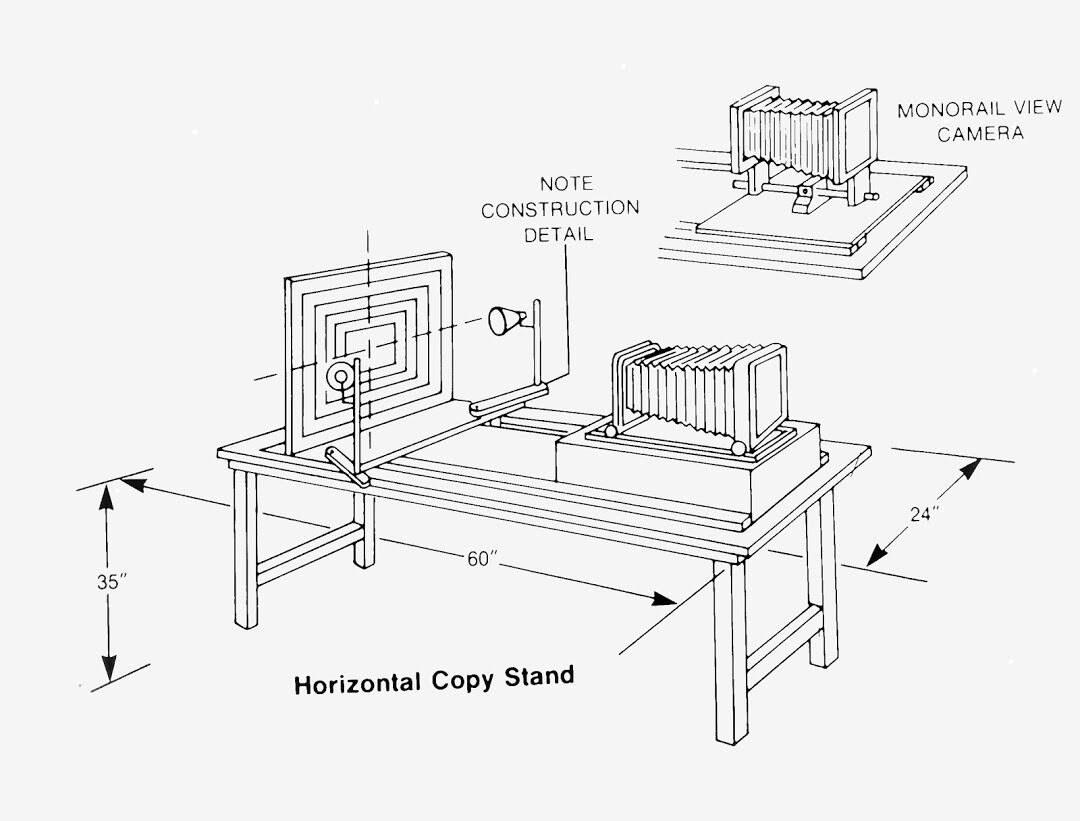
I set up a horizontal "copy stand" or easel and place each ligh at 45 degrees. The camera is kept parallel to the prints. Whe the CPL filter is rotated, at one point, all unwanted reflections will be eliminated and contrast and color saturation will be maximized.
You can set up the light to cover the largest prints and leave them at that distance for all the other prints. Once you even out the lighting and establish exposure, you can shoot all of the prints in athe same settings. To insure even lighting, take a meter reading at each corner of the copy surface and move the lights incrementally until all the readigs match. It tasks a bit of setup time but once you establish things the restof the job can move rapidly.
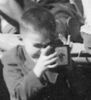
See attached diagrams for the lighting setup. The diagram shows my old setup with a large format camera. Nowadas I use a digital camera fitted with a macro lens. There is a shot of the acetate polarizing filter. The copy stand is not necessary, an easel ledge on the wall or magnetic copy board will do the job.
There is much software available for slide show production that will enable fades, lap dissolves, wipes, etc. as well as the inclusion of a music track.
If you prefer to use your camera, especially with prints that won't find in the scanner, my preferred setup is using cross-polarization, that is polarization filters on your ligh and a CPL filter on the lens.
The polarization filters for the ligh are made of acetate and are available for various sources including Rosco. The ones I use are mounted on cardboard with index marks to insure that are placed in the correct direction over the lights. You can use electronic flash, incandescent, or LED light sources in standard reflectors.
I set up a horizontal "copy stand" or easel and place each ligh at 45 degrees. The camera is kept parallel to the prints. Whe the CPL filter is rotated, at one point, all unwanted reflections will be eliminated and contrast and color saturation will be maximized.
You can set up the light to cover the largest prints and leave them at that distance for all the other prints. Once you even out the lighting and establish exposure, you can shoot all of the prints in athe same settings. To insure even lighting, take a meter reading at each corner of the copy surface and move the lights incrementally until all the readigs match. It tasks a bit of setup time but once you establish things the restof the job can move rapidly.
See attached diagrams for the lighting setup. The diagram shows my old setup with a large format camera. Nowadas I use a digital camera fitted with a macro lens. There is a shot of the acetate polarizing filter. The copy stand is not necessary, an easel ledge on the wall or magnetic copy board will do the job.
There is much software available for slide show production that will enable fades, lap dissolves, wipes, etc. as well as the inclusion of a music track.


Nov 3, 2022 11:47:30 #

petego4it wrote:
I need to digitize hard copies of 7 decades+ of ph... (show quote)
Having done a number of these shows, I know what a chore it is! Here are some pointers:
> Pre-edit. Before any reproduction of hard copies, separate the ones that work from the ones that don't. It takes a lot of time to copy or scan photos and post-process them for use in a show of some sort.
> Decide what level of quality you are going for. It takes a LOT of work to make things look pristine clean and "like you were just there." For some shows, that's worth it. But for others, simple copies with no editing may work.
> The best reproductions of original prints and printed materials such as books are made with a macro lens and a digital camera. If you have, or create, a "copy stand" setup, you can rapidly record raw files and adjust them in post to crop, straighten, spot, lighten, darken, adjust color, tweak sharpness, etc. In this instance, post-processing will take the longest.
> If you have a PHOTO grade flatbed scanner, capable of generating 16-bit TIFF files, you may also get great results. Your scanner driver software may make use of scanner technology that hides dust and scratches, and may also attempt to "restore" color and tone. However, scan times can be quite long when using those features.
> If you want to copy actual slides or original, black-and-white or color film negatives, read my white paper on how I do it. It's attached as a PDF file download, below.
> The vital principles of copy stand photography:
— Keep the sensor of the camera parallel to the copy stand base.
— Use relatively large light sources centered at 37.5° to 45° above the copy surface, spaced far enough away, EQUALLY, on the left and right sides of the copy board, to provide even illumination. Feather the light to keep exposure within 1/6 of one f/stop across the copy board.
I use a pair of NEEWER 17"x12" LED panels I bought for video production, because they are quite close to daylight color quality and generate almost no heat. But you can use 3200K quartz-halogen incandescents (they're hot and waste energy!), or Type ECA 250-Watt Photoflood bulbs, or PHOTO GRADE, FLICKER FREE CFL or LED bulbs. Just be sure the sources are identical on both sides of the copy stand and that they are reasonably large. You want any specular reflections from embossed or stippled papers to be at the same brightness as the rest of the image. The way you do that is to use light sources that are large, so they "wrap the light" around all the surface irregularities.
— Batch copy by sizes to minimize changes in camera position or magnification. I do all 4x5 and 4x6 inch prints at the same magnification, all 3x3 and 3x5 prints at the same magnification, all 5x5 and 5x7 prints at the same magnification... I set the camera height to get the entire image in the frame, but any wasted space is on the sides, not top and bottom. I rotate in post, when necessary.
— Avoid using glass. I use a couple of 2" strips cut from 8.5x11 inch magnetic sheet material used to make refrigerator magnets. These are heavy enough to hold most prints flat. I place them over the top and bottom edges of prints that curl.
— Remove prints from album pages when possible. If glued, DON'T remove them, but remove the entire page if the album can be disassembled and reassembled somehow. If the album uses sticky wax beads under a sheet of plastic to hold the prints, expect the prints to be deteriorated. You might have to photograph them "as is." This was the worst-conceived album ever manufactured. The best albums — and easiest to work with when doing projects like this — use slip-in, pocketed polypropylene (inert plastic) pages. They're not the prettiest, but they are reasonably priced and archival-safe.
— If you must photograph items in books or albums, do what you can to keep the images parallel to the camera sensor! That usually involves propping up part of the book. It may involve rotating the image 90° so the whole thing is lit properly.
— If you must photograph through glass, try to use polarizing filters on the light sources and the camera lens. Also work in a BLACK room, with a BLACK ceiling, and a BLACK baffle that hides the camera and copy stand components. All of this is to avoid reflections off the glass! Black plastic landscape plastic is your friend... Rub it with a wool sweater to give it a static charge and it acts like a dust magnet to clean the air around your work surfaces. Black Velcro® sheeting is useful to absorb light, too.
— Each time you move the camera, meter a Delta-1 18% Gray Card or a similar gray balance exposure reference tool. Typically, keep your aperture about two or three stops down from wide open (f/6.3 on a 55mm or 60mm Micro Nikkor has always worked for me). Set MANUAL ISO, MANUAL Shutter Speed, MANUAL Aperture, and CUSTOM/MANUAL/PRESET white balance in reference to the gray card.
— I use multi-point AF with great success. It's more accurate than my old, tired eyes and manual focus.
— Record and process raw files. The white balance you took at the camera is stored in the EXIF data of the JPEG preview image stuffed into the raw file, and will prime your post-production software, so you'll get close to perfect reproduction right out of the gate.
I work in Lightroom Classic, which does well over 90% of what I need to make images ready for use. I use all of its tools at one time or another, so I won't do a tutorial on that here. When needed, I send files to Photoshop and back for additional work.
— I produce my actual slide shows as 4K videos, using Final Cut Pro, a Mac-only video editor. FCP allows me to import stills, convert them to video, time them, crop them, pan and zoom them, title them, add special effects, add music, add narration... In short, practically any production tool Ken Burns has used in his shows on PBS is available in Final Cut.
WARNING: 4K video generates HUGE files. Last Spring, I did a 44 minute, 850+ slide show to run in the background of a class reunion dinner. The original edit file in Apple ProRes format was 867 GIGABYTES without sound! I presented a 44 GB export, and posted an 11.5 GB 1080P (2K) version to my private YouTube channel accessible by classmates.
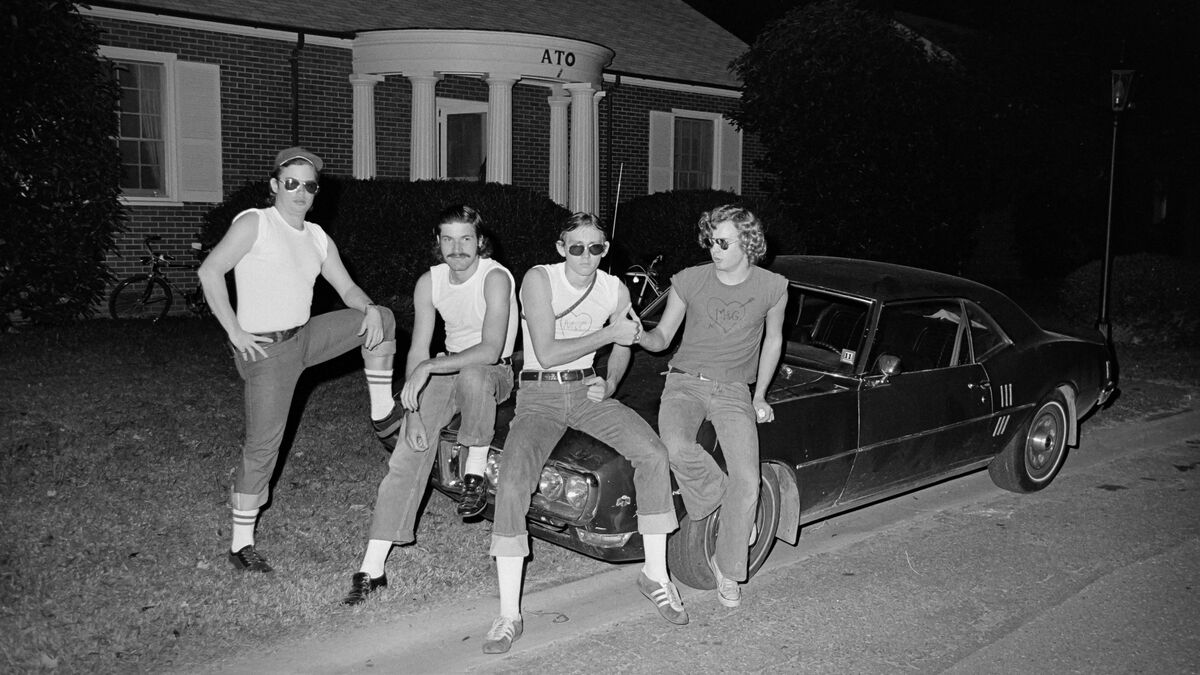
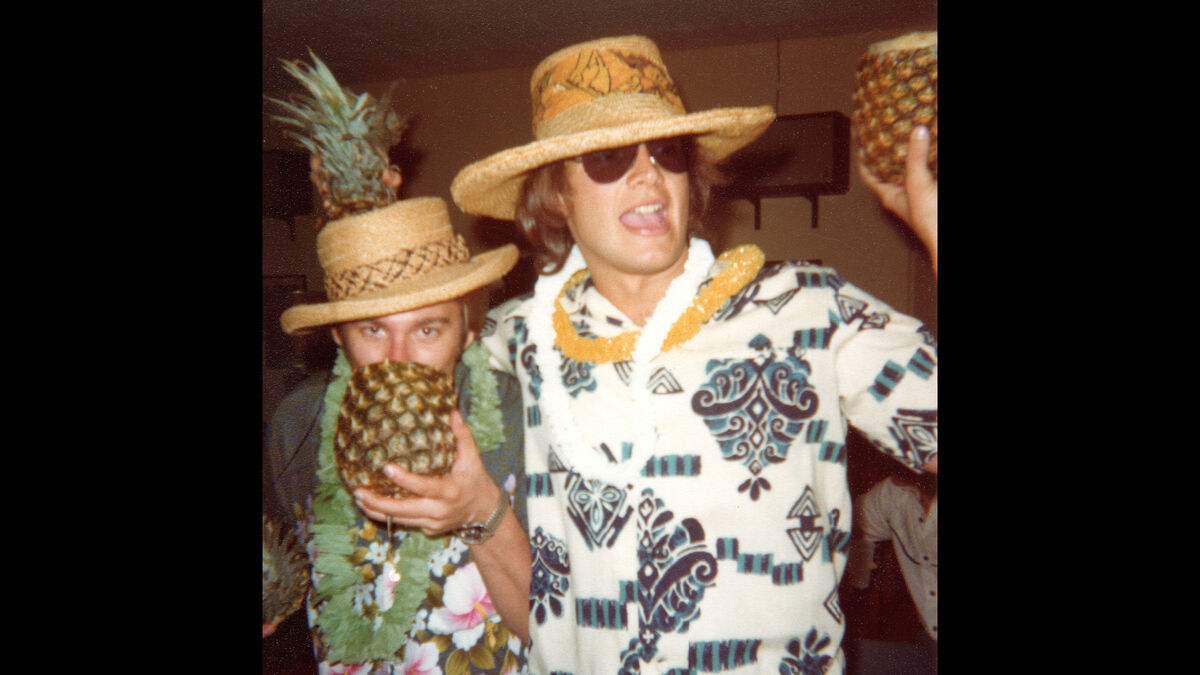
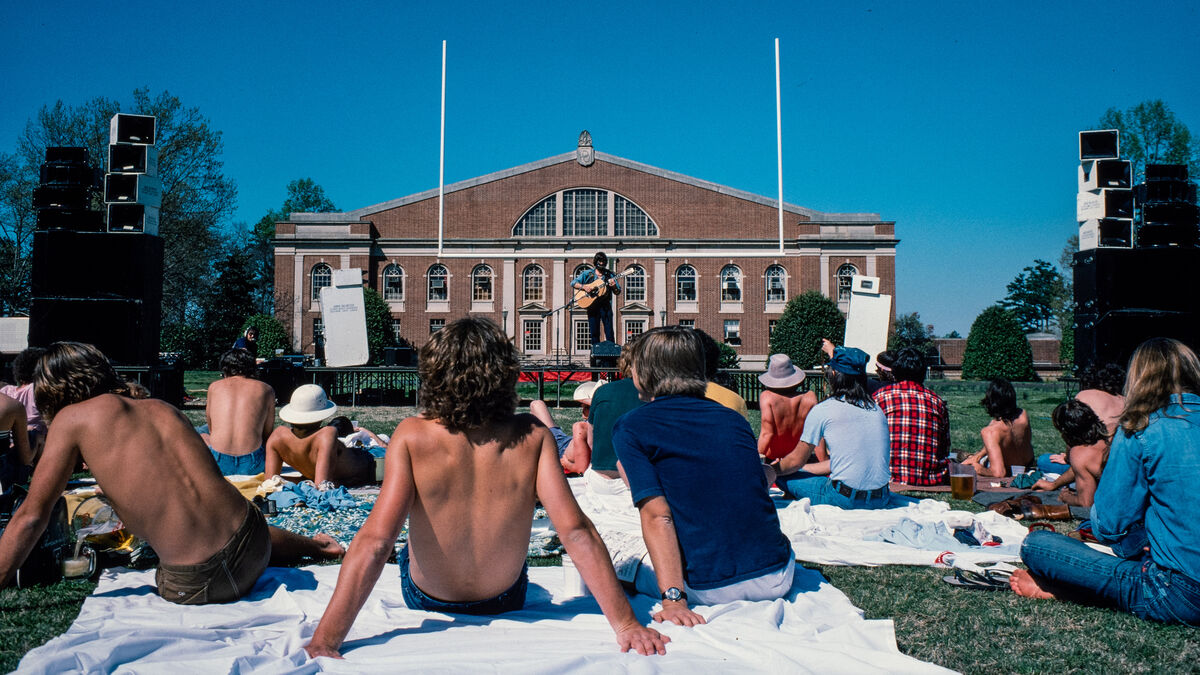
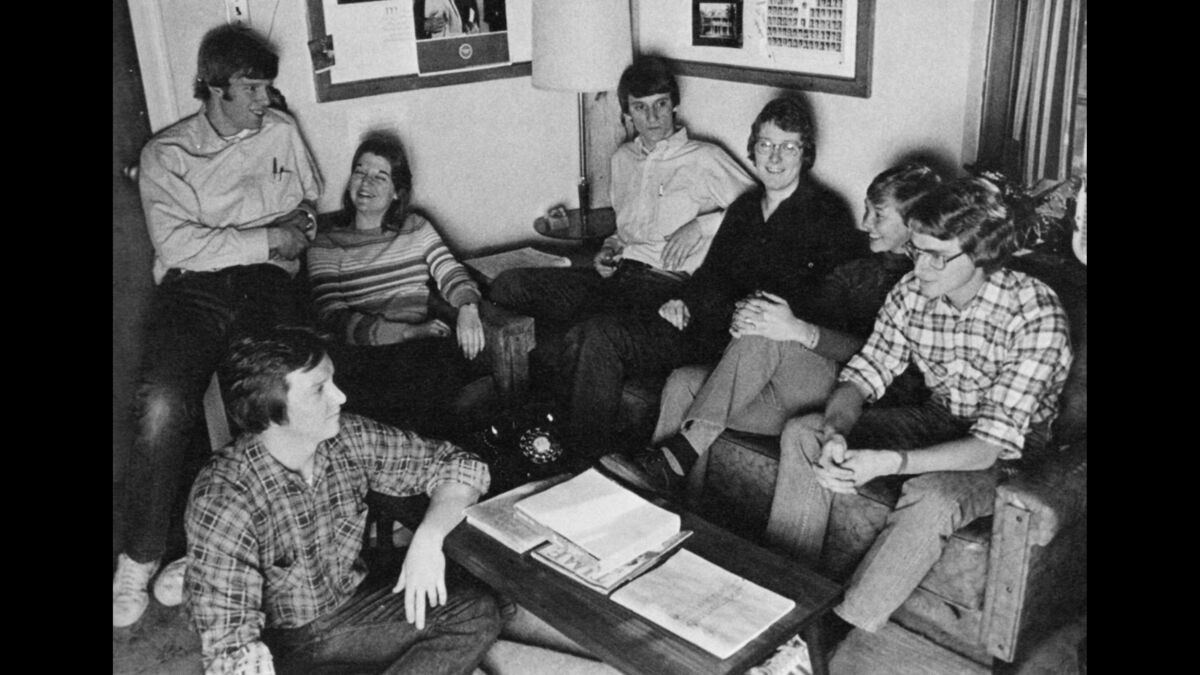
In preparation for video, I size all my images to 3840x2160 pixels (4K standard video resolution). To do that, I use Photoshop to resize and pad canvas. Few, if any, images start as 16:9 aspect ratio, although I do crop many to that aspect ratio in Lightroom Classic. I use Photoshop to create 3840x2160 pixel JPEGs imported into Final Cut Pro for the show. I've attached a few sample images below, after the white paper on camera scanning slides and negatives. These are all from that same 45th year class reunion show mentioned above.
Camera Scanning.pdf opens in your favorite PDF reader.
Attached file:
(Download)
16:9 crop from 35mm negative
(Download)
16:9 padded canvas of a 4:5 aspect ratio crop from a 35mm negative

(Download)
16:9 padded canvas of a scanned 1:1 aspect ratio original (3x3 inch snapshot)
(Download)
16:9 crop from 35mm slide
(Download)
16:9 padded canvas of a photo scanned from yearbook page with de-screening applied in the scanner driver
(Download)
Nov 3, 2022 14:22:39 #

burkphoto wrote:
Having done a number of these shows, I know what a... (show quote)
That second shot has to be the hidden place where scrap paper goes to die 💀💀💀💀💀 And the others are nice shots from years back

Nov 3, 2022 15:25:14 #
joecichjr wrote:
That second shot has to be the hidden place where scrap paper goes to die 💀💀💀💀💀 And the others are nice shots from years back
The guy across the hall from me was studying for a chemistry mid-term exam. His “friends” stuffed the entire room from windows to door, ceiling to floor. He came back at 1:00 AM to find it, and all hell broke loose! By morning, the fire hazard was cleared… but feelings were still hurt. There’s a whole sequence, including color slides of the stuffing. I have lots of bizarre images from my years there. I collected photos from over two dozen classmates.
Nov 4, 2022 07:09:57 #

Nov 4, 2022 09:13:28 #
petego4it
Loc: NY
bsprague wrote:
Not if is framed, mounted, in an album or part of a photo book!
most shots I'll take at this point are in photo books. Have a large-ish Epson 4990 Perfection 9x12 flatbed I haven't used in quite a while which could be good for this, appreciate the prods above, but of course the driver I have doesn't work with iMac 12.6 and its seems no update... I did keep a five year old iMac for such purpose but at the moment can't get it to fire; if could get it going wonder if that could serve decently via shot uploads and then tweak on the new iMac or if I need a new Epson? Or?
Nov 4, 2022 09:25:55 #
petego4it
Loc: NY
burkphoto wrote:
Having done a number of these shows, I know what a... (show quote)
wowowow! how and where can I hire you?? It's for my wife's 80th birthday celebration!!
Nov 4, 2022 09:29:38 #
petego4it
Loc: NY
mvetrano2 wrote:
There is a company called Legacy Box that will do that for you.
I've done Legacy Box and it's a decent idea but don't see how to do in this case without shipping the books and/or somebody, me probably, needing to destroy them...
Nov 4, 2022 09:39:11 #
petego4it
Loc: NY
E.L.. Shapiro wrote:
Using a scanner is your best bet for a "produ... (show quote)
thx. It seems the lighting angle is critical and even polarizing needed? cumbersome and large to set up...
If you want to reply, then register here. Registration is free and your account is created instantly, so you can post right away.