budrakey wrote:
Why not just use a piece of black velvet and simplify things? I have done this for years with much success.
do you take a stand out to hang it on when you do outdoor shots??
and what do the passers by say when you drape it over a wall to take a flower shot :lol: (only kidding there)
This technique can be used in daylight or indoors without the need for any backdrop. I bought backdrops then learnt this technique (doh)... Should have bought another speedlight instead.
http://www.youtube.com/watch?v=pnOofosv0W0young kid demonstrates and explains very well but still looking for Doms video
JoboX wrote:
silver wrote:
Lens Cap wrote:
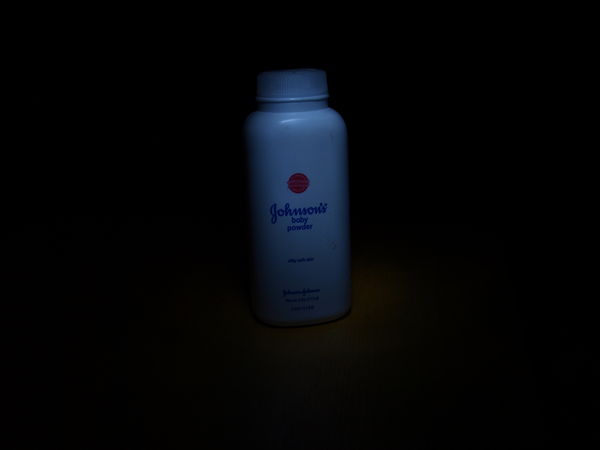
Hey All,...been trying to get the black background without a backdrop. I got a new flash unit for christmas and desided to try again. This time I think I'm close. Any suggestions on the darker shadows? or is that an accepted bi-product?
A shot like this can easily be done using one flash. You just have to correct your exposure. As far as the shadows go using a reflector can bounce light into the shadow areas. Any white material will do. You can easily make a reflector by covering a piece of cardboard with a piece of white paper or aluminum foil if you want a stronger amount of light and you have a reflector. Learning how to use simple tools will make you a much better image maker. Learning how to control light will make you an expert image maker. Another thing you can do is diffuse your light source. You can make a cheap diffuser using wax paper. Get an old cheap picture frame and cover it with wax paper and hold it in front of your flash. This will diffuse your flash and give you a softer quality light. You can also use tissue paper or any thin white fabric. Remember, the material you use to diffuse should be a white white. Any colored material will give you a color cast. Have fun experimenting.
quote=Lens Cap Hey All,...been trying to get the ... (
show quote)
Hi Silver.... what angle would you have the single flash and deflectors set at to get all round light??
I notice the original shot is at about 45 degrees on 2 planes. could you supply an example and setup for 1 light set up with reflectors (nothing major just a quick 5 min setup) as I have struggled with this in the past that is why I have ended up using 3 to get all around light so this would be invaluable to all hedgehoggers.
Do you deflect the light and bounce back to avoid overspill at the varying angles??
Still looking for the Dom video I didn't realise he had done so many... then again it is good to revisit the old videos
quote=silver quote=Lens Cap Hey All,...been tryi... (
show quote)
Set one flash behind and above the subject pointing down onto the subject. Make sure that the flash is above the frame the camera sees through the viewfinder. Place a reflector in front and lower then the subject and point the reflector into the front of the subject. You should only have to use one flash for this. Make sure that there are no items that have color near the subject because the color will be included in the image. I will try to find some examples but I have to look in old files. I do all of my product photography this way, jewelry and products included. My flash is in a soft box but you can use a raw flash also but the light will be a bit harsh. Just practice this and you will have fun and great success.
silver wrote:
JoboX wrote:
silver wrote:
Lens Cap wrote:
Hey All,...been trying to get the black background without a backdrop. I got a new flash unit for christmas and desided to try again. This time I think I'm close. Any suggestions on the darker shadows? or is that an accepted bi-product?
A shot like this can easily be done using one flash. You just have to correct your exposure. As far as the shadows go using a reflector can bounce light into the shadow areas. Any white material will do. You can easily make a reflector by covering a piece of cardboard with a piece of white paper or aluminum foil if you want a stronger amount of light and you have a reflector. Learning how to use simple tools will make you a much better image maker. Learning how to control light will make you an expert image maker. Another thing you can do is diffuse your light source. You can make a cheap diffuser using wax paper. Get an old cheap picture frame and cover it with wax paper and hold it in front of your flash. This will diffuse your flash and give you a softer quality light. You can also use tissue paper or any thin white fabric. Remember, the material you use to diffuse should be a white white. Any colored material will give you a color cast. Have fun experimenting.
quote=Lens Cap Hey All,...been trying to get the ... (
show quote)
Hi Silver.... what angle would you have the single flash and deflectors set at to get all round light??
I notice the original shot is at about 45 degrees on 2 planes. could you supply an example and setup for 1 light set up with reflectors (nothing major just a quick 5 min setup) as I have struggled with this in the past that is why I have ended up using 3 to get all around light so this would be invaluable to all hedgehoggers.
Do you deflect the light and bounce back to avoid overspill at the varying angles??
Still looking for the Dom video I didn't realise he had done so many... then again it is good to revisit the old videos
quote=silver quote=Lens Cap Hey All,...been tryi... (
show quote)
Set one flash behind and above the subject pointing down onto the subject. Make sure that the flash is above the frame the camera sees through the viewfinder. Place a reflector in front and lower then the subject and point the reflector into the front of the subject. You should only have to use one flash for this. Make sure that there are no items that have color near the subject because the color will be included in the image. I will try to find some examples but I have to look in old files. I do all of my product photography this way, jewelry and products included. My flash is in a soft box but you can use a raw flash also but the light will be a bit harsh. Just practice this and you will have fun and great success.
quote=JoboX quote=silver quote=Lens Cap Hey All... (
show quote)
Silver ...thank you ....have included setup photos for YOU... you just put your feet up get a cup of tea (or something stronger if over 18 on me) and say job well done...Love the effect it gives even took one side on to show light spread.
The room I was shooting has a lot of ambient light the shot was taken by the window but still got the desired result and handheld
camera settings
Mode Manual (M)
ISO 100
Apeture F5.6 - F9
shutter speed 1/80 - 1/200
camera Flash manual 1/32 (to act as trigger for slave flash)
Subject
As described in last post, reflector was an A4 card with kitchen foil wrapped over to demonstrate....
I carry a 3 foot square piece of black velvet (the real thing, as it just eats up light and swallows it whole); I have found that imitation velvet can give some slight reflections especially if it is not stretched tightly. The small square folds well so is easy to carry.
In our own garden I use some spare staking posts and clamps to hold the black velvet up; my wife often helps me. When not in our own garden I can usually get a companion or two to hold it and on one occasion I managed to talk a couple of strangers to help me out.
The whole idea started one morning when I came into our dining room and there was a new Amaryllis flower on the window sill which was just spectacular. My wife was walking by with a black jacket on a hanger and I asked her to hold it up in back of the flower while I shot it. The resulting photo was also spectacular and thus a series of flower photos resulted in what I called, "My Wife's Black Jacket" series. Of course a black jacket was not always conveniently available so I purchased the piece of black velvet.
A photographer friend used a larger piece of black cloth with a slit in the middle which he used to photograph Lady Slippers in the wild. He gently placed the cloth over the flower through the slit but he had to use Photoshop to make the background completely black. The larger lightweight cloth allows him to drape it over the surrounding foliage.

JoboX wrote:
silver wrote:
JoboX wrote:
silver wrote:
Lens Cap wrote:
Hey All,...been trying to get the black background without a backdrop. I got a new flash unit for christmas and desided to try again. This time I think I'm close. Any suggestions on the darker shadows? or is that an accepted bi-product?
A shot like this can easily be done using one flash. You just have to correct your exposure. As far as the shadows go using a reflector can bounce light into the shadow areas. Any white material will do. You can easily make a reflector by covering a piece of cardboard with a piece of white paper or aluminum foil if you want a stronger amount of light and you have a reflector. Learning how to use simple tools will make you a much better image maker. Learning how to control light will make you an expert image maker. Another thing you can do is diffuse your light source. You can make a cheap diffuser using wax paper. Get an old cheap picture frame and cover it with wax paper and hold it in front of your flash. This will diffuse your flash and give you a softer quality light. You can also use tissue paper or any thin white fabric. Remember, the material you use to diffuse should be a white white. Any colored material will give you a color cast. Have fun experimenting.
quote=Lens Cap Hey All,...been trying to get the ... (
show quote)
Hi Silver.... what angle would you have the single flash and deflectors set at to get all round light??
I notice the original shot is at about 45 degrees on 2 planes. could you supply an example and setup for 1 light set up with reflectors (nothing major just a quick 5 min setup) as I have struggled with this in the past that is why I have ended up using 3 to get all around light so this would be invaluable to all hedgehoggers.
Do you deflect the light and bounce back to avoid overspill at the varying angles??
Still looking for the Dom video I didn't realise he had done so many... then again it is good to revisit the old videos
quote=silver quote=Lens Cap Hey All,...been tryi... (
show quote)
Set one flash behind and above the subject pointing down onto the subject. Make sure that the flash is above the frame the camera sees through the viewfinder. Place a reflector in front and lower then the subject and point the reflector into the front of the subject. You should only have to use one flash for this. Make sure that there are no items that have color near the subject because the color will be included in the image. I will try to find some examples but I have to look in old files. I do all of my product photography this way, jewelry and products included. My flash is in a soft box but you can use a raw flash also but the light will be a bit harsh. Just practice this and you will have fun and great success.
quote=JoboX quote=silver quote=Lens Cap Hey All... (
show quote)
Silver ...thank you ....have included setup photos for YOU... you just put your feet up get a cup of tea (or something stronger if over 18 on me) and say job well done...Love the effect it gives even took one side on to show light spread.
The room I was shooting has a lot of ambient light the shot was taken by the window but still got the desired result and handheld
camera settings
Mode Manual (M)
ISO 100
Apeture F5.6 - F9
shutter speed 1/80 - 1/200
camera Flash manual 1/32 (to act as trigger for slave flash)
Subject
As described in last post, reflector was an A4 card with kitchen foil wrapped over to demonstrate....
quote=silver quote=JoboX quote=silver quote=Le... (
show quote)
You should make your flash a little higher and move your reflector closer to the subject. Practice makes perfect. You can also diffuse the flash for a more even light. THis is one technique of many for this type of photography. I am still looking for my samples, ill show you some when I find them. Good job keep going. Learning how to control light is very important. By using only one light it challenges you to be really creative. One thing, dont use your camera flash, get a sync cord to attach your camera to the flash. Learn to use the reflector. You can have more then one reflector but just use one flash. This will be a great learning experience for you.
JoboX wrote:
silver wrote:
JoboX wrote:
silver wrote:
Lens Cap wrote:
Hey All,...been trying to get the black background without a backdrop. I got a new flash unit for christmas and desided to try again. This time I think I'm close. Any suggestions on the darker shadows? or is that an accepted bi-product?
A shot like this can easily be done using one flash. You just have to correct your exposure. As far as the shadows go using a reflector can bounce light into the shadow areas. Any white material will do. You can easily make a reflector by covering a piece of cardboard with a piece of white paper or aluminum foil if you want a stronger amount of light and you have a reflector. Learning how to use simple tools will make you a much better image maker. Learning how to control light will make you an expert image maker. Another thing you can do is diffuse your light source. You can make a cheap diffuser using wax paper. Get an old cheap picture frame and cover it with wax paper and hold it in front of your flash. This will diffuse your flash and give you a softer quality light. You can also use tissue paper or any thin white fabric. Remember, the material you use to diffuse should be a white white. Any colored material will give you a color cast. Have fun experimenting.
quote=Lens Cap Hey All,...been trying to get the ... (
show quote)
Hi Silver.... what angle would you have the single flash and deflectors set at to get all round light??
I notice the original shot is at about 45 degrees on 2 planes. could you supply an example and setup for 1 light set up with reflectors (nothing major just a quick 5 min setup) as I have struggled with this in the past that is why I have ended up using 3 to get all around light so this would be invaluable to all hedgehoggers.
Do you deflect the light and bounce back to avoid overspill at the varying angles??
Still looking for the Dom video I didn't realise he had done so many... then again it is good to revisit the old videos
quote=silver quote=Lens Cap Hey All,...been tryi... (
show quote)
Set one flash behind and above the subject pointing down onto the subject. Make sure that the flash is above the frame the camera sees through the viewfinder. Place a reflector in front and lower then the subject and point the reflector into the front of the subject. You should only have to use one flash for this. Make sure that there are no items that have color near the subject because the color will be included in the image. I will try to find some examples but I have to look in old files. I do all of my product photography this way, jewelry and products included. My flash is in a soft box but you can use a raw flash also but the light will be a bit harsh. Just practice this and you will have fun and great success.
quote=JoboX quote=silver quote=Lens Cap Hey All... (
show quote)
Silver ...thank you ....have included setup photos for YOU... you just put your feet up get a cup of tea (or something stronger if over 18 on me) and say job well done...Love the effect it gives even took one side on to show light spread.
The room I was shooting has a lot of ambient light the shot was taken by the window but still got the desired result and handheld
camera settings
Mode Manual (M)
ISO 100
Apeture F5.6 - F9
shutter speed 1/80 - 1/200
camera Flash manual 1/32 (to act as trigger for slave flash)
Subject
As described in last post, reflector was an A4 card with kitchen foil wrapped over to demonstrate....
quote=silver quote=JoboX quote=silver quote=Le... (
show quote)
Ok All so here is where I am....I went to my old camera an Olympus C-720..Set the camera to the manual settings and I got the results I am looking for...see pic #1.....So back to the Olympus e-520...After many disapointing set ups I talked to Olympus directly. the camera will not allow a shutter speed higher than 180. I even went to my off camera flash where I can get faster shutter speeds, but the flash fires early.....( again contacted Olympus they say I can't do what I want to do).. So picture #2 is my try tonight. Using the proper camera settings without the flash...adding concentrated light (led flash light) not bad..obviously I need som more light but the process works....Thank you all
#1 Olympus C-720
#2 Olympus E=520
Lens Cap wrote:
Hey All,...been trying to get the black background without a backdrop. I got a new flash unit for christmas and desided to try again. This time I think I'm close. Any suggestions on the darker shadows? or is that an accepted bi-product?
Why use a speedlight? Try LED lights. I did this with a 6 sec exposure and two off camera LED's.
Yep that's what I used in my last picture
mikeyatc wrote:
Lens Cap wrote:
Hey All,...been trying to get the black background without a backdrop. I got a new flash unit for christmas and desided to try again. This time I think I'm close. Any suggestions on the darker shadows? or is that an accepted bi-product?
Why use a speedlight? Try LED lights. I did this with a 6 sec exposure and two off camera LED's.
High speed sync will work also. If your camera and speedlight has that option.
Lens Cap wrote:
JoboX wrote:
silver wrote:
JoboX wrote:
silver wrote:
Lens Cap wrote:
Hey All,...been trying to get the black background without a backdrop. I got a new flash unit for christmas and desided to try again. This time I think I'm close. Any suggestions on the darker shadows? or is that an accepted bi-product?
A shot like this can easily be done using one flash. You just have to correct your exposure. As far as the shadows go using a reflector can bounce light into the shadow areas. Any white material will do. You can easily make a reflector by covering a piece of cardboard with a piece of white paper or aluminum foil if you want a stronger amount of light and you have a reflector. Learning how to use simple tools will make you a much better image maker. Learning how to control light will make you an expert image maker. Another thing you can do is diffuse your light source. You can make a cheap diffuser using wax paper. Get an old cheap picture frame and cover it with wax paper and hold it in front of your flash. This will diffuse your flash and give you a softer quality light. You can also use tissue paper or any thin white fabric. Remember, the material you use to diffuse should be a white white. Any colored material will give you a color cast. Have fun experimenting.
quote=Lens Cap Hey All,...been trying to get the ... (
show quote)
Hi Silver.... what angle would you have the single flash and deflectors set at to get all round light??
I notice the original shot is at about 45 degrees on 2 planes. could you supply an example and setup for 1 light set up with reflectors (nothing major just a quick 5 min setup) as I have struggled with this in the past that is why I have ended up using 3 to get all around light so this would be invaluable to all hedgehoggers.
Do you deflect the light and bounce back to avoid overspill at the varying angles??
Still looking for the Dom video I didn't realise he had done so many... then again it is good to revisit the old videos
quote=silver quote=Lens Cap Hey All,...been tryi... (
show quote)
Set one flash behind and above the subject pointing down onto the subject. Make sure that the flash is above the frame the camera sees through the viewfinder. Place a reflector in front and lower then the subject and point the reflector into the front of the subject. You should only have to use one flash for this. Make sure that there are no items that have color near the subject because the color will be included in the image. I will try to find some examples but I have to look in old files. I do all of my product photography this way, jewelry and products included. My flash is in a soft box but you can use a raw flash also but the light will be a bit harsh. Just practice this and you will have fun and great success.
quote=JoboX quote=silver quote=Lens Cap Hey All... (
show quote)
Silver ...thank you ....have included setup photos for YOU... you just put your feet up get a cup of tea (or something stronger if over 18 on me) and say job well done...Love the effect it gives even took one side on to show light spread.
The room I was shooting has a lot of ambient light the shot was taken by the window but still got the desired result and handheld
camera settings
Mode Manual (M)
ISO 100
Apeture F5.6 - F9
shutter speed 1/80 - 1/200
camera Flash manual 1/32 (to act as trigger for slave flash)
Subject
As described in last post, reflector was an A4 card with kitchen foil wrapped over to demonstrate....
quote=silver quote=JoboX quote=silver quote=Le... (
show quote)
Ok All so here is where I am....I went to my old camera an Olympus C-720..Set the camera to the manual settings and I got the results I am looking for...see pic #1.....So back to the Olympus e-520...After many disapointing set ups I talked to Olympus directly. the camera will not allow a shutter speed higher than 180. I even went to my off camera flash where I can get faster shutter speeds, but the flash fires early.....( again contacted Olympus they say I can't do what I want to do).. So picture #2 is my try tonight. Using the proper camera settings without the flash...adding concentrated light (led flash light) not bad..obviously I need som more light but the process works....Thank you all
quote=JoboX quote=silver quote=JoboX quote=sil... (
show quote)
Been getting some really good Low key shots since taking the advice off Silver and googling a few other techniques.... The 1/180 should be enough as I have had mine down to 1/90 and still got a decent shot by upping my F-Stop and reducing flash power in manual modes....I've never used LCDs so cant really comment but like the effect although the apple on the right seems over exposed.... was this done using the light painting technique.
I always take a picture without flash to ensure I have a black screen to start... so F5.. if its still showing light I move it up to F8... then F11 then I set the flash to 1/16 power and take 1 shot if it turns out like your #2 I go to 1/8 and move the light accordingly ....away = less light until you get the right balance.
Will be using the techniques shortly as I have two shoots coming up... A dancer shoot and a family Shoot......
Been a pleasure learning alongside you..... :thumbup: :thumbup: keep us posted on your shots
If you want to reply, then
register here. Registration is free and your account is created instantly, so you can post right away.