A little direction please.
Jan 1, 2013 11:47:37 #
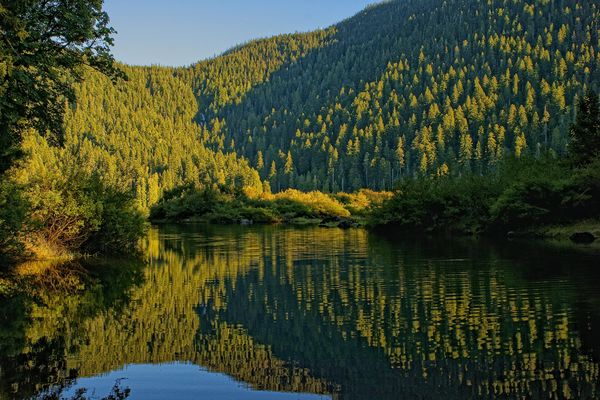
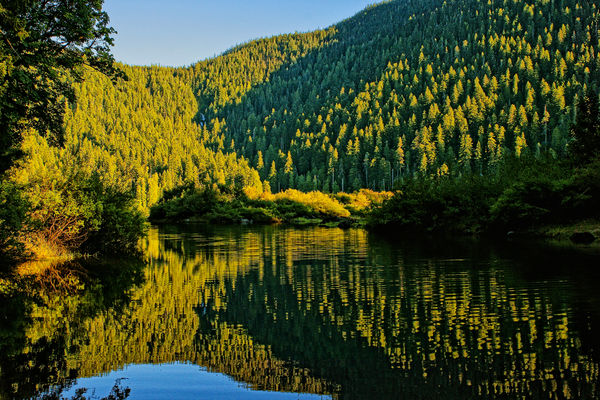
So, I recently sold a version of this same scene to an acquaintance of my wife recently. My second sale this season as I haven't yet hung out my photographer's shingle yet.
I actually like the composition of this image better because it includes blue sky, where the one I sold doesn't. My problem here is various parts of the image that I think are of some importance are too dark and subsequently it doesn't print well. I have tried "global" type corrections such as fill light and lightening up the shadows. The outcomes with those attempts are included in the image I posted here. If I go any further with those techniques the shaded areas and the shadows develop a tint that has an ashen and unnatural feel to it. I am more than willing to use the more tedious editor portion of my image editor, Paint Shop Pro X4, to lift the illumination of those areas but am hoping to find some direction first.
Thanks in advance.
Jan 1, 2013 12:34:03 #

frankeieio wrote:
So, I recently sold a version of this same scene t... (show quote)
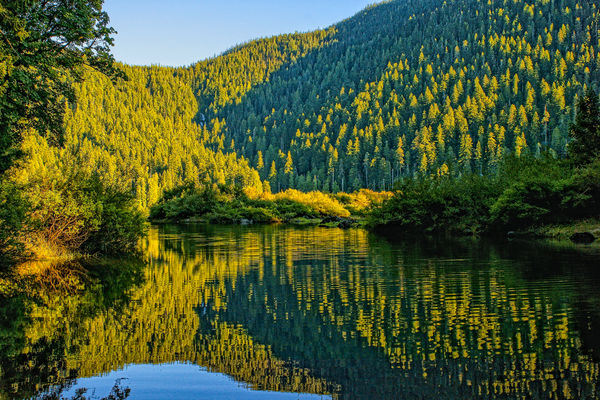
Does this look better?

Jan 1, 2013 14:17:54 #
It does, thank you. I'll see what happens when I print it. What did you do?
Jan 1, 2013 14:27:36 #
frankeieio wrote:
It does, thank you. I'll see what happens when I print it. What did you do?
Just recovered the shadows in Photoshop.
There are various methods, try using the slider adjustments in Levels
Jan 4, 2013 14:51:37 #

I have to say that the image looked fine. It was BARELY clipping a few VERY SMALL BLACKS.
If it shows good on the histogram, then it should print fine...the histo distribution looks pretty good in LR.
I moved it SLIGHTLY.... but really...It looked fine.
Is your printer calibrated with everything else?
If it shows good on the histogram, then it should print fine...the histo distribution looks pretty good in LR.
I moved it SLIGHTLY.... but really...It looked fine.
Is your printer calibrated with everything else?
Jan 5, 2013 13:51:54 #

frankeieio wrote:
So, I recently sold a version of this same scene t... (show quote)
The part of photography that is the least understood is printing. An image never prints the way it is viewed on your screen. Much has to be done to get colors, shadows, mid tones etc. to match the screen. Calibrating your monitor is a start. Secondly, getting a print profile for the printer being used and the paper being used on that printer. Lastly, knowing how to proof your image, make adjustments to the proof and print sharpen before your final save.
Jan 5, 2013 19:05:13 #
Jan 5, 2013 20:07:19 #
It looks to me as if the shadows got a little darker with your version HMM.
Jan 5, 2013 23:16:01 #
Easy enough to correct, I didn't spend that long on it. Also, they'll look somewhat darker in comparison. You can use these, or similar methods, to achieve the result you want, and to reflect what you saw.
Jan 6, 2013 10:02:13 #
Yes, I am interested in what your process is HMM. As stated I am also interested in bringing up the shadows a bit while maintaining the overall tonal quality of the image. Something I've gotten close to but not achieved with what I've tried.
As for printing and my printer, I have sent this out actually, twice. Proofing 9x12s. My aim is print something in the 24" x 16" range. There is some nifty detail in this composition, including a waterfall halfway up the far hill. It's reflection can be seen in the water.
As for printing and my printer, I have sent this out actually, twice. Proofing 9x12s. My aim is print something in the 24" x 16" range. There is some nifty detail in this composition, including a waterfall halfway up the far hill. It's reflection can be seen in the water.
Jan 6, 2013 11:00:47 #
frankeieio wrote:
Yes, I am interested in what your process is HMM. ... (show quote)
We are all working with a jpg file.
Do you have the RAW version?
Jan 6, 2013 11:05:09 #
I opened the JPEG in Camera Raw in Photoshop and increased the exposure. I also boosted clarity and vibrance by 20 and the saturation by 5 (I usually use 10 for my camera). I then opened the image and created a set of luminosity masks and a set of associated curves (one curve for each luminosity mask). I lightened the super dark, dark dark and dark curves a bit, though I had to go back and cut back the blues a bit, as the trees on the hillside were getting a bit too much of a blue hue. I then flattened the image. I added a layer filled with 50 percent gray in soft loaded the expanded midrange mask in Soft Light mode and used a large white brush to dodge the lighter colors. Luminosity masks and using them in burn/dodge layers are explained on Tony Kuyper's website at http://www.goodlight.us/writing/tutorials.html.
I have three sets of actions to create the masks, the curve layers, and to clean everything up afterwards. Learning to use them takes some practice, but makes subtle improvements relatively easy and avoids the harsh contrasts that other methods tend to produce.
I have three sets of actions to create the masks, the curve layers, and to clean everything up afterwards. Learning to use them takes some practice, but makes subtle improvements relatively easy and avoids the harsh contrasts that other methods tend to produce.
Jan 6, 2013 11:47:50 #
Thank you RMM. Your response is exactly what I was looking for. I have more time in the winter to work on my post processing skills, which I intend to do now, I just needed to be pointed in the right direction.
Here also is the RAW (Sony ARW) file for those who are interested. I shot this exposure to produce a blue sky out of the camera. In other words, I spot metered on the sky, thinking I could bring up the shadows.
Here also is the RAW (Sony ARW) file for those who are interested. I shot this exposure to produce a blue sky out of the camera. In other words, I spot metered on the sky, thinking I could bring up the shadows.
Jan 6, 2013 18:15:45 #
frankeieio, thanks for the "Thank you." Someone is sure to say you should have bracketed your exposures and either blended them with HDR, combine them on your own, or at least pick the best one to work with. Not being a fan of HDR, there's still merit to bracketing when you're unsure of the light. But I think you got a good shot to work with.
Digital cameras don't have the dynamic range of film, so you have to find ways to compensate. Tools like luminosity masks can make that effort easier and produce better results.
Have fun!
Digital cameras don't have the dynamic range of film, so you have to find ways to compensate. Tools like luminosity masks can make that effort easier and produce better results.
Have fun!
If you want to reply, then register here. Registration is free and your account is created instantly, so you can post right away.