Can this photo be improved
Dec 11, 2012 18:13:56 #
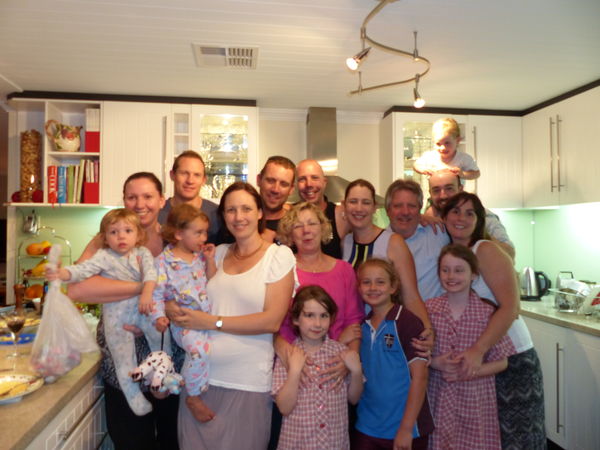
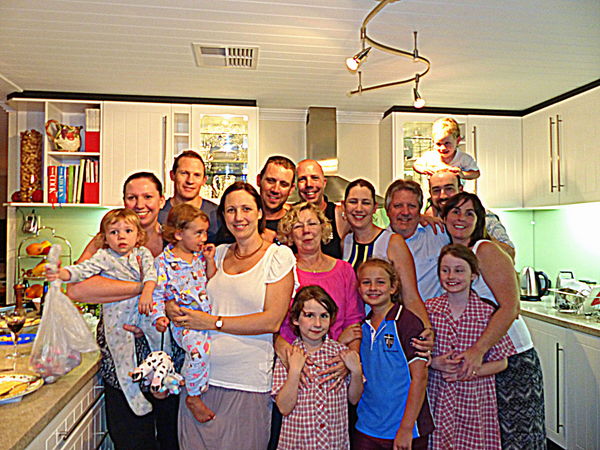
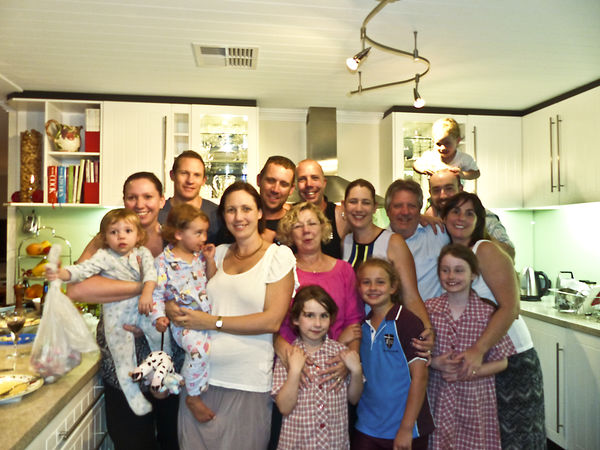
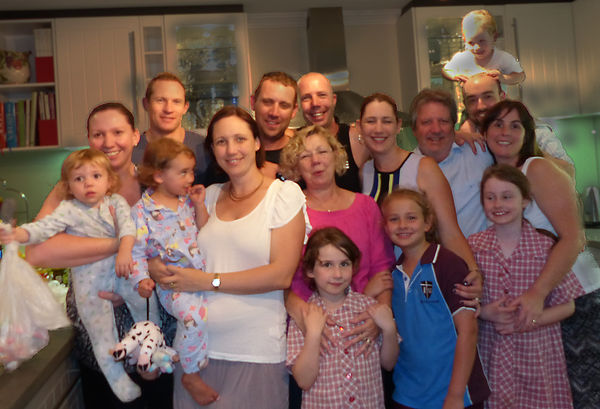
It is very hard to take group photos and this wasn't the best setting but it is where everyone gathered and the first time in a long while that everyone was in one place! I seemed to have missed the sharp focus that I wanted...I have only just bought Elements 10 and with this photo needed quickly, I have no hope of learning the program that soon (My aim for the new year). Is anyone able to make it any sharper? Many thanks in advance!
Dec 11, 2012 19:11:40 #
KRphotofun wrote:
It is very hard to take group photos and this wasn't the best setting but it is where everyone gathered and the first time in a long while that everyone was in one place! I seemed to have missed the sharp focus that I wanted...I have only just bought Elements 10 and with this photo needed quickly, I have no hope of learning the program that soon (My aim for the new year). Is anyone able to make it any sharper? Many thanks in advance!
You've got a whole bunch of problems with this photo. Focus, for one. You have multiple light sources of different types - a little daylight, fluorescent and tungsten - and the lighting is uneven. The infant at the top right is right under a light, and there's areas that are burnt out.
That said:
Opened in Photoshop in Camera raw and lowered the temperature of the light (shifted towards the blue), boosted the clarity, vibrance and saturation. Also cropped it. After that, I opened it in Photoshop, converted to Lab color and sharpened the Lightness layer quite a bit. I then duplicated the image and added a Curves layer. In the Lightness layer, I lightened the image and shifted the skin tones in the "b" layer to reduce the blue, with an eye to the people towards the right. I then added a layer mask and applied a gradient so that those effects were concentrated on the people on the right, and had little effect on everyone else. Flattened the image, converted back to RGB and saved. Net result: sharper, more "focused" (and consequently noisier), more evenly lit in overall tone and color, less background clutter.
Dec 11, 2012 19:36:52 #
Hi I gave it a shot with what I have here at work to work with I am sure someone here can do better.
Dec 11, 2012 22:49:26 #
Dec 12, 2012 06:05:18 #
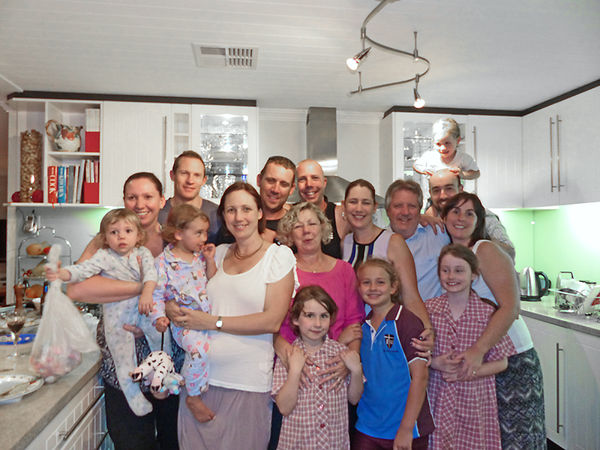
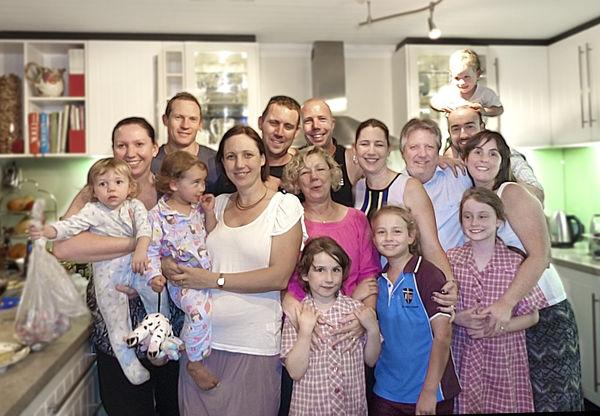
Thanks RMM and thank you too for explaining what you did...I will keep those directions so that when I learn Elements I'll hopefully be able to work through those. Your work makes the photo look so much better. My friends will surely appreciate it!
Dec 12, 2012 06:06:07 #
Dec 12, 2012 06:07:21 #
Dec 12, 2012 07:05:34 #
after you've done all you can, even if you are not satisfied , you keep it anyway because it may be a one time only shoot.
Dec 12, 2012 07:24:14 #

Dec 12, 2012 07:29:05 #
RMM wrote:
quote=KRphotofun It is very hard to take group ph... (show quote)
Nice job,,,quite an improvement :)
Dec 12, 2012 07:34:58 #

Dec 12, 2012 07:54:24 #
You will be your own worst critic on this one. True, there are some technical issues that could be addressed, but I would almost guarantee that everyone in the pic will like it. Unless they are all avid photographers, here's what they will see. Everyone's face is visible, the color is acceptable, this large a group probably seldom can get together, and they are all smiling.
So, you have satisfied the needs of the group and they will all think you are a hero.
Now, having said that, apply my "Triple R&P" remedy. There is literally a train load of photographic information out there and if you are shooting digital, you have no investment in film and prints, so 'read and practice, read and practice, read and practice (the Triple R&P).
Dec 12, 2012 08:45:01 #


Dec 12, 2012 10:03:31 #
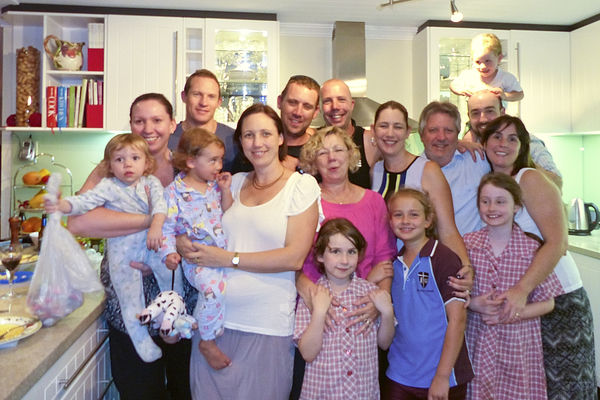
Here's mine.
Cropped and straightened (maybe rotated a bit too much...should have used brown line at the top).
Created masked layer for the crowd.
Sharpened the crowd layer.
Darkened the background layer and burned out some highlights.
Not happy with the sharpening.
Cropped and straightened (maybe rotated a bit too much...should have used brown line at the top).
Created masked layer for the crowd.
Sharpened the crowd layer.
Darkened the background layer and burned out some highlights.
Not happy with the sharpening.
Dec 12, 2012 11:21:42 #

Here is a go at it.
The second photo is identical to the first, just "saved for web" in CS5, which converts to more web friendly colors.
The second photo is identical to the first, just "saved for web" in CS5, which converts to more web friendly colors.
"Saved for web"

If you want to reply, then register here. Registration is free and your account is created instantly, so you can post right away.