How is this possible
Apr 14, 2023 18:24:56 #

I'm using Photoshop 24.3.0, on an iMac (2017) running Ventura 13.3.
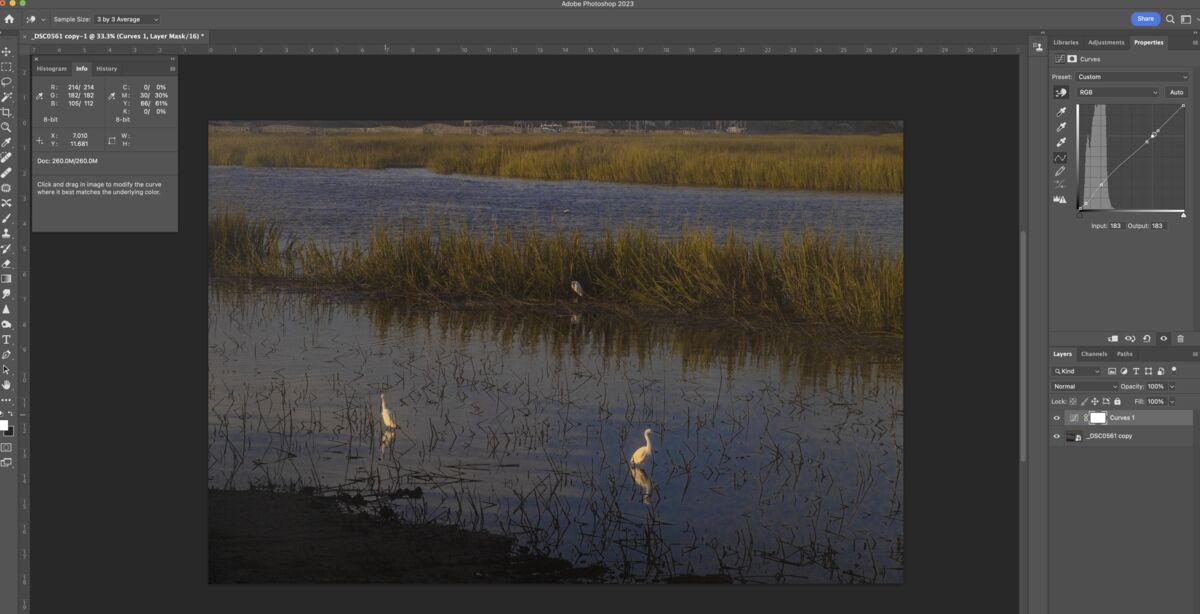
This image is pretty dim at this point, but the sampling cursor from the curves layer is on the upper chest of the bird in the left foreground (although for some reason the screenshot doesn't show that cursor). The curve properties panel on the upper right shows that that point on the bird's chest has an input of 183 and an output of 183, which it should, since it is among the three points on the curve that each have the same input and output values, and three points, I was taught, determine a straight line. Still, the Info panel on the left says that, while the input and output values are the same for R and G, they are not the same for B, which is 106 input and 112 output. I know it isn't a big difference, but it bugs me that it is there at all. Can anyone explain to me how that is possible?
This image is pretty dim at this point, but the sampling cursor from the curves layer is on the upper chest of the bird in the left foreground (although for some reason the screenshot doesn't show that cursor). The curve properties panel on the upper right shows that that point on the bird's chest has an input of 183 and an output of 183, which it should, since it is among the three points on the curve that each have the same input and output values, and three points, I was taught, determine a straight line. Still, the Info panel on the left says that, while the input and output values are the same for R and G, they are not the same for B, which is 106 input and 112 output. I know it isn't a big difference, but it bugs me that it is there at all. Can anyone explain to me how that is possible?
Apr 15, 2023 05:35:16 #

You are working in an area where there is no data to speak of.
Look at your histogram. The image is grossly under exposed. If you shot raw, are using a low ISO (100/400), you are in luck (assuming you have an invariant sensor).
If using JPG, good luck. If the ISO was high, same.
When looking at your screen capture that show 33% view, I see many issues that cannot be corrected to anyone's satisfaction.
I see this is a loss. It can be a great teaching tool for you on how to use PP to mitigate some of the issues that may crop later on, in a better image to start with.
The sample offered shows the exposure issue. From there, play with the birds using a mask. Good luck.
Apr 15, 2023 11:58:56 #
Rongnongno wrote:
You are working in an area where there is no data ... (show quote)
Ron, I think you're telling me the image was underexposed, and I get that; from a D850 raw, there is a measure of hope on that, despite ISO 2000.
However, my question was about Photoshop, and where the curves layer seems to be altering brightnesses I'm supposing it shouldn't alter. Perhaps you can help me see where you have addressed that issue but I've failed to understand properly.
Apr 15, 2023 14:28:24 #
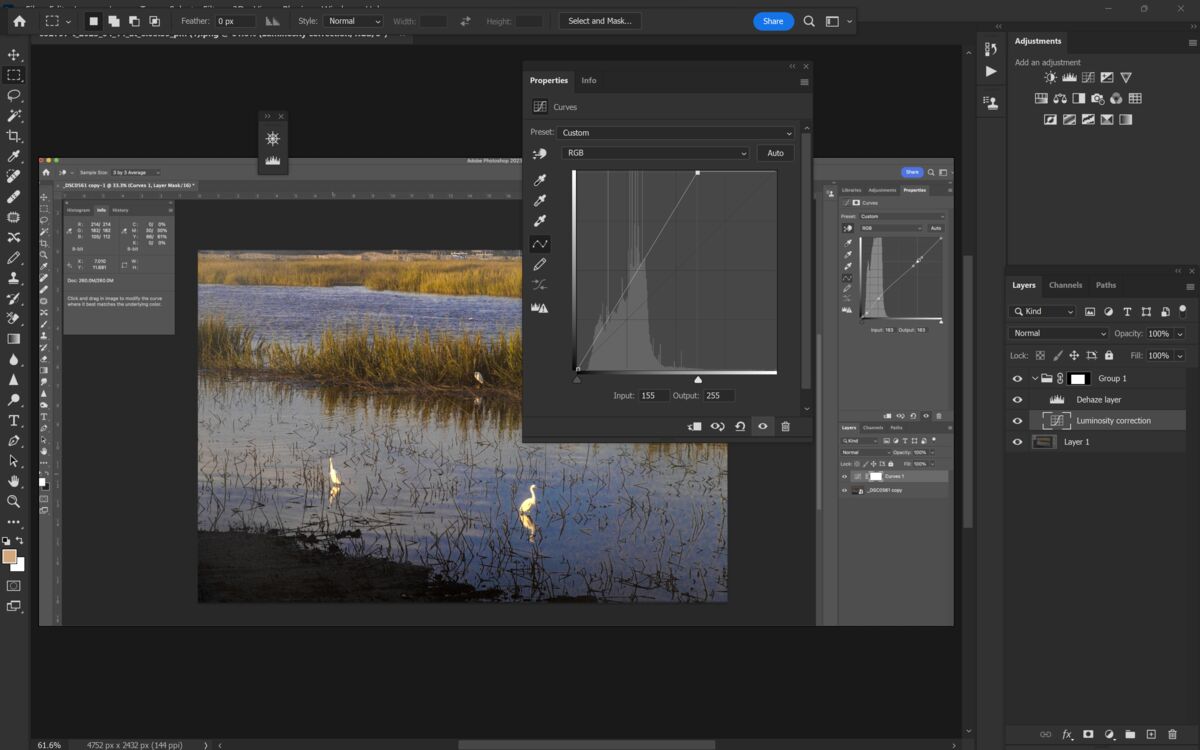
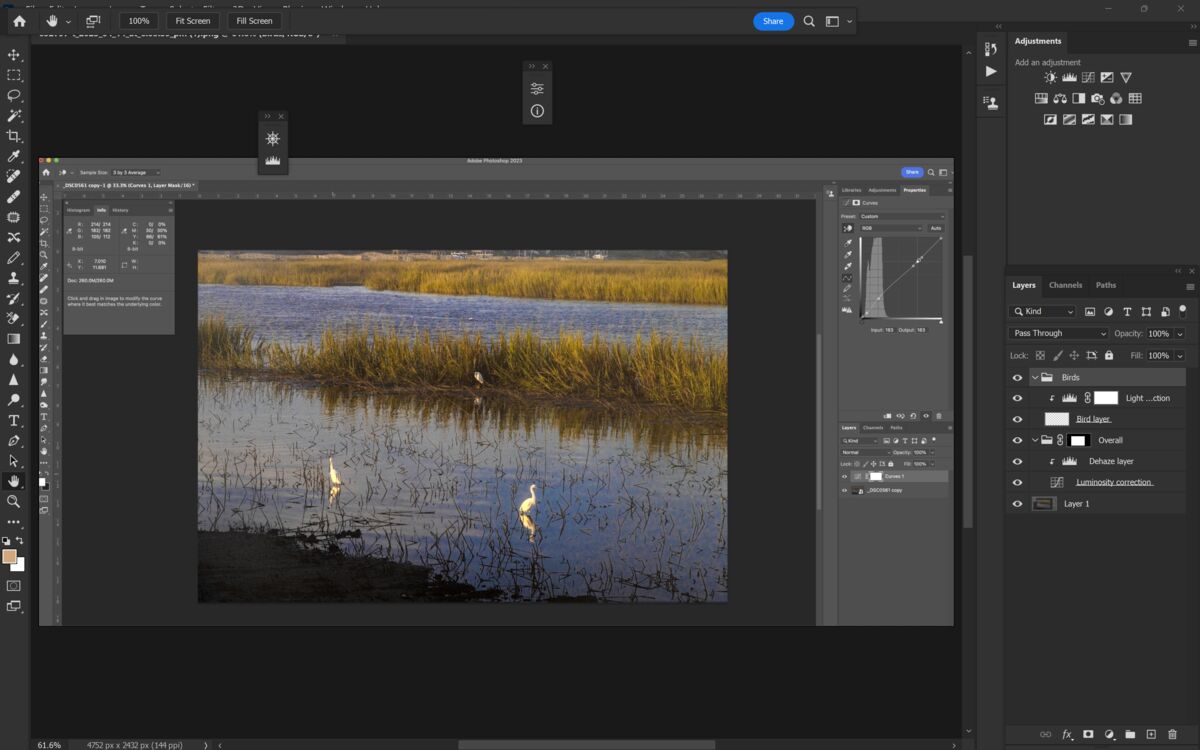
The curve layers changes the luminosity contrast (either as a whole or per channel RGB). That is its purpose. As per your image, you can do very little when there is no data as shown by the histogram.
When you want to alter only a part of an image using anything, you need to mask it or use 'blend if'.
In this case the underexposure will prevent you to get a realistic result, especially if you think you can do the birds first then the rest. Of course, you can use a reverse mask; honestly, there is no reason to go this way.
The method used is as follows:
Adjust the global issue, exposure/luminosity (curve) and then the haze (level layer).
To adjust the birds I made a quick, imperfect selection of the birds, on the base layer; pressed Ctl-J to create a new layer, moved that one to the top of the pile
I then used a simple level layer to adjust the birds and locked it with the layer below (small down arrow).
To facilitate the understanding, I created two groups. One is overall (global luminosity) then birds, (birds level adjustment).
Please note that by creating the groups, I also removed the need for the bird layer down link.
The mask used on the overall group is to prevent the PS CC work environment (WE) to interfere with the modification. I should mention that I did not use on the second group simply because the selection was small and did not include any of PS CC WE.
ISO 2000 is beyond the D850 invariant sensor reach. You will get some results, but never as good as with a correctly exposed capture.
---------------
* I always recommend avoiding using mask for various reasons, there are other tools that do the same thing in a more refined way. 'Blend If' option being the most obvious.
If you want to reply, then register here. Registration is free and your account is created instantly, so you can post right away.