Circular Abstract Instructions - for DWU2
Aug 31, 2022 12:34:41 #
lmTrying
Loc: WV Northern Panhandle
What a cratered road this has been.
Pretty much tore this room apart looking for those instructions. NADA!
Did find and organized a lot of other things.
Then the allergies / sinuses set in, to slow things down. Nothing like a head cold in August.
Finally contacted a friend to see if they had a copy. They texted me their re-written version. Humm. Better Test it first. Several tires and re-writes later, I have two versions, one for Adobe PhotoShop and one for Corel PaintShop Pro.
I work in Corel PaintShop Pro, so I'm not absolutely sure the PhotoShop instructions are correct, but it will get you close. I worked out the bugs in the Corel version and it will get you a good image.
I tried untold times last night to download the instructions, but had no success. So, these are typed directly in.
Creating a Circular Abstract in Adobe PhotoShop
1. Open Adobe PhotoShop.
2. Open the file containing the photo you wish to work on. Click on the image to highlight it, click "OPEN".
3. Chose; Filter, Distort, Polar Coordinates.
4. In the box, click on "Polar to Rectangular", go with "Right", and click "OK".
5. Chose; Image, Rotation, and 180 degrees, click "OK".
6. Chose; Filter, Distort, Polar Coordinates.
7. In the box, click on "Rectangular to Polar", go with "Right", and click "OK".
8. Chose; Image, Rotation, and 180 degrees, click "OK".
9. Chose; Image, Canvas Size, Enter the larger number into the smaller number box to create a square image. The Aspect Ratio should be 1 to 1.
This should create a somewhat round, circular, or oval abstract.
From this point on, I'm not sure of these instructions, because I work in Corel's PaintShop Pro. And the language is pretty much that of my friend.
10. Chose; Magnifier, Filter Frame (on the top Menu). This will make the canvas square by adding a Rectangular Marquis around the image. Edit, Transform, Scale, and pull up and down in the middle of your picture to make it square inside your new Canvas Box. You may need to hold down the SHIFT key to keep the square dimensions as you pull up and down on the picture. Then with the Rectangular Marquis active, select Transform, Perspective.
11. Shift / Left / Click the right side to drag from bottom to top of image.
12. Do the same for the left side. this will switch the bottom to the top on the bottom side.
13. Left click the checkmark to accept the Transform Change.
14. Chose "Select", then "Deslect", then "SAVE" or "SAVE AS".
Creating A Circular Abstract in Corel PaintShop Pro
1. Open Corel PaintShop Pro.
2. Open the file containing the photo you wish to work on. Click on the image to highlight it, then click on "OPEN".
3. Chose: Effects, Distortion Effects, Polar Coordinates.
4. In the box, click on "Polar to Rectangular", and click "OK".
5. Chose; Image, Free Rotation, go with "Right", and click "OK".
6. Chose; Effects, Distortion Effects, Polar Coordinates.
7. In the box, click on "Rectangular to Polar", and click "OK".
8. Chose; Image, Free Rotation, go with "Right", and click "OK".
9. Chose; Image, Canvas Size, Enter the larger number into the smaller number box to create a square image. The Aspect Ratio should be, or will change to, 1 to 1. This should create node points on each corner of the image as well as nodes in the middle of each side, connected by a dotted line around the image and one node point in the middle. (Rectangular Marquis)
10. Use the node points to adjust the image to the size of the canvas, which should be square. Of course, if you like the oval shape, there is nothing wrong with that.
11. You can adjust the size of the canvas, or image, add a background (like cutting a matt), and add a frame of your choice.
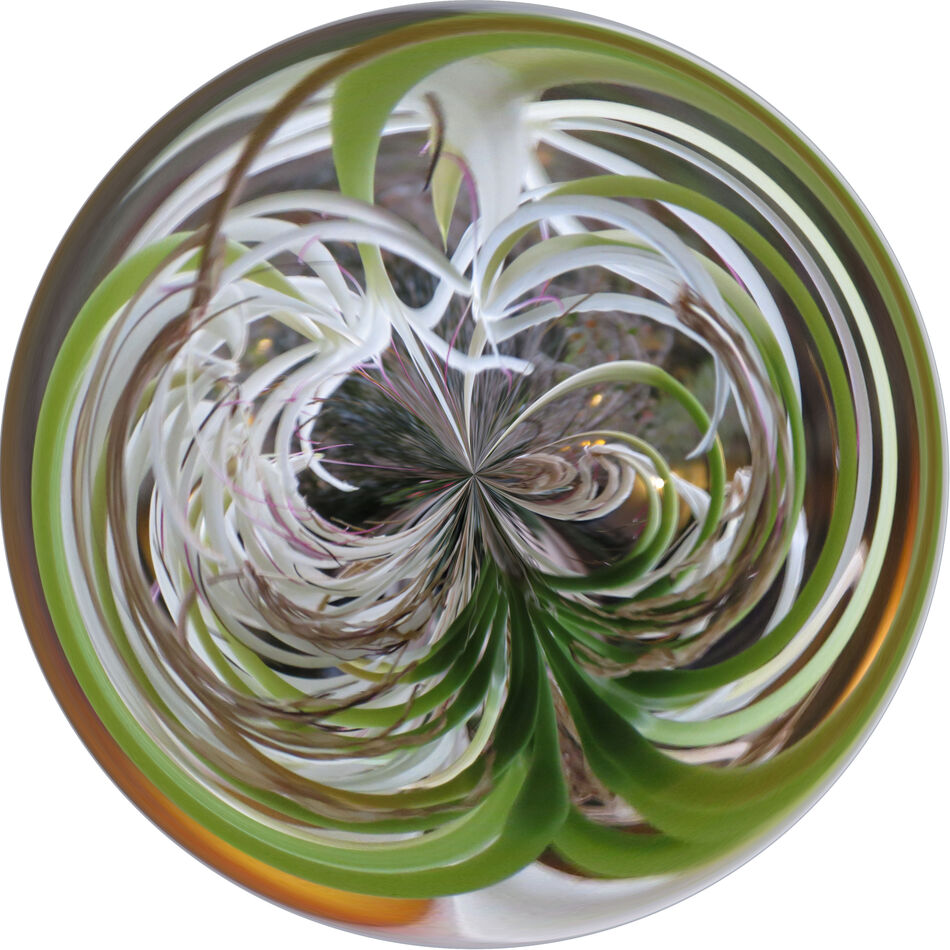
Please note, the differences in lines 4 and 7 of each set of instructions. Keeping them in order the first few times will help achieve the circular effect. After you have created a few abstracts, play with the order of lines 4 and 7, change Right to Left, change 180 degrees to 90, or 270, or 45, whatever. The first one I ever saw was a sunflower in full bloom with all the pedals pointing inward instead of outward!
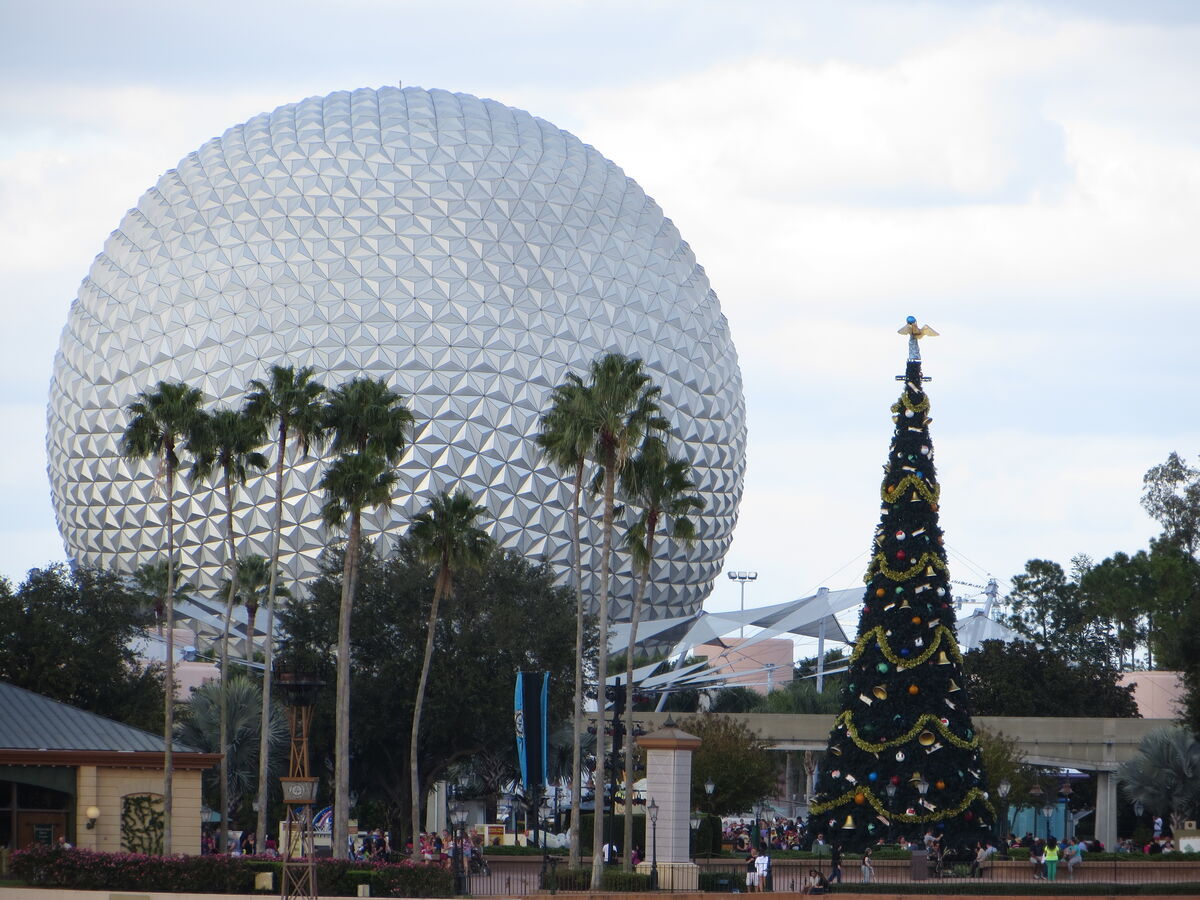
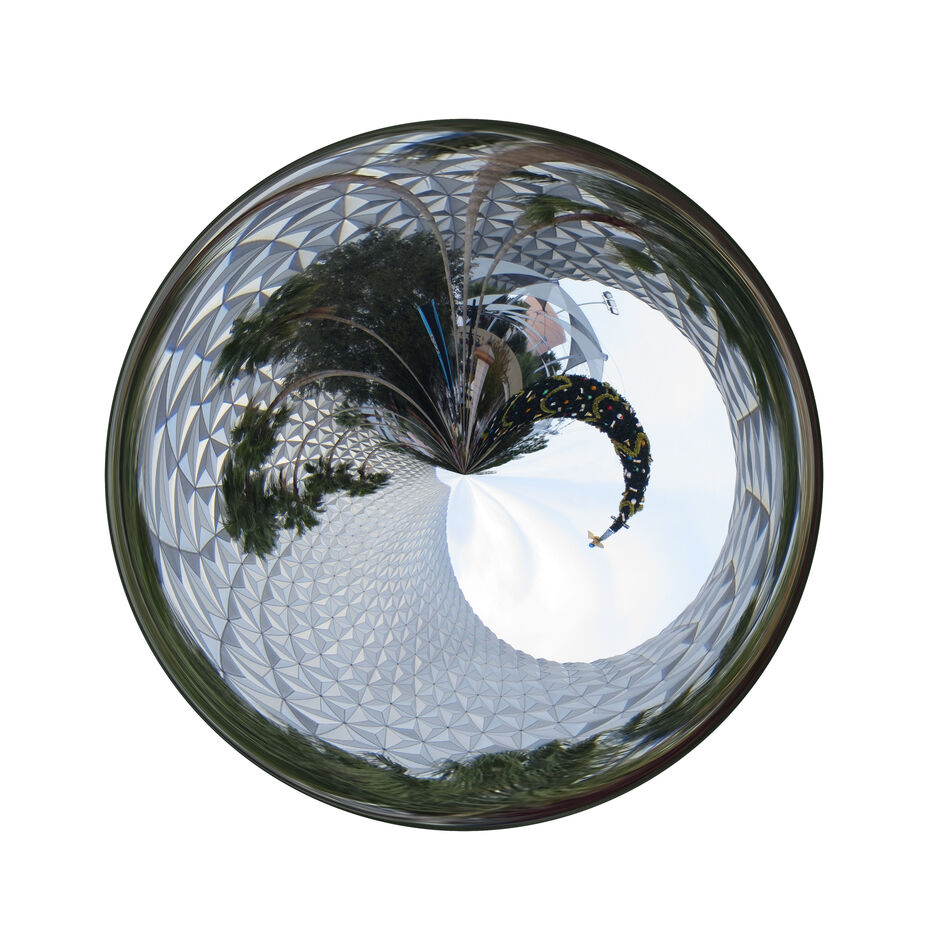
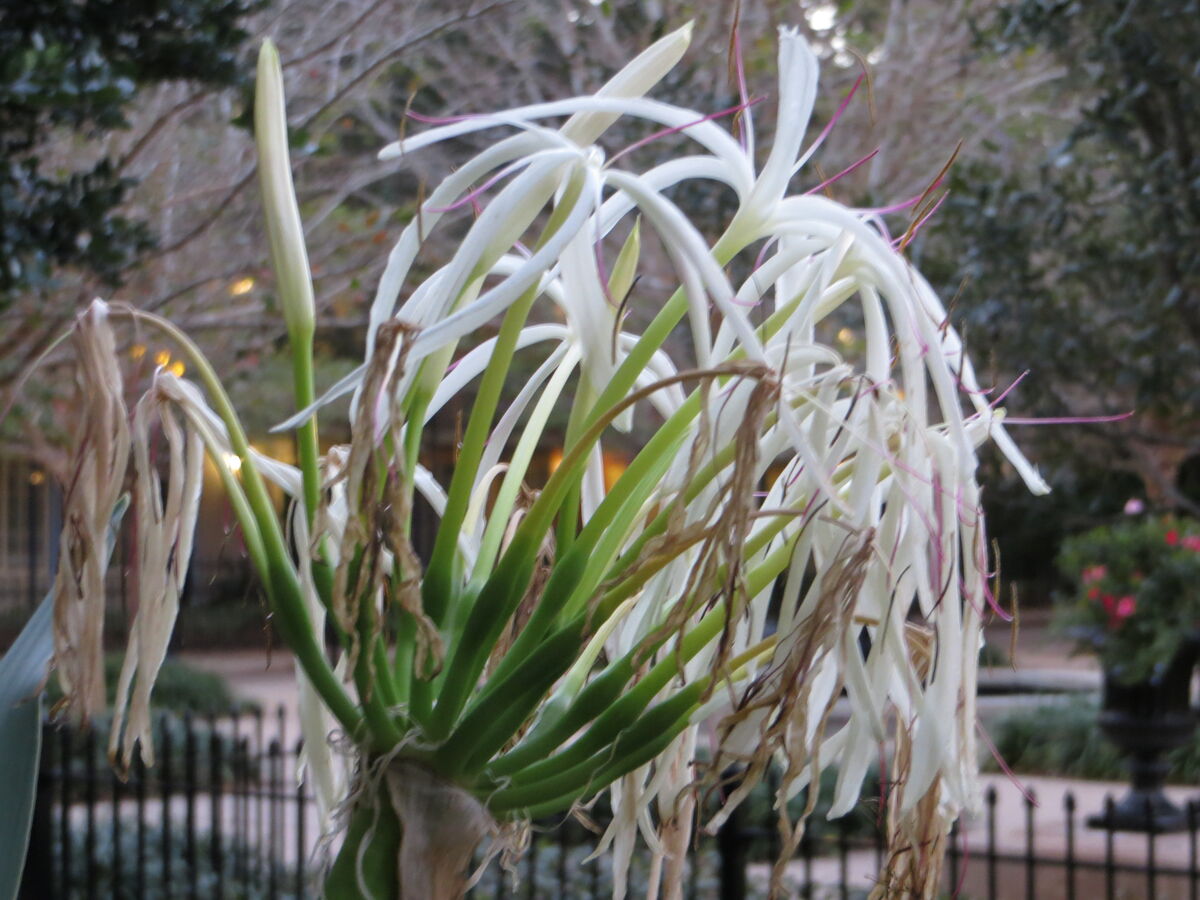
Here are a couple more that I created last night from the instructions above. First the original, then the abstract.
Learn, play, have fun!
Pretty much tore this room apart looking for those instructions. NADA!
Did find and organized a lot of other things.
Then the allergies / sinuses set in, to slow things down. Nothing like a head cold in August.
Finally contacted a friend to see if they had a copy. They texted me their re-written version. Humm. Better Test it first. Several tires and re-writes later, I have two versions, one for Adobe PhotoShop and one for Corel PaintShop Pro.
I work in Corel PaintShop Pro, so I'm not absolutely sure the PhotoShop instructions are correct, but it will get you close. I worked out the bugs in the Corel version and it will get you a good image.
I tried untold times last night to download the instructions, but had no success. So, these are typed directly in.
Creating a Circular Abstract in Adobe PhotoShop
1. Open Adobe PhotoShop.
2. Open the file containing the photo you wish to work on. Click on the image to highlight it, click "OPEN".
3. Chose; Filter, Distort, Polar Coordinates.
4. In the box, click on "Polar to Rectangular", go with "Right", and click "OK".
5. Chose; Image, Rotation, and 180 degrees, click "OK".
6. Chose; Filter, Distort, Polar Coordinates.
7. In the box, click on "Rectangular to Polar", go with "Right", and click "OK".
8. Chose; Image, Rotation, and 180 degrees, click "OK".
9. Chose; Image, Canvas Size, Enter the larger number into the smaller number box to create a square image. The Aspect Ratio should be 1 to 1.
This should create a somewhat round, circular, or oval abstract.
From this point on, I'm not sure of these instructions, because I work in Corel's PaintShop Pro. And the language is pretty much that of my friend.
10. Chose; Magnifier, Filter Frame (on the top Menu). This will make the canvas square by adding a Rectangular Marquis around the image. Edit, Transform, Scale, and pull up and down in the middle of your picture to make it square inside your new Canvas Box. You may need to hold down the SHIFT key to keep the square dimensions as you pull up and down on the picture. Then with the Rectangular Marquis active, select Transform, Perspective.
11. Shift / Left / Click the right side to drag from bottom to top of image.
12. Do the same for the left side. this will switch the bottom to the top on the bottom side.
13. Left click the checkmark to accept the Transform Change.
14. Chose "Select", then "Deslect", then "SAVE" or "SAVE AS".
Creating A Circular Abstract in Corel PaintShop Pro
1. Open Corel PaintShop Pro.
2. Open the file containing the photo you wish to work on. Click on the image to highlight it, then click on "OPEN".
3. Chose: Effects, Distortion Effects, Polar Coordinates.
4. In the box, click on "Polar to Rectangular", and click "OK".
5. Chose; Image, Free Rotation, go with "Right", and click "OK".
6. Chose; Effects, Distortion Effects, Polar Coordinates.
7. In the box, click on "Rectangular to Polar", and click "OK".
8. Chose; Image, Free Rotation, go with "Right", and click "OK".
9. Chose; Image, Canvas Size, Enter the larger number into the smaller number box to create a square image. The Aspect Ratio should be, or will change to, 1 to 1. This should create node points on each corner of the image as well as nodes in the middle of each side, connected by a dotted line around the image and one node point in the middle. (Rectangular Marquis)
10. Use the node points to adjust the image to the size of the canvas, which should be square. Of course, if you like the oval shape, there is nothing wrong with that.
11. You can adjust the size of the canvas, or image, add a background (like cutting a matt), and add a frame of your choice.
Please note, the differences in lines 4 and 7 of each set of instructions. Keeping them in order the first few times will help achieve the circular effect. After you have created a few abstracts, play with the order of lines 4 and 7, change Right to Left, change 180 degrees to 90, or 270, or 45, whatever. The first one I ever saw was a sunflower in full bloom with all the pedals pointing inward instead of outward!
Here are a couple more that I created last night from the instructions above. First the original, then the abstract.
Learn, play, have fun!
Aug 31, 2022 12:57:53 #

Aug 31, 2022 15:36:09 #
lmTrying
Loc: WV Northern Panhandle
DWU2 wrote:
Thank you! That was a lot of work for you!
I needed a set of instructions for myself. So it's all good. Enjoy.
Sep 1, 2022 10:28:01 #

You know, I actually did that years ago when I first got Photoshop. It was simply a grab and drag activity that worked. Now that I have newer and better PS programs, I can't do that anymore. Curious.
Sep 1, 2022 18:56:12 #
lmTrying
Loc: WV Northern Panhandle
AzPicLady wrote:
You know, I actually did that years ago when I first got Photoshop. It was simply a grab and drag activity that worked. Now that I have newer and better PS programs, I can't do that anymore. Curious.
I had to play with it the other day. First several attempts were miserable failures. Not sure why, and didn't save them. (Some day I'm gonna learn not to do that.) I do know that if you reverse steps 4 and 7 you will get two big loops meeting on the center. You will also notice that the instructions for Corel are shorter, because I quit when I liked what I saw. That's why I said play with it. Change order, change angles, move nodes. Don't take it too seriously.
Sep 4, 2022 13:43:40 #

Sep 4, 2022 14:38:52 #
lmTrying
Loc: WV Northern Panhandle
topcat wrote:
Neat! I'll have to try that. And pass it on to my club members.
If you want to reply, then register here. Registration is free and your account is created instantly, so you can post right away.