Check out Landscape Photography section of our forum.
How to use Alpha Channels to create masks
Oct 6, 2019 19:35:57 #
Steve DeMott
Loc: St. Louis, Missouri (Oakville area)
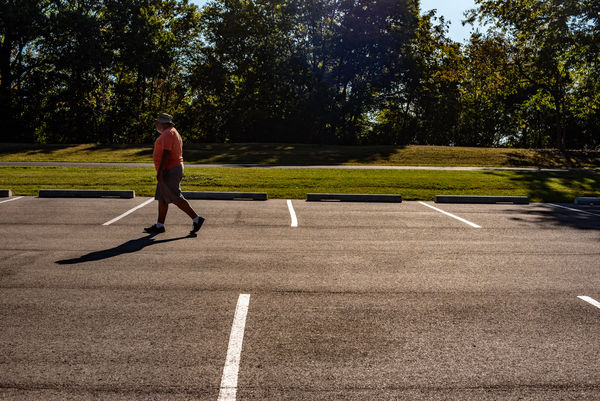
Items Needed - tripod, camera, and remote shutter(best option) or friend. Take some test shots to find exposure & composition. I was using 50mm lens @ f/8, 1/1000 & ISO 200. I took about 20 shots
Try to have the exposure as close as possible. Lightroom to the rescue.
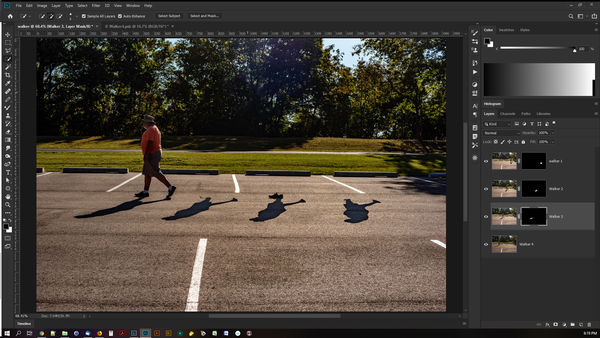
Load all photos into photoshop, Stack photos on 4 different layers.
Here's how to do it manually. Lightroom will do it automatically.
a. Select marquee tool
b. Right click on 1st image and select "duplicate layer" from drop-down
c. In the "duplicate layer" window click on the document pull-down arrow and select "new". Name it "walker" and press OK.
d. Repeat for the next 3 images except in the "duplicate layer" window click on the document pull-down arrow and select "walker"
This will place all 4 images in a stack called "walker"
Once all photo are in 1 file - Align layers
Layers are in order from top to bottom walker 1,2,3 & 4.
Select layer 1 hold down the shift key and select layer 4. all layers should be highlighted.
Select Edit > Auto-Align- Layers.
If you haven't saved, Now would be a good time.
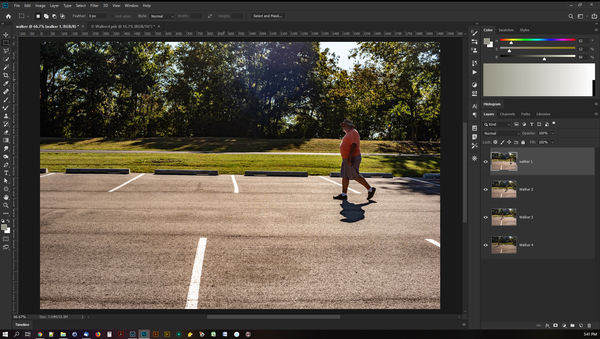
You should have a file similar to exhibit 1.
Selection using channels
Select layer 1 or Walker 1 then select the channels tab, "windows > channels".
Your looking for the channel that will give the best contrast of the shadow.
Select the Red or Blue or Green channel. I found the Red channel works best.
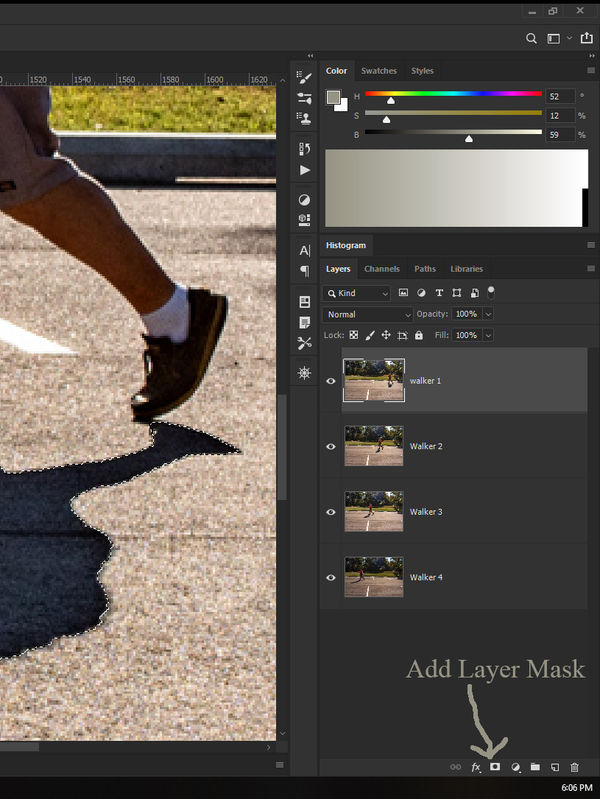
Zoom in if needed. Select the "Quick Selection tool (w)" and select the shadow area. This should highlight the entire Shadow.
Using the "Quick Selection Tool"
The "[" will decrease the size the the selection area and the "]" will increase the selection area.
The alt key will help eliminate part of the selection not needed. We can fine tune the selection later.
You should have a marquee around the shadow. Selecting the RGB layer should highlight all the layers. Now select the layers tap. "windows > layers". Your shadow should still be marqueed.
Select the "add Layer Mask" button to create a mask. Exhibit 2
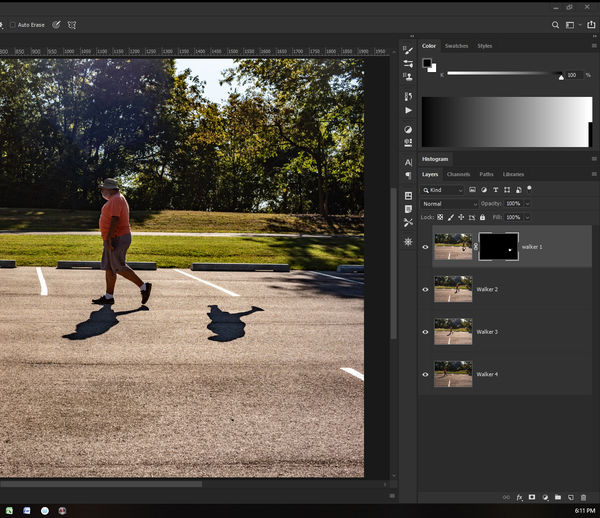
See exhibit 3. Don't forget to save
Repeat the selection channel process for the next 2 layers
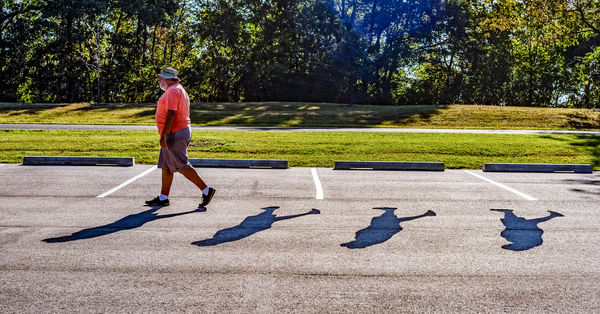
Exhibit 4 is the final image. This should give a rough idea how to create layer masks using channels. All we need to do now is tweek the layer masks to add or hide parts. Notice I lost my shoe.
Try to have the exposure as close as possible. Lightroom to the rescue.
Load all photos into photoshop, Stack photos on 4 different layers.
Here's how to do it manually. Lightroom will do it automatically.
a. Select marquee tool
b. Right click on 1st image and select "duplicate layer" from drop-down
c. In the "duplicate layer" window click on the document pull-down arrow and select "new". Name it "walker" and press OK.
d. Repeat for the next 3 images except in the "duplicate layer" window click on the document pull-down arrow and select "walker"
This will place all 4 images in a stack called "walker"
Once all photo are in 1 file - Align layers
Layers are in order from top to bottom walker 1,2,3 & 4.
Select layer 1 hold down the shift key and select layer 4. all layers should be highlighted.
Select Edit > Auto-Align- Layers.
If you haven't saved, Now would be a good time.
You should have a file similar to exhibit 1.
Selection using channels
Select layer 1 or Walker 1 then select the channels tab, "windows > channels".
Your looking for the channel that will give the best contrast of the shadow.
Select the Red or Blue or Green channel. I found the Red channel works best.
Zoom in if needed. Select the "Quick Selection tool (w)" and select the shadow area. This should highlight the entire Shadow.
Using the "Quick Selection Tool"
The "[" will decrease the size the the selection area and the "]" will increase the selection area.
The alt key will help eliminate part of the selection not needed. We can fine tune the selection later.
You should have a marquee around the shadow. Selecting the RGB layer should highlight all the layers. Now select the layers tap. "windows > layers". Your shadow should still be marqueed.
Select the "add Layer Mask" button to create a mask. Exhibit 2
See exhibit 3. Don't forget to save
Repeat the selection channel process for the next 2 layers
Exhibit 4 is the final image. This should give a rough idea how to create layer masks using channels. All we need to do now is tweek the layer masks to add or hide parts. Notice I lost my shoe.
Final photo
(Download)
walker 1
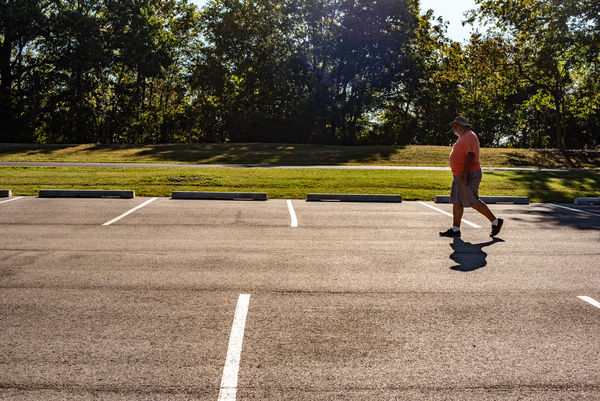
(Download)
walker 2
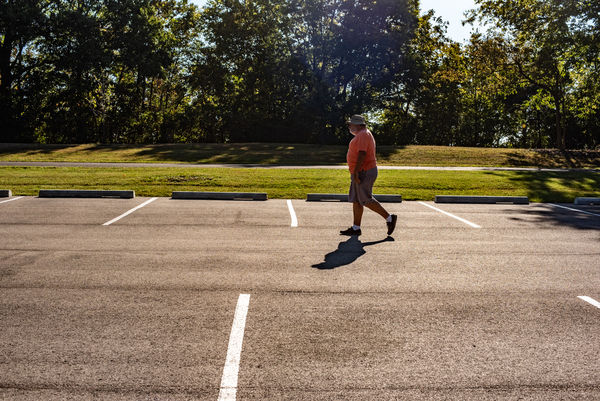
(Download)
walker 3
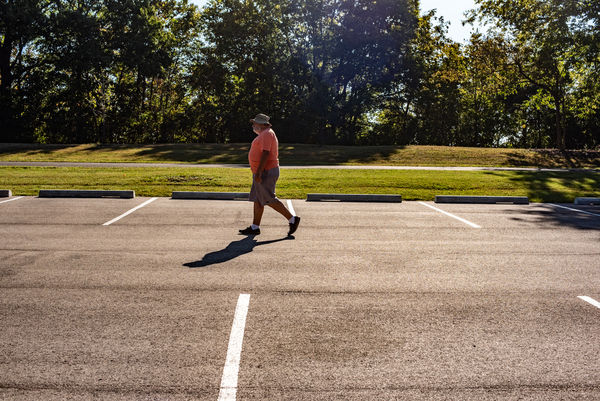
(Download)
walker 4
(Download)
exhibit 1
(Download)
exhibit 2
(Download)
exhibit 3
(Download)
exhibit 4
(Download)
Oct 7, 2019 08:12:10 #
berchman
Loc: South Central PA
steve DeMott wrote:
Exhibit 4 is the final image. This should give a rough idea how to create layer masks using channels. All we need to do now is tweek the layer masks to add or hide parts. Notice I lost my shoe.
Exhibit 4 is the final image. This should give a rough idea how to create layer masks using channels. All we need to do now is tweek the layer masks to add or hide parts. Notice I lost my shoe.
I don't understand the *reason* why one would do this. Is it simply to produce the picture in exhibit 4?
Oct 7, 2019 08:42:14 #
berchman wrote:
I don't understand the *reason* why one would do this. Is it simply to produce the picture in exhibit 4?
This procedure can be used for all sorts of image manipulations. Use your imagination!
Check out Professional and Advanced Portraiture section of our forum.
Oct 7, 2019 12:48:32 #
Steve DeMott
Loc: St. Louis, Missouri (Oakville area)
berchman wrote:
I don't understand the *reason* why one would do this. Is it simply to produce the picture in exhibit 4?
Thanks for stopping by and leaving a comment.
I posted a photo in another section that used this technique and they ask how I did it.
I find this (sometimes) easier to create masks then just using the magic wand.
I posted this in that section and it was moved here. As rook2c4 mentioned this is a process that can be used to create masks.
Oct 10, 2019 16:37:06 #
lmTrying
Loc: WV Northern Panhandle
berchman wrote:
I don't understand the *reason* why one would do this. Is it simply to produce the picture in exhibit 4?
Reason? There don't need to be a *reason*! It's just neater than crap. It's fun. It's funny. It's interesting. I like it. Shows real imagination on the OP's part. I hope he does more. Lots more!
Oct 10, 2019 18:38:28 #
Steve DeMott
Loc: St. Louis, Missouri (Oakville area)
lmTrying wrote:
Reason? There don't need to be a *reason*! It's just neater than crap. It's fun. It's funny. It's interesting. I like it. Shows real imagination on the OP's part. I hope he does more. Lots more!
Thank you. It was really a lot of fun creating that photo
Oct 10, 2019 22:14:20 #
lmTrying
Loc: WV Northern Panhandle
steve DeMott wrote:
Thank you. It was really a lot of fun creating that photo
You're welcome.
If you want to reply, then register here. Registration is free and your account is created instantly, so you can post right away.
Check out Commercial and Industrial Photography section of our forum.