Panorama advice
Jul 26, 2012 01:56:01 #
glojo
Loc: South Devon, England
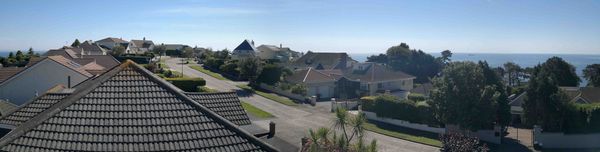
A friend took seven images to obtain a 360 degree view from the top of our house. Unfortunately there was not enough overlap to stitch all the images together.
I have tried the latest Microsoft link as supplied by a very kind forum member and have also tried Photoshop CS5 all without success. The best I can achieve is three images but I then start getting 'curvature'.
I'm not sure if I can get another set of images so what options do I have? How do we overcome curvature?
Is this letterbox type effect acceptable and if not how do you overcome it. Reading posts, am I better off attempting to get portrait images and if so it might take about 20 shots.
Is there any need for raw files, or will fine JPEG suffice (I've only ever shot in raw format)
If I cannot get any more images has ANY ONE got any ideas as to how I can manually stitch the images together?
The attached picture contains just two of the 7 images. :(
Jul 27, 2012 06:48:36 #
photocat
Loc: Atlanta, Ga
There is nothing that can stitch images together if there isn't enough over lapping.
Curvature, is a parallex issue which is very common with panos. You need a tripod head that has been calibrated to the lens in use to keep the nodal point of the lens in the center (think a starting price of $500)
I tend to recommend portrait mode and a mid range focal length to help element curvature. Remember at some point the view is closer to the middle of the lens than other points.
Jul 27, 2012 06:49:46 #
photocat
Loc: Atlanta, Ga
photocat wrote:
There is nothing that can stitch images together if there isn't enough over lapping.
Curvature, is a parallex issue which is very common with panos. You need a tripod head that has been calibrated to the lens in use to keep the nodal point of the lens in the center (think a starting price of $500)
I tend to recommend portrait mode and a mid range focal length to help element curvature. Remember at some point the view is closer to the middle of the lens than other points.
Curvature, is a parallex issue which is very common with panos. You need a tripod head that has been calibrated to the lens in use to keep the nodal point of the lens in the center (think a starting price of $500)
I tend to recommend portrait mode and a mid range focal length to help element curvature. Remember at some point the view is closer to the middle of the lens than other points.
There are quite a few stitching programs that can handle 50 exposures or more.
You might try out Serif"s Panorama Plus, or Auto stitch .
Jul 27, 2012 07:00:11 #
Be sure to use portrait mode other wise you may end up with a photo that is like 270 inches long and 4 inches high. Besides portrait mode, you can shoot two or tree rows and stitch them all together ( sort of like the 1/3s grid we always talk about, for placing your main subject. in other words, shoot one row all the way around, then lower the lens, and shoot a second row of photos lower all the way around.
The big KEY is- you have to overlap 20-25% or the programs cannot stitch it- period!!
The big KEY is- you have to overlap 20-25% or the programs cannot stitch it- period!!
Jul 27, 2012 08:55:21 #
glojo
Loc: South Devon, England
steinr98 wrote:
Be sure to use portrait mode other wise you may en... (show quote)
Thanks photocat and unfortunately every piece of software I tried failed to merge the seperate files together. NOT the fault of the software but the person who went up high to take the pictures thought it was correct to just let each image touch... The result was there was not enough information to stitch each picture to the next one.
As per stein98's suggestion and we had already got 'the man' to retake the pictures... and yes eighteen raw files and a few of at least seventy miles.. The Western Approaches going beyond Berry Head and in the other direction, looking up the English Channel past Portland Bill. What a view. I might spend some time fine tuning the images but this file must be HUGE!
Thanks for the advice
John
Jul 27, 2012 08:56:09 #
IanC
Loc: Northumberland UK
In days gone by I aways put my panoramas together manually in photoshop.
You are better getting all the images down to a manageable size, if landscape, say 400x600px.
If you have 10 images then the new document should be 4000x600px.
1. Now simply drag images 1 & 2 into the document.
2. Drop the opacity of the second image and line them up perfectly to where the they should meet.
3. Continue until you have all images in the document perfectly lined up.
4. Flatten the image, and if you have content aware in CS5/CS6 then simply run the content aware tool brush down the joins.
If you do not have P?S CS5/6, you will need to gently erase away portions of the second image with the eraser brush set to about 30% opacity, or whatever does the best job for you.
It does take time, but I have had some fantastic results this way.
Cheers
Jul 27, 2012 09:07:45 #

1. I don't see the purpose behind shooting "portrait" when all you get is more featureless blue sky. If you are shooting interiors fine, but otherwise ? ? ?
2. Finished pano's are rarely printed (where do you find photopaper 4" by 20", for example), and if shown digitally or emailed, high resolution is not required. RAW will add to your file size and more than likely your images will have to be converted to JPEG before processing anyway. Shoot JPEG
3. Pano heads for your tripod start at $150, but you get what you pay for. I made one from a laser level tripod and it works just fine.
Jul 27, 2012 09:58:06 #

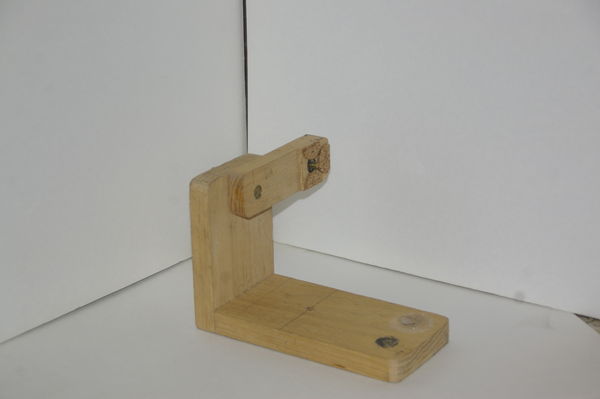
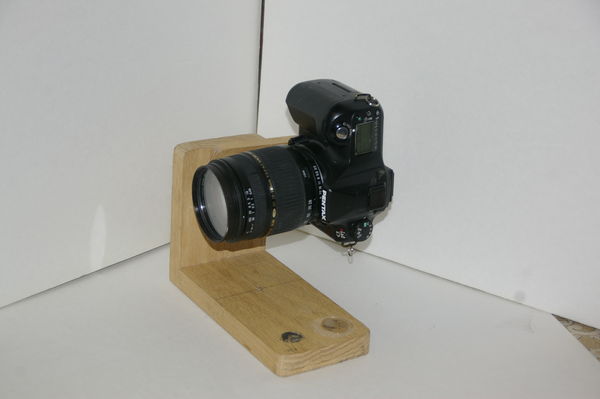
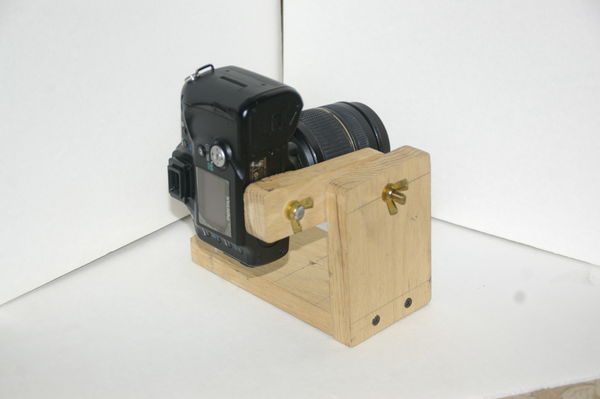
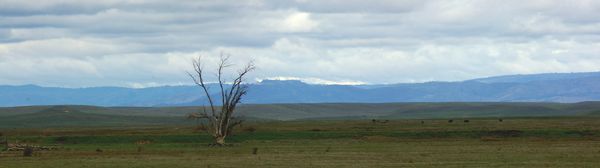
Here is a pano head that I made out of oak. The arm on this one is set up for an 18-200mm T.F. Worked on a 28-300, as the nodle was the same. Shoot in "Landscape" . With the camera on it's side, you can get a large enough set of photos to work with. Overlap 15-25% to insure good stitching. This pano was made with Roxio 2011 Creator.


Dead Wood in Winter
Jul 27, 2012 10:10:42 #
glojo
Loc: South Devon, England
IanC wrote:
In days gone by I aways put my panoramas together ... (show quote)
:thumbup: :thumbup: Where were you when you wuzz needed :lol: Thank you very much for that. :thumbup:
Jul 27, 2012 10:14:23 #
glojo
Loc: South Devon, England
wteffey wrote:
1. I don't see the purpose behind shooting "... (show quote)
All I can say is you must be doing something wrong as I have just sent a VERY, very compressed file of my panorama to a very good friend who was amazed at what has been achieved although to me it is a first attempt and there is lots wrong with it.
Portrait is DEFINITELY the way to go even though there was 17 raw files each 25mb in size
Jul 27, 2012 10:23:10 #
photocat
Loc: Atlanta, Ga
wteffey wrote:
1. I don't see the purpose behind shooting "... (show quote)
1. less parellex issues
2. print them out all the time, and if you want something for the wall it has to be very sharp
3. and you do get what you pay for
Jul 27, 2012 10:53:51 #
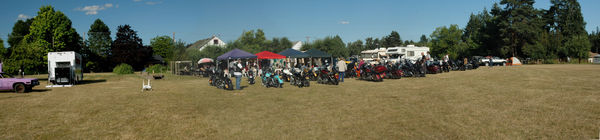
The Serif PhotoPlus series of software works great. You don't HAVE to align anything generally, but it gives you the option after it has done its behind the scene work at stitching, for fine tuning IF needed. (Serif software is reasonably priced in my opinion) Hugin is a freeware product that has all kinds of manual alignment techniques, BUT I found that my computer just isn't quite good enough to crunch all that is required from the program and had problems with the image AFTER I had spent a fair amount of time doing the manual alignment techniques.
Made from 7 shots, all handheld, in Serif PhotoPlus
Jul 27, 2012 11:22:09 #

Jul 27, 2012 12:16:54 #
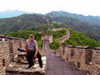
I have made MANY panorama shots with handheld but... one important thing to remember whether hand held or with a tripod... you want the pivot point to be under the lens. For example if you are standing in one spot and take a photo and turn your shoulders for the next one you are turning the whole camera angle so pivot the camera in your hands instead. Yes a tripod is much superior. This was done handheld and overlap is a must.


Jul 27, 2012 13:07:53 #
glojo
Loc: South Devon, England
CocoaRoger wrote:
I have made MANY panorama shots with handheld but... one important thing to remember whether hand held or with a tripod... you want the pivot point to be under the lens. For example if you are standing in one spot and take a photo and turn your shoulders for the next one you are turning the whole camera angle so pivot the camera in your hands instead. Yes a tripod is much superior. This was done handheld and overlap is a must.
They are far, far to small to make anything of?? :(
If you want to reply, then register here. Registration is free and your account is created instantly, so you can post right away.