Real estate shoot..
Apr 27, 2018 13:25:08 #

suntouched wrote:
There is a site called Photography for Real Estate... (show quote)
Thank you suntouched
Apr 27, 2018 13:31:06 #
rmalarz wrote:
Lee, I'm not sure I'm of the opinion that HDR woul... (show quote)
Thank you Bob.... I will use spot metering and expose to the window... I might also just as backup, use bracketing or HDR..what do you think?
Apr 27, 2018 17:17:41 #
pauldh
Loc: Melbourne, Australia
I watched a photographer take photos of my home which was sold a few years ago. He happened to be an Interior Designer too. He did all of his photography on a tripod with the camera about 2 feet above the floor using a Canon APS-C camera with a wide lens, looking at the photographs it could have been about a 16mm lens. All the photos were taken from a corner of each of the areas. Lighting in our home was predominantly incandescent downlights which he had on. The photographs were taken at about 4pm (AEST) in August, the day was quite clear with a low Sun and a few clouds about. The house had a Northerly aspect and was in suburban Melbourne. He took the outdoor photos in twilight with all the exterior lighting on without a flash.
Our home was uncluttered and quite elegantly furnished and with an open design but a typical single level three (master size) bedroom home with a large rumpus, formal dining and lounge and living area and a well presented landscaped garden. He moved a few vases and other ornaments around to his taste while taking the photographs.
Overall the result was excellent and contributed to a very good result with over 140+ people viewing the property over the three weekend open days.
Hope this helps!
Apr 27, 2018 21:02:09 #

I do quite a bit of interior work- some high end real estate, architectural. portfolio shots for interior decorators and furniture manufacturers and retailers.
Sometimes, I need to bring in a ton of lighting but here's the surprising part. In high end homes, ofenties the light is an intrinsic part of the design. Oftentimes the natural lighting in each room is far more effective and flattering to the place than a very complex setup. I fine that a simple formula works well: If the room is primarily lighted with incandescent sources such as track lighting, table/floor lamps, spotlights or "eyeballs" in the ceiling, recessed lighting ect, I simply expose and white balance for that existing light and fill in very gently with a quartz or others high output incandescent or tungsten light sources either bounced of a far wall or ceiling or a large white umbrella. Sometimes I may replace the bulbs in table and floor lamps with 250 Watt Photofloods.
If the room is mainly light with natural daylight, I do the same procedure except I fill in with flash, or old fashioned blue photofloods. I can also replace the bulbs in table and floor lamps with 250 Watt Blue Photofloods. I hope they still make those regular and blue Photofloods- I have a few cases of them just for interior work. The are cheap and deliver 3200K light when the are fresh. For tungsten bounce fill, I use 3200K 500 and 1000 watt quartz lights.
Additional matching light sources can also be placed in other or adjoining room so the don't go dark if the can be seen from the camera position or allow the light to filter through french doors to create interesting shadows on the floor.
As for window blowout- If the landscape is nice, expose for the out of doors lighting and fill with flash or blue floods. HDR is sometimes effective. On occasion, I just make two separate shots and merge them in post processing.
Moderate wide angle focal length are quite acceptable. If you don't have a PC lens, just keep the camera level and crop excessive ceiling or floor in post. Shoot all-over room settings and details as well. If there are archways or interesting doorways, use them for foreground framing.
Show features such as hardwood or inlaid flooring, interesting woodwork, stairway or banastres, interesting lines, decorative or leaded glass windows, fireplaces, exterior landscaping and a few impressive exteriors. Exterior shots at the "magic hour" with the interior lights on can be very attractive.
Minor perspective issue can be corrected in post.
Pack a polarizing filter for dramatic skies and rich foliage or to help with bad reflection on some shots that may become problematic.
Apr 27, 2018 22:03:06 #

I just did my first real estate shoot a week ago. I went to photographyforrealestate.net And downloaded an e-book for $20 that gives a quick lesson on how to do things And also how to approach the business of real estate photography.
You are supposed to put your camera on the tripod and either use a shutter release or three second timer on your camera. Shoot about 2 to 3 feet off the ground except in the kitchen where you want to be slightly above the countertops. The reason for this is if you shoot at 5 feet off the floor then the tendency is to want to point the camera downward which causes the verticals to Keystone. So if youre lower to the floor then you get more of the room without having to tilt the camera down. You want the camera to be level. Shoot in live view and put a grid Over the screen so that you can see the verticals are straight. this is possible in Canon cameras I don’t know about Nikon. Another way is to get a bubble leveler that slides into your hot shoe. I have both.
What I did was shoot a nine bracket shot, in other words nine shots one stop apart from dark enough to have the windows exposed properly only all the way up to overexposed several shots. Leave your aperture at 5.6 and change the shutter speed three clicks for each stop.
Practiced on my own house first. I found out it took 13 minutes for 19 frame shot to process.
As the e-book recommended I got a open source program called LRenfuse Which is a plug-in for light room. If you pay $10 or however much you feel like you can afford you can get a registration code to unlock the software out of the trial version. This is a type of HDR or stacking that doesn’t result in colors that are radioactive
Read the e-book about tips and tricks for shooting your first job. And go for it it’s not that hard.
I have a 17 to 40 lens that I used to shoot I usually use it on 17 mm. I shot in the morning but evening is good to especially if you want to get a twilight shot just before or after sunset. Message me if you want to know any more information and I will even speak to you on the phone. Is a lot more information I can share with you then here on the forum.
Apr 27, 2018 22:12:39 #
canon Lee wrote:
To those that have experience in real estate photo... (show quote)
Hire a photographer.
Apr 27, 2018 22:29:29 #

Lee, as they say, a picture is worth a thousand words. Here's one I did a while back. The intent was to showcase the lighting as the person contracting me was an interior designer whose main focus was lighting. Note the outdoors is not blown out, though shot prior to being close to sunset. This is just one of many of the interior of the house, but all featured the lighting and no blown outdoor highlights. Enhancement, such as HDR, was not allowed by contract. The lighting had to appear as close to real as possible. The contractor was quite pleased with the result.
--Bob
--Bob
canon Lee wrote:
Thank you Bob.... I will use spot metering and expose to the window... I might also just as backup, use bracketing or HDR..what do you think?

Apr 28, 2018 04:28:16 #

fotoman150 wrote:
I just did my first real estate shoot a week ago. ... (show quote)
The current Lightroom offers HDR merging, so LR Enfuse is mostly irrelevant. I used to use it before it was added to Lightroom, and it did provide the most natural look among all the HDR programs, which it was why it was so popular among RE shooters.
Apr 28, 2018 08:09:02 #
canon Lee wrote:
To those that have experience in real estate photo... (show quote)
Lee, rather than resorting to HDR, try two exposure blending using apply image or autoblend in Photoshop
https://www.youtube.com/watch?v=T6M0vNhyw8I
https://www.youtube.com/watch?v=8Bdv4xME3dg
And this image using a composite image applying flash in different areas of the room, using one hand-held flash on a remote trigger
https://www.youtube.com/watch?v=1dBizvRDUL0
https://www.youtube.com/watch?v=1dBizvRDUL0
I found these in my saved links. Thought they might be helpful.
Apr 28, 2018 09:43:39 #
Available light + gentle fill about 1 to 2 stops below ambient lighting - on INTERIORS.
Apr 30, 2018 07:01:27 #
ez22
Loc: The World
I almost never use HDR for interiors anymore. Sometimes, in an important room I would do it both ways and usually the non-HDR turned out better. Even outside, I often do it both ways and use the non-HDR shot. In small rooms I use one flash directed at a corner wall/ceiling joint. I can usually nail the shot at 100 ISO with a few bracketed shots, but sometimes I use 800 ISO on a huge difficult room.
I use a Canon 6D and sometimes my 5D MK IV when I want an interesting closeup of something remarkable. The 6D usually has my 16-35 lens on it for everything.
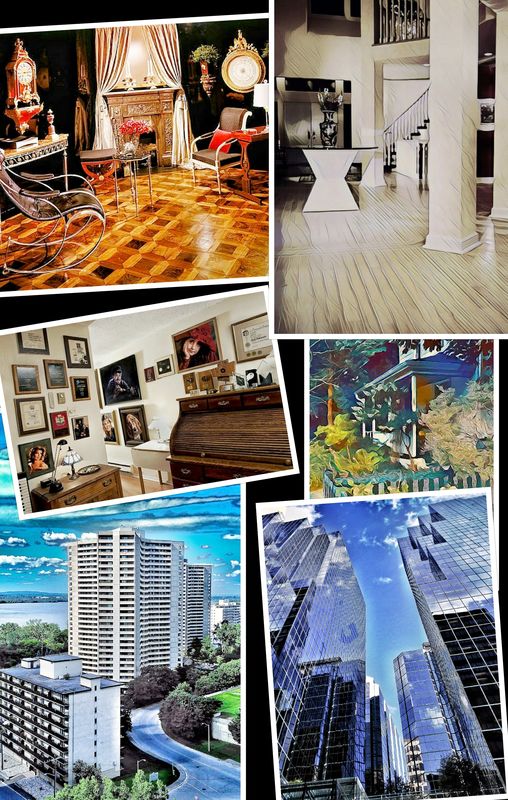
I wouldn't let an expensive house intimidate you. Rooms are rooms, exteriors are exteriors. They're all handled pretty much the same way. My RE gallery enclosed here. https://www.ellenzaslawphotography.com/portfolio/G0000w8BozsWFkBs
Best of luck with this.
I use a Canon 6D and sometimes my 5D MK IV when I want an interesting closeup of something remarkable. The 6D usually has my 16-35 lens on it for everything.
I wouldn't let an expensive house intimidate you. Rooms are rooms, exteriors are exteriors. They're all handled pretty much the same way. My RE gallery enclosed here. https://www.ellenzaslawphotography.com/portfolio/G0000w8BozsWFkBs
Best of luck with this.
If you want to reply, then register here. Registration is free and your account is created instantly, so you can post right away.