Pixel Shift with ANY Camera body
Apr 26, 2018 12:19:55 #
Anybody tried this? Interesting and am wondering how it might dovetail with multiple exposure HDR or if it means it might actually take the place of it....? Looks like I have some experimenting to do.
https://www.dpreview.com/articles/0727694641/here-s-how-to-pixel-shift-with-any-camera
https://www.dpreview.com/articles/0727694641/here-s-how-to-pixel-shift-with-any-camera
Apr 26, 2018 12:44:00 #
MichaelH
Loc: NorCal via Lansing, MI
mrjcall wrote:
Anybody tried this? Interesting and am wondering how it might dovetail with multiple exposure HDR or if it means it might actually take the place of it....? Looks like I have some experimenting to do.
https://www.dpreview.com/articles/0727694641/here-s-how-to-pixel-shift-with-any-camera
https://www.dpreview.com/articles/0727694641/here-s-how-to-pixel-shift-with-any-camera
This is also the focus of this thread:
http://www.uglyhedgehog.com/t-526067-1.html
And yes, I noticed the pun.
I did a quick test of the method described in the web page:
1) Bring all images into Photoshop as layers in a document. (Use only sharp images or you will end up with a blurry image in the end.)
2) Resize the image to 200% width and 200% height using 'Nearest Neighbor' (Highlight/choose/select the layers in your document and with them all selected go to Image::Image Size... and set "Document Size:" to 200 percent and check "Resample Image" with "Nearest Neighbor". Resolution should not matter.
3) With the resized layers still selected you will align the layers - Edit::Auto Align Layers...::Use "Auto" radio button choice.
4) Average the layers by setting each layer's opacity to 1/layer number (the 1st layer will be 1/1 so 100% opacity, the 2nd layer will be 1/2 so 50% opacity, and the 4th layer will be 1/4 or 25% opacity, and so on). Use "Normal" blend mode.
5) Sharpen the image using a Radius setting of 2, and a suitable Amount setting (we used 200% for the 4 image stack and 300% for the 20 image stack – the more images you stack the more amenable the composite will be to aggressive sharpening) {I merged my layers at this point before sharpening as the Photoshop document DID get very large.}
6) Now resize the final output by 50% width and height (try Bicubic resampling for this step). Again this is Image::Image Size... and choose 50% and Resample using Bicubic.
Your image is now the size it was when you started. You will notice a decrease in Noise in the image but I did not notice much increase in Sharpness. And the difference is more pronounced as increasing levels of Noise are present in the images. I have not tested leaving out any steps in this process so I do not know how each step effects the end result.
Apr 27, 2018 00:36:49 #
MichaelH wrote:
This is also the focus of this thread: br http://w... (show quote)
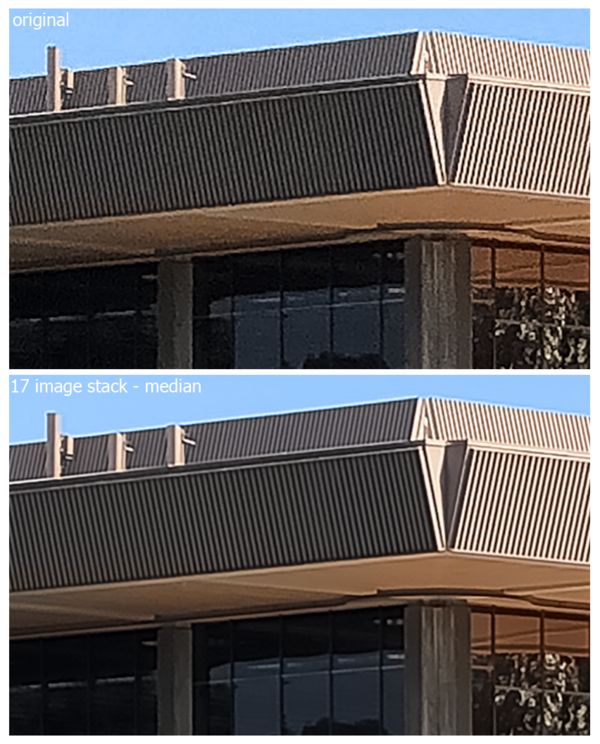
I use this method occasionally with good results. However, rather than using the method in 4, I just create a smart layer of the images. I then take a median of the smart layer stack using Layer>Smart Objects>Stack Mode>Median. It makes step 4 much easier. I haven't done any sharpening, but I would try sharpening before taking the stack median. I also don't reduce the image size back to its original size. You're subject to reduced sharpness due to pixelation.
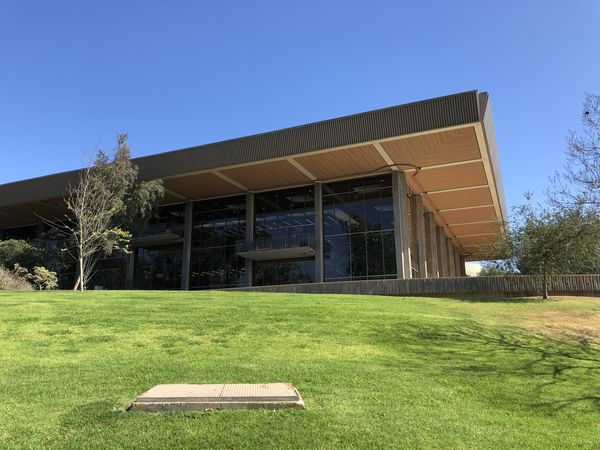
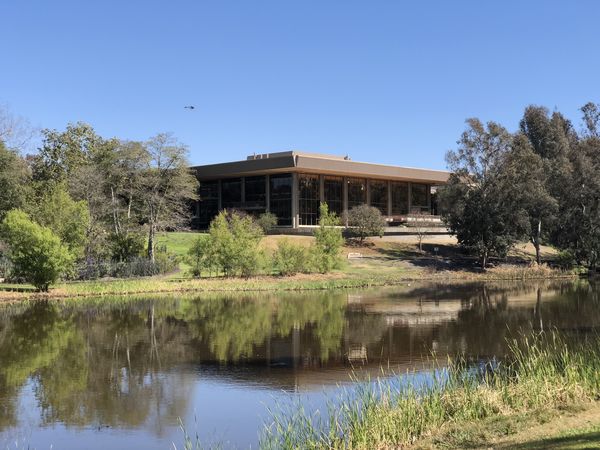
Here's an iphone example using 7 images. In the download, check out the detail in the rafters between the two images.
Mike

Apr 27, 2018 09:02:39 #
RRS
Loc: Not sure
SalvageDiver wrote:
I use this method occasionally with good results. ... (show quote)
Thanks Mike but am I missing something? The original image looks better then the stacked image. I know that you said that you didn't do any sharpening but shouldn't that create a different outcome. Where I see the difference is in the leaves on the tree, true the rafters do look better but after all of this I would hope for an overall better, sharper, image.
Apr 27, 2018 09:25:55 #
StanMac
Loc: Tennessee
The two examples shown tell me the process is a lot of effort for an imperceptible gain, at least at normal viewing distances. Can someone show an example where there is an improvement at a practical level?
Stan
Stan
Apr 27, 2018 09:46:03 #
RRS wrote:
Thanks Mike but am I missing something? The original image looks better then the stacked image. I know that you said that you didn't do any sharpening but shouldn't that create a different outcome. Where I see the difference is in the leaves on the tree, true the rafters do look better but after all of this I would hope for an overall better, sharper, image.
Hi RSS,
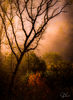
Good Catch. I use this method to improve the resolution of key details, especially in some iPhone images. However the weakness of multiple sampling and this applies to any of the methods employed by any of the camera makers, or any instrumentation, is excessive movement. By assuming a static scene and averaging, movement such as wind will blur that part of the image, just like the blur of an ND filter. In those cases, I just blend in one image to deghtost those areas of excessive movement. In this case it was the trees moving due the the heavy breeze. However, the point of this particular image was the fine detail in the rafters of the building. The resolution in the stacked image is clearly better in the stacked image than the single image as long as I have the sample images labelled correctly. [yep, they're labelled correctly]
As far as sharpening, I admit I haven't tried that, yet. I don't know if sharpening would really do much since it is only creating edge contrast but not improving image resolution. Because sharpening tends to accentuate noise, I would sharpen and then let the averaging process dampen the noise.
This method isn't perfect, i.e. it has its strengths and weaknesses, and is just another tool to use when the specific situation dictates.
.
Apr 27, 2018 09:47:55 #
MichaelH
Loc: NorCal via Lansing, MI
One of the issues (perhaps exemplified in the tree leaves) is that any movement differences in the layers will cause a blurring of the items that were moving.
Apr 27, 2018 12:05:39 #
RRS
Loc: Not sure
SalvageDiver wrote:
Hi RSS, br br Good Catch. I use this method to i... (show quote)
Thanks a lot. I understand what you are doing now.
Apr 29, 2018 22:35:36 #
tjw47
Loc: Michigan
You are not doing "PIXEL SHIFT" since you are not shifting pixels.
You are doing image stacking...
An image stack combines a group of images with a similar frame of reference, but differences of quality or content across the set. Once combined in a stack, you can process the multiple images to produce a composite view that eliminates unwanted content or noise.
You are doing image stacking...
An image stack combines a group of images with a similar frame of reference, but differences of quality or content across the set. Once combined in a stack, you can process the multiple images to produce a composite view that eliminates unwanted content or noise.
Apr 30, 2018 19:19:55 #
tjw47 wrote:
You are not doing "PIXEL SHIFT" since you are not shifting pixels.
You are doing image stacking...
An image stack combines a group of images with a similar frame of reference, but differences of quality or content across the set. Once combined in a stack, you can process the multiple images to produce a composite view that eliminates unwanted content or noise.
You are doing image stacking...
An image stack combines a group of images with a similar frame of reference, but differences of quality or content across the set. Once combined in a stack, you can process the multiple images to produce a composite view that eliminates unwanted content or noise.
Hi tjw47,
I have to respectfully disagree with you. This method is pixel shifting and not simply image stacking. Pixel shifting in-camera is done by shifting the sensor a small amount up and down while taking an image after each movement (the sony a7riii does it slightly differently). Image stacking simply takes a series of images overlaying each image on top of the preceding layer and takes a layer average of each pixel. This reduces noise but does not increase image resolution. It also relies on no movement between images.
This method the OP is referring to achieves pixel shifting by hand holding the camera and taking a rapid succession of images. This method doens't work using a tripod. The hand holding causes small amount of movement in each images. However, this by itself would just cause a blurry image. To achieve the sub-pixel movement, two things are needed; 1) dithering the images, i.e. small amounts of movement, which is equivalent to pixel shifting and 2) the image size needs to be increased. In the practical sense, to reduce the large amounts movement, the auto-align feature in PS is used. But this is an imperfect process which actually makes this method possible. The variations in pixel location after auto aligning the image stack is the mechanism that simulates the smaller in-camera sensor pixel shifting. To get the benefits of the increase resolution, expanding the image size before aligning is a manual step but necessary to realize the higher image resolution. Otherwise your limited by the pixelation of the original image. I've attached a better example showing a before and after iphone differences. I used the iphone because it has the lowest resolution of all my cameras but its applicable to any digital image sensor.
We should note that if the image is being displayed on a monitor or small prints, then improving image resolution isn't of much value however you do it. But, if you want to print a scene taken with your iphone, for example, and print it at 20x30, rather than 8x10, then you need something like this to get a good quality final print for close viewing.
I should also note that these techniques have been in use in other field of imaging, signal processing and electronics for a long time, well in the 80's and 90's. It just taken a lot longer to find its way into the photographic arena.
Mike
May 1, 2018 00:05:47 #
RRS
Loc: Not sure
SalvageDiver wrote:
Hi tjw47, br br I have to respectfully disagree... (show quote)
Mike, I had to read this a few times but it sure does work, nice example, Thanks again...Ron
May 1, 2018 01:58:52 #
RRS wrote:
Mike, I had to read this a few times but it sure does work, nice example, Thanks again...Ron
Your welcome Ron. There's also variations on this basic technique of image stacking to solve problems you might run into while shooting.
One method of just stacking images and averaging removes noise. You could take a night shot without needing your tripod. Set your camera for a good single exposure keeping shutter speed fast enough to ensure a sharp image. It's likely you'll need a very high ISO, probably around 6400 or maybe higher. Hand hold and rapidly capture several images at the high ISO. Each image will likely have an unacceptable amount of noise. Stacking the images and averaging retains the exposure you shot at, but the averaging reduces the noise down to good or excellent results.
A second use is to duplicate the effect of a long exposure using an ND filter. Let's say you see this nice waterfall and you like the soft effects that a long exposure gives. Without an ND filter and tripod, you might think you're out of luck. But you're not. You can use the same process I described above. Hand holding, just set your exposure, keeping shutter speed high enough to ensure a sharp image and take multiple shots. Load each image as a layer in PS, auto-align, convert layers to a smart object and average the stack. The areas of movement, i.e. the water, will be averaged (blurred) and the areas of no movement will remain sharp. This method also allows you to adjust the amount of blurring (analogous to changing exposure time) by changing the number of images in the smart object stack.
I don't use these methods that often, not like exposure bracketing anyway, but they're there when I need them. Once you know how to use them, I find these process faster than setting up a tripod, determining exposure, chimping to confirm exposure and any retakes. It's just another tool to use when the need arises.
Mike
May 1, 2018 05:37:15 #
tjw47
Loc: Michigan
So how do you guarantee with your method that you are obtaining all RGB color data and luminance data from each pixel since your hand holding gives a random shift and not an exact 1 pixel shift ?
May 2, 2018 00:59:36 #
tjw47
Loc: Michigan
I see what you are talking about but you will not get as good as a result as a camera that does Pixel Shift.
First you have to allow the camera to shake to get a shifted image which will blurr the image ( Pixel Shifting cameras usually are mounted on a tripod )
Second you can't control how much of a pixel shift you are getting - it could be anywhere from Zero to 100% of a pixel.
First you have to allow the camera to shake to get a shifted image which will blurr the image ( Pixel Shifting cameras usually are mounted on a tripod )
Second you can't control how much of a pixel shift you are getting - it could be anywhere from Zero to 100% of a pixel.
If you want to reply, then register here. Registration is free and your account is created instantly, so you can post right away.