Is it my equpment
Apr 24, 2018 10:31:27 #
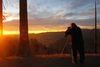
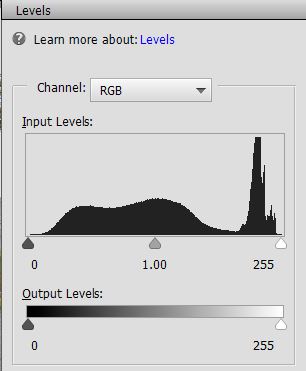
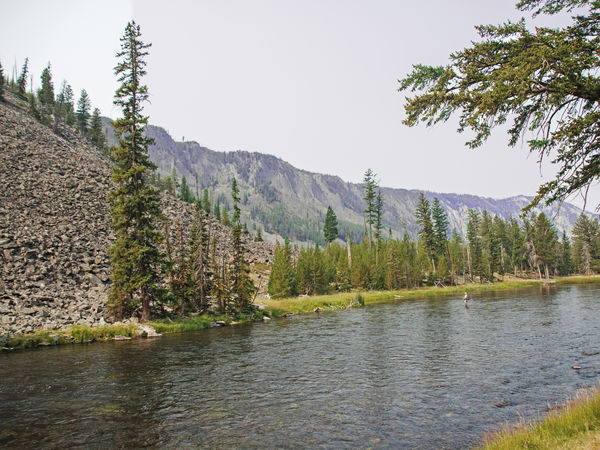
I tweaked your picture by using the Control L level adjust. Histogram shows darkness on one side. I will show detail. It is very wrong to show this fisherman. He would have to be 100 times larger to enjoy. It only looks like a dirt blob now.
May 10, 2018 16:13:43 #
Jun 19, 2018 01:10:59 #
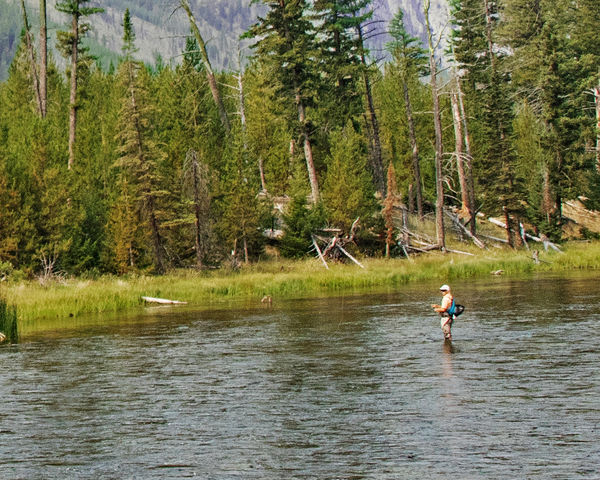
OK... I am going to treat you like one of my students. :-) I always tell them simple is better. ALWAYS! In this shot, there is really too much shown, and my suggestion would be going more toward the 200mm portion of your lens. Frame the man fishing in the bottom third of the image and let the mountains and grass fall where they may. If he is going to be a focal point of your image, be bold about it. Moving in would make him much more obvious and interesting. Details in photos work very well, and you should remember that as well. Simple and well detailed will win each and every time.
Jun 19, 2018 15:00:07 #

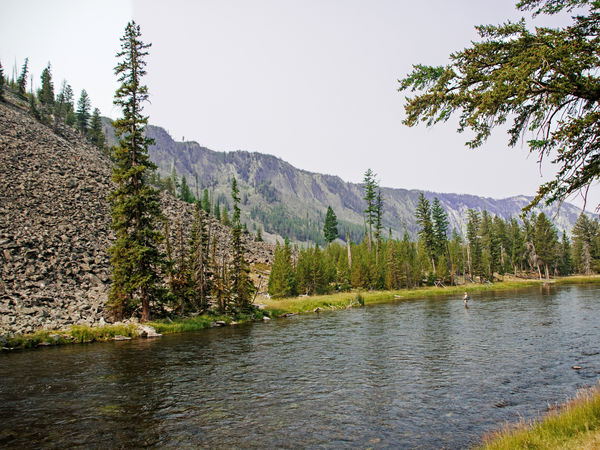
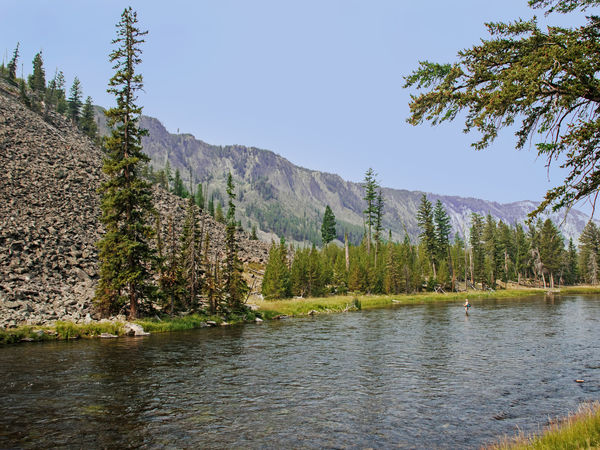
So, working with what you posted I did two actions in DxO Optics Pro 11 Elite (my go to for PP). One click for "Smart Lighting" and the second click for "ClearView" at 70%. There's no substitute for adept PP. Now, reading the EXIF of this shot ISO 400, f/4.5, 1/400th/s, 18mm (24mm equal), here's my take. I recommend Shoot RAW+JPEG (ETTR), Aperture Priority, ISO 100, f/8, with a 2/3 to full stop+/- three shot bracket. Check the histogram is showing some blown highlights on camera's LCD on at least one frame. Adjust and reshoot as necessary. Post process in DxO Optics Pro 11 Elite. As to composition well, work on that, too. I only answered to what I read you ask. All camera/lens combinations have a sweet spot and that was my suggestion above. Remember, the way to Carnegie Hall is PRACTICE, PRACTICE, PRACTICE. There's no substitute for those three things. LOL!!!
Jun 28, 2018 13:27:13 #
amfoto1
Loc: San Jose, Calif. USA
I think a lot of good suggestions have already been given....
First, do you have a "protection" filter on your lens? If so, is it a high quality, multi-coated filter? I ask because there's some loss of sharpness an chromatic aberration in the image that might have been caused or amplified by a filter. Also, did you use a lens hood? The reason I ask is there's some overall veiling flare of the original image, which can be caused by oblique light striking the lens. Veiling flare reduces contrast and desaturates colors, both of which appear to be happening here.
I didn't see what lens, focal length, lens aperture were used... but all lenses have "optimal" apertures which make for their sharpest images. Certain focal lengths and apertures also may make for more or less chromatic aberration and for distortions. You should test your lens to see what's best and make note of it for future reference. That's pretty easily done.... just set up focused on a detailed, flat object like a weathered fence or brick wall and shoot a series of images at different apertures and focal lengths. Then study the images to see which is best (EXIF in the images can tell you what f-stop or focal length was used, but it might be easier to prepare a bunch of 3x5 cards with f-stops and/or focal lengths written on them, to incorporate in each image to be able to immediately identify them).
Chromatic aberration is difficult to avoid when there's a strong contrast such as the dark tree branches against the sky, especially in the corners of images. But there are means of correcting CA in many image editing software programs. Some programs have "lens profiles" built in or that can be added, to automatically make corrections. Or it may be possible to do manually. Some cameras even can help counteract CA when used with particular lenses.
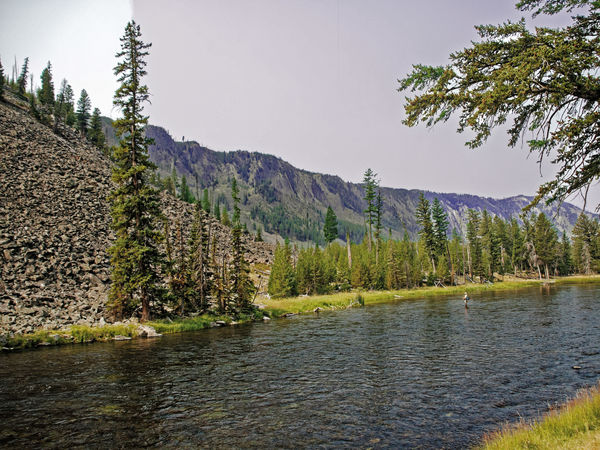
I also took the liberty of making some edits to your image in Photoshop to try to improve it. Below is the original before I made any adjustments, then a copy where I:
1. straightened the image a bit (based on the vertical of the trees throughout the image)
2. boosted contrast & color saturation throughout the image
3. selected the sky and added some blue to it (this was kept quick and simple here. Normally I'd do more work to make it look more realistic or use a sky with clouds from images I have on file).
4. added a little blue to the water because it would reflect the sky
First, do you have a "protection" filter on your lens? If so, is it a high quality, multi-coated filter? I ask because there's some loss of sharpness an chromatic aberration in the image that might have been caused or amplified by a filter. Also, did you use a lens hood? The reason I ask is there's some overall veiling flare of the original image, which can be caused by oblique light striking the lens. Veiling flare reduces contrast and desaturates colors, both of which appear to be happening here.
I didn't see what lens, focal length, lens aperture were used... but all lenses have "optimal" apertures which make for their sharpest images. Certain focal lengths and apertures also may make for more or less chromatic aberration and for distortions. You should test your lens to see what's best and make note of it for future reference. That's pretty easily done.... just set up focused on a detailed, flat object like a weathered fence or brick wall and shoot a series of images at different apertures and focal lengths. Then study the images to see which is best (EXIF in the images can tell you what f-stop or focal length was used, but it might be easier to prepare a bunch of 3x5 cards with f-stops and/or focal lengths written on them, to incorporate in each image to be able to immediately identify them).
Chromatic aberration is difficult to avoid when there's a strong contrast such as the dark tree branches against the sky, especially in the corners of images. But there are means of correcting CA in many image editing software programs. Some programs have "lens profiles" built in or that can be added, to automatically make corrections. Or it may be possible to do manually. Some cameras even can help counteract CA when used with particular lenses.
I also took the liberty of making some edits to your image in Photoshop to try to improve it. Below is the original before I made any adjustments, then a copy where I:
1. straightened the image a bit (based on the vertical of the trees throughout the image)
2. boosted contrast & color saturation throughout the image
3. selected the sky and added some blue to it (this was kept quick and simple here. Normally I'd do more work to make it look more realistic or use a sky with clouds from images I have on file).
4. added a little blue to the water because it would reflect the sky

If you want to reply, then register here. Registration is free and your account is created instantly, so you can post right away.