Check out Infrared Photography section of our forum.
Rica-3
Oct 30, 2017 21:25:55 #


Oct 30, 2017 21:52:15 #
Oct 31, 2017 09:14:52 #

Oct 31, 2017 10:04:28 #
Oct 31, 2017 10:17:49 #
StevenG
Loc: Long Island, NY
wayne-03 wrote:
A few more from yesterday.
Very nice! I like #1 best.
Steve
Nov 1, 2017 01:16:35 #
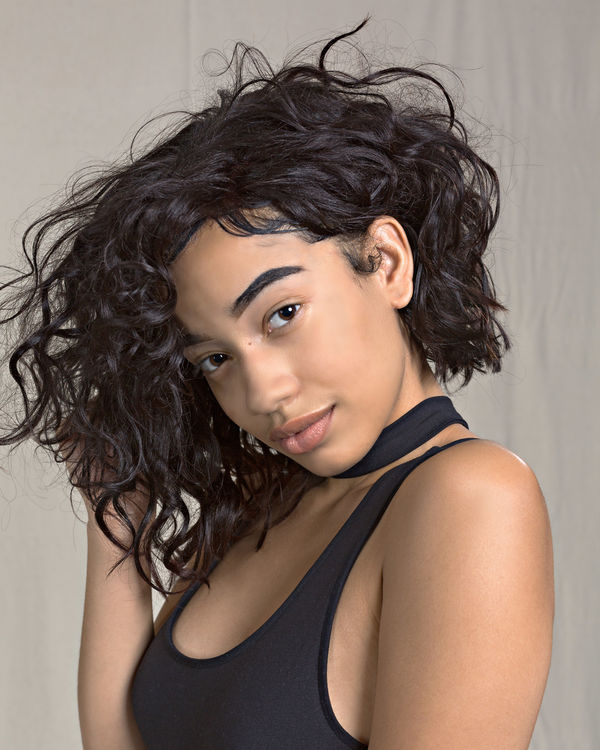
I realize this is a personal taste thing, but shooting directly in to the shoulder for #'s 1, 2, &4 is not the best angle. There is as much real estate on the upper arm as there is on the face and they compete for attention. Especially in 1 and 2 where her face is directly over that bare skin. It is not as noticeable in #3 as it is more of a 3/4 length, her face is not over that shoulder, and the shoulder is not as big a percentage of the image.
When I photograph anyone (men as well) as head and shoulder shots, I have them wear long sleeves - or at least to the elbow. Preferably dark colors like black, navy, brown, gray, etc.
If the dress is the REASON for the photograph, then of course sleeveless is fine since it is the dress that is important. When the face is the star, the bare shoulder has to go.
All just my opinion.
Shoulder issues aside, these are nice,
But the backdrop looks like a wrinkled/creased sheet.
Nov 2, 2017 13:35:57 #
You obviously have some technical savvy, but with too much specular light that's totally blown out cheeks, forehead and nose and cannot be recovered at from these downloaded samples. I hope you have RAW files with enough info to bring them down. If not it's a lighting lesson, huh? In that case it's a reshoot and drop the exposure 1/2-2/3 stop for these high key
Check out Film Photography section of our forum.
Nov 2, 2017 18:13:07 #
papa wrote:
You obviously have some technical savvy, but with too much specular light that's totally blown out cheeks, forehead and nose and cannot be recovered at from these downloaded samples. I hope you have RAW files with enough info to bring them down. If not it's a lighting lesson, huh? In that case it's a reshoot and drop the exposure 1/2-2/3 stop for these high key
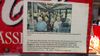
I meant to address those blown highlights. Actually it is a very simple thing to repair that and no need to have th raw file.
In Photoshop, use the Clone Stamp. set opacity to around 30-40% and mode to darken. Then just sample the correct skin near the offending area and paint it in. Sample attached.
Nov 6, 2017 20:54:01 #
CaptainC wrote:
I meant to address those blown highlights. Actually it is a very simple thing to repair that and no need to have th raw file.
In Photoshop, use the Clone Stamp. set opacity to around 30-40% and mode to darken. Then just sample the correct skin near the offending area and paint it in. Sample attached.
In Photoshop, use the Clone Stamp. set opacity to around 30-40% and mode to darken. Then just sample the correct skin near the offending area and paint it in. Sample attached.
I see you've saved a blown shot, but does that improve your lighting? If you were to reshoot this with all your lights set back proportionately, then it wouldn't look so flat in your fixed in PS shot. Of course, if there's no possibility to reshoot, then the fixed image will have to do, huh? By the way, we all need the RAW file just for this any many other uses.
Nov 6, 2017 20:58:17 #
papa wrote:
I see you've saved a blown shot, but does that improve your lighting? If you were to reshoot this with all your lights set back proportionately, then it wouldn't look so flat in your fixed in PS shot. Of course, if there's no possibility to reshoot, then the fixed image will have to do, huh? By the way, we all need the RAW file just for this any many other uses.
If you are addressing me, this is not my image. I was just showing how to address the blown spot on the arm. I agree that shooting raw is better but this particular fix can be done just as easily to a jpg. I was not addressing his lighting - just how to repair a blown highlight.
Nov 9, 2017 14:31:06 #
If you want to reply, then register here. Registration is free and your account is created instantly, so you can post right away.
Check out AI Artistry and Creation section of our forum.