White balance and tinted "filter"
Sep 13, 2017 13:45:06 #

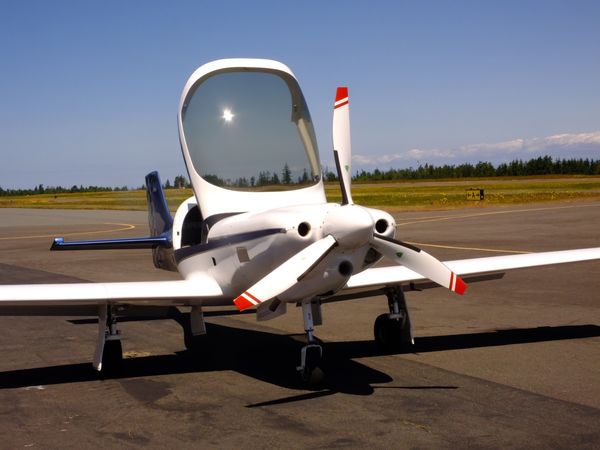
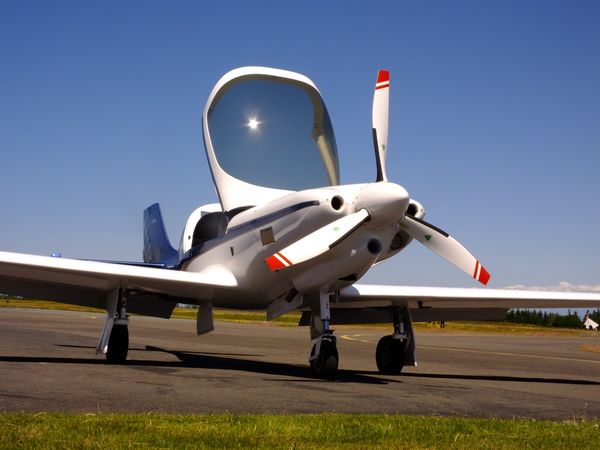
I have nearly 300 photos shot through the canopy shown in the two attached images. Several days were spent fighting with trying to get a weird cast out of the photos before I thought of the canopy and found these photos to verify. If I had thought of it at the start I could have shot a sheet of white paper through it and the camera would have set a custom white balance and all would have been OK. Could-a/Should-a don't count now, however.
Now, my question is, with the information in these two photos is it possible to set a correction factor in PP? These photos are JPG made directly from the RAW with no PP.
I'm using Lightroom and PSE-15.
Cheers, Neil
Now, my question is, with the information in these two photos is it possible to set a correction factor in PP? These photos are JPG made directly from the RAW with no PP.
I'm using Lightroom and PSE-15.
Cheers, Neil
Sep 13, 2017 15:05:53 #
Sep 13, 2017 15:12:20 #

Sep 13, 2017 16:24:16 #

In LR - open one image in Develop and press the combined key sequence: <CNTL><SHIFT>U (that is Control, Shift, and the letter U together). I'm on Windows 10. You can also go to the Basic section and use the WB drop down and select 'auto'.
Don't be shocked by LR's auto results, it's never "right", just a starting point. My experience is to use the relative direction and magnitude of LR's changes in Temperature and Tint as a guide. I've found dividing their numbers by 5 gives a reasonable start. I'm using LR5.7. Your software may be the same or different in the results of the analysis.
On my set-up the top image (27040) gives an initial result of +17 in Temp and -19 in Tint from LR in Auto WB. That is, adding more "yellow" (warming) and moving the tint toward green. Changing these auto values to +3 Temp and -4 Tint still seemed "off". I'm working from my laptop rather than my calibrated monitor. It looks like -1 Temp and -3 Tint results best. These are subtle changes as the original when downloaded from UHH and imported to LR didn't grab my attention for "gross" WB issues.
If you're not working from a calibrated monitor, these types of changes can feel like chasing a ghost ... Anyway, you can then sync the WB setting across all images. I've found too the WB continues to need to be tweaked as you work on images where the light changes over the day. Or, your position changes, etc. Use your slash key ( \ ) to toggle back and forth between your edits and the original. This makes tweaking the WB easy to see as you "zero in" on the best setting.
Sep 13, 2017 17:04:34 #
CHG_CANON wrote:
In LR - open one image in Develop and press the co... (show quote)
Thank you very much for the step by step directions. I've never had to work with WB before, and wasn't getting very far with blind trial and error.
Sep 14, 2017 07:39:59 #

Just downloaded and checked the first of the two photos. It didn't show any overt need to do any white balance. They look pretty good.
--Bob
--Bob
Sep 14, 2017 09:08:32 #
rmalarz wrote:
Just downloaded and checked the first of the two photos. It didn't show any overt need to do any white balance. They look pretty good.
--Bob
--Bob
We're on different pages, Bob. Right, there is nothing wrong with the posted photos, but you will notice the canopy against the blue sky has a tint. That is what I was shooting through and, I believe, is messing up my white balance. I would like to know if there is any value in the canopy's tint against the blue sky that could be used to provide a correction factor that could be applied to my photos that were shot through the canopy?
Sep 14, 2017 10:16:15 #
Linary
Loc: UK
neilds37 wrote:
We're on different pages, Bob. Right, there is nothing wrong with the posted photos, but you will notice the canopy against the blue sky has a tint. That is what I was shooting through and, I believe, is messing up my white balance. I would like to know if there is any value in the canopy's tint against the blue sky that could be used to provide a correction factor that could be applied to my photos that were shot through the canopy?
If you could upload one of the "offending" images, it would be easier to understand the effect the canopy has had on the white balance - and then if everything is consistent, make an adjustment and synchronize that adjustment in LR.
I can see in your first picture the greenish tint of the canopy, but that seems to be a little less in the second image. I imagine the WB will also change depending on the course of the plane relative to the sun.
I have snapped a few shots through plane windows, and found each one had to be altered separately even though the windows "appeared" to be clear (no tint). Perhaps now we understand the problem, I was caught in the same area as Bob - "what's wrong with the posted images?" - more members with flying photography experience will chime in.
Sep 14, 2017 10:18:45 #

In looking at these images it doesn't appear to me that you have a white balance issue. The area behind the canopy is just darker more saturated. This is normal when looking through a most likely uv tinted glass. I
Sep 14, 2017 10:36:08 #
lloydl2 wrote:
In looking at these images it doesn't appear to me that you have a white balance issue. The area behind the canopy is just darker more saturated. This is normal when looking through a most likely uv tinted glass. I
You may be right. I was assuming the tint altered the WB, but maybe not.
Sep 14, 2017 10:57:25 #
Linary wrote:
If you could upload one of the "offending&quo... (show quote)
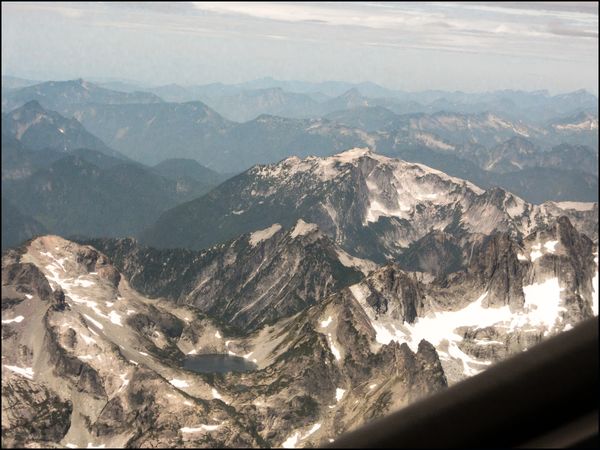
This one of those that just doesn't look right to me. I suppose this could be something completely normal that I am attributing my inexperience with it to an effect by the canopy.
Sep 14, 2017 10:58:32 #
Ah.... Thanks for the explanation, Neil. Could you post one of the photos you took through the canopy?
Edit:, never mind. I see that you did. I'll take a look later today when I get home.
--Bob
Edit:, never mind. I see that you did. I'll take a look later today when I get home.
--Bob
neilds37 wrote:
We're on different pages, Bob. Right, there is nothing wrong with the posted photos, but you will notice the canopy against the blue sky has a tint. That is what I was shooting through and, I believe, is messing up my white balance. I would like to know if there is any value in the canopy's tint against the blue sky that could be used to provide a correction factor that could be applied to my photos that were shot through the canopy?
Sep 14, 2017 11:27:01 #
neilds37 wrote:
This one of those that just doesn't look right to me. I suppose this could be something completely normal that I am attributing my inexperience with it to an effect by the canopy.
the effect on this one seems more from the haze you can reduce the haze with the dehaze slider in lightroom also increasing clarity would help and increasing the blacks
Sep 14, 2017 12:29:51 #
Linary
Loc: UK
neilds37 wrote:
This one of those that just doesn't look right to me. I suppose this could be something completely normal that I am attributing my inexperience with it to an effect by the canopy.
Bearing in mind I was not there and did not see what you saw: -
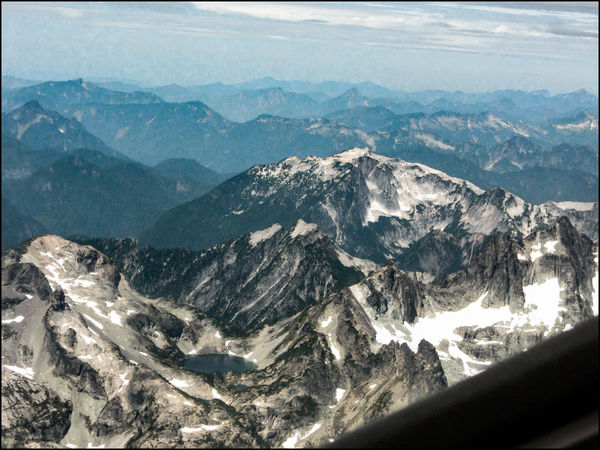
Took a white balance from a mid grey tone in the image which LR adjusted to -13 temp and -13 tint. Increased Clarity to 20 and de-haze to +43.
I think the pattern in the sky is maybe an effect from the canopy. there does appear to be quite a bit of noise which I have not attempted to remove. (In this case it adds to the flavour). I notice you are you using a Fuji HS50, I have an HS20 which is even noisier under certain conditions.
Black point is fine, the only clipped black is in the bottom right corner (inside of the plane). Snow is blown out, but that is to be expected. The lake, bottom centre left) I would think is the correct colour and is showing some nice reflections.
Sep 14, 2017 13:23:07 #
Linary wrote:
Black point is fine, the only clipped black is in the bottom right corner (inside of the plane).
Black point is fine, the only clipped black is in the bottom right corner (inside of the plane).
It is generally unacceptable to clip whites as you lose the detail when you do. It is perfectly acceptable and often desirable to clip blacks, doing so can add depth, emotion and mood to the image. I often (almost always) slide the black slider to the left and beyond the clipping point and this image other than the bottom right black bar lacks blacks and therefore has that hazy look. moving clarity and dehaze (they add black too) and help correct this situation.. Just wanted to share my experience but as we all know beauty is in the eye of the beholder so give it a whirl if you chose to and see what you think..
If you want to reply, then register here. Registration is free and your account is created instantly, so you can post right away.