Photoshop help
Jul 9, 2017 12:35:55 #
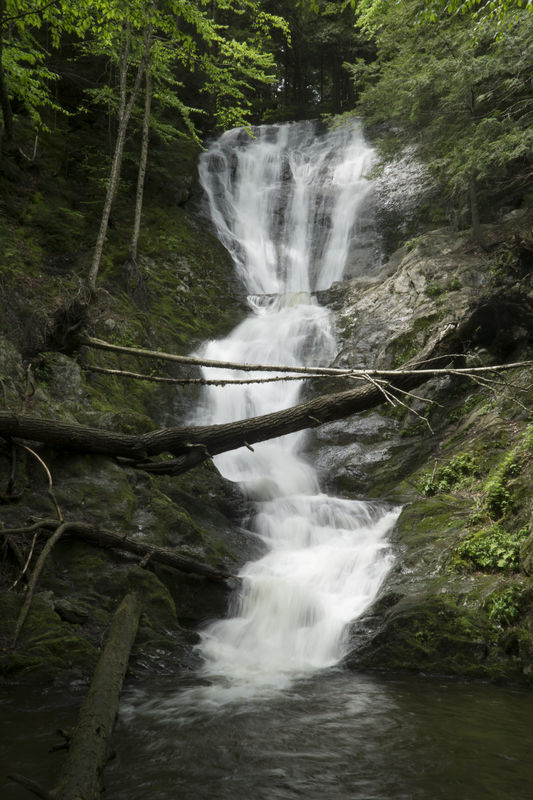
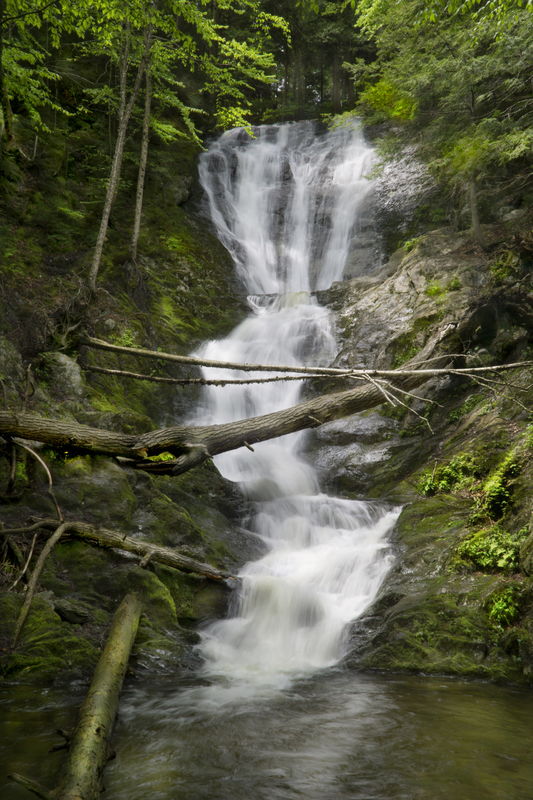
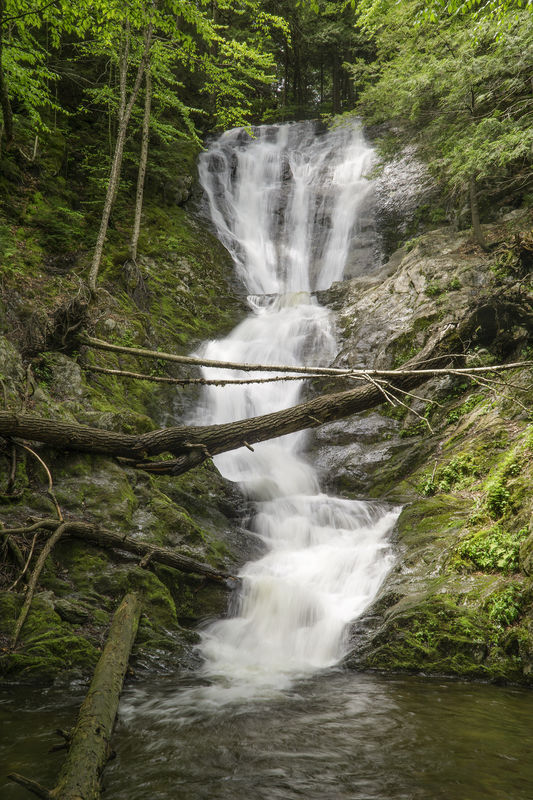
Hey all - i'm trying to learn PS this summer (finally!) and would love to hear how others would approach this particular image using only PS. I've become pretty comfortable inside LR, but feel i'm missing more finite adjustments not using layers. I'm going through the Lynda.com tutorials and will look to other things as well until i feel more adept. I would love to hear how other folks who are more versed in PS would approach enhancing this shot. I approached it using adjustment layers on 6 different areas for brightness, contrast, exposure, and color. Does this sound like a decent approach, or would you attack this differently? I'm attaching the jpeg of the original, my inexperienced edits in PS, and a link to the TIF version in case you care to try your own hand at this. I'd just really like to know what your workflow would be on this. Thanks for any thoughts/ideas you may have.
Marylea
Tiff Link:
https://drive.google.com/file/d/0B6h7eCVDIw9YLXducW5BcWNlSkE/view?usp=sharing
Marylea
Tiff Link:
https://drive.google.com/file/d/0B6h7eCVDIw9YLXducW5BcWNlSkE/view?usp=sharing
Jul 9, 2017 13:37:42 #
Try this: create a duplicate layer and go nuts on the editing, filters, contrast, etc. Then play around with the Opacity slider to see how you can blend effects. Download the Google NiX filters for a different approach.
Jul 9, 2017 21:33:02 #
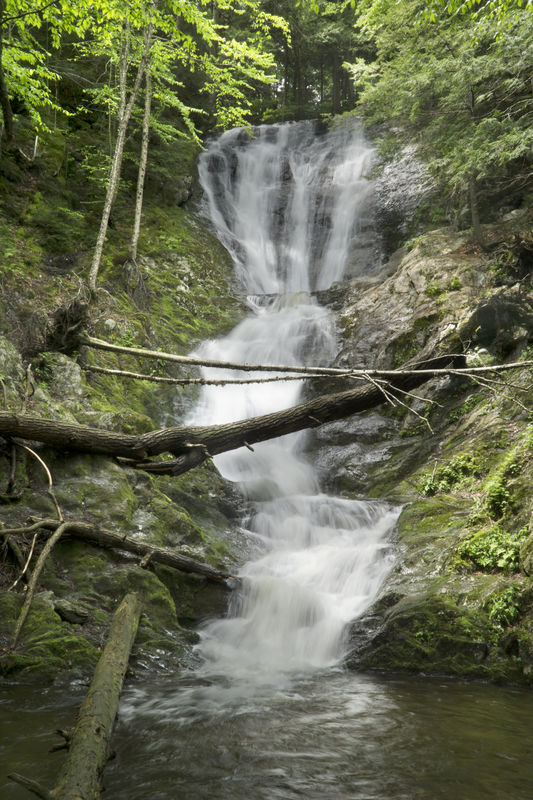
My workflow would have a different approach. First I am not sure if your version of Photoshop has Camera Raw under filters. If it doesn't do you have Lightroom? I downloaded your photo and opened in Photoshop. Made Duplicate layer, command J. Opened Camera Raw Filter under filters. I lowered highlight a small amount, opened shadows all the way, moved white slider to the right while holding alt/option key until a bit more whites started showing. I increased blacks a small amount, added clarity a small amount. Moved on to sharpness and increased sharpness to 80 and used the Mask slider while holding alt/option key and watched the edges and made sure only the edges were strong. Moved Luminance to 20. Took one last look and upped my exposure a very small amount. Hit enter and this is my final edit. If I wanted to do additional exposure, brightness or other changes I would then add the additional layers as you mentioned but add a mask and only open areas you need to change. The way you did it makes it hard to see all the combined changes as quick as camera raw allows. For me you final edit went flat, not totally sure why that happened.
Jim
Another note. If and when you make your duplicate layer you can change layer to smart object. Layer>Smart Object>Convert to Smart Object.
If you do this then all changes are non-destructive and you can go back and make additional changes in camera raw. You will just double click the words Camera Raw area within the layer. Try it and you will understand better.
Jul 10, 2017 03:30:59 #
Racmanaz
Loc: Sunny Tucson!
melueth wrote:
Hey all - i'm trying to learn PS this summer (fina... (show quote)
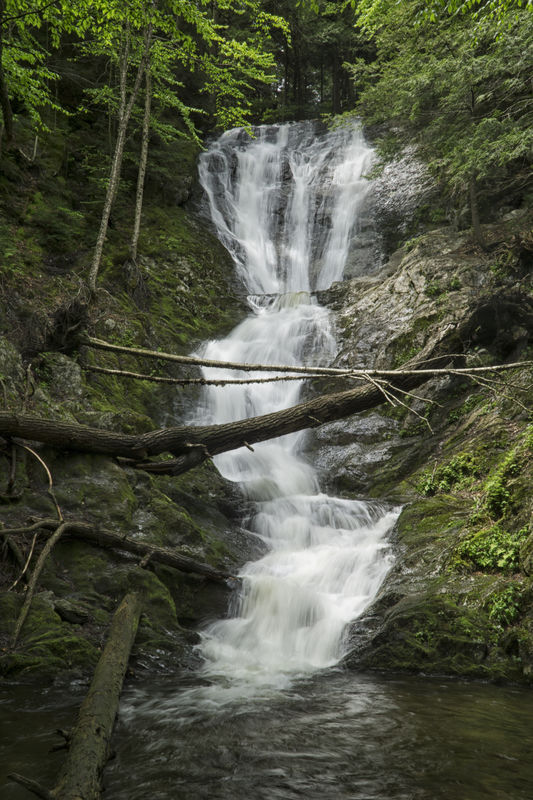
I gave it a try but mind you that I do not have access to Photoshop, so I edited the image in ACDsee Pro 10. You can use layers if you wish yet I chose to just use one copy and performed mostly dodge and burn techniques on the highlights and shadows, also added a little bit of saturation in the green leaves of the tree's. I am still very new to image editing so bare with me :). Wish I could upload the TIFF file for you on here.
Jul 10, 2017 06:31:38 #
melueth wrote:
Hey all - i'm trying to learn PS this summer (fina... (show quote)
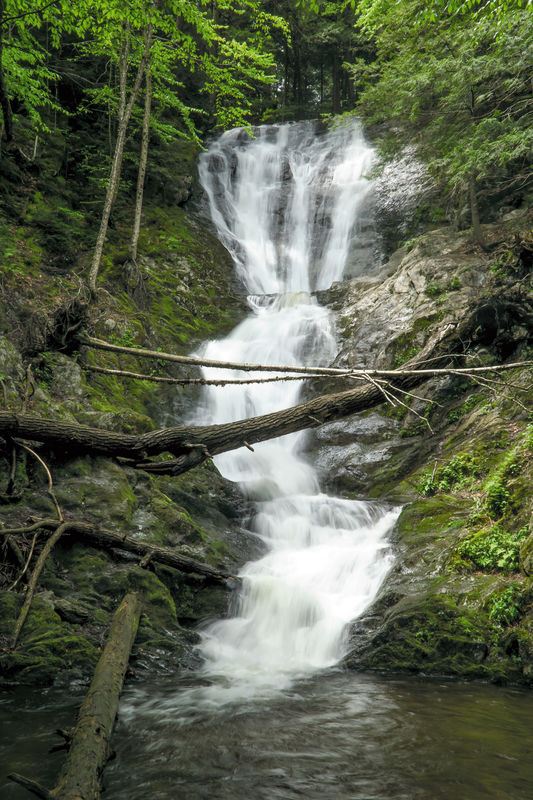
I'm using Photoshop CC. Opened up your Tiff Image. Then took it into the NiK Color EFEX Pro plugin>Detail Extractor and used the 1st preset. Next
I used a Lights 1 Curves adj luminosity mask layer from Tony Kuyper's panel to adjust the light tonal values, Then I used a Darks 1 Curves adjustment luminosity mask layer to adj the dark areas.
Jul 10, 2017 08:19:46 #
rgrenaderphoto wrote:
Try this: create a duplicate layer and go nuts on the editing, filters, contrast, etc. Then play around with the Opacity slider to see how you can blend effects. Download the Google NiX filters for a different approach.
Thanks! I didn't create a duplicate layer, but i can see how that would allow some worry-free tinkering.
ML
Jul 10, 2017 08:27:15 #
Jim-Pops wrote:
My workflow would have a different approach. First... (show quote)
Thank you so much for this detailed approach Jim. I do have LR, and am using the current subscription version of both LR and PS, so there are RAW tools to work with. I'd originally started on this using LR, performing several of the same adjustments you did, but because i'm trying to really cement the knowledge of layering into my brain, decided to use just PS for this exercise. Your description helps a lot . . . this simply may not be an image that requires a large use of layers, given the strategic adjustments available in LR or Camera Raw. Maybe my rendition appears flat due to the many edges i created in all the layering, regardless of how much feathering i used . . . ? I like what you came up with a lot. Thanks again.
ml
Jul 10, 2017 08:30:30 #
Racmanaz wrote:
I gave it a try but mind you that I do not have access to Photoshop, so I edited the image in ACDsee Pro 10. You can use layers if you wish yet I chose to just use one copy and performed mostly dodge and burn techniques on the highlights and shadows, also added a little bit of saturation in the green leaves of the tree's. I am still very new to image editing so bare with me :). Wish I could upload the TIFF file for you on here.
This is a very nice rendition . . . looks almost storybook-like. Again, even though this isn't PS, i'm learning that this just may not be an image i needed to pull in PS at all. Thanks for the contribution!
ML
Jul 10, 2017 08:34:03 #
Fstop12 wrote:
I'm using Photoshop CC. Opened up your Tiff Image. Then took it into the NiK Color EFEX Pro plugin>Detail Extractor and used the 1st preset. Next
I used a Lights 1 Curves adj luminosity mask layer from Tony Kuyper's panel to adjust the light tonal values, Then I used a Darks 1 Curves adjustment luminosity mask layer to adj the dark areas.
I used a Lights 1 Curves adj luminosity mask layer from Tony Kuyper's panel to adjust the light tonal values, Then I used a Darks 1 Curves adjustment luminosity mask layer to adj the dark areas.
Thanks very much! Very interesting approach. I have the NiK set, but have never really used them. I will give this a try. I think i'd like to see the left shadows brought up a little more . . . but that's just a mood/taste thing i guess.
ml
Jul 10, 2017 09:28:45 #
One additional process I use in Photoshop.
Some times, lets say in this example, I want to open up the lower left part of the picture but I am not sure what it needs, open shadows, open white add clarity or what ever. I will make a duplicate layer and go to Camera Raw and look at the area in question and start adjusting for only that area. Once done I will hit enter and on this layer make a mask and only open the new improved area. This works when you're not sure what is needed. If the adjustment is to much you can dial back this layer using Opacity. Just another way to make an adjustment using layers and masks.
Jim
Jul 10, 2017 10:49:56 #
melueth wrote:
Thanks very much! Very interesting approach. I have the NiK set, but have never really used them. I will give this a try. I think i'd like to see the left shadows brought up a little more . . . but that's just a mood/taste thing i guess.
ml
ml
NiK plugins is my Go To most of the time. It's amazing that Google offers it for free. You should also check out Viveza in NiK as well. It is a very nice plugin that allows selective editing by placing key points on your image.
Jul 10, 2017 10:58:58 #
Fstop12 wrote:
NiK plugins is my Go To most of the time. It's amazing that Google offers it for free. You should also check out Viveza in NiK as well. It is a very nice plugin that allows selective editing by placing key points on your image.
The funny thing is - i have all of those plug-ins, but have never really worked with them because i typically turn to the Topaz collection. I'm sure i'm not getting the most out of those tools either, but i'm working on it!
ML
Jul 10, 2017 11:00:10 #
Jim-Pops wrote:
One additional process I use in Photoshop. br Some... (show quote)
You've taught me a lot here . . . i'm going to try this. I really like the sound of this technique. Thank you!!
ML
Jul 10, 2017 12:53:11 #
This is my attempt. I was working with your JPEG file, used only Photoshop, in Camera Raw Filter corrected almost all basic parameters, after that duplicated layers with blending mode Soft Light, reduced opacity, flatten layers and sharpened with Unsharp mask filter. I am sorry if you do not like my result.
melueth wrote:
Hey all - i'm trying to learn PS this summer (fina... (show quote)
Jul 10, 2017 13:41:42 #
MMC wrote:
This is my attempt. I was working with your JPEG file, used only Photoshop, in Camera Raw Filter corrected almost all basic parameters, after that duplicated layers with blending mode Soft Light, reduced opacity, flatten layers and sharpened with Unsharp mask filter. I am sorry if you do not like my result.
MMC - i love your result! I'm really learning a lot through this post . . . so many different ways to do things in all this. Thanks for sharing your workflow; i have even more to try now.
ML
If you want to reply, then register here. Registration is free and your account is created instantly, so you can post right away.