How To Create This Photo Using PSE 12 Or Newer
Jan 4, 2017 05:45:45 #

boberic asked me several days ago how I did this.
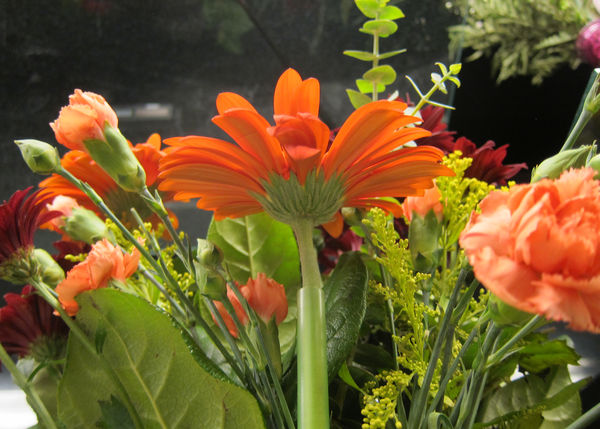
Take your original photo by placing your camera under the flower and take several shots. One or two may be usable!
Bring your photo into PSE, duplicate your photo, Ctrl>J, and crop to 7x5x300 res.; (Photos 1, 7X5)
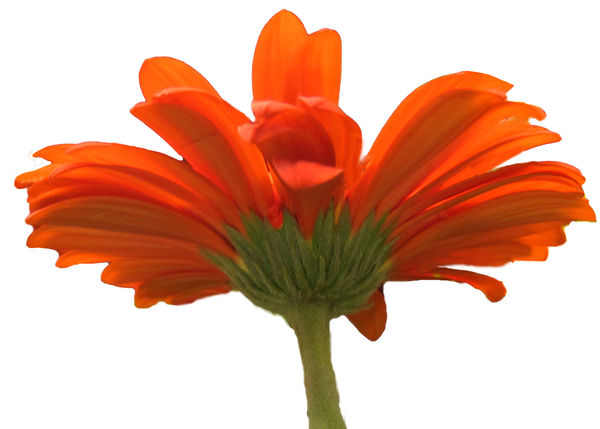
Next select the Quick Selection Tool and go over the parts of the flower you want to keep. Right click your mouse and select Inverse. Knock out the eye ball in the lower layer and hit the delete key. Your flower should be all that shows and the area around the flower will be opaque (Photo 2.) Save this as a PNG file after cleaning it up. Use the Eraser tool, and the Clone Stamp tool for cleaning up the Flower!
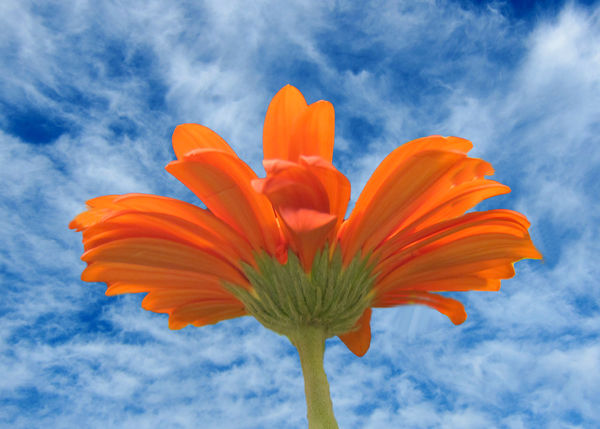
If you don't have Cloud photos, take some and put them in their own folder for future use. Choose one and open it in PSE. It should be the photo that now fills the screen. Duplicate the layer and crop to 7X5x300 (Photo 3!) Go to the Project Bin at the lower left of the bottom tool bar and hold your mouse over the flower photo and drag it up on to the screen. Using the Move Tool, place the flower in the lower middle of the sky photo. Hit Ctrl>T for the transform tool and make the flower how you want it (Photo 4.)
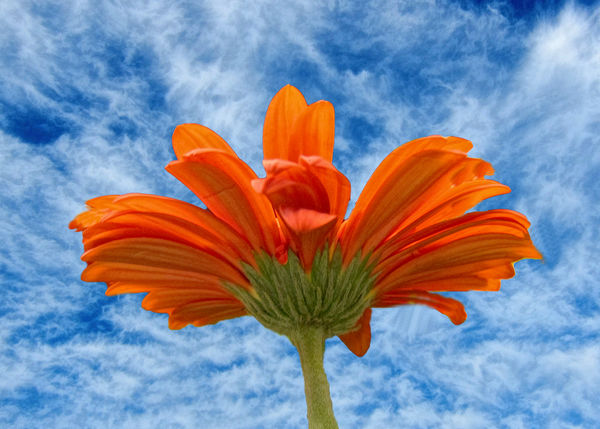
Play with the flower image until your happy with its size relative to the sky image. When done, highlight your top layer and hit Ctrl>Alt>Shift and E which makes a layer with everything in it. Further adjustments can be made by clicking on the Adjustment layer icon, the one that's half B&W, select the Levels tool and move the middle slider to your liking (Photo 5)! l strongly suggest saving this as both a PSD and JPG to the folder you started with.
Take your original photo by placing your camera under the flower and take several shots. One or two may be usable!
Bring your photo into PSE, duplicate your photo, Ctrl>J, and crop to 7x5x300 res.; (Photos 1, 7X5)
Next select the Quick Selection Tool and go over the parts of the flower you want to keep. Right click your mouse and select Inverse. Knock out the eye ball in the lower layer and hit the delete key. Your flower should be all that shows and the area around the flower will be opaque (Photo 2.) Save this as a PNG file after cleaning it up. Use the Eraser tool, and the Clone Stamp tool for cleaning up the Flower!
If you don't have Cloud photos, take some and put them in their own folder for future use. Choose one and open it in PSE. It should be the photo that now fills the screen. Duplicate the layer and crop to 7X5x300 (Photo 3!) Go to the Project Bin at the lower left of the bottom tool bar and hold your mouse over the flower photo and drag it up on to the screen. Using the Move Tool, place the flower in the lower middle of the sky photo. Hit Ctrl>T for the transform tool and make the flower how you want it (Photo 4.)
Play with the flower image until your happy with its size relative to the sky image. When done, highlight your top layer and hit Ctrl>Alt>Shift and E which makes a layer with everything in it. Further adjustments can be made by clicking on the Adjustment layer icon, the one that's half B&W, select the Levels tool and move the middle slider to your liking (Photo 5)! l strongly suggest saving this as both a PSD and JPG to the folder you started with.
Original cropped 7x5x300
(Download)
PNG using the Quick Selection Tool
(Download)
Original cropped to 7x5x300

(Download)
Placing Flower on top of Sky
(Download)
Using Adjustment Layer>Levels Tool
(Download)
Jan 4, 2017 05:46:49 #

Jan 4, 2017 05:56:10 #
Snap Shot wrote:
boberic asked me several days ago how I did this. ... (show quote)
Bill, well done tutorial. I am not up to doing this much PP for many reasons but still appreciated the time and effort it took you to make this post. I just had to say, Thank You.
Greg
Jan 4, 2017 06:02:29 #
Jan 4, 2017 06:03:26 #
CLF wrote:
Bill, well done tutorial. I am not up to doing this much PP for many reasons but still appreciated the time and effort it took you to make this post. I just had to say, Thank You.
Greg
Greg
Thanks for commenting Greg! Much appreciated!


Jan 4, 2017 06:04:16 #

Jan 4, 2017 06:05:21 #

NO NO NO, it can not be that easy. One must have full PS, Many Plugins, the newest and best camera. Yep SSS, great job of explaining. (3 SSSs?) Me, I evangelize CROP, so many photos within a photo, too much territory... you selected one flower and made a masterpiece. Kudos Sir Snap Shot oh! that is why SSS
Jan 4, 2017 06:20:23 #
Jan 4, 2017 06:21:32 #
dpullum wrote:
NO NO NO, it can not be that easy. One must have full PS, Many Plugins, the newest and best camera. Yep SSS, great job of explaining. (3 SSSs?) Me, I evangelize CROP, so many photos within a photo, too much territory... you selected one flower and made a masterpiece. Kudos Sir Snap Shot oh! that is why SSS
Thank you Don! Much appreciated!
Jan 4, 2017 06:30:03 #

Jan 4, 2017 06:33:36 #
jayway55 wrote:
Thanks for another valuable lesson, Bill. Nicely done.
Jane
Jane
You're very welcome Jane! Now please try it and post your results! I'd love to see them!
Jan 4, 2017 07:18:25 #

Jan 4, 2017 07:20:29 #

Jan 4, 2017 08:16:13 #

Jan 4, 2017 11:20:11 #
Cwilson341 wrote:
Well done tutorial! Both fun and applicable to many situations!
Thanks Carol! Please try it... it isn't hard to do! And post your results!
If you want to reply, then register here. Registration is free and your account is created instantly, so you can post right away.