How To Make A Christmas Card
Dec 17, 2016 07:59:48 #

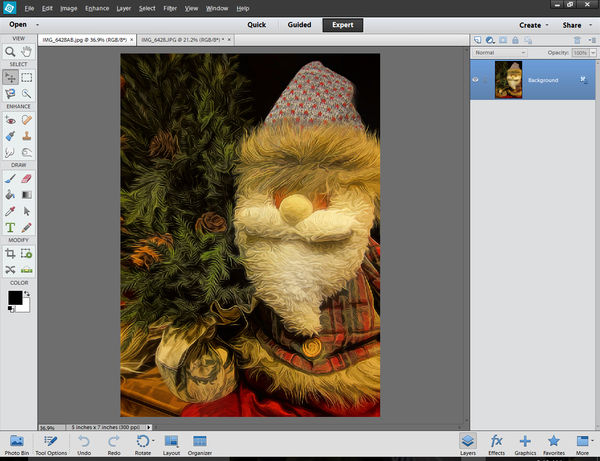
I'm using Photoshop Elements 12 for this project. First, fully process your photo to 7x5x300 resolution. (See photos 1 and 2 for my Original and Processed Santa.) With this done set your timer and we'll have a card ready to print in less than 5 minutes!
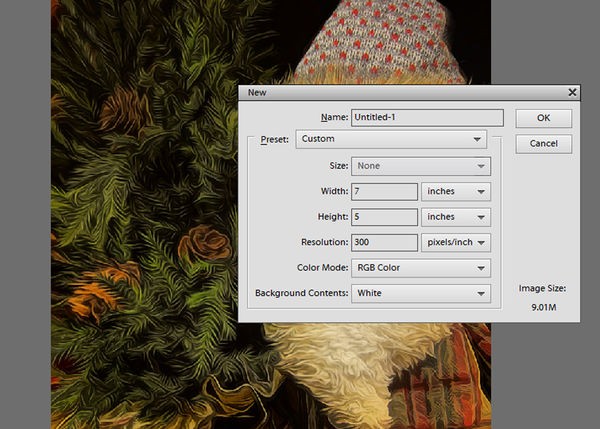
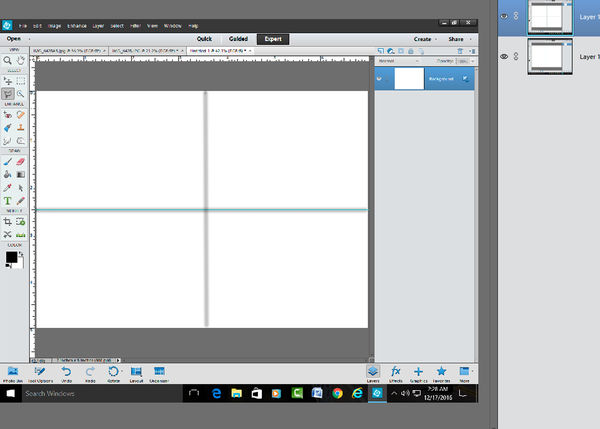
Next Click on Ctrl>N to bring up a new blank image (Photo 3.) Select Inches, 7x5x300, RGB, White and click OK. In the upper tool bar select View>Ruler and drag the top ruler down to 2.5" and slide the left ruler to the right at 3.5." (Photo4.)
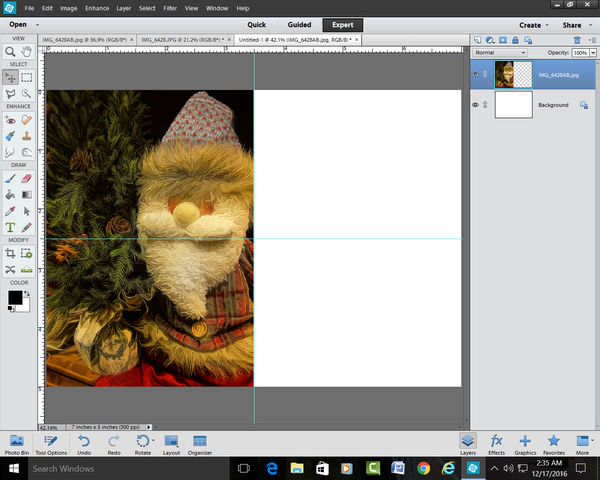
Next, Click on the Project Bin in the lower bottom left of your screen. Your processed image and the new white blank image will be listed. Make sure the White image fills the Upper screen. Hold your mouse over your processed image, left click and drag it up onto the upper screen (photo5.) Use your arrow keys to place your image to the far left of the screen. Click Ctrl>T for the Transform tool and, while holding your mouse on the center right little square, slide your photo to fit against the center blue grid line. Also make sure your image is flush with all four sides of the left grid.
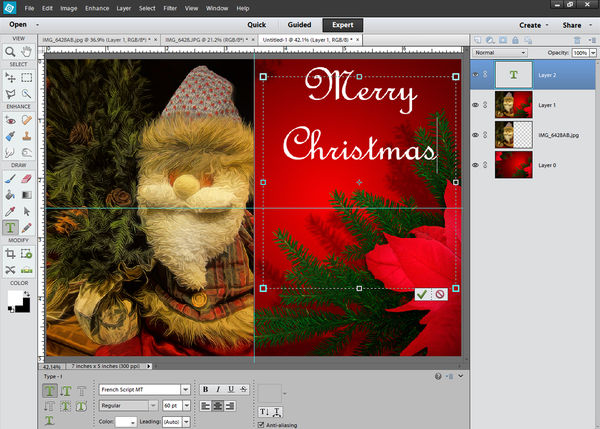
Next, click on Graphics in the lower bottom right tool bar; it has the Plus sign. In the tool bar for that group, select By Season>Winter and Show all! Find an image you like and drag it on to your screen on the left. After it shows up, click on the Layers option at the very bottom right tool bar next to FX Effects. Double click it and click OK. Now right click it and select Simplify Layer. Again click the Transform tool to align this image with in the right blue lines (photo6.) With this done hold down Ctrl>Alt>Shift and E keys. Your layers pallet should have 3 layers; From the bottom going up, your Background > your Image on the left of the screen and a combined top layer showing both Background and your image together.
Just add your text and you're good to go!
Next Click on Ctrl>N to bring up a new blank image (Photo 3.) Select Inches, 7x5x300, RGB, White and click OK. In the upper tool bar select View>Ruler and drag the top ruler down to 2.5" and slide the left ruler to the right at 3.5." (Photo4.)
Next, Click on the Project Bin in the lower bottom left of your screen. Your processed image and the new white blank image will be listed. Make sure the White image fills the Upper screen. Hold your mouse over your processed image, left click and drag it up onto the upper screen (photo5.) Use your arrow keys to place your image to the far left of the screen. Click Ctrl>T for the Transform tool and, while holding your mouse on the center right little square, slide your photo to fit against the center blue grid line. Also make sure your image is flush with all four sides of the left grid.
Next, click on Graphics in the lower bottom right tool bar; it has the Plus sign. In the tool bar for that group, select By Season>Winter and Show all! Find an image you like and drag it on to your screen on the left. After it shows up, click on the Layers option at the very bottom right tool bar next to FX Effects. Double click it and click OK. Now right click it and select Simplify Layer. Again click the Transform tool to align this image with in the right blue lines (photo6.) With this done hold down Ctrl>Alt>Shift and E keys. Your layers pallet should have 3 layers; From the bottom going up, your Background > your Image on the left of the screen and a combined top layer showing both Background and your image together.
Just add your text and you're good to go!
Photo1 Original photo prior to processing

(Download)
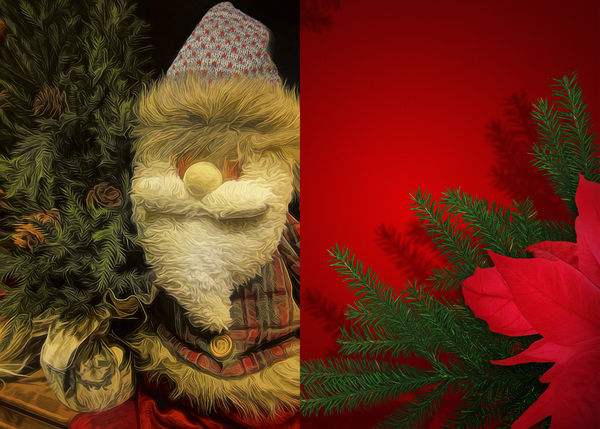
Photo 2 Processed Original
(Download)
Photo 3 Ctrl>N
(Download)
Photo 4 Setting up grid lines
(Download)
Photo 5 Pulling up Santa
(Download)
Photo 6 Adding Graphic
(Download)
Photo 7 Adding Ctrl.>Alt>Shift and E and text
(Download)
Dec 17, 2016 08:01:28 #
Dec 17, 2016 08:07:00 #

Dec 17, 2016 08:21:13 #
jerryc41 wrote:
Thanks for that. I'll file it away.
I hope you use it Jerry! Thanks for watching!


Dec 17, 2016 08:22:44 #
Treepusher wrote:
Nice tutorial! Thanks for posting i!
Your very welcome Randy! You probably already know this stuff.. it's for those just getting started!
Dec 17, 2016 09:53:14 #
Thanks for the "how to" Snap Shot. I should be further along on being creative with photos in P. Elements and otherwise too. Just haven't taken the time to learn. Something I hope to have more time for soon. I'll save this tutorial also.
Dec 17, 2016 11:28:18 #
LorrieLynn wrote:
Thanks for the "how to" Snap Shot. I should be further along on being creative with photos in P. Elements and otherwise too. Just haven't taken the time to learn. Something I hope to have more time for soon. I'll save this tutorial also.
LorrieLynn, thanks for taking an interest! You'll have to make time! It's always nice to see a new visitor!
Dec 17, 2016 14:54:54 #

Bill, thanks for sharing your wealth of information!!!
Much appreciated and I will be printing this out!!
Much appreciated and I will be printing this out!!
Dec 17, 2016 15:37:44 #

Dec 17, 2016 18:45:36 #
angela k wrote:
Bill, thanks for sharing your wealth of information!!!
Much appreciated and I will be printing this out!!
Much appreciated and I will be printing this out!!
Post it for all to see!
Dec 17, 2016 18:46:05 #
Dec 17, 2016 20:08:48 #
Bill!!! I followed your directions and made my first card!!! Thanks so much!!
Dec 17, 2016 21:54:33 #
angela k wrote:
Bill!!! I followed your directions and made my first card!!! Thanks so much!!
Angela, please post it so I can see it!
Dec 17, 2016 21:59:01 #
Snap Shot wrote:
Angela, please post it so I can see it!
I'll post it tomorrow!! I shut down my pc already.
Dec 17, 2016 22:46:46 #
If you want to reply, then register here. Registration is free and your account is created instantly, so you can post right away.