How to shoot test equipment LCD screen
Oct 9, 2016 02:44:28 #
KM6VV
Loc: Central Coast, CA
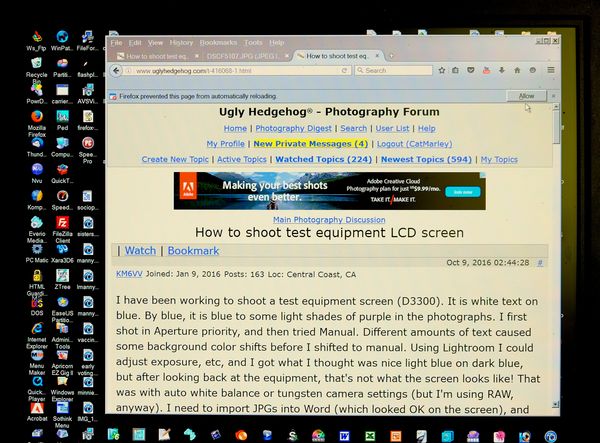
I have been working to shoot a test equipment screen (D3300). It is white text on blue. By blue, it is blue to some light shades of purple in the photographs. I first shot in Aperture priority, and then tried Manual. Different amounts of text caused some background color shifts before I shifted to manual. Using Lightroom I could adjust exposure, etc, and I got what I thought was nice light blue on dark blue, but after looking back at the equipment, that's not what the screen looks like! That was with auto white balance or tungsten camera settings (but I'm using RAW, anyway). I need to import JPGs into Word (which looked OK on the screen), and then print out the documentation I'm writing. Contrast is really low on the printouts, and dull looking.
So what settings should I be using?
Thanks for any comments.
So what settings should I be using?
Thanks for any comments.
Oct 9, 2016 07:26:47 #

Your question is definitely legitimate. Why not ask folks like DPReview or PopPhoto who print images of test screens all the time?
Oct 9, 2016 22:36:23 #
Oct 10, 2016 03:12:33 #
jdubu
Loc: San Jose, CA
I have not done this, but I would think the refresh rate of the monitor would dictate a slower shutter speed to allow the color you see to register correctly on the sensor.
So I would ensure the camera is mounted on a tripod, minimal iso and a smallish aperture. The shutter speed would be whatever I needed for wanted exposure, .5 to 1 second to start. If it's still overexposed, mount a polarizer or an ND filter to keep the shutter open long enough.
As I said, I haven't ever attempted this, but this is what I would start with and experiment with my settings from there.
Oct 10, 2016 07:11:22 #
You didn't mention how you hd your camera set up so I don't know if you just used auto and hoped for the best or if you are making manual adjustments. The lcd probably refreshes at 60i and your camera possibly needs to sync with it so try setting your camera on 'shutter priority' setup on a tripod. Try a few test shots, the with the shutter at 1/30, 1/60, 1/120, etc to see if syncing your camera speed with the lcd refresh speed helps.
Oct 10, 2016 07:56:09 #

KM6VV wrote:
I have been working to shoot a test equipment scre... (show quote)
Do a series of white balance tests, from 10000K down to 5000K. Use manual exposure and adjust until you see pixels in the text. Most monitors are natively 9300K.
To avoid the black bar effect, keep the shutter slow (and use a tripod). 1/8 to 1/30 should work.
Oct 10, 2016 08:27:40 #

KM6VV wrote:
I have been working to shoot a test equipment scre... (show quote)
KM6VV,
You have an interesting problem to solve, there are many various types of visual reporting displays. From the traditional CRT O'Scope, to plasma, LCD, and LED displays; all of which can projects differently to a digital sensor.
Consider this option until you can identify the display type and the corrective method to capture the display in color.
Capture your test display in full color.
In PP convert the photograph to B&W Film.
Use the colored filters in the B&W conversion UID to present a high contrast image and well balanced gray scale screen.
When happy with the gray scale image add some light blue background to the image to represent the original colors of the test display.
It will not matter if the text has a slight shade of color, with the original test display the text would have had some color shade anyway.
Michael G
Oct 10, 2016 12:05:55 #
KM6VV wrote:
I have been working to shoot a test equipment scre... (show quote)
I don't really understand what you like to accomplish here. Do you want to check how close the color on that tiny camera screen comes to the actual color there is? If so, why? That is not the purpose of that little screen. No one uses them to check exposures of their shots!! For that you need the computer monitor!!!!
Oct 10, 2016 15:56:00 #

I would use black and white and increase the contrast in LR. If it has to be accurate colors for some reason (picky equipment manufacturer?) adjust the color and contrast in LR.
Oct 10, 2016 16:20:15 #

speters wrote:
I don't really understand what you like to accomplish here. Do you want to check how close the color on that tiny camera screen comes to the actual color there is? If so, why? That is not the purpose of that little screen. No one uses them to check exposures of their shots!! For that you need the computer monitor!!!!
I do use the LCD to check the exposure but still I agree that there isn't much need for photographing the screen with accurate color.
Oct 10, 2016 16:38:16 #

KM6VV wrote:
I have been working to shoot a test equipment scre... (show quote)
I shot this at f3.6, ISO 400, 1/15 sec using daylight WB with my XT-1 handheld. It looks very close to the screen. Probably could bump up the contrast a bit.
Oct 11, 2016 00:51:53 #
KM6VV
Loc: Central Coast, CA
Wow! quite a few replies!
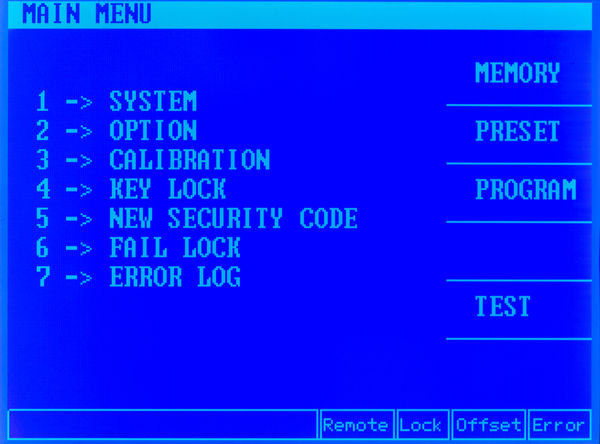
The screen is a 4" x 5" or so LCD on Electrical safety test equipment. I don't need perfect color rendition, just some white on blue that prints properly from a Word file. This time around, I'll do a bunch of test shots as was recommended. I used Lightroom to crop, and modify the exposure and contrast a little.
The Nikon D3300 is on a tripod. No flash. I didn't notice any refresh rate problems. I can try a longer exposure, and smaller aperture. Manual, most of my effort was to get camera square with the screen. I didn't explore the exposure sufficiently. As someone mentioned, the cameras' viewer is not the best way to evaluate the exposures. I choose tungsten for light balance, but I'm shooting RAW anyway. 9300K! that's up there. No black bars that I could notice, LCD display.
I hadn't thought to convert to B&W, but how do you add the color back? Just color (tint) it? I thought the shots looked fine (OK acceptable) on the monitor. Above doesn't have the white text that I'd like. Doesn't have to be accurate colors, just look good (pop a little).
Cat's screen capture certainly looks accurate, but my biggest problem was when I went to print out the Word document. Horrible! No Lightroom at work, so a long cycle before I can see what a corrected shot prints like. I know, take a lot of tests...
Here's where I was shooting at EXIF:
ExposureTime - 1/30 seconds
FNumber - 8
ExposureProgram - Manual control
ISOSpeedRatings - 200
ShutterSpeedValue - 1/30 seconds
ApertureValue - F 8.00
ExposureBiasValue - 0.00
MeteringMode - Multi-segment
LightSource - Tungsten
Flash - Not fired
FocalLength - 105.00 mm
FocalPlaneXResolution - 2591.80
FocalPlaneYResolution - 2591.80
FocalPlaneResolutionUnit - Centimeter
SensingMethod - One-chip color area sensor
FileSource - DSC - Digital still camera
SceneType - A directly photographed image
CustomRendered - Normal process
ExposureMode - Manual
White Balance - Manual
Thanks for the comments!
Oct 11, 2016 10:41:01 #
KM6VV wrote:
Wow! quite a few replies!
Since you and I use different image editing software I cannot take you step-by-step through the process. In a general sense this is what you should be able to do for your images of a test screen.
Your camera should have the ability to project a composition grid onto the optical viewfinder, or live view LCD panel. Use this to square up the image in the camera so there is no parallax distortion and the subject is both vertical and horizontal.
Set the camera mode to full color.
It will not matter if you capture in RAW, or use .jpg for this type of project.
Capture a quick test image of the subject, make sure all is looking good just after the capture.
Somewhere in your image editing software you should be able to convert (export) the capture to B&W Film. Do not just suck out the color, of decrease the Chroma levels, at this point you need to emulate Kodak Tri-X film. With this type of conversion, you still have the ability to use colored glass filtration before the lens to control the effect color bands have on the exposure of the subject on film. (This is going back to Ansel Adams, Henri Cartier Bresson, Edward Weston, W Eugene Smith, and the photographers of Life, Look Magazines). In this type of user interface and conversion you do not place a glass filter before the camera lens, you adjust the filtration with mouse controlled slider for the exact effect in B&W you need for the test screen.
After you get the subject looking good in B&W you can then select the full image and use the Paint Bucket to flood fill the image with the background color of your desire. Use the Transparency slider to control the amount of fill color and leave the text near white. Or, you can select the background, leaving the text un-selected, and flood fill the background; invert the selection and flood fill the text characters to the color and transparency of your desire.
If you can get the desired rendition of the subject under test on your computer, and print a test page, and that page look good, you may have a problem with others printers and MS Word.
Whenever you insert an image into a Microsoft application use the file formats .jpg, or .png.
Print a test page, take the Word file to work and print another test page. This will point to where the rendering problem resides.
Michael G
Oct 11, 2016 13:48:13 #
KM6VV wrote:
Wow! quite a few replies! br br The screen is a 4... (show quote)
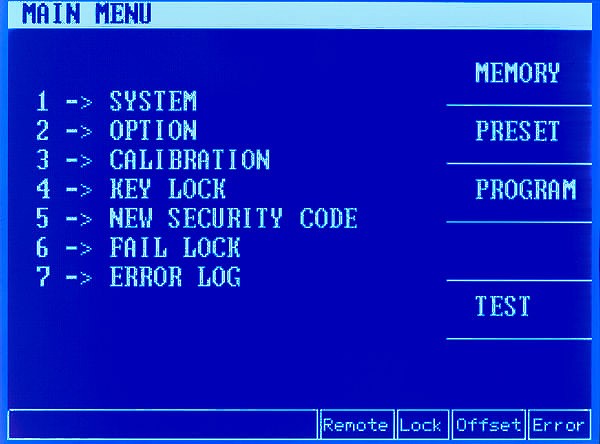
I see what the problem is. The screen you are photographing is limited to light cyan on blue. Inkjet printers cannot cope with that limited color palette. There is nothing that can supply contrast because there is no white ink to lighten the text against the blue background. Even in my image processing program, no amount of "contrast" will change the relative values. But by replacing the colors you can achieve a reasonable contrast that will print well. i.e.

Oct 11, 2016 16:50:12 #
If you want to reply, then register here. Registration is free and your account is created instantly, so you can post right away.