replacing sky in Photoshop 6
Jun 7, 2016 23:44:35 #
I have tried watching all kinds of Youtube videos on replacing a sky in PS. None work. It says:
Are you sure you want to convert colors to a destination document with a color profile that does not match the current RGB working space?
Source- SRGB
Destination- ProPhoto RGB
Working- SRGB
I don't understand this at all.
I have also tried dragging the sky over the photo, but it has a circle with a line through it that prevents it. Can anyone help on this? Thanks
Jun 8, 2016 02:30:15 #

You might want to post this in the post processing section where some folks will be inclined to give you a step by step instructions as they are several methods. The color space has very little to do with creating a composite.
Open the first image.
Open the second by dragging it from your storage area (click and drag from explorer) onto the first open document.
The second image covers completely of partially your first. Adjust is so that the sky is covered and that the proportions are respected.
Using 'blend if', allow the lower layer to punch through.
This is the fastest, effort free, way to create a semi decent replacement for the sky.
Other methods involve creating a selection and or masking to replace the existing sky.
Jun 8, 2016 02:41:13 #
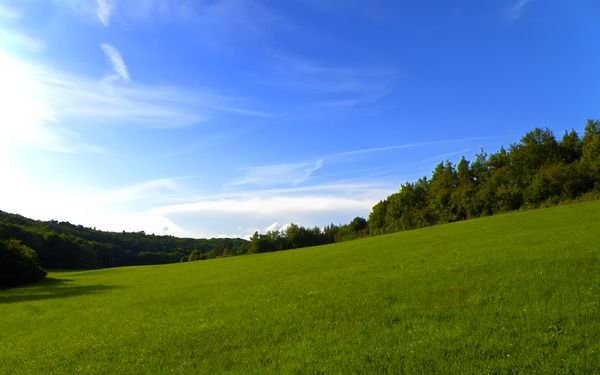
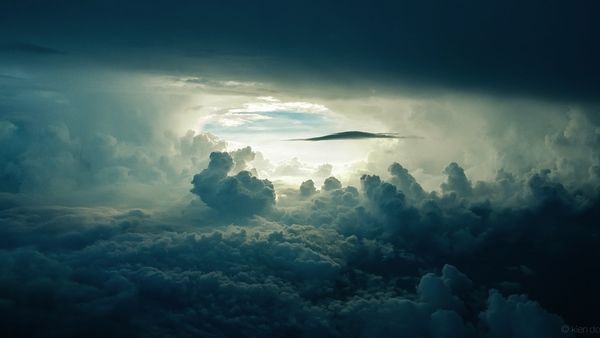
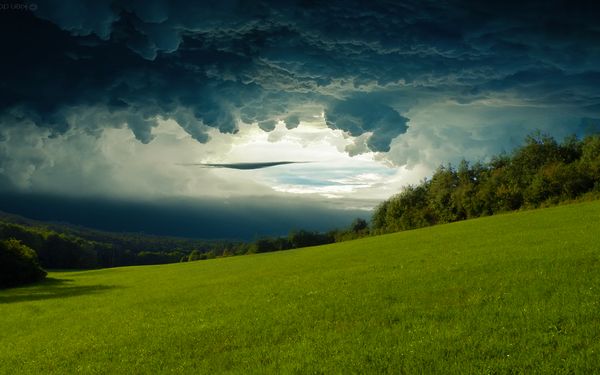
Rongnongno wrote:
sample
This was done in a few minutes after DL the samples from internet.
Software used: PS CC 2015
Jun 8, 2016 09:45:12 #

You are trying to paste in a sky from a photo which has a different color profile than the photo you want to paste it into. That won't necessarily be a problem, but you could always convert one of the photos into the same color profile as the other one, and then you won't get that warning.
Jun 8, 2016 12:05:45 #
Jun 8, 2016 12:27:24 #
You do NOT have to. The first image determines everything. The second image is automatically converted.
The 'no deal' icon is likely due to your layer selection, not the color profile or depth.
The 'no deal' icon is likely due to your layer selection, not the color profile or depth.
Jun 8, 2016 12:33:43 #
If you want to change a color profile of any image use the menu Image then Mode, select your poison.
Short cut Alt, I, M (press each key in turn.
Short cut Alt, I, M (press each key in turn.
Jun 8, 2016 18:58:03 #

Well, boy howdy! I've been messing with PS for a couple years now and never knew about Blend IF. I took your two photos and made a pretty sky in minutes! Thanks, Rongnongno!
I also found a video that shows five other uses for Blend IF--selective sharpening and noise reduction, vignetting, patterns and refined saturation boosting. https://www.youtube.com/watch?v=tIa_XenL4QU
[quote=Rongnongno]You might want to post this in the post processing section where some folks will be inclined to give you a step by step instructions as they are several methods. The color space has very little to do with creating a composite.
If you want to reply, then register here. Registration is free and your account is created instantly, so you can post right away.