For Wannbe Wedding Photographers
May 4, 2012 20:30:51 #

Here's My take on Wedding Photography,(Crash Course)
My take on Wedding Photography - Kenneth William Caleno
Essential Equipment
Two camera bodies that share the lenses
Two flashes (strobes) plus cables, etc.,
18mm-55mm zoom
50mm standard lens F1.8 or even better F1.4-for low-light situations
Not essential, but handy for candids and from back of church images- 70mm-300mm zoom lens
large capacity digital storage cards
At least triple batteries as you think you will need
Two white reflectors
Diffusion (soft-focus) filtere
85c warming filter for grey days (Shade White balance)
Tripod for formal photos
Lens hoods to control flare
Planning the wedding shoot
You must have a timetable to work from, or you will fail miserably.
You must always remember:
The Bride is never on time
Cars are sometimes late arriving
Ministers will often talk for longer than expected
Traffic may be chaotic
Something may have been forgotten somewhere
Murphy, being the Patron Saint of Wedding Photographers, will no doubt ensure that if anything can go wrong-it will, and usually at the most inopportune moment. Allow for plenty of time for each section of the shooting script.
Planning Session
Planning is crucial, so make sure that time has been allowed for photography, and travelling to each location.
A: Who is Paying?
Find out who is paying for the photography, because the person footing the bill is the client, and needs to be consulted-If the brides parents are paying, and want nice, classic portrait shots of Bride & Groom, and the Bride wants cross-processed, arty, or black & white images-you had better get nice safe photos for Mum and Dad as well!
It is very important to find out and determine EXACTLY what the client wants, and is expecting to get. Quite often people do not know what they want-until you have shot it.
What you dont want to hear is: We didnt want half of this stuff, we want a refund!!!
Whoever is paying, make sure you get paid up front. I usually ask for my daily rate photography fee on signing the contract, and the balance seven days before the wedding date. (This saves you wondering if and when you are going to be paid, and saves you chasing clients for payment.) I also only charge for the days photography up front-prints are priced separately - I take around 2000 shots per wedding, and shave these down to around 500 and put as proofs on CDs made to show to my clients-then they can choose what they want for their albums.
B. Working with schedules and timetables
Once you have found out what is wanted and who is paying, start working out your shooting schedule. I usually type these out and give to attendants in the bridal party, to organise everybody for their photo to save time.
I also type my schedule on small cards for my pocket while I am shooting, so I know when the next sequence is due.
Let your clients know that formal photos of the bridal party should take between one to one-and-a-half hours.-Any longer will drag the proceedings, and any less time will limit the number of set-ups wanted.
Subtly point out that the guests should be advised of what is going on.
It is important to let the client know that if they cut your time, you will need to cut the amount of photography to shoot.
Protocol and family Politics
You need to tread very carefully where family politics are concerned, as you set up groups- ex-wives versus new wives, step-children, recently divorced couples. Better to let people sort themselves where they want to be, then just arrange set-ups accordingly.
If everyone, guests included, know exactly what happens, and when, and with whom, it will alleviate, the Brides and grooms stress, your stress, and you will get results that please your clients.
Once PLAN A ( Beautiful sunny day, no wind,) is in place, work out alternatives- B; C; D; etc., You need somewhere to photograph if its raining, snowing, gale-force winds etc., And a choice of idyllic locations.
A Typical Schedule Plan
a). Grooms House
Photos at the Grooms house happen rarely, but if they are wanted, then you must make sure things run on time, in order to get to the Brides house on time
b). Brides House
Get to the house early, showing you are organised and professional. The Bride may be very nearly ready, and being the early bird may give you a chance to get things in order without rushing. Confidence is the keyword, so compliment the Bride, say she looks nice, and has nothing to worry about (Do not, under any circumstances tell her she is beautiful, because, if she isnt, she will know, and this could turn her against you.)
If you can help the bride and her family to be calm at the house, the tone of the whole wedding will reflect on this.
Let the family know what you are going to photograph outside the church, or wedding venue.
c). Church or Wedding Venue
Get to church, or wedding venue as soon as you can to get set up for what follows.
Talk to, and photograph the Groom.
Talk to minister/celebrant, checking all is ok, use/non-use of flash, etc.,
Wait outside for cars to arrive
While the ceremony is taking place, look around for photo opportunities-is the Brides Mother crying? her Father, crying or smiling?
Once the vows have been made, register signed, etc., Bride and Groom will walk down the aisle, or things will just finish. This can be an awkward moment-one of two things usually happen:
a) The Bride & Groom will be surrounded by guests, and if there are lots of guests the crowd may take a time to clear.
b) (Usually at churches) when Bride & Groom come out there is no-one at first, then all guests file out slowly and stand around the couple looking at them.
Some guests will want to take photographs at this point, so set up the shot and let them fire away, after you. Work with these people throughout the day, and some of these people could be your next client.
Start the family photos, beginning with the Brides side, then the Grooms, then all the friends and hangers-on.
d). The Formal Photos
After all the ceremony kerfuffle, the bridal party will want to relax a bit, maybe have a drink and a smoke for 10 minutes or so, while you are getting ready. But when you are ready, you need to get them back on track to get all required images done on time Bride and Groom, at this point, arent usually the problem, its generally the best man wants another beer, or the maid of honour who wants another smoke, or someone gets loud. You need to gain control of this.
If there are children in the party, use them first, as they have a very short attention span.
No matter what happens here,-stay calm, even when things go wrong, keep calm you wont get good photos if you are stressed.
When you think you have finished, better check with Bride and Groom that you have all they wanted, or if you were pressed for time, that you have the set-ups they wanted the most.
Now you have to get back to the reception before the wedding party do.
e). Mock Cake Cutting
This is done when budgets are tight, and you arent required to attend the reception, due to funds being tight.
f ). The Reception
Before the bride and Groom arrive at the reception venue, Be ready to catch them arriving.
Things that usually happen at reception are: (in any order): speeches, toasts, food, then the first dance. While there is potential photography, dont eat, or drink, just in case you miss something worthwhile.
Before leaving be sure that the Bride, Groom and whoever is paying for the photography, have all the shots they need with nothing missed.
g ). After it all
Get the finished prints to the Bride & Groom as soon as possible, thats good business, You will want them to see the prints while the day will still be fresh in their memory. Do not get caught in the middle of any disputes-The prints are always to be delivered to the Married couple, and not to anyone else. (unless arranged otherwise). If someone other than the Bride & Groom is paying for the photography, it should be explained to them beforehand that the Bride & Groom get the prints.
When sorting out the finished prints, take out the blinks, and the ones that arent up to par.
The Photography
A blow by blow account of a typical wedding - Ceremony at 4pm
You have your little schedule cards on a loop of string

You have your flash/strobe set to ¼ Iso (for fill-in, or all outdoor photos if you want to play safe, use at full Iso for indoor shots)
You 18-55 zoom lens on camera
1. At Grooms house 10:00 am - 11:30am ( All times can only be approximated)
Groom, getting ready,
Groomsmen, playing around
Groom, in mirror
Groom dressed, GQ pose, jacket over shoulder
Groom Full length
Groom with mother Close-up
Groom with Father Close-up
Groom with both parents full length
Groom with both parents close-up
Groom with Grandparents Full length
Groom with Grandparents close-up
With sisters
With brothers
With immediate family
Groom and Best man full length
Groom and Best man Close-up
Groom and best man shaking hands
Groom and all groomsmen 1
2.At Brides house 12:30am - 3:00pm
Bride dressing
Mother helping with veil
Mother/maid of honour adjusting veil
Bride looking in mirror

Bride with mother looking in mirror
Bride putting on garter
Bride putting on garter with bridesmaids looking on
Bride full length
Bride half length
Bride close-up
Bride with Mother close-up
Bride with Mother full length
Corsage being pinned on Mother
Bride with Father full length
Bride with Father close-up
Bride pinning-on Fathers button-hole
Bride with both parents, full length
Bride with both parents, close-up
With Grandparents close-up
With Grandparents full length
With sisters
With brothers with immediate family
Bride and maid of honour full length
Bride and maid of honour. Close-up 2
Bride with attendants
Bride with flower girl/ring bearer
Bride leaving house with parents and Bridesmaids
Father helping Bride into limo
3. At the Ceremony 3:30pm - 4:45
Groups of guests and everybody [ 28mm or 28-70mm zoom]
Flower girl walking down aisle
Ring-bearer walking down aisle
Maid of honour walking down aisle
Bridesmaids walking down aisle
Father walking down aisle with Bride
Father Giving Bride away [You may choose to change to 75-300mm zoom
Bride & groom exchanging vows for these shots]
Bride and Groom exchanging rings
The Kiss
Bride signing register
Groom signing register
Bride and Groom walking back down aisle
Bride and groom outside church

Bride and Groom getting into limo 3
4. Formal Photos 5:00 - 6:30
Bride alone Full length

Bride alone ¾
Bride alone close-up
Bride alone head shot
Bride alone peeping over flowers

Bride & groom Kissing
Bride & Groom full length
Bride & Groom close-up 3
Groom full length
Groom ¾
Groom close-up
Close-up of rings
Group shot of bride & bridesmaids [18-55mm zoom]

5. At reception
Wedding party announced
Bride and Groom announced
Bride & grooms first dance

Wedding party dancing
Brides dance with Father
Grooms dance with Mother
Best man toasting Bride & Groom
Bride & groom toasting each other
The cake

Bride& Groom posed at cake
Cutting cake
Bride & Groom feeding each other cake
Throwing bouquet
Bouquet catch
Groom taking off garter
Groom throwing garter
Garter catch
Bride & Groom with catchers
Guests leaving 4
Posed departure of bride & Groom ( Kissing, waving etc.,)
Bride & Groom leaving reception venue
Bride and Groom leaving in limo
Close up of invitation
Picture of band or DJ
Photography Modus Operandi
Although you usually should use a tripod when shooting the formals (the group shots after the ceremony with the bride, groom, family members, etc.), when shooting the wedding ceremony in a low-light situation like a church, youll often need to hand-hold your shots. This is a problem because hand-holding in low-light situations is almost a guarantee of having blurry photos (because of the slow shutter speeds of low-light situations). So, how do the pros get those crisp low-light shots in a setting like a church? Two things: (1) they increase their digital cameras ISO (the digital film speed). Todays digital SLR cameras (in particular, the Nikons and Canons) let you shoot at very high ISOs with little visible noise. So how high can you go? At least ISO 800 (see Canon LCD panel above), but you can usually get away with as high as ISO 1600 in most situations. This lets you get away with hand-holding in the low light of a church, while avoiding the camera shake youd get at ISO 100 or 200. (2) They shoot with their fastest lens (your lens with the largest available f-stop, like f/1.4, f/2.8, or f/3.5), which lets in more available light, allowing you to shoot in lower light without blurring your images.
If youre shooting your weddings with a flash indoors, youre likely to get harsh shadows and unflattering, flat light, but it doesnt have to be that way. The trick for getting soft, diffused light from your built-in flash without those harsh, hard shadows is to get a flash diffuser (a translucent sheet that fits over your flash to make the light softer and diffused). If you have a built-in pop-up flash on your digital camera, you can use something like LumiQuests Soft Screen Diffuser (which runs around $13), or if you have an external flash unit, take a look at Gary Fongs Lightsphere-II, which sells for around $48, attaches over your flash unit, and does a great job of softening the light and dispersing it evenly. This will make a big difference in the quality of the light that falls on your bride, groom, and bridal party, and youll get much more professional results for a very small investment.
The other method of getting soft, diffused, and better yet, directional light using a flash (the key word here is directional, because it keeps your flash shots from looking flat) works if youre using an external flash unit (and not the built-in flash on your camera, which is pretty limited, as youll soon see). The advantage of an external flash unit is that you can change the angle and direction of the flash. The reason this is cool is that instead of aiming your flash right into your subjects face (which gives the most harsh, flat light you can imagine), you can bounce the light off one of two places: (1) the ceiling. If the room youre shooting in has a white ceiling (and chances are the ceiling is white), then you can aim your flash head up at the ceiling at a 45° angle (as shown above, and provided that the ceiling isnt more than 10 feet tall) and the ceiling will absorb the harsh light, and what will fall on your subject is much softer, smoother light and, best of all, it wont cast hard shadows behind your subject. Instead, your soft shadows will cast on the ground (and out of your frame). Now, want to take this up another notch? Then instead of aiming at the ceiling, (2) have an assistant (a friend, relative, etc.) hold a reflector on your left or right side, slightly above shoulder height, then angle your flash head into that. So now, the reflector eats up the harsh light, but better yet, since the reflector is at an angle, it casts soft directional light on an angle, too. This puts soft shadows on one side of the brides (grooms, bridesmaids, etc.) face, giving a more pleasing and less flat lighting effect (think of it as side lighting).
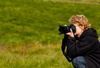
One trick that wedding photographers have been using for years is to use fill flash outdoors on sunny days. I know, it sounds crazy to use a flash when the sun is bright in the sky, but wedding photographers add flash to these daylight shots to help eliminate those hard, harsh shadows in their subjects faces, and make the bride and groom look more natural under these undesirable lighting conditions (plus it will usually add nice catchlights in the eyes of your subjects, as well). Make sure you check the results in your LCD monitor to make sure your light is properly balanced. Heres a shot of me taken while shooting a recent wedding. Notice the flash doesnt fire straight into the wedding partys faces. Instead, the head is rotated to the right (or left) and tilted 45°, so the flash fills in the shadows yet doesnt have that harsh look youd get by aiming the flash straight at your subjects. As long as youre not more than 8 or 10 feet away from your subject, dont worrythe flash will still be effective, even though its not aiming straight on.
Another Cool Flash Tip
Heres another tip that will make your flash seem less flashy when shooting outdoors: use your cameras flash exposure compensation button and change the flash exposure compensation to 1 (it works the same way regular exposure compensation works, but for flash exposures). Your flash will still help lift out the shadows, but now without being so
Its not unusual for a pro wedding photographer to shoot 750 shots in one wedding, covering the four major parts of a wedding (the pre-wedding shots, the ceremony, the formals, and the reception), so its likely youll be shooting a similar amount (maybe less, maybe more, but it will be literally hundreds of shots). The last thing you want to happen is to run out of film (in other wordsyou dont want to fill up your digital cameras memory card unless you have an empty backup card ready to step right in so you can keep shooting). The trick here is to keep a spare backup memory card physically on you at all times. Keep one right there in your pocket (or purse) so the moment your card reads full, youre just seconds away from continuing your shoot. Its a natural law of wedding photography that your memory card will become full at the most crucial moment of the ceremony, and if you have to stop to go find your backup card (in your camera bag across the room, in the car, or in the reception hall), youre going to miss the most important shot of the day (I learned this the hard way). So always keep a backup physically on you, so youre only 10 seconds away from shooting again.
After the ceremony, in most cases youll shoot the formal portraits of the bride and groom posed with everyone from bridesmaids to grandparents. The hard part is rounding up all the people youll need to shoot with the bride and groom at the exact time you need them. This can take 30 minutes or three hoursits up to you and how organized you are. Heres a tip to make things move as quickly as possible: gather everyone that will appear in any shot together right from the start. While theyre all sitting there, shoot the formal bride and groom portraits first (youll see why in just a moment). Once youve got those out of the way, shoot the largest groups of people (the huge family portraits), and then once youre done with a group (like the grandparents for example), send them off to the reception. So, in shortstart with everyone, and then as you shoot them, release them to go to the reception until youre left with just the bride and groom again. If you dont do it this way, youll wind up standing around for long periods of time waiting for Uncle Arnie, whos somewhere in the reception hall. The reason you shoot the bride and groom first is that the pressure to get the bride and groom to the reception hall increases exponentially as time goes by, because generally they hold the meal until the bride and groom have arrived. So, everyone is sitting in the reception hall waiting on youthe photographer. You then wind up rushing the most important portraits of them all (the ones the couple will actually buytheir formal portraits). Make your life easystart big, then get small.
When shooting large groups for the formal portraits, youll want to make sure that you use an aperture setting that keeps everyone in focus. Try f/11 for a reasonable depth of field for groups. Now, where do you focus? If you have more than one row of people deep, the old rule (which still stands true today) is to focus on the eyes of the people in the front row. You have more depth behind than in front, so make sure you focus on them, and the rest should be okay, but if that front row is out of focus, the whole shot is a bust.
If you shoot a group of five people or more, its almost guaranteed that one or more people will have their eyes shut. Its another natural law of wedding photography, but youre not going to have to worry about that very much, because youre about to learn a great trick that will eliminate most, if not all, instances of people blinking or having their eyes closed. When youre ready to shoot the shot, have everybody close their eyes, and then on the count of three have them all open their eyes and smile. Then, wait one more count before you take your shot. When Im shooting these groups, heres what I say, Okay, everybody close your eyes. Now open them on 3-2-1...open! Then I wait one count after they open their eyes before I take the shot. It works wonders.
Theres a problem with taking photos of people dancing. If you shoot them with a flash (and most likely you will), it will freeze their movement, so theyll look like theyre just standing still, but in somewhat awkward poses. It still amazes me how people doing a line dance can be pictured as people in a police lineupthe camera just doesnt capture motionunless you tell it to. There are really two techniques: the first is in the camera. Its called panning, where you take the camera and follow the movement of one of the people dancing (usually the bride, groom, a bridesmaid, or a groomsman), while using a slow shutter speed so the rest of the people have a motion blur, which makes them look like (you guessed it) theyre dancing. If you didnt remember to employ this technique during your reception shoot, then you can add this motion blur in Photoshop. The first step is to duplicate the Background layer. Then go under the Filter menu, under Blur, and choose Motion Blur. Set the Angle to 0°, then increase the Distance until things look like theyre really moving. The last step is to get the Eraser tool, choose a really big soft-edged brush (like the soft round 200-pixel brush) and erase over the person youre focusing on (like the bride, etc.) so that person appears in focus, while everyone else is dancing and moving around having a good time.
The main focus at any wedding is the bride, so make darn sure your main focus at the pre-wedding, the ceremony, the formals, and the reception is the bride. Follow the bride just like you would follow the quarterback if you were shooting a football game. Especially if youre going to be selling these photos as it will be the bride (either directly or indirectly) that will be buying the prints. So make darn sure that shes the clear star of the show (photos of Uncle Arnie at the reception dont sell well, if you get my drift).
When youre shooting your formal shots, the height that you position the camera is actually very important, because if its not positioned correctly, your subjects body can look distorted or some parts can look larger than normal (in general, this is just not good stuff). So, finding the right height for professional portraits is critical. Here are a few guidelines to help you get the pro look:
Standing, Full-Length Portrait: Position your camera (on your tripod) at the brides waist height (yes, youll have to squat down/bend over, etc., but the final result will be worth it). Keep your lens straight (dont aim up towards the brides face).
7/8 Shots (from the Calf Up): Position your camera (on your tripod) at the brides chest level and shoot with your lens straight from there.
Head and Shoulders Shots: Position your camera (on your tripod) either at the brides eye level or slightly above.
When youre framing your formals in your viewfinder, for a more professional look, be careful not to cut off anyone at the joints (in other words, dont let the bottom of the frame cut anyone off at the elbow or knee. On the side of the frame, dont cut anyone off at the wrist or elbow either). Basically, stay away from the joints. If you have to crop an arm or leg off, try to do it as close to the middle of the arm or leg as possible, staying clear of the joints. Nuf said.
Theres a popular format for creating all your formalshave the bride and groom in the center, and have them stay put. They dont moveinstead you have groups of other people (bridesmaids, groomsmen, the best man, maid of honor, parents, grandparents, etc.) move in and out around them. Use the bride and groom as building blocks and everything will be much easier (well, as far as posing your large groups goes anyway).
In formal portraits, the backgrounds are just thatbackgrounds. And the key to a great background is using a very simple one. The simpler, the better. So dont look for an outdoor shot with a waterfall, 36 different kinds of plant life, and flowers blossoming from hanging vines, etc. Look for simplicity or it will greatly distract from your portraits, and give your formals an uncomfortable look (yet nobody will know why). Plus, if for any reason you have to retouch the background later in Photoshop, the less busy the background, the easier your retouch will be.
Background Tip
Heres another good tip: vary your background for your formals. It may not seem like a big deal at the time, but when you see the same background over and over and over again in the final wedding album, it can become really tedious. Once youve shot a few sets on one background, if theres another simple background nearby, try it in order to keep the album from looking like a cookie cutter.
The photojournalism style of wedding photography is very big right now (where you tell the story of the wedding in photos as if you were covering it for a newspaper or magazine). One of the cornerstone elements of this technique is to make sure to photographically capture the tiny details of the wedding, especially behind the scenes before the wedding. Heres a list of things you might want to capture (shoot), which can either stand alone in the wedding album or be used as backgrounds for other photos:
The brides shoes
The brides dress hanging on a hanger
The brides tiara, necklace, etc.
The wedding invitation
The sheet music played at the wedding
The guestbook (once a few people have signed it)
Their champagne glasses
Name cards at the reception
Their wedding rings (perhaps posed on the invitation with some rose petals casually placed nearby)
The airline tickets for their honeymoon
The sheet music, or CD jewel case, to the music for their first dance
The grooms boutonniere
The brides bouquet
Any fine detail in her dress
Want to create a shot everyone will remember? Shoot it from a high vantage point (look for a second story window you can shoot down from, or a balcony on the second floor, a bridge, etc.). If you cant find an existing high vantage point, then you can always create your own by bringing (or borrowing) a ladder to shoot from. Of course, be careful, because being on a ladder with expensive camera equipment is the stuff Hollywood comedies are made of. This high vantage point trick is ideal for shooting bridesmaids, groomsmen, and even the bride and groom, as shown here.
At most weddings there is a spot with really spectacular light just waiting for you to walk over and find it, but once you find it, you have to know how to use it. That light, of course, is natural light coming in through a window (its hard to make a photo look bad in that light). Look for a window that doesnt have direct sunlight (a window facing north usually works well to provide some soft, diffused light). So, once you find this wonderful natural side light coming in from a window, where do you place the bride? Ideally, about 6 to 8 feet from the window, so the light falls evenly and softly upon her (almost sounds like a song, doesnt it?). This is a great spot for shooting some pre-wedding shots of the bride alone, the bride with her mother, and the bride with her father.
When youre posing other people with the bride, including the groom, to create the level of closeness youll want in your photos, be sure to position the heads of the bride and the other person very close to each other. This doesnt sound like it would be a problem, until you actually start posing people. When they fall into what feels like a natural pose, they leave way too much room between their head and the brides head. While this may look perfectly natural in person, the photos will lack a closeness that will be really obvious. Ive seen this again and again, and I constantly have to remind people, even the groom, to move their head in very close to the bride. To them, it just feels unnatural being that close while posing, but if they dont do it, your shots will look stiff and unnatural. Keep an eye out for this on your next wedding shoot and youll be amazed at how the level of closeness between your subjects goes up, giving you much more powerful image
At weddings, there are three things youre definitely going to want to shoot with a wide-angle lens. One is the rice throwing (of course, they dont actually throw rice anymore). Youll want to shoot this with a wide-angle lens so you get the bride, groom, andjust as importantthe crowd throwing the rice (or rice byproduct) behind and around them. The other thing youll want a wide-angle lens for is shooting the interior of the church. The bride is going to expect a photo that takes it all in and your wide-angle lens will be your Get Out of Jail Free card when it comes to covering this all-important shot. Lastly, youll want your wide-angle lens for shooting the bouquet toss and garter toss, so you can get both the tosser and the anxious crowd waiting to capture the prize (so to speak). Go wide, shoot from in front of the bride, and youll get it all in one shot (but dont just take one shotthis is where a burst of shots will pay off).
A wedding happens once. You dont get a redo, so make sure that backing up your photos on location is a part of your workflow. If you fill a memory card, and pop in a new one, the next thing you should be doing is backing up that full card to a hard drive. I recommend either the Epson P-2000 or P-4000 (shown above), both of which enable you to pop a CompactFlash card directly into the unit and back up your photos onto it without having a computer nearby. I keep a P-2000 in my camera bag, and as soon as I fill a card, I pop it into the P-2000 and hit the copy button. In just a few minutes, my memory card (with those irreplaceable photos) is backed up. Also, as soon as I return to my studio, I immediately copy all the photos onto a removable hard drive, so now I have two backups of the wedding photos. This backing up is so importantwithout a backup, youre placing a lot of faith in those memory cards. Imagine how youd feel having to tell a bride and groom that your memory card somehow became corrupted and you lost the shots of their ceremony. You can sidestep that crisis by making one or two simple backups.
If youre shooting with your digital camera set to RAW format, you dont need to worry about the white balance (leave it set at Auto White Balance, you can always change it later, in Photoshop), but if youre like many pro wedding photographers, youre shooting in JPEG Fine format (so you can take more shots and write to the memory card faster). If thats the case, then youre better off choosing a preset white balance in the camera that matches the lighting situation youre shooting in (that way, the overall color of your photo looks balanced for the light). If you dont set the right white balance, your photos can look too yellow or too blue. Luckily, choosing a white balance is easier than youd think, and it will save you loads of time later when youre processing your photos in Photoshop. Just go to the menu on your digital camera, scroll to the white balance control and choose Incandescent if youre shooting in a standard reception hall, or Daylight if youre shooting an outdoor wedding. If youre using a flash, set your white balance to Flash. Its that easy to get your color in line.
Ken Caleno

Creative People Photography Phone/Fax :
Standard Wedding Photography Contract
Wedding date_____________
Brides name____________________________ Phone:______________
Address___________________________________________ ________
Grooms name___________________________ Phone:_____________
Address___________________________________________ ________
Address After Wedding________________________________________
1. This constitutes an order for wedding photography.
The client agrees that editorial use of photos and/or advertising use by Ken Caleno is acceptable unless otherwise noted. Ken Caleno may make use of these wedding photos for samples to show future customers.
2. Although all care will be taken with the photographs taken at the wedding, Ken Caleno limits any loss, damage or failure to deliver pictures for any reason, to return monies paid ( Except for Scheduling fee )
3. Upon signature, Ken Caleno reserves the time and date agreed upon, and will make no other reservations for that time and date. for this reason, Scheduling fee is non-refundable, even if date is changed or wedding cancelled for any reason.
4. A scheduling Fee is due on signing this contract; the remaining balance to be paid 7 days prior to wedding date.
All terms of this agreement are understood and agreed upon.
Agreed price for photography $_________________________
Signature of photographer:_________________________________
Signature of signing party__________________________________
Address___________________________________________ ____
Date________________
© Kenneth William Caleno (Dip Phot) 2012 and beyond
My take on Wedding Photography - Kenneth William Caleno
Essential Equipment
Two camera bodies that share the lenses
Two flashes (strobes) plus cables, etc.,
18mm-55mm zoom
50mm standard lens F1.8 or even better F1.4-for low-light situations
Not essential, but handy for candids and from back of church images- 70mm-300mm zoom lens
large capacity digital storage cards
At least triple batteries as you think you will need
Two white reflectors
Diffusion (soft-focus) filtere
85c warming filter for grey days (Shade White balance)
Tripod for formal photos
Lens hoods to control flare
Planning the wedding shoot
You must have a timetable to work from, or you will fail miserably.
You must always remember:
The Bride is never on time
Cars are sometimes late arriving
Ministers will often talk for longer than expected
Traffic may be chaotic
Something may have been forgotten somewhere
Murphy, being the Patron Saint of Wedding Photographers, will no doubt ensure that if anything can go wrong-it will, and usually at the most inopportune moment. Allow for plenty of time for each section of the shooting script.
Planning Session
Planning is crucial, so make sure that time has been allowed for photography, and travelling to each location.
A: Who is Paying?
Find out who is paying for the photography, because the person footing the bill is the client, and needs to be consulted-If the brides parents are paying, and want nice, classic portrait shots of Bride & Groom, and the Bride wants cross-processed, arty, or black & white images-you had better get nice safe photos for Mum and Dad as well!
It is very important to find out and determine EXACTLY what the client wants, and is expecting to get. Quite often people do not know what they want-until you have shot it.
What you dont want to hear is: We didnt want half of this stuff, we want a refund!!!
Whoever is paying, make sure you get paid up front. I usually ask for my daily rate photography fee on signing the contract, and the balance seven days before the wedding date. (This saves you wondering if and when you are going to be paid, and saves you chasing clients for payment.) I also only charge for the days photography up front-prints are priced separately - I take around 2000 shots per wedding, and shave these down to around 500 and put as proofs on CDs made to show to my clients-then they can choose what they want for their albums.
B. Working with schedules and timetables
Once you have found out what is wanted and who is paying, start working out your shooting schedule. I usually type these out and give to attendants in the bridal party, to organise everybody for their photo to save time.
I also type my schedule on small cards for my pocket while I am shooting, so I know when the next sequence is due.
Let your clients know that formal photos of the bridal party should take between one to one-and-a-half hours.-Any longer will drag the proceedings, and any less time will limit the number of set-ups wanted.
Subtly point out that the guests should be advised of what is going on.
It is important to let the client know that if they cut your time, you will need to cut the amount of photography to shoot.
Protocol and family Politics
You need to tread very carefully where family politics are concerned, as you set up groups- ex-wives versus new wives, step-children, recently divorced couples. Better to let people sort themselves where they want to be, then just arrange set-ups accordingly.
If everyone, guests included, know exactly what happens, and when, and with whom, it will alleviate, the Brides and grooms stress, your stress, and you will get results that please your clients.
Once PLAN A ( Beautiful sunny day, no wind,) is in place, work out alternatives- B; C; D; etc., You need somewhere to photograph if its raining, snowing, gale-force winds etc., And a choice of idyllic locations.
A Typical Schedule Plan
a). Grooms House
Photos at the Grooms house happen rarely, but if they are wanted, then you must make sure things run on time, in order to get to the Brides house on time
b). Brides House
Get to the house early, showing you are organised and professional. The Bride may be very nearly ready, and being the early bird may give you a chance to get things in order without rushing. Confidence is the keyword, so compliment the Bride, say she looks nice, and has nothing to worry about (Do not, under any circumstances tell her she is beautiful, because, if she isnt, she will know, and this could turn her against you.)
If you can help the bride and her family to be calm at the house, the tone of the whole wedding will reflect on this.
Let the family know what you are going to photograph outside the church, or wedding venue.
c). Church or Wedding Venue
Get to church, or wedding venue as soon as you can to get set up for what follows.
Talk to, and photograph the Groom.
Talk to minister/celebrant, checking all is ok, use/non-use of flash, etc.,
Wait outside for cars to arrive
While the ceremony is taking place, look around for photo opportunities-is the Brides Mother crying? her Father, crying or smiling?
Once the vows have been made, register signed, etc., Bride and Groom will walk down the aisle, or things will just finish. This can be an awkward moment-one of two things usually happen:
a) The Bride & Groom will be surrounded by guests, and if there are lots of guests the crowd may take a time to clear.
b) (Usually at churches) when Bride & Groom come out there is no-one at first, then all guests file out slowly and stand around the couple looking at them.
Some guests will want to take photographs at this point, so set up the shot and let them fire away, after you. Work with these people throughout the day, and some of these people could be your next client.
Start the family photos, beginning with the Brides side, then the Grooms, then all the friends and hangers-on.
d). The Formal Photos
After all the ceremony kerfuffle, the bridal party will want to relax a bit, maybe have a drink and a smoke for 10 minutes or so, while you are getting ready. But when you are ready, you need to get them back on track to get all required images done on time Bride and Groom, at this point, arent usually the problem, its generally the best man wants another beer, or the maid of honour who wants another smoke, or someone gets loud. You need to gain control of this.
If there are children in the party, use them first, as they have a very short attention span.
No matter what happens here,-stay calm, even when things go wrong, keep calm you wont get good photos if you are stressed.
When you think you have finished, better check with Bride and Groom that you have all they wanted, or if you were pressed for time, that you have the set-ups they wanted the most.
Now you have to get back to the reception before the wedding party do.
e). Mock Cake Cutting
This is done when budgets are tight, and you arent required to attend the reception, due to funds being tight.
f ). The Reception
Before the bride and Groom arrive at the reception venue, Be ready to catch them arriving.
Things that usually happen at reception are: (in any order): speeches, toasts, food, then the first dance. While there is potential photography, dont eat, or drink, just in case you miss something worthwhile.
Before leaving be sure that the Bride, Groom and whoever is paying for the photography, have all the shots they need with nothing missed.
g ). After it all
Get the finished prints to the Bride & Groom as soon as possible, thats good business, You will want them to see the prints while the day will still be fresh in their memory. Do not get caught in the middle of any disputes-The prints are always to be delivered to the Married couple, and not to anyone else. (unless arranged otherwise). If someone other than the Bride & Groom is paying for the photography, it should be explained to them beforehand that the Bride & Groom get the prints.
When sorting out the finished prints, take out the blinks, and the ones that arent up to par.
The Photography
A blow by blow account of a typical wedding - Ceremony at 4pm
You have your little schedule cards on a loop of string

You have your flash/strobe set to ¼ Iso (for fill-in, or all outdoor photos if you want to play safe, use at full Iso for indoor shots)
You 18-55 zoom lens on camera
1. At Grooms house 10:00 am - 11:30am ( All times can only be approximated)
Groom, getting ready,
Groomsmen, playing around
Groom, in mirror
Groom dressed, GQ pose, jacket over shoulder
Groom Full length
Groom with mother Close-up
Groom with Father Close-up
Groom with both parents full length
Groom with both parents close-up
Groom with Grandparents Full length
Groom with Grandparents close-up
With sisters
With brothers
With immediate family
Groom and Best man full length
Groom and Best man Close-up
Groom and best man shaking hands
Groom and all groomsmen 1
2.At Brides house 12:30am - 3:00pm
Bride dressing
Mother helping with veil
Mother/maid of honour adjusting veil
Bride looking in mirror

Bride with mother looking in mirror
Bride putting on garter
Bride putting on garter with bridesmaids looking on
Bride full length
Bride half length
Bride close-up
Bride with Mother close-up
Bride with Mother full length
Corsage being pinned on Mother
Bride with Father full length
Bride with Father close-up
Bride pinning-on Fathers button-hole
Bride with both parents, full length
Bride with both parents, close-up
With Grandparents close-up
With Grandparents full length
With sisters
With brothers with immediate family
Bride and maid of honour full length
Bride and maid of honour. Close-up 2
Bride with attendants
Bride with flower girl/ring bearer
Bride leaving house with parents and Bridesmaids
Father helping Bride into limo
3. At the Ceremony 3:30pm - 4:45
Groups of guests and everybody [ 28mm or 28-70mm zoom]
Flower girl walking down aisle
Ring-bearer walking down aisle
Maid of honour walking down aisle
Bridesmaids walking down aisle
Father walking down aisle with Bride
Father Giving Bride away [You may choose to change to 75-300mm zoom
Bride & groom exchanging vows for these shots]
Bride and Groom exchanging rings
The Kiss
Bride signing register
Groom signing register
Bride and Groom walking back down aisle
Bride and groom outside church

Bride and Groom getting into limo 3
4. Formal Photos 5:00 - 6:30
Bride alone Full length

Bride alone ¾
Bride alone close-up
Bride alone head shot
Bride alone peeping over flowers

Bride & groom Kissing
Bride & Groom full length
Bride & Groom close-up 3
Groom full length
Groom ¾
Groom close-up
Close-up of rings
Group shot of bride & bridesmaids [18-55mm zoom]

5. At reception
Wedding party announced
Bride and Groom announced
Bride & grooms first dance

Wedding party dancing
Brides dance with Father
Grooms dance with Mother
Best man toasting Bride & Groom
Bride & groom toasting each other
The cake

Bride& Groom posed at cake
Cutting cake
Bride & Groom feeding each other cake
Throwing bouquet
Bouquet catch
Groom taking off garter
Groom throwing garter
Garter catch
Bride & Groom with catchers
Guests leaving 4
Posed departure of bride & Groom ( Kissing, waving etc.,)
Bride & Groom leaving reception venue
Bride and Groom leaving in limo
Close up of invitation
Picture of band or DJ
Photography Modus Operandi
Although you usually should use a tripod when shooting the formals (the group shots after the ceremony with the bride, groom, family members, etc.), when shooting the wedding ceremony in a low-light situation like a church, youll often need to hand-hold your shots. This is a problem because hand-holding in low-light situations is almost a guarantee of having blurry photos (because of the slow shutter speeds of low-light situations). So, how do the pros get those crisp low-light shots in a setting like a church? Two things: (1) they increase their digital cameras ISO (the digital film speed). Todays digital SLR cameras (in particular, the Nikons and Canons) let you shoot at very high ISOs with little visible noise. So how high can you go? At least ISO 800 (see Canon LCD panel above), but you can usually get away with as high as ISO 1600 in most situations. This lets you get away with hand-holding in the low light of a church, while avoiding the camera shake youd get at ISO 100 or 200. (2) They shoot with their fastest lens (your lens with the largest available f-stop, like f/1.4, f/2.8, or f/3.5), which lets in more available light, allowing you to shoot in lower light without blurring your images.
If youre shooting your weddings with a flash indoors, youre likely to get harsh shadows and unflattering, flat light, but it doesnt have to be that way. The trick for getting soft, diffused light from your built-in flash without those harsh, hard shadows is to get a flash diffuser (a translucent sheet that fits over your flash to make the light softer and diffused). If you have a built-in pop-up flash on your digital camera, you can use something like LumiQuests Soft Screen Diffuser (which runs around $13), or if you have an external flash unit, take a look at Gary Fongs Lightsphere-II, which sells for around $48, attaches over your flash unit, and does a great job of softening the light and dispersing it evenly. This will make a big difference in the quality of the light that falls on your bride, groom, and bridal party, and youll get much more professional results for a very small investment.
The other method of getting soft, diffused, and better yet, directional light using a flash (the key word here is directional, because it keeps your flash shots from looking flat) works if youre using an external flash unit (and not the built-in flash on your camera, which is pretty limited, as youll soon see). The advantage of an external flash unit is that you can change the angle and direction of the flash. The reason this is cool is that instead of aiming your flash right into your subjects face (which gives the most harsh, flat light you can imagine), you can bounce the light off one of two places: (1) the ceiling. If the room youre shooting in has a white ceiling (and chances are the ceiling is white), then you can aim your flash head up at the ceiling at a 45° angle (as shown above, and provided that the ceiling isnt more than 10 feet tall) and the ceiling will absorb the harsh light, and what will fall on your subject is much softer, smoother light and, best of all, it wont cast hard shadows behind your subject. Instead, your soft shadows will cast on the ground (and out of your frame). Now, want to take this up another notch? Then instead of aiming at the ceiling, (2) have an assistant (a friend, relative, etc.) hold a reflector on your left or right side, slightly above shoulder height, then angle your flash head into that. So now, the reflector eats up the harsh light, but better yet, since the reflector is at an angle, it casts soft directional light on an angle, too. This puts soft shadows on one side of the brides (grooms, bridesmaids, etc.) face, giving a more pleasing and less flat lighting effect (think of it as side lighting).
One trick that wedding photographers have been using for years is to use fill flash outdoors on sunny days. I know, it sounds crazy to use a flash when the sun is bright in the sky, but wedding photographers add flash to these daylight shots to help eliminate those hard, harsh shadows in their subjects faces, and make the bride and groom look more natural under these undesirable lighting conditions (plus it will usually add nice catchlights in the eyes of your subjects, as well). Make sure you check the results in your LCD monitor to make sure your light is properly balanced. Heres a shot of me taken while shooting a recent wedding. Notice the flash doesnt fire straight into the wedding partys faces. Instead, the head is rotated to the right (or left) and tilted 45°, so the flash fills in the shadows yet doesnt have that harsh look youd get by aiming the flash straight at your subjects. As long as youre not more than 8 or 10 feet away from your subject, dont worrythe flash will still be effective, even though its not aiming straight on.
Another Cool Flash Tip
Heres another tip that will make your flash seem less flashy when shooting outdoors: use your cameras flash exposure compensation button and change the flash exposure compensation to 1 (it works the same way regular exposure compensation works, but for flash exposures). Your flash will still help lift out the shadows, but now without being so
Its not unusual for a pro wedding photographer to shoot 750 shots in one wedding, covering the four major parts of a wedding (the pre-wedding shots, the ceremony, the formals, and the reception), so its likely youll be shooting a similar amount (maybe less, maybe more, but it will be literally hundreds of shots). The last thing you want to happen is to run out of film (in other wordsyou dont want to fill up your digital cameras memory card unless you have an empty backup card ready to step right in so you can keep shooting). The trick here is to keep a spare backup memory card physically on you at all times. Keep one right there in your pocket (or purse) so the moment your card reads full, youre just seconds away from continuing your shoot. Its a natural law of wedding photography that your memory card will become full at the most crucial moment of the ceremony, and if you have to stop to go find your backup card (in your camera bag across the room, in the car, or in the reception hall), youre going to miss the most important shot of the day (I learned this the hard way). So always keep a backup physically on you, so youre only 10 seconds away from shooting again.
After the ceremony, in most cases youll shoot the formal portraits of the bride and groom posed with everyone from bridesmaids to grandparents. The hard part is rounding up all the people youll need to shoot with the bride and groom at the exact time you need them. This can take 30 minutes or three hoursits up to you and how organized you are. Heres a tip to make things move as quickly as possible: gather everyone that will appear in any shot together right from the start. While theyre all sitting there, shoot the formal bride and groom portraits first (youll see why in just a moment). Once youve got those out of the way, shoot the largest groups of people (the huge family portraits), and then once youre done with a group (like the grandparents for example), send them off to the reception. So, in shortstart with everyone, and then as you shoot them, release them to go to the reception until youre left with just the bride and groom again. If you dont do it this way, youll wind up standing around for long periods of time waiting for Uncle Arnie, whos somewhere in the reception hall. The reason you shoot the bride and groom first is that the pressure to get the bride and groom to the reception hall increases exponentially as time goes by, because generally they hold the meal until the bride and groom have arrived. So, everyone is sitting in the reception hall waiting on youthe photographer. You then wind up rushing the most important portraits of them all (the ones the couple will actually buytheir formal portraits). Make your life easystart big, then get small.
When shooting large groups for the formal portraits, youll want to make sure that you use an aperture setting that keeps everyone in focus. Try f/11 for a reasonable depth of field for groups. Now, where do you focus? If you have more than one row of people deep, the old rule (which still stands true today) is to focus on the eyes of the people in the front row. You have more depth behind than in front, so make sure you focus on them, and the rest should be okay, but if that front row is out of focus, the whole shot is a bust.
If you shoot a group of five people or more, its almost guaranteed that one or more people will have their eyes shut. Its another natural law of wedding photography, but youre not going to have to worry about that very much, because youre about to learn a great trick that will eliminate most, if not all, instances of people blinking or having their eyes closed. When youre ready to shoot the shot, have everybody close their eyes, and then on the count of three have them all open their eyes and smile. Then, wait one more count before you take your shot. When Im shooting these groups, heres what I say, Okay, everybody close your eyes. Now open them on 3-2-1...open! Then I wait one count after they open their eyes before I take the shot. It works wonders.
Theres a problem with taking photos of people dancing. If you shoot them with a flash (and most likely you will), it will freeze their movement, so theyll look like theyre just standing still, but in somewhat awkward poses. It still amazes me how people doing a line dance can be pictured as people in a police lineupthe camera just doesnt capture motionunless you tell it to. There are really two techniques: the first is in the camera. Its called panning, where you take the camera and follow the movement of one of the people dancing (usually the bride, groom, a bridesmaid, or a groomsman), while using a slow shutter speed so the rest of the people have a motion blur, which makes them look like (you guessed it) theyre dancing. If you didnt remember to employ this technique during your reception shoot, then you can add this motion blur in Photoshop. The first step is to duplicate the Background layer. Then go under the Filter menu, under Blur, and choose Motion Blur. Set the Angle to 0°, then increase the Distance until things look like theyre really moving. The last step is to get the Eraser tool, choose a really big soft-edged brush (like the soft round 200-pixel brush) and erase over the person youre focusing on (like the bride, etc.) so that person appears in focus, while everyone else is dancing and moving around having a good time.
The main focus at any wedding is the bride, so make darn sure your main focus at the pre-wedding, the ceremony, the formals, and the reception is the bride. Follow the bride just like you would follow the quarterback if you were shooting a football game. Especially if youre going to be selling these photos as it will be the bride (either directly or indirectly) that will be buying the prints. So make darn sure that shes the clear star of the show (photos of Uncle Arnie at the reception dont sell well, if you get my drift).
When youre shooting your formal shots, the height that you position the camera is actually very important, because if its not positioned correctly, your subjects body can look distorted or some parts can look larger than normal (in general, this is just not good stuff). So, finding the right height for professional portraits is critical. Here are a few guidelines to help you get the pro look:
Standing, Full-Length Portrait: Position your camera (on your tripod) at the brides waist height (yes, youll have to squat down/bend over, etc., but the final result will be worth it). Keep your lens straight (dont aim up towards the brides face).
7/8 Shots (from the Calf Up): Position your camera (on your tripod) at the brides chest level and shoot with your lens straight from there.
Head and Shoulders Shots: Position your camera (on your tripod) either at the brides eye level or slightly above.
When youre framing your formals in your viewfinder, for a more professional look, be careful not to cut off anyone at the joints (in other words, dont let the bottom of the frame cut anyone off at the elbow or knee. On the side of the frame, dont cut anyone off at the wrist or elbow either). Basically, stay away from the joints. If you have to crop an arm or leg off, try to do it as close to the middle of the arm or leg as possible, staying clear of the joints. Nuf said.
Theres a popular format for creating all your formalshave the bride and groom in the center, and have them stay put. They dont moveinstead you have groups of other people (bridesmaids, groomsmen, the best man, maid of honor, parents, grandparents, etc.) move in and out around them. Use the bride and groom as building blocks and everything will be much easier (well, as far as posing your large groups goes anyway).
In formal portraits, the backgrounds are just thatbackgrounds. And the key to a great background is using a very simple one. The simpler, the better. So dont look for an outdoor shot with a waterfall, 36 different kinds of plant life, and flowers blossoming from hanging vines, etc. Look for simplicity or it will greatly distract from your portraits, and give your formals an uncomfortable look (yet nobody will know why). Plus, if for any reason you have to retouch the background later in Photoshop, the less busy the background, the easier your retouch will be.
Background Tip
Heres another good tip: vary your background for your formals. It may not seem like a big deal at the time, but when you see the same background over and over and over again in the final wedding album, it can become really tedious. Once youve shot a few sets on one background, if theres another simple background nearby, try it in order to keep the album from looking like a cookie cutter.
The photojournalism style of wedding photography is very big right now (where you tell the story of the wedding in photos as if you were covering it for a newspaper or magazine). One of the cornerstone elements of this technique is to make sure to photographically capture the tiny details of the wedding, especially behind the scenes before the wedding. Heres a list of things you might want to capture (shoot), which can either stand alone in the wedding album or be used as backgrounds for other photos:
The brides shoes
The brides dress hanging on a hanger
The brides tiara, necklace, etc.
The wedding invitation
The sheet music played at the wedding
The guestbook (once a few people have signed it)
Their champagne glasses
Name cards at the reception
Their wedding rings (perhaps posed on the invitation with some rose petals casually placed nearby)
The airline tickets for their honeymoon
The sheet music, or CD jewel case, to the music for their first dance
The grooms boutonniere
The brides bouquet
Any fine detail in her dress
Want to create a shot everyone will remember? Shoot it from a high vantage point (look for a second story window you can shoot down from, or a balcony on the second floor, a bridge, etc.). If you cant find an existing high vantage point, then you can always create your own by bringing (or borrowing) a ladder to shoot from. Of course, be careful, because being on a ladder with expensive camera equipment is the stuff Hollywood comedies are made of. This high vantage point trick is ideal for shooting bridesmaids, groomsmen, and even the bride and groom, as shown here.
At most weddings there is a spot with really spectacular light just waiting for you to walk over and find it, but once you find it, you have to know how to use it. That light, of course, is natural light coming in through a window (its hard to make a photo look bad in that light). Look for a window that doesnt have direct sunlight (a window facing north usually works well to provide some soft, diffused light). So, once you find this wonderful natural side light coming in from a window, where do you place the bride? Ideally, about 6 to 8 feet from the window, so the light falls evenly and softly upon her (almost sounds like a song, doesnt it?). This is a great spot for shooting some pre-wedding shots of the bride alone, the bride with her mother, and the bride with her father.
When youre posing other people with the bride, including the groom, to create the level of closeness youll want in your photos, be sure to position the heads of the bride and the other person very close to each other. This doesnt sound like it would be a problem, until you actually start posing people. When they fall into what feels like a natural pose, they leave way too much room between their head and the brides head. While this may look perfectly natural in person, the photos will lack a closeness that will be really obvious. Ive seen this again and again, and I constantly have to remind people, even the groom, to move their head in very close to the bride. To them, it just feels unnatural being that close while posing, but if they dont do it, your shots will look stiff and unnatural. Keep an eye out for this on your next wedding shoot and youll be amazed at how the level of closeness between your subjects goes up, giving you much more powerful image
At weddings, there are three things youre definitely going to want to shoot with a wide-angle lens. One is the rice throwing (of course, they dont actually throw rice anymore). Youll want to shoot this with a wide-angle lens so you get the bride, groom, andjust as importantthe crowd throwing the rice (or rice byproduct) behind and around them. The other thing youll want a wide-angle lens for is shooting the interior of the church. The bride is going to expect a photo that takes it all in and your wide-angle lens will be your Get Out of Jail Free card when it comes to covering this all-important shot. Lastly, youll want your wide-angle lens for shooting the bouquet toss and garter toss, so you can get both the tosser and the anxious crowd waiting to capture the prize (so to speak). Go wide, shoot from in front of the bride, and youll get it all in one shot (but dont just take one shotthis is where a burst of shots will pay off).
A wedding happens once. You dont get a redo, so make sure that backing up your photos on location is a part of your workflow. If you fill a memory card, and pop in a new one, the next thing you should be doing is backing up that full card to a hard drive. I recommend either the Epson P-2000 or P-4000 (shown above), both of which enable you to pop a CompactFlash card directly into the unit and back up your photos onto it without having a computer nearby. I keep a P-2000 in my camera bag, and as soon as I fill a card, I pop it into the P-2000 and hit the copy button. In just a few minutes, my memory card (with those irreplaceable photos) is backed up. Also, as soon as I return to my studio, I immediately copy all the photos onto a removable hard drive, so now I have two backups of the wedding photos. This backing up is so importantwithout a backup, youre placing a lot of faith in those memory cards. Imagine how youd feel having to tell a bride and groom that your memory card somehow became corrupted and you lost the shots of their ceremony. You can sidestep that crisis by making one or two simple backups.
If youre shooting with your digital camera set to RAW format, you dont need to worry about the white balance (leave it set at Auto White Balance, you can always change it later, in Photoshop), but if youre like many pro wedding photographers, youre shooting in JPEG Fine format (so you can take more shots and write to the memory card faster). If thats the case, then youre better off choosing a preset white balance in the camera that matches the lighting situation youre shooting in (that way, the overall color of your photo looks balanced for the light). If you dont set the right white balance, your photos can look too yellow or too blue. Luckily, choosing a white balance is easier than youd think, and it will save you loads of time later when youre processing your photos in Photoshop. Just go to the menu on your digital camera, scroll to the white balance control and choose Incandescent if youre shooting in a standard reception hall, or Daylight if youre shooting an outdoor wedding. If youre using a flash, set your white balance to Flash. Its that easy to get your color in line.
Ken Caleno

Creative People Photography Phone/Fax :
Standard Wedding Photography Contract
Wedding date_____________
Brides name____________________________ Phone:______________
Address___________________________________________ ________
Grooms name___________________________ Phone:_____________
Address___________________________________________ ________
Address After Wedding________________________________________
1. This constitutes an order for wedding photography.
The client agrees that editorial use of photos and/or advertising use by Ken Caleno is acceptable unless otherwise noted. Ken Caleno may make use of these wedding photos for samples to show future customers.
2. Although all care will be taken with the photographs taken at the wedding, Ken Caleno limits any loss, damage or failure to deliver pictures for any reason, to return monies paid ( Except for Scheduling fee )
3. Upon signature, Ken Caleno reserves the time and date agreed upon, and will make no other reservations for that time and date. for this reason, Scheduling fee is non-refundable, even if date is changed or wedding cancelled for any reason.
4. A scheduling Fee is due on signing this contract; the remaining balance to be paid 7 days prior to wedding date.
All terms of this agreement are understood and agreed upon.
Agreed price for photography $_________________________
Signature of photographer:_________________________________
Signature of signing party__________________________________
Address___________________________________________ ____
Date________________
© Kenneth William Caleno (Dip Phot) 2012 and beyond
May 5, 2012 00:16:55 #
wow. thanks for all the effort it took to compose this post. not a wedding photographer but dad was. you have alot of helpull advise that you passed on. you also write well. I enjioyed it even with my not being a wedding guy. I apreciate your expertise and the effort it took.
May 5, 2012 00:39:30 #

Excellent post. When I am goaded into shooting a wedding, I bring a complete portable studio, including 4000-5000 watt seconds of strobes, Mola beauty dishes, Umbrellas, Soft Boxes, Pocket Wizards with backups, two flashmeters, C-stands, 24x48 cutters, sand bags, 200-300 feet of No. 10 power distribution, two primary DSLRs, 12 or so lenses, plus a roving digital point and shoot for my assistant(s) to schlep around for more candid stuff, and, of course, full HD video production with all its bells and whistles, wireless mics and what not, like Steadicam. At one wedding, I also brought a full Photoshop/Dye Sublimation printing solution so the two families left with their finalized, archival group 8x10 shots. I actually take a lot more than this, but it gives you an idea. For obvious reasons, I try not to shoot weddings. I'm too long a filmmaker and too much a studio guy, though I do have a lot of Nikon SB800s with Gary Fong diffusion and what not. It's just the light from a tiny strobe cannot match a beauty dish, though I am working on a rig for three SB800s to fire into the Beauty Dish. Nuff Said. Just a post for humor after an excellent tour de force.
May 5, 2012 05:19:24 #

May 5, 2012 06:07:14 #
Pablo8
Loc: Nottingham UK.
Wonderful posting. I wonder though, did you ever shoot a wedding on medium format roll film? I read that todays vogue is to shoot masses too many for the couples to comprehend and choose for their album.
May 5, 2012 06:38:10 #
Old Timer
Loc: Greenfield, In.
I have always been amazed that people that think all you have to do is point the camera and press that button. The work and preparation that most occupation takes a lot time, practice, patience, dedication, resources, personality, plus a lot of other requirements not mentioned, then they think $200.00 dollars is high. Plus you are dealing with a bride on the 2 most emotional days of her life. I was at one wedding that wife of the father of the bride would not be in a shot the mother of the bride was in. I salute any one who wants and can maneuver this successfully. Not for me.
You sound as you are highly organized and well prepared, and detail oriented. From reading your post, you earn ever thing you can get for hours of dedication and work. that is the reason I like candid and snaps of people, but prefer landscape and wild life. You can capture what they look like not, what they should look like.
You sound as you are highly organized and well prepared, and detail oriented. From reading your post, you earn ever thing you can get for hours of dedication and work. that is the reason I like candid and snaps of people, but prefer landscape and wild life. You can capture what they look like not, what they should look like.
May 5, 2012 06:46:30 #

My lens choice may be different but as you said if anything can go wrong it will.
May 5, 2012 07:16:41 #

WOW, what more an I say,,wow! Great. Thank you for the great "Book of Weddings Manual" a fantastic post!!
===============
Adding a few things to the list: Several low cost P&S set to Auto to loan to appointed B&G friends so you will have what the see from their vantage point. Perhaps lady with a P&S in the brides dressing room. I also give my card to the P&S people in the before-the-ceremony crowd.
Ring flash on one of the DSLR cameras.
Shooting the friends at before-the-ceremony gets them acquainted with the fact that I am the not to be seen Nina guy that will be officially taking photos. I ask those with cameras to send me their best shots to add to the wonderful moments of memory. I give them several cards, to wife and one to guy. (He will lose his)
In a previous "wedding" forum this week, formality of classic wedding photography came up. I did a survey Friday while sub-teaching in English/honors/creative writing. I am as careful as I can be asking questions so as not to influence the results. Of course I asked only young women, 11/12 grade, no guys.
"we were discussing wedding photography in a photo-blog- but what do we know, old guys know about you young folds- so that's why I am asking you ladies...educate me please"
COST: Well, the results were that money is important... rather have the $$ to live with and buy necessities.
QUALITY & FORMALITY: They are use to Phone-Camera photos, like candid, now things, funny and real life stuff is great (I shot a woman in the 3rd row sleeping during ceremony and the B&G loved it and it was the one they got most excited about!! Laughing and commenting to each other! I had captured the Aunt's soul!) (on their 52" HDTV)
PRESENTATION: Summarized, conglomerated replies were as follows; One of those 7 inch things that show the photos. My cell phone. Email. I asked about a DVD for the TV? "Hay, that would be great." A book would be very low on their list and I had to mention it none spontaneously mentioned a book. Books are old fashion in this e' world. A social media generation. They have their pads, phones, Nooks, etc out all the time, uncontrollable, that is who they are... this Hi-5-Flipflop (shoe) generation... now is now...
May 5, 2012 08:18:41 #

Wow
very well written and so very informative!! Thank you for the time and the effort set forth on this posting!! I read it all and though I don't plan on being a wedding photographer I did walk away with some great picture ideas with all the recommendations that you wrote out. My step son just got engaged this past week and they are looking at a Sept. 2013 wedding
I have over a year to get good with my camera and then I may be able to take a few candid shots of my own using these ideas you gave!!
You are well informed and knowledgeable about this and so kind to inform others who may be wanting to start into wedding photography and with this lay out they have a great foundation to start out on!!!
Thank you once again for your time and great effort on this !!
You are well informed and knowledgeable about this and so kind to inform others who may be wanting to start into wedding photography and with this lay out they have a great foundation to start out on!!!
Thank you once again for your time and great effort on this !!
May 5, 2012 08:47:56 #

Thank you so much! I am just starting to get into wedding photography and this information is invalueable!
May 5, 2012 09:47:28 #

Very impressive. I think you should put a location in your profile, because people might want to employ you. I also think that we should all pitch in for the medical expenses you incur for the carpal tunnel syndrome you get from typing such a long post.
May 5, 2012 11:14:30 #
May 5, 2012 14:12:59 #
Jhouse341
Loc: Indianapolis In
This is the most complete wedding info anyone can give to someone. Even I thank you for sharing. You can't go wrong going with this.
May 5, 2012 14:27:08 #

I don't do weddings but found your post most interesting and educational.
I'm sure the effort you put into your post will be appreciated by many here that strive to follow your example. :thumbup:
I'm sure the effort you put into your post will be appreciated by many here that strive to follow your example. :thumbup:
May 6, 2012 08:25:59 #
If you want to reply, then register here. Registration is free and your account is created instantly, so you can post right away.