extracting a car from cluttered background
Dec 6, 2015 15:16:44 #

Hi all,
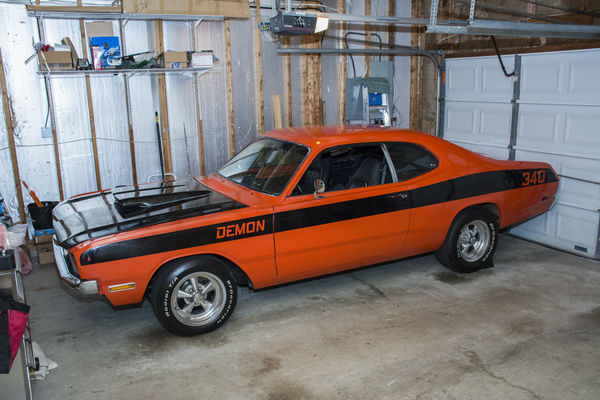
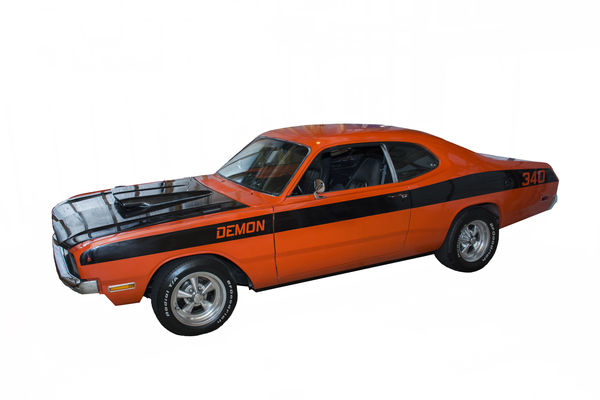
I know some of you like a challenge so I have one for ya. I want to surprise my brother with a canvas of a car he's been working on for eons but if I ask him to remove it from the garage I'll ruin the surprise. Soooo, I took it in the garage but I need to put it on a background that matches another I did years ago for him so I need it on a transparent (or white would work) background. I've tried the magnetic lasso to do this and it works fairly well but I keep ending up with one area that isn't included in the selection and when I try to add with any of the tools it's just not working. Maybe someone out there could give me a hand. It's a fairly large file. I hope it goes thru.
Thanks!
Donna
Dec 6, 2015 16:20:20 #

Dec 6, 2015 16:42:15 #
Rongnongno wrote:
Use the pen tool.
Hmmmm....if I can access my training I'll see how to do that. Thanks.
Dec 6, 2015 18:44:13 #
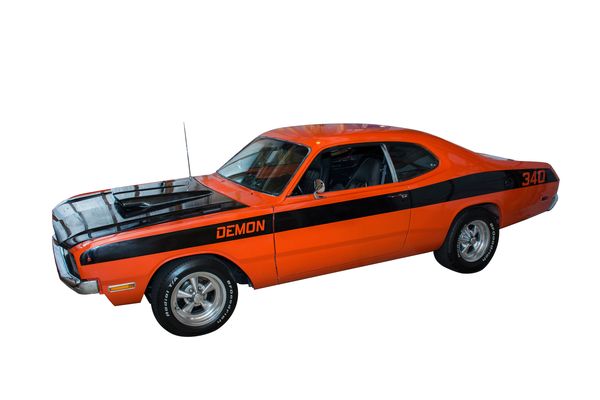
Maybe this will get you started, Donna. The edges aren't perfect. You might want to dress them up a little. The reflections are a little strange. The tires are a challenge because they are flat where they rest on the concrete.
Mike
Mike
Dec 6, 2015 18:51:54 #
Blenheim Orange wrote:
Maybe this will get you started, Donna. The edges aren't perfect. You might want to dress them up a little. The reflections are a little strange. The tires are a challenge because they are flat where they rest on the concrete.
Mike
Mike
Wow! That looks amazing to me, Mike. I know the original is not perfect. His wife and I tried everything from having the garage open/closed/lights on/lights off/with flash/without flash - EVERYTHING - with the added challenge that he could have come home at any moment and ruin the surprise! Not sure how I could have made the tires rounder. lol I did the best I could under the circumstances. You've really done a great job! Thanks.
Dec 6, 2015 18:56:10 #
Blenheim Orange wrote:
Maybe this will get you started, Donna. The edges aren't perfect. You might want to dress them up a little. The reflections are a little strange. The tires are a challenge because they are flat where they rest on the concrete.
Mike
Mike
Can I ask what tool(s) you used to get such a beautiful result? I'm trying to learn this selection stuff but keep running into brick wall after brick wall.
Dec 6, 2015 19:09:17 #
donnahde wrote:
Can I ask what tool(s) you used to get such a beautiful result? I'm trying to learn this selection stuff but keep running into brick wall after brick wall.
The best tool for selecting smooth forms like this is the pen tool.
Is is tricky to learn at first but once you get the hang of it nothing will even present a challenge if there is any dark of weird refletions.
Dec 6, 2015 19:35:39 #
Rongnongno wrote:
The best tool for selecting smooth forms like this is the pen tool.
Is is tricky to learn at first but once you get the hang of it nothing will even present a challenge if there is any dark of weird refletions.
Is is tricky to learn at first but once you get the hang of it nothing will even present a challenge if there is any dark of weird refletions.
I tried that after you suggested it, Ron, but it was very weird and at times extended both directions where I didn't want it to. I'll have to find a video to teach me how to use it. It's one I've never used before and the instructor in the Photo Artistry course I'm taking said he rarely, if ever, uses that tool.
Dec 6, 2015 19:43:59 #
donnahde wrote:
Can I ask what tool(s) you used to get such a beautiful result? I'm trying to learn this selection stuff but keep running into brick wall after brick wall.
I used a couple of techniques - the selection tools and the pen tool. I described the procedure for using the selection tools in this thread earlier today, which came from a thread that Rongnongno started a while back:
http://www.uglyhedgehog.com/t-353819-1.html
Here is a pen tool method I use:
1. Copy the original and paste as a new layer.
2. Flood fill the background with the background color you want (or paste a new background.)
3. Create a new vector layer on top of the image.
4. Draw a vector line with the pen tool around the outline of the object. By selecting the right color and using the right width you can get a line that will be almost invisible (as a line).
5. Node edit the line to conform exactly to the edge of the object, overlapping the edge by 50%.
6. On the vector layer, use the magic wand selection tool to select the area outside of the object, and then expand it by a couple of pixels so that the selection falls in the middle of your vector line.
7. Switch to the second layer, with the copy of the original, and cut or delete the selected section of the image.
Mike
Dec 6, 2015 19:57:17 #
Blenheim Orange wrote:
I used a couple of techniques - the selection tool... (show quote)
Wow, Mike. That's above and beyond anything I've attempted up to this point. All new to me. Thanks so much!
Dec 7, 2015 09:02:35 #
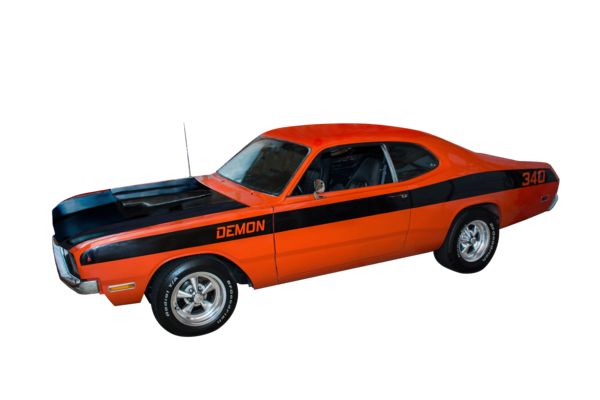
I took it one more step and removed as much reflections as I could ...You may like it or you may not , that's ok . Shined up the chrome wheels .Most of the reflections were removed using the paint brush . I used PS CC 2015 . Tommy
Dec 7, 2015 09:10:11 #
kubota king wrote:
I took it one more step and removed as much reflections as I could ...You may like it or you may not , that's ok . Shined up the chrome wheels .Most of the reflections were removed using the paint brush . I used PS CC 2015 . Tommy
Thanks, Tommy. You did a great job on the reflections AND the extraction. Man, you and Mike should give lessons!
Dec 7, 2015 15:42:22 #
donnahde wrote:
Hi all, br br I know some of you like a challenge... (show quote)
Here . . . I cheated and used Topaz ReMask 5
Dec 7, 2015 15:47:13 #

Although the pen tool is the best selection tool, it takes time to master and seems like a big step for a beginner. At your skill level, I suggest you use the Quick Selection tool to do a rough, then use Quick Mask to paint in or out the parts of the selection that are imperfect (there will be many). If you know how to use the brush, you can master Quick Mask very quickly and leave the pen until you have more experience.
Joe
Joe
Dec 7, 2015 17:10:50 #
kubota king wrote:
I took it one more step and removed as much reflections as I could ...You may like it or you may not , that's ok . Shined up the chrome wheels .Most of the reflections were removed using the paint brush . I used PS CC 2015 . Tommy
Nice job.
Mike
If you want to reply, then register here. Registration is free and your account is created instantly, so you can post right away.