How to make a test strip in Lightroom
Jul 19, 2015 09:58:04 #
I thought my method a lot clunky and cumbersome, so I searched Google and there was nothing. In fact there are many threads on Google imploring Adobe to implement Test Strips in the Print Module.
So with all its clunkiness, here is how to produce a test strip, and if anyone can come up with a better method, please, please publish it.
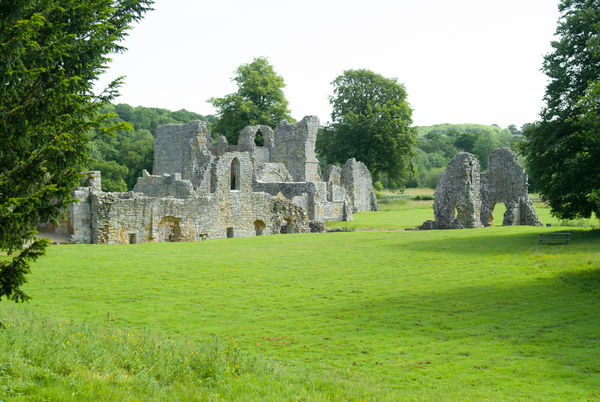
1 Find a landscape image well exposed and has a spread of the same colour and contrast across the width.
2 Crop or resize the image to 6 wide x 4 high.
3 Create a collection and name it Test Strip. (It is essential to create a collection)
4 Place the image into the collection.
5 In Photoshop, Elements or Paintshop or any other editing program you have, create a white image (white all over) size 6x4, import this into Lightroom and place it into the collection Test Strip.
6 Create two virtual copies of the white image.
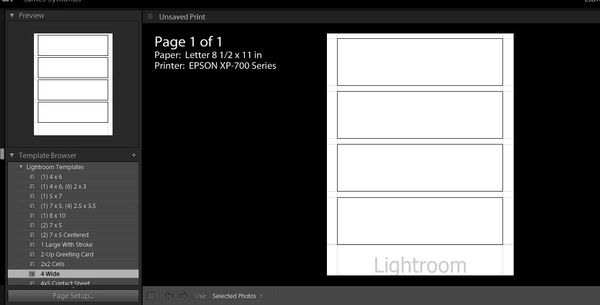
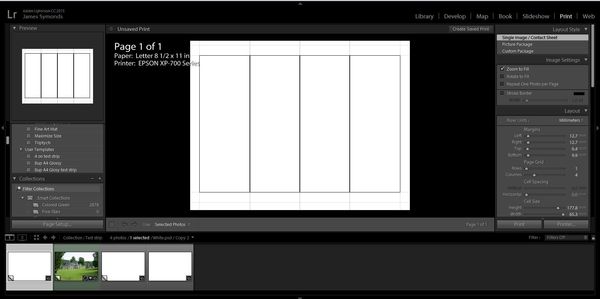
7 In the Print Module, Choose the template 4 Wide
8 Click Page Set Up, choose the printer and open its properties
9 Change the paper size to 4 x 6
10 Choose the paper (I am using Epson Premium Glossy
11 Choose Landscape
12 Enable Print Preview
13 Enable ICM in Colour Management
14 Do not disable Colour Adjustment
15 OK the print settings
16 OK the Print Set up dialogue and return to the LR Print Module
17 Select Single Image / Contact Sheet
18 Check Zoom to Fill
19 In Layout, go straight to Cell size and change the Height as required
20 Now change the margins as required
21 Guide, check show guides (should already be checked), ensure Image Cells is checked
22 Leave unchecked Page Background Colour
23 Uncheck Identity Plate
24 Watermarking unchecked
25 Page Options unchecked
26 Photo Info unchecked
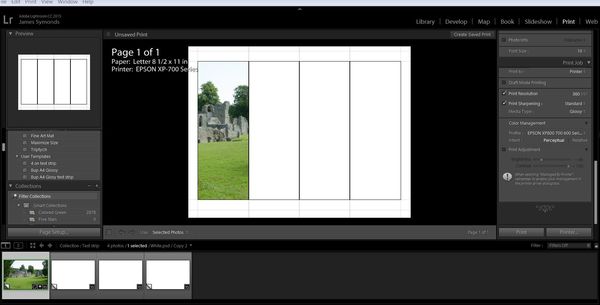
27 Print Job: set your preferred resolution
28 Print Sharpening: I use standard
29 Media type make sure this is the same (glossy or matte) that you set in Print set up
30 In Colour Management choose your paper profile
31 Choose Perceptual or Relative (I cant see a difference on my prints)
32 Uncheck Print adjustment
33 On the panel Template Browser there is a + sign, click on this to save all this work into the user template section. Call it Test strip Premium Glossy or another meaningful name.
34 Select the photograph in the film strip (a portion of this should show in the first panel of the print on screen.
35 Press Print
36 The preview should show just the 1st panel without any brightness or contrast adjustments
37 Print the image.
38 Do not remove the image from the printer yet.
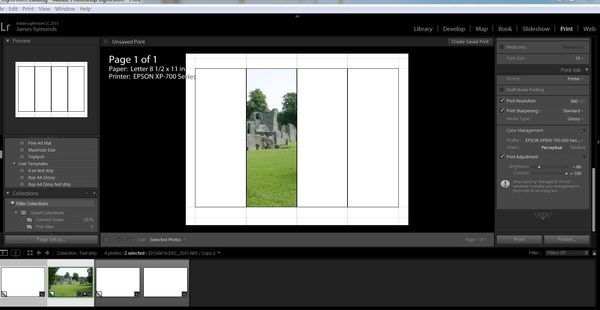
39 In the film strip, you probably have the photo followed by three plain white images. Put your cursor on the last white image, drag it to the first position. The result should be white, Photo, White and White.
40 Select the first white, and then Control + Click on the photo. The result should be that the photo is now showing in the second position on the main screen.
41 In the Colour Management panel, check Print adjustment and enter -66 into the Brightness and 0 into the contrast boxes.
42 Reload your printed copy into the printer (I cant tell you how to do that, all printers are different. )
43 Press Print
44 If all is well, the test print will now have two images printed on it, the second being darker than the first.
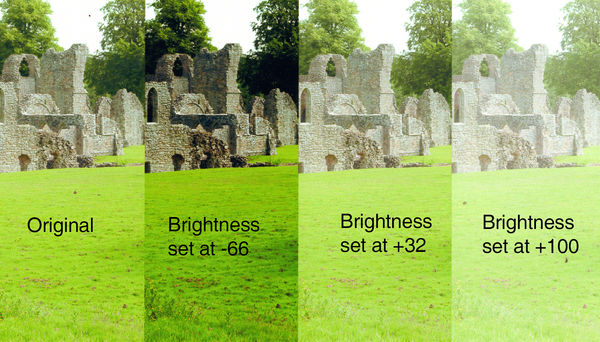
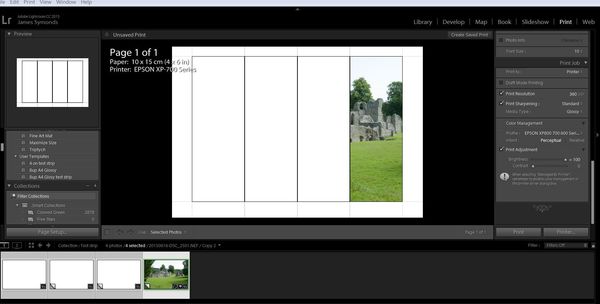
45 Repeat steps 39-43 but of course for the 3rd image, the order needs to be White, White, Photo, White and the brightness slider should be set to +32. The 4th image needs to be White, White, White, Photo and the brightness set to +100.
Note: you will not see the brightness levels on the screen, although Print Preview may give you an indication.
The test strip demonstrated in only 4 levels of brightness and very course, if you make one it will need finer tuning, perhaps 6 steps of 20 units.
So with all its clunkiness, here is how to produce a test strip, and if anyone can come up with a better method, please, please publish it.
1 Find a landscape image well exposed and has a spread of the same colour and contrast across the width.
2 Crop or resize the image to 6 wide x 4 high.
3 Create a collection and name it Test Strip. (It is essential to create a collection)
4 Place the image into the collection.
5 In Photoshop, Elements or Paintshop or any other editing program you have, create a white image (white all over) size 6x4, import this into Lightroom and place it into the collection Test Strip.
6 Create two virtual copies of the white image.
7 In the Print Module, Choose the template 4 Wide
8 Click Page Set Up, choose the printer and open its properties
9 Change the paper size to 4 x 6
10 Choose the paper (I am using Epson Premium Glossy
11 Choose Landscape
12 Enable Print Preview
13 Enable ICM in Colour Management
14 Do not disable Colour Adjustment
15 OK the print settings
16 OK the Print Set up dialogue and return to the LR Print Module
17 Select Single Image / Contact Sheet
18 Check Zoom to Fill
19 In Layout, go straight to Cell size and change the Height as required
20 Now change the margins as required
21 Guide, check show guides (should already be checked), ensure Image Cells is checked
22 Leave unchecked Page Background Colour
23 Uncheck Identity Plate
24 Watermarking unchecked
25 Page Options unchecked
26 Photo Info unchecked
27 Print Job: set your preferred resolution
28 Print Sharpening: I use standard
29 Media type make sure this is the same (glossy or matte) that you set in Print set up
30 In Colour Management choose your paper profile
31 Choose Perceptual or Relative (I cant see a difference on my prints)
32 Uncheck Print adjustment
33 On the panel Template Browser there is a + sign, click on this to save all this work into the user template section. Call it Test strip Premium Glossy or another meaningful name.
34 Select the photograph in the film strip (a portion of this should show in the first panel of the print on screen.
35 Press Print
36 The preview should show just the 1st panel without any brightness or contrast adjustments
37 Print the image.
38 Do not remove the image from the printer yet.
39 In the film strip, you probably have the photo followed by three plain white images. Put your cursor on the last white image, drag it to the first position. The result should be white, Photo, White and White.
40 Select the first white, and then Control + Click on the photo. The result should be that the photo is now showing in the second position on the main screen.
41 In the Colour Management panel, check Print adjustment and enter -66 into the Brightness and 0 into the contrast boxes.
42 Reload your printed copy into the printer (I cant tell you how to do that, all printers are different. )
43 Press Print
44 If all is well, the test print will now have two images printed on it, the second being darker than the first.
45 Repeat steps 39-43 but of course for the 3rd image, the order needs to be White, White, Photo, White and the brightness slider should be set to +32. The 4th image needs to be White, White, White, Photo and the brightness set to +100.
Note: you will not see the brightness levels on the screen, although Print Preview may give you an indication.
The test strip demonstrated in only 4 levels of brightness and very course, if you make one it will need finer tuning, perhaps 6 steps of 20 units.
Original
(Download)
Finished test strip
(Download)
4 Wide LR template
(Download)
Test Strip Template
(Download)
Position One - No Adjustments
(Download)
Position two - Brightness set at -66
(Download)
Position Four - Brightness set at +100
(Download)
Jul 19, 2015 17:26:45 #

Jul 19, 2015 17:33:36 #

You are always doing something helpful for all of us and you put a lot of work into it. Thank you, Jim!
Jul 19, 2015 18:38:30 #

Jul 20, 2015 06:44:11 #

wow...this is wonderful. Thank you for sharing this idea and how to do it.
I wasn't quite sure where you were going with this at the start. I'd like to suggest that you put an image of the finished product somewhere at the beginning.
I wasn't quite sure where you were going with this at the start. I'd like to suggest that you put an image of the finished product somewhere at the beginning.
Jul 20, 2015 07:15:57 #

I have done something similar before I learned for one printer I had to perfect the monitor image and then do a +20 on brightness and then print. Not always a solution but was most of the time. Finally adjusted my monitor to be "off" by the correct amount so it agreed with the printer.
I have done a similar by doing several brightness levels, saving and then combining on one grand image using copy paste and combine.
My approach to a test sheet was as follows: One of the levels was the base. The base image was stretched in "resize canvas" the additional brightness images were copied, paste, and moved to be next to the base image. The rest were added on in a like manner. Finally the composite was "flattened - merged"
Searcher, if I am off in left base with my approach please lit me know.
Jul 20, 2015 07:23:20 #
dpullum wrote:
I have done something similar before I learned for... (show quote)
That would work, but not in Lightroom (no layers).
I have found a video where some one has achieved this totally in LR (I had to create the white images outside of LR), the problem is the commentator on the video is mumbling in a (Spanish?) accent.
Half the battle with my method is creating the initial template, and the white masks, that is what I am working on, (and then Adobe will bring out a single click to do the whole thing).
In PS I am trying by adding a graduated filter across the image and then posturizing, but at the moment I can't quantify the brightness levels to translate to a printer.
Jul 20, 2015 07:28:57 #
Psergel wrote:
wow...this is wonderful. Thank you for sharing this idea and how to do it.
I wasn't quite sure where you were going with this at the start. I'd like to suggest that you put an image of the finished product somewhere at the beginning.
I wasn't quite sure where you were going with this at the start. I'd like to suggest that you put an image of the finished product somewhere at the beginning.
I wish I had thought of that when I started. It would make much more sense in the presentation. I will give it a go later on.
EDIT: suggestion implemented.
Jul 20, 2015 11:58:38 #
Jul 20, 2015 19:03:51 #
Thanks for the time, effort and great detail put into this presentation James. Much appreciated.
Don
Don
If you want to reply, then register here. Registration is free and your account is created instantly, so you can post right away.