Tutorial - High Contrast Monochrome (HCM Series)
Mar 26, 2015 08:02:30 #

There is nothing new about converting images into black and white for dramatic impact. At heart, this process is little more than placing a bright, white subject on a subdued dark background. I happen to use NIK Silver Efex to do my monochrome conversions, but there are other packages out there that could do pretty much the same thing.
My "secret sauce" in this process is adding a layer from a Topaz Simplify custom preset I call "Bob_SBlackOutline" (which I have provided for download below). At a certain point in the workflow, while the photo is still in color, I will run this preset to capture a layer with fine black outlines on a white border which I set aside to blend in much later using the Mulitply blending mode. But more of that to come.
For this particular tutorial I am going to include most of my comments in the description space for each illustration of the workflow.
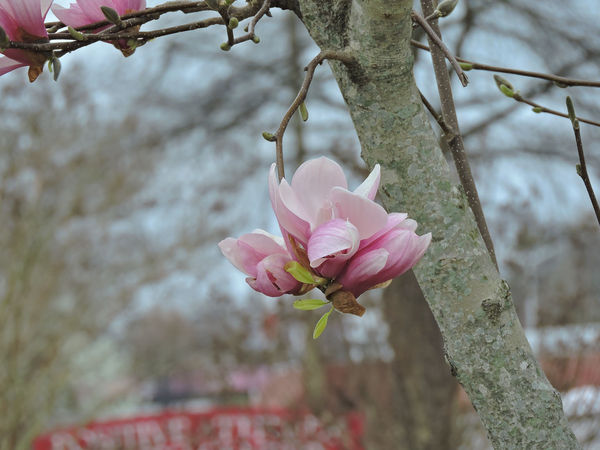
Pink Magnolia Blossom, straight out of the camera. For subject matter, it is best to chose a subject that is white or a very pale pastel
(Download)
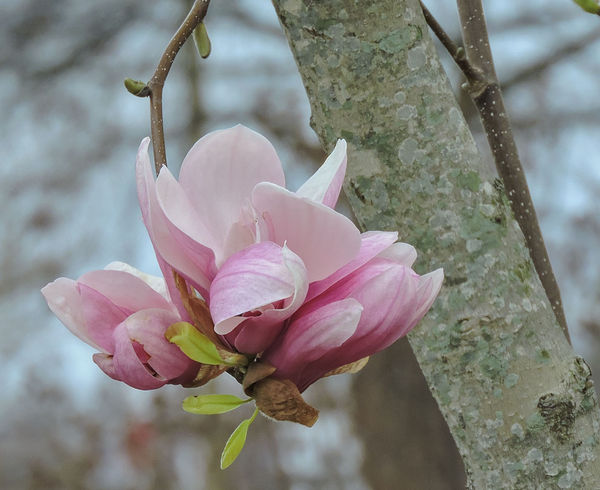
Image cropped in LR5 - highlights, shadows, white, black, clarity and vibrance sliders used to enhance image
(Download)
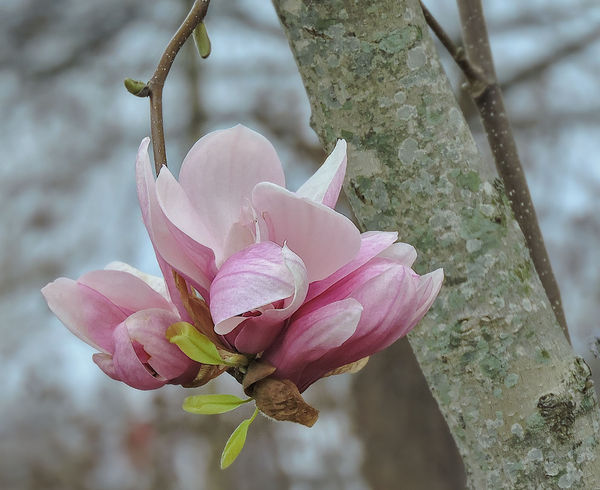
Edit image in PS CC 2014 - clean up edges and distracting spots using the Lasso tool and Fill (Content Aware with Color Adaptation checked). Applied Viveza for structure, Piccure + for Sharpness and created a layer mask to blur portions of the background using the Paint Brush tool
(Download)
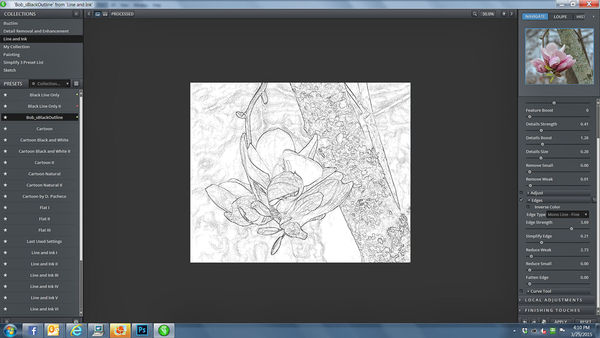
Create an outline layer using Topaz Simplify and a Custom Preset, "Bob_sBlackOutline". A copy of that preset is listed immedately below and may be downloaded for Import to Topaz Simplify (Line and Ink section)
(Download)
Bob_SBlackOutline Topaz Simplify (Line and Ink) Preset
Attached file:
(Download)
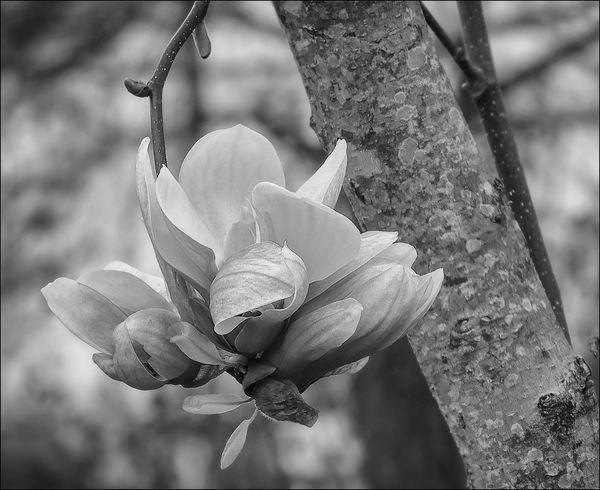
Convert Color Image to black and white using Silver Efex Pro. Use control points if a certain portion of the image needs to be highlighted. In this case, I darked the background just a bit, then placed control points on the flower blossom and several on the tree trunk to make them brighter and sharper. I used both Vignette and Burn Edges to darken the outside edges of the image so as to emphasize the main subject
(Download)
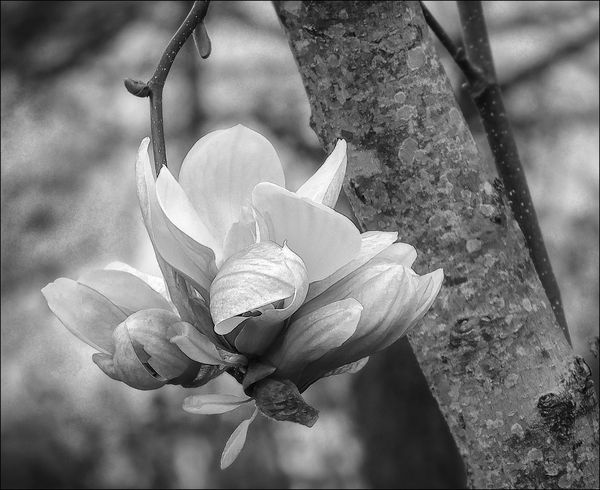
There are several things going on here. I used Smart Photo Editor (SPE) "Soft Glow" preset to create a glow effect on the image. I later called the same program, using "Grunge Background 006), which I used to create a masking layer and paint into the background to subdue the backlighting somwhat, blended in at very low opacity. I then blended in the Black Background layer using Multiply mode, placing the layer at the top of the layer stack. This creates a very fine edge along the borders of the subject which sets it apart, ever so slightly, from the background. It also serves to make some of the striations in the flower petals to become more visible. Created a Brightness/Contrast Adjustment layer then brushed in some brightness to the flower blossom.
(Download)
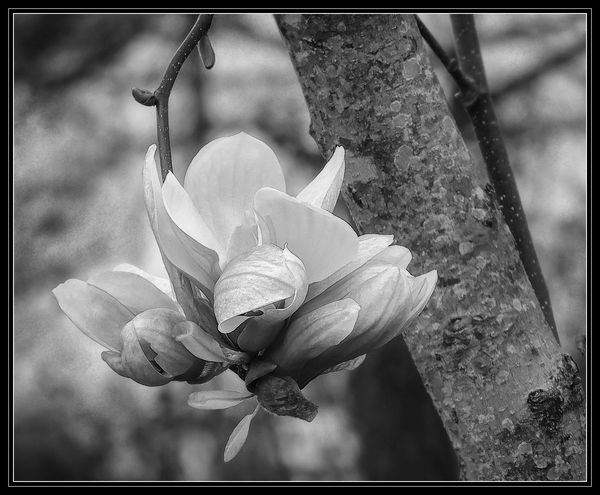
Added frame using FastStone Image Viewer. This is now "HCM Series - Magnolia Blossom"
(Download)
Mar 26, 2015 10:36:22 #

Great tutorial Bob and really nice effects achieved with this one. :thumbup:
Mar 26, 2015 11:28:16 #
jwt wrote:
Thanks Jim. Now if anyone asks, I can give them the link to this tutorial.Great tutorial Bob and really nice effects achieved with this one. :thumbup:
As it turns out, though, I wish that I had chosen a better subject. This one was just a little too much backlit to provide the dramatic contrast shift between light and dark. Still, it served its purpose for the tutorial.
Mar 26, 2015 11:46:13 #

Thanks for the tutorial.
I would like to try your Topaz preset but having trouble importing.
I've downloaded to my documents folder.
Open an image in PSE 12.
Go to filter - Topaz Adjust 5 - and from a preset collection choose import and choose your preset from the documents folder.
Then I get an error that Topaz has stopped working and I have to esc back to PSE 12.
Mar 26, 2015 11:56:30 #
dannac wrote:
Dannac, the preset should be used in Topaz Simplify, Line and Ink presets. Other than that the procedures you followed should probably work.Thanks for the tutorial.
I would like to try your Topaz preset but having trouble importing.
I've downloaded to my documents folder.
Open an image in PSE 12.
Go to filter - Topaz Adjust 5 - and from a preset collection choose import and choose your preset from the documents folder.
Then I get an error that Topaz has stopped working and I have to esc back to PSE 12.
Mar 26, 2015 12:04:47 #
Mar 26, 2015 12:44:51 #
dannac wrote:
That would explain it. By the way, Simplify is one of the plugins I use most often. It is well worth its purchase price, especially if you can catch it when it goes to 50% off.Oh OK ... I have Adjust not Simplify.
Thanks
Thanks
Mar 26, 2015 13:58:25 #
Mar 26, 2015 16:21:49 #

Very interesting technique, Bob. I'll have to give it a try. Nice work coming up with this, and thanks for sharing!
Mar 26, 2015 16:44:40 #
Treepusher wrote:
Thanks Randy. I think I've had my share of writing tutorials for a while ..... it's time to go out and record the arrival of summer. Our azaleas will be out in force in about 2 weeks .... it's best to catch them while they're fresh.Very interesting technique, Bob. I'll have to give it a try. Nice work coming up with this, and thanks for sharing!
Mar 26, 2015 16:45:28 #
juanderfulpics wrote:
You're welcome juanderfulpics. I hope you get the chance to try it out someday.Thank you so much Mr Yankle
Mar 26, 2015 16:49:12 #
Mar 27, 2015 08:19:34 #

THANKS BOB. I have a note book and print such great directions so that I can use as a reference.** Rare indeed that I do not post process a photo... I have the complete Topaz collection except impressions.
** block tutorial copy and paste into Word
** block tutorial copy and paste into Word
Mar 27, 2015 09:18:58 #
dpullum wrote:
You're quite welcome dpullum. It seems you have plenty of tools to craft your own post processing images. Best of luck.THANKS BOB. I have a note book and print such great directions so that I can use as a reference.** Rare indeed that I do not post process a photo... I have the complete Topaz collection except impressions.
** block tutorial copy and paste into Word
** block tutorial copy and paste into Word
Mar 27, 2015 09:46:43 #
Bob Yankle wrote:
... dpullum. It seems you have plenty of tools to craft your own post processing images...
Yes, great post and paint tools. My 24/7 Sony 20mpix HX50 gets a lot of use while my Sony Alpha and Lenses collects dust. The 24/7 of course requires some (Topaz) deNoise and Detail ... and sure color kicking... oh a little fill here... and and...
I am reverting more and more to my old oil painting days... a photos starts one way and eventually can not be recognized as the start point... sniff as I may, I can not smell the turpentine of the 1960's. Probably the "ol' Terp" is off the marked listed as a "controlled substance!!"
If you want to reply, then register here. Registration is free and your account is created instantly, so you can post right away.