Challenge, 4-21~23-14 Exploring Exposure
Apr 20, 2014 20:26:14 #
Exploring Exposure
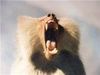
Many of you already have learned that adjusting the aperture and shutter to the reading the in-camera meter indicates does not always guarantee the final results being good. However do you know why? Below are two pictures one of a black piece of cardboard and the other of white. Both were exposed according to the camera meters indicated f-stop and shutter speed for each individual shot and they were photographed in color. Can you tell me which one is which and why both came out the way they did? If you cant answer these questions then this is a challenge with you in mind.
Briefly the meter works on reflected light and is calibrated to international standards, reading all light as 18% reflectance. Which means that if your camera is pointed at something that has a greater reflectance value the meter will still read it at 18% and you will have an underexposed picture. On the other hand if the meter is reading something with a lesser reflectance value than 18% then the image will be over exposed.
Here is a little test to run for yourself: Use something white and insure no shadows are cast on it. Now take a reading again insuring the meter is only reading the white. Take a shot then open up two stops and take another shot. Then duplicate the test using something black, however instead of opening up close down two stops. Look at the results. The first of each test should show a gray image and the others should be closer to the natural color of the subject that was photographed.
It is important were the meter reading is taken within the image. To bright an area under exposed, to dark and over exposed. You as the photographer defines what the image is to look like. Knowing how to achieve proper exposures is the foundation for which good images are based.
As this challenge progresses I will post pictures with indicators where the meter was taking its reading. These shots will be straight out of the camera in order for you to see the importance of proper metering. Also I will give tips on how to get good readings even under difficult conditions. Your challenge is to show images that are properly exposed and to describe where the meter was taking its reading as well as if you compensated for over or underexposure.
Happy Shooting


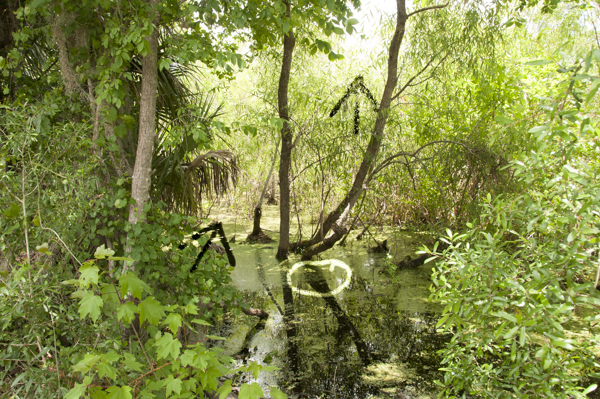
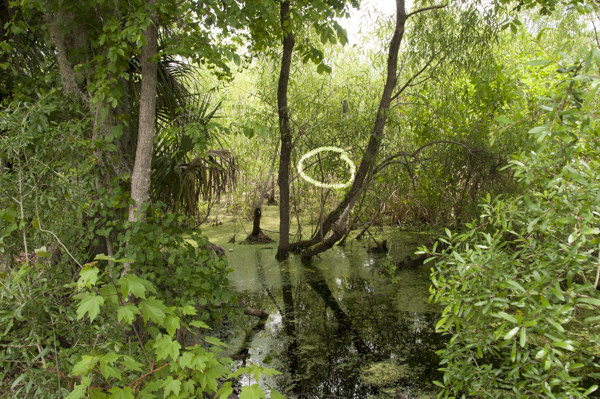
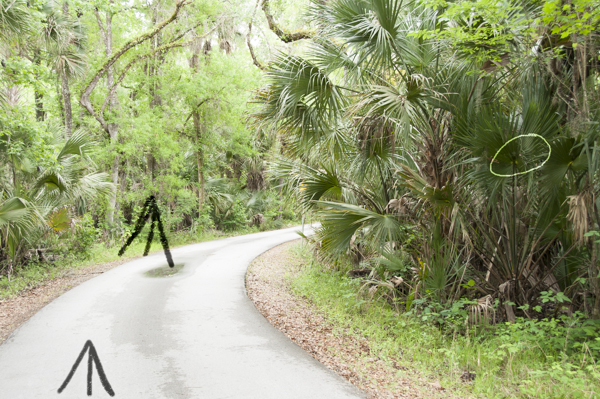
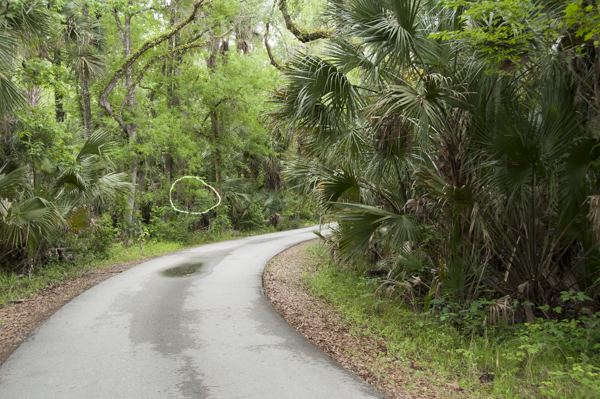
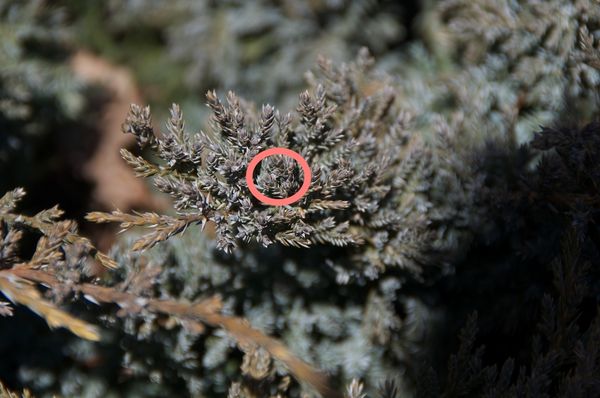
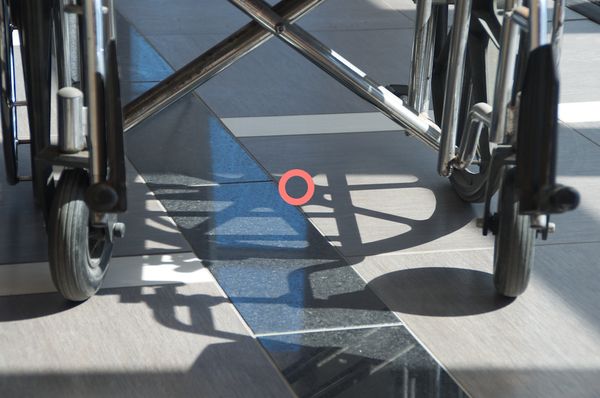
First let me say that these shots are only for demonstration and have no photographic value other than that. The circle shows where the meter took its reading. The arrows show areas that are washed out because of poor exposure.
Look at the details that show in this shot that were not in the first.
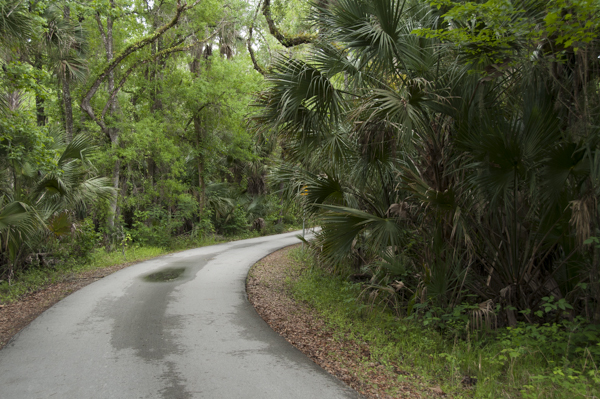
Under exposed the shot is washed out.
Not as washed out.
More like it truly was. Notice washed out areas are gone.
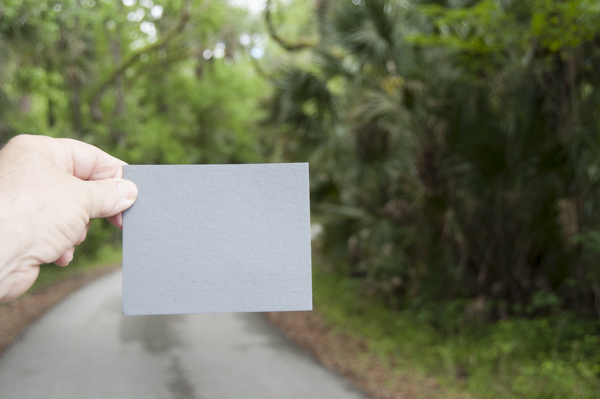
I always carry a gray card with me. The meter reading for the above shot was taken off the gray card.
Apr 20, 2014 22:10:13 #
This will be a good review for me. I understand it all, but it isn't quite"automatic" for me yet. Using M mode I tend to rely on the exposure indicator in my camera, but I find I am developing a "feel" for when a couple stops under or over will get me what I want. Am I accomplishing the same thing? Maybe that's a stupid question? I know I can't rely on what I see through the viewfinder.
Did you use multisegment exposure or center or spot in your examples? Guess I'm full of questions tonight! Will be working on this.
Did you use multisegment exposure or center or spot in your examples? Guess I'm full of questions tonight! Will be working on this.
Apr 20, 2014 22:16:27 #
Is the first card an underexposed white card and the second an overexposed black one?
Apr 20, 2014 22:34:36 #
Yes Pat you are accomplishing the same thing. However there are many techniques that can help get close to if not the right exposure. Using the gray card is one, studying the scene and finding the area that has a 18% reflectance to it. And using the back of your hand as a substitute for the gray card works. There is also what Dane brought out in his challenge, bracketing. Three shots one as indicated one above and one below. I used the spot meter in all of these snapshots.
PAToGraphy wrote:
This will be a good review for me. I understand it... (show quote)
Apr 20, 2014 22:59:36 #
Apr 21, 2014 00:02:36 #

Bushido thanks for hosting. Great refresher thanks. I have a couple to post in the am.
Apr 21, 2014 07:40:02 #
Bushido wrote:
Exploring Exposure br br Many of you already have... (show quote)
THIS will be a challenge! :thumbup:
Apr 21, 2014 08:01:47 #
I think this will separate the wheat from the shaft.
Roadrunner wrote:
THIS will be a challenge! :thumbup:
Apr 21, 2014 08:02:33 #
Bushido wrote:
Yes Pat you are accomplishing the same thing. However there are many techniques that can help get close to if not the right exposure. Using the gray card is one, studying the scene and finding the area that has a 18% reflectance to it. And using the back of your hand as a substitute for the gray card works. There is also what Dane brought out in his challenge, bracketing. Three shots one as indicated one above and one below. I used the spot meter in all of these snapshots.
If I'm really unsure and don't want to miss the shot, I do bracket. My plan is to shoot something for the challenge today - it's a plan anyway.
Apr 21, 2014 08:03:29 #
Roadrunner wrote:
THIS will be a challenge! :thumbup:
You back? Did you win out over WIN8?
Apr 21, 2014 08:30:50 #
Outstanding Bushido, thank you. I've never had any training so this type of instruction is invaluable.
Apr 21, 2014 08:32:51 #
It is of greater importance to have proper exposure when photographing in JPEG than in RAW due to the loss of detail in the high lights that can not be reclaimed in post processing.
Apr 21, 2014 08:45:26 #
Pat, I am going to say yes, however do not hold me to that. I have used the examples for a few years in training situations and I can not find the original files that have the metadata indicating which is which. I do know there is one of each.
PAToGraphy wrote:
Is the first card an underexposed white card and the second an overexposed black one?
Apr 21, 2014 08:47:02 #
Until I get to shoot today or tomorrow, I remembered these from a couple weeks ago. Subjects aren't spectacular, but it was one of those times I had to wait for a ride and had taken a camera to keep me occupied. Tried some things and one was spot metering.
A bush with lots of shadows; wanted texture
Wasn't even thinking "gray card" until I looked at the shot today - I metered off a gray area "accidentally" trying to get the shadow patterns under the chair
Next to me, a bench in bright sun. Liked the lines and wood against brick. Some parts are "blown out"
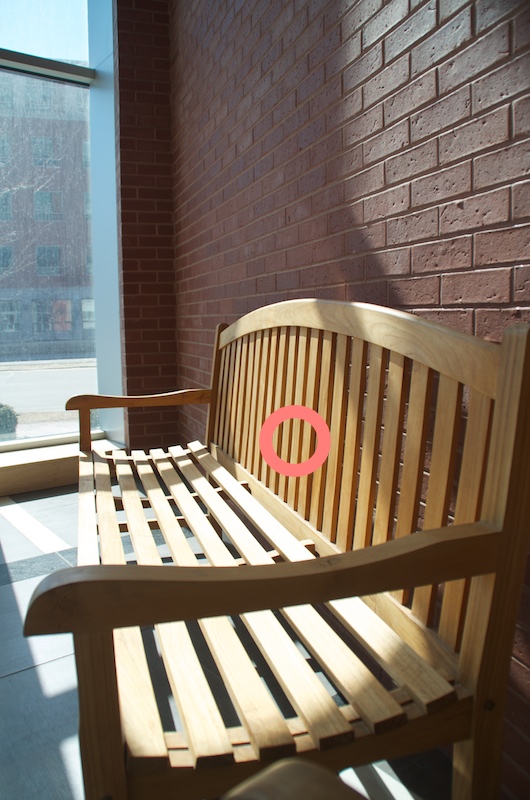
Another view of bench - I "spotted" in the wrong place, got some more blowout, but not quite as bad. Again "accidentally" metered off something that was more gray and blowout not as bad as the above bench.

Apr 21, 2014 09:00:03 #
I am not going to comment of the first one because I am not sure how to read it. However, the second one is a perfect example of finding a surface that is close to 18% reflectance and using it. Now let me say the surface does NOT have to be gray. Many colors and hues have the same reflectance. The third image, look at the seat of the bench is there any detail in the wood? Would it be a more compelling image if there were grain? Yes better exposure, there is more detail in the highlights.
PAToGraphy wrote:
Until I get to shoot today or tomorrow, I remembered these from a couple weeks ago. Subjects aren't spectacular, but it was one of those times I had to wait for a ride and had taken a camera to keep me occupied. Tried some things and one was spot metering.
If you want to reply, then register here. Registration is free and your account is created instantly, so you can post right away.