Light/shadow pictures
Dec 25, 2011 21:07:19 #
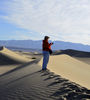
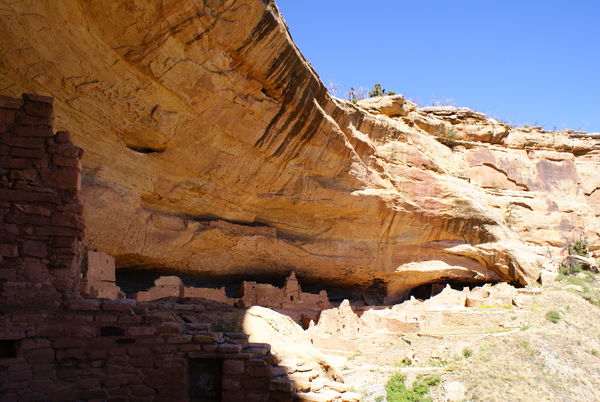
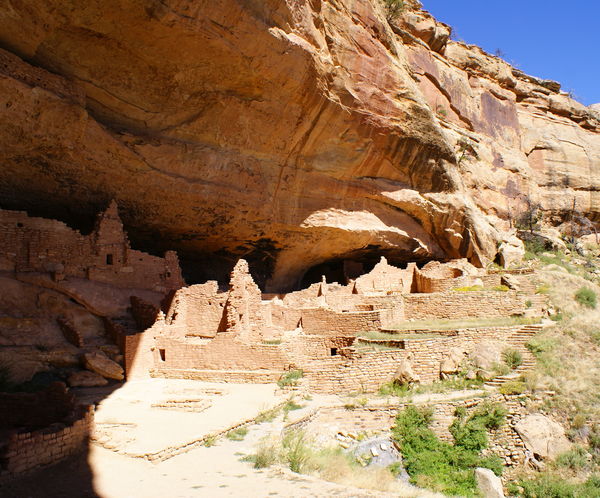
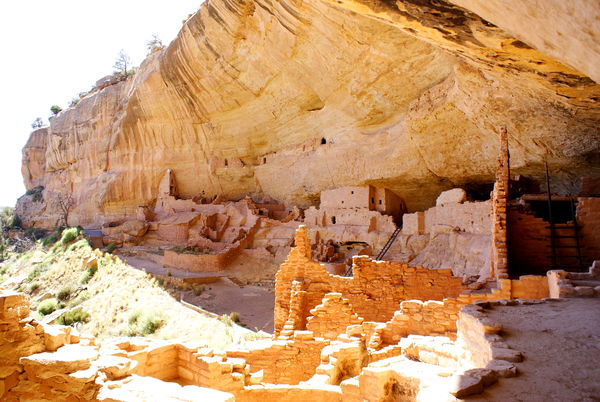
Last year I traveled to Mesa Verde National Park. Unfortuately, the guided Ranger tours I took were not at the optimum time for the sun, so had to make do with what I had. These pictures show the sun in the late afternoon at Long House ruin. If I expose for the overhang, the part of the shot in the sun is overexposed. If I expose for the sun, the ruin under the overhang is too dark. This situation also applies with shooting in woods towards a lighted source outside the trees, like I had at Yosemite and Sequoia National Park where I was shooting from the shade. What should I be doing to get correct balance with both the sun and shade in my pictures, or is the answer to copy the shot, fix the overexposure, or underexposure as the situation warrants, and then merge the two shots? Thoughts please.
Long House Ruin
Long House Ruin
Long House Ruin
Dec 25, 2011 21:28:56 #

Dec 25, 2011 21:58:54 #
Hi AuntieM...
Wouldn't it be wonderful if we could just reach up and move the sun a little this way or that, without burning our fingers?!
You're just trying to photograph scenes that have a contrast range exceeding the capabilities of your camera's sensor. You can train your eyes to recognize this situation, but the only thing you can really do about it is frame your photos to exclude some of these areas that are too dark or too bright.
In our living rooms we can use a flash to fill in shadow areas, but out there in the "big world" we cannot.
HDR photography tends to solve this problem, but requires a tripod, in most cases, and a little more post-production.
You're on your way to doing some nice work! Don't stop now!
Dec 26, 2011 00:20:40 #

The best thing you can do in the future is take two pictures (three are better) using different settings, one for dark, one for light and merge them together in post processing. Kinda like doing HDR work.
Dec 26, 2011 01:13:43 #

Dec 26, 2011 01:37:34 #
chapjohn wrote:
Would a #2 graduated ND filter be helpful in these situations?
If the density of the filter could only occupy the overexposed areas of the photo, that would be great. A simple graduated ND would also darken some of the dark areas in AuntieM's photos.
Dec 26, 2011 01:53:31 #
The ultimate answer here, is HDR. This is the typical situation, for the use of the procedure.
Dec 26, 2011 08:40:08 #

chapjohn wrote:
Would a #2 graduated ND filter be helpful in these situations?
What does ND stand for? Photography is a lifetime of learning :thumbup:
Dec 26, 2011 08:52:25 #

Blake wrote:
What does ND stand for? Photography is a lifetime of learning :thumbup:
chapjohn wrote:
Would a #2 graduated ND filter be helpful in these situations?
What does ND stand for? Photography is a lifetime of learning :thumbup:
Hi Blake,
A neutral density (ND) filter is used to darken the lens. It uses a neutral grey color so that the image colors will not be affected. It allows you to use a larger aperture and/or slower shutter to achieve the correct exposure.
Graduated ND filters are dark at one side of the lens and change to a lighter shade or clear at the other. You can put the line where the colors change at the horizon line to darken the sky allowing more light from the darker portions of the photo.
Hope that makes sense.
Dec 26, 2011 09:37:21 #
JHodge wrote:
quote=Blake quote=chapjohn Would a #2 graduated ... (show quote)
Yes, Jim it does. Now something else to put in my camera bag. Thank you :thumbup:
Dec 26, 2011 10:55:58 #
senad55verizon.net
Loc: Milford, NJ
1. Set your exposure metering mode to the widest possible setting (the opposite end of the choices from center-spot), and shoot raw files. Nikon's Color Matrix metering mode is great for this purpose. (absolutely NO JPGs here.)
2. Process the file tfirst in Camera Raw, trying in sequence all of the three following options: adjust the Exposure slider so that the highlights (usually sky) have best available detail and color; adjust so that the dark areas have best available color and detail; and the last with no change in exposure. After each exposure change (or no change) carry the image into Photoshop. It makes sense to do the no-change option first, but be sure to try the other two as well.
3. In Photoshop and go to Image->Adjustments->Shadows/Highlights. There is a good possibility that you will be able to get a very nice image with the adjustments in Shadows/Highlights, with one or another of your exposure options. Don't forget to adjust both Radius sliders (lots of power there) in Shadows/Highlights. The more you use this remarkable tool, the more you will understand it and use it regularly.
Some images just demand HDR, but if you haven't made multiple images there is still hope.
Go back to the raw file and save a series of 3 - 5 tif files, each with a different exposure level set in Camera Raw. Make the exposure intervals the same across the series; 0.5, 0.75 1.0 can all work well. Then process these 3 - 5 in an HDR application.
Photomatix is one of the best HDR apps, doesn't cost much and gives you vastly more effective controls and many more options than Photoshop's "Merge to HDR" routine. Read the online instructions for Photomatix carefully to minimize startup confusion.
These technics are not necessarily easy at first, but if you stay with it you'll be able to make images that you never thought possible in otherwise unworkably contrasty situations.
You will be amazed at the detail and colors available in the far ends of the luminance scales of a raw file, detail that often don't get squeezed into the image in convential post-processing.
Good luck, and keep at it!.
Dec 26, 2011 11:15:19 #
This is a good selling point for the Sony Alpha series. They have a built in HDR mode which works very well. Enough of that since you already have a good camera it looks like. This is where the HDR function in photoshop works very well. You can fix them right up.
Dec 26, 2011 11:33:00 #
Danilo wrote:
Hi AuntieM... br Wouldn't it be wonderful if we co... (show quote)
You could try HDR without a tripod. Set EV compensation & # of shots. For this shot, I would try three shots at -1, 0, +1 & Set camera to Aperture Priority. Set you camera shutter to fire continuously with one shutter press. Steady the shot & press the shutter. You should get three exposures to align using a program like Photomatix. I've done this several times w/o a tripod. Attached is an example of my front "porch" using five shots.

Dec 26, 2011 12:14:57 #

The correct answer is a graduated neutal density filter and tighter cropping on the right side of the first picture. Also, reading Pop Photo and Imaging on a regular basis will teach you about many such things-they are also online-Good Luck!
Dec 26, 2011 12:17:56 #
murphy2049 wrote:
The correct answer is a graduated neutal density filter and tighter cropping on the right side of the first picture. Also, reading Pop Photo and Imaging on a regular basis will teach you about many such things-they are also online-Good Luck!
I don't think the graduated ND would work here without a definitive "horizon line".
If you want to reply, then register here. Registration is free and your account is created instantly, so you can post right away.