Getting Sharp Pictures of BIF/BOW
This topic is locked to prevent further replies.
Apr 17, 2013 11:54:16 #
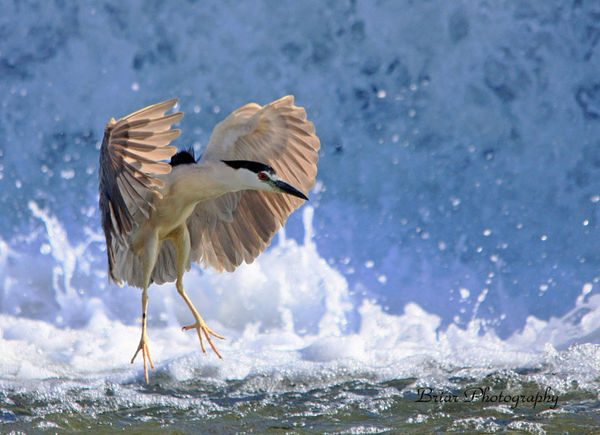
Making sharp photos of birds is not an accident. It is the result of learning what works in the variety of situations we bird photographers find ourselves in. Birds are a challenging subject. You have to find them first and they are not always cooperative. They sometimes move too fast and hide in the bushes. We have set ourselves up for the ultimate challenge in bird photography: Birds in Flight and Birds on Water.
Below, I have listed some of the major things that you need to consider when trying to take sharp photos of birds. This is written for the DSLR owner no matter what quality kit you have. It assumes you have moved away from full automatic and have some knowledge of how to adjust the various settings that a modern DSLR has.
One note before I begin: We often get hung up on pixel quality rather than picture quality. Often enough, the photo that tells a good story, piques our interest, or involves us emotionally isnt the sharpest one. Getting sharp pictures is a craft. Getting pictures that move us is art. Doing both is genius.
1. Control what your camera focuses on and whether it will continue to focus if the bird moves.
One rule of thumb is that you should always focus on the birds eye. Other parts of the bird can be out of focus and the picture will be acceptable but if the eye is blurry, the picture is worthless. If you cant get on the eye, then focus on some part of the bird that is at the same distance as the eye. Restrict your Auto Focus system to a single AF sensor or just a few closely spaced sensors. If the bird is stationary, set your camera to focus only once when you half press the shutter. Place the AF point on the eye or head, half press the shutter button to focus, recompose the picture and then take the shot. If the bird is moving, then your camera should be set to tracking focus. That means it will continually focus as the bird moves closer or farther away as long as you have the shutter button half pressed. Keep the focus point on the bird as it moves, half press the shutter button to achieve focus, and take your pictures.
Sometimes Auto Focus is not possible like when I am using a 2X tele-converter. To photograph inactive birds use Live View on your LCD. On many DSLRs you can zoom in on the live view image and, using manual focus, fine tune the image.
2. Stabilize the camera.
While I firmly recommend hand holding for Birds in Flight, there are times when the use of a tripod or monopod is necessary i.e. shooting from a hide or blind or if you know you will be stationary. For more information on shooting BIFs see my previous sticky post http://www.uglyhedgehog.com/t-88437-1.html Out in the field, a tripod can be a hindrance but there often are trees, fences walls etc that can be used to help stabilize the camera. If you are hand holding and shooting stationary or slow moving birds turn on Image Stabilization, especially in low light, if your lens is so equipped. If you are shooting BIFs, turn it off. IS cannot cope with the gross movements that are necessary to track a BIF and it is my experience that it will interfere with focus acquisition. Some lenses have a panning mode that might be helpful if you have birds that are flying perfectly horizontally past you. Panning mode tells the lens to ignore motion in either the horizontal or vertical axis. If you are tracking a bird that is flying in a diagonal or even an erratic direction, which axis should the lens ignore? The system becomes confused and either stops working or the image jumps around. Either way, the result can be a blurred image. Usually, we turn off IS when we are tripod mounted but, with long lenses in gusty winds, IS can be helpful.
3. Use a fast shutter speed.
Whenever we cant use a tripod or Image Stabilization we need to compensate with a short shutter duration. The rule of thumb that says you can shoot hand held at a shutter duration of 1 over the focal length goes out the window with Birds in Flight. You are contending with BOTH camera movement AND subject movement. I regularly shoot my 500mm at 1/2000 and still find blurred wingtips!
4. Use DOF to your advantage.
Long lenses have little depth of field so accurate placement of the focus point is essential. With a 500mm lens, a bird at 50 ft shot at f/4 will have only 6 of DOF. At f/8 that becomes 11 and f/16 gives you 21 ½. As the bird gets closer, DOF shrinks even more. At 15 feet the 500mm has only 5/8 at f/4! At f/16 this is still only 6. From a practical standpoint, that means that it may be impossible to get even two birds together in focus unless they are at the same distance from the camera. Thankfully, when we are shooting BIFs at normal distances of 60-70 feet and mid range apertures, we have enough DOF to get all but the wingtips in focus of the larger birds. (As a technical side note, the usual rule of thumb that DOF extend 1/3 in front and 2/3 behind the focus point does not apply to long lenses. The split is nearly 50-50.)
5. Work within the limitations of your camera and lens
What is the maximum ISO that you can use and still get acceptable noise levels? It varies from camera model to camera model. You may need to do some experimenting to understand just how far you can go. Is your lens less sharp when used at its maximum aperture? Does your zoom lens loose definition when used at maximum focal length? Knowing the answers to these questions can help you avoid fuzzy images.
Photographing birds always seems to have us pushing the limits of our technology. Understanding what contributes to sharpness can help us make knowledgeable tradeoffs in our settings and return home with that calendar shot!
Apr 23, 2013 14:37:43 #
Thanks for a helpful article. I generally set my Nikon D7000 to Shutter Priority mode when shooting birds with a zoom lens, 1/1000 in bright light, down to about 1/250 in dim light, always hand held. My longest lens is a Nikon 55-300. Do the settings and mode sound right to you? What settings do you use with hand held medium length lenses?
Apr 25, 2013 09:37:06 #
wings42 wrote:
From a sharpness perspective, 1/1000 on a 300mm lens should be adequate. Many bird photographers I have talked to prefer using Aperture Priority along with a high enough ISO for the situation to ensure a high shutter speed. That way they can control their DOF based on the distance the birds are away from you, whether there are multiple birds on different focus planes, whether you want to blur the background, etc. Obviously, as the light fades, you will need to adjust ISO, use wider apertures and use Image Stabilization etc as we are forced to use longer and longer shutter durations.Do the settings and mode sound right to you? What settings do you use with hand held medium length lenses?
Apr 25, 2013 11:19:25 #
Thanks. On the advise of another Ugly Hedgehog bird photographer, I tried Aperture mode yesterday in bright sunshine: F8, ISO 400 set with the front wheel. The pictures came out much sharper. These pictures would have been soft in S mode. They were in bright sunshine. The camera automatically bumped ISO up to 800.
It will be interesting to see what happens during our San Diego "May grey" and "June gloom" periods of deep coastal low clouds all day.
It will be interesting to see what happens during our San Diego "May grey" and "June gloom" periods of deep coastal low clouds all day.
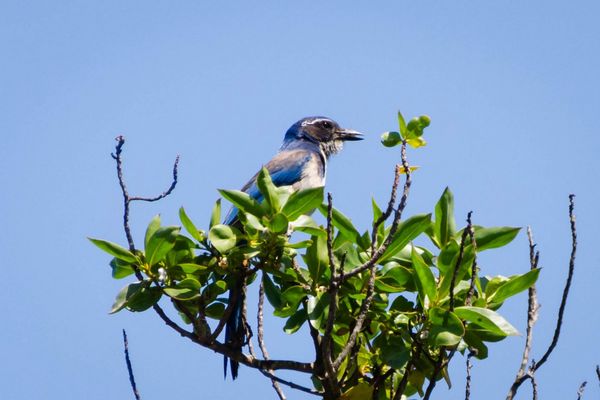
Western Scrub Jay - San Diego
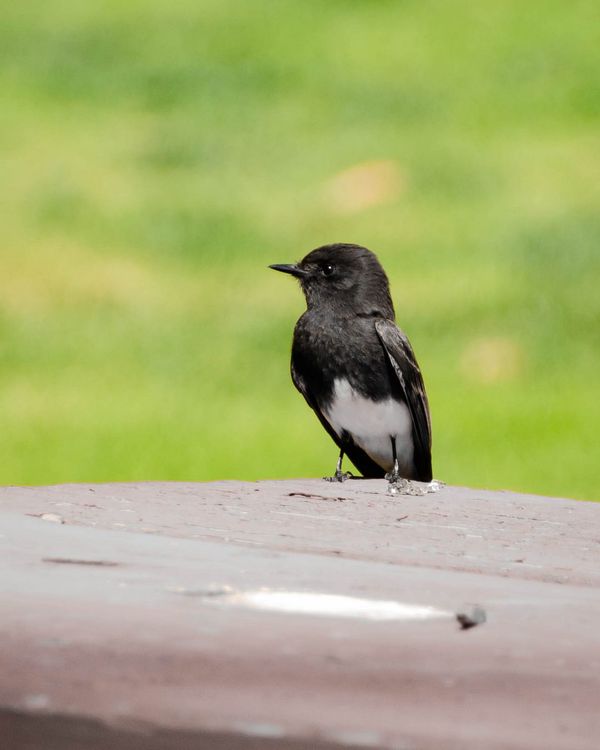
Black Phoebe - San Diego
Jul 21, 2013 22:25:52 #
greg vescuso
Loc: Ozark,Mo.
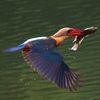
Years ago I was try to take some shots of Black Crown Herring landing around Ohio Falls on the Ohio River at
Louisville Ky. and was having a heck of a time with the bright back light from the water where the bird was dark in
the image. And there where some very experienced photographers there shooting these birds also and I showed one of them what I was getting and he told me to
set my camera (I was using a canon 40d at the time) to Highlight tone priority which I didn't know how to do and he showed me.Here is the picture I got , sorry about the quality of the image as I lost my hard drive with this shot years ago and had to get it from a post I had on the internet. I hope this helps someone when shooting birds flying around water with a lot of back light.
Oct 23, 2013 20:36:30 #
Could you advice as to what EC/EV to set when shooting snowy egret and/or black crows? Thanks!
Oct 23, 2013 23:17:34 #
Chelli wrote:
There is no set formula because it depends on what type of metering system you are using ie Matrix or Spot. For more definitive info see my sticky post at: http://www.uglyhedgehog.com/t-140381-1.htmlCould you advice as to what EC/EV to set when shooting snowy egret and/or black crows?
Although this one treats only white birds you can apply it to black birds by simply applying the opposite adjustment. That is to say, if you would have increased exposure in a particular circumstance for a white bird, you would decrease exposure for the black bird.
I hope that's clear. If not, PM me.
Feb 16, 2015 08:20:38 #
Jim S
Loc: Barrington RI, DC now Hilton Head,
greg vescuso wrote:
What is the Highlight Tone Priority?. . . he told me to set my camera (I was using a canon 40d at the time) to Highlight tone priority which I didn't know how to do and he showed me.
Feb 22, 2015 18:16:02 #
Jim S wrote:
Highlight tone priority is a setting on Canon cameras that causes the sensor to expand the dynamic range between middle gray and the brightest whites to better render details in scenes with lots of tones at the higher end of the brightness scale. It does this at the expense of the darker tones which can show more abrupt gradations may show more noise. HTP can be of help when shooting white birds.OK - What is the Highlight Tone Priority?
If you want to reply, then register here. Registration is free and your account is created instantly, so you can post right away.