Mini Tutorial – Textures - The Longhorn Saloon
This topic is locked to prevent further replies.
Mar 7, 2019 17:03:46 #

Thank you “Linda from Maine” for requesting a mini-tutorial on how I created this image!
I started with an image that I had already processed through my standard workflow — crop, adjust white balance, exposure, contrast, etc, in Lightroom and then imported into Photoshop for finishing touches. (Note: Although I used Lightroom and Photoshop, Darkroom and Gimp would work as well.)
Skills needed to accomplish this task are a working knowledge of layers, masks, brushes, and the Free Transform Tool.
1. First, I began by importing the image into Photoshop, then creating a duplicate layer of the original.
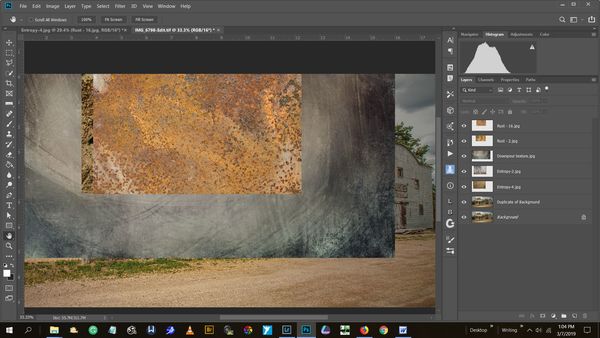
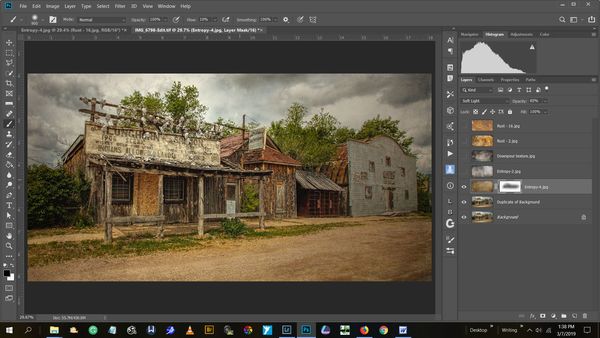
2. Next I opened my texture library and select several textures and imported them as layers into Photoshop. See Image #1
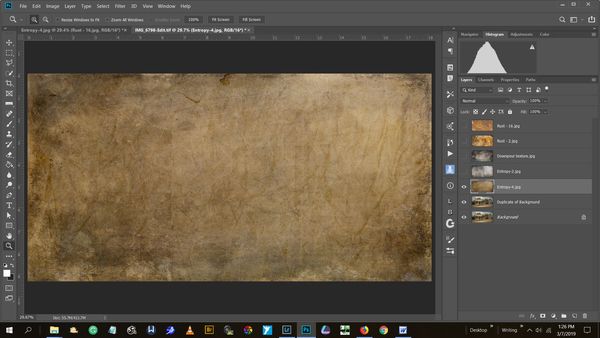
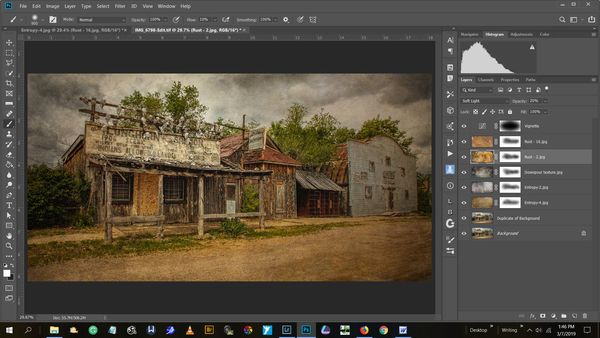
3. Next I turned off all the texture layers except the first one. I selected that layer and used the Free Transform Tool (CTRL+T) to reposition the texture to fit over the base image. See Image #2
4. Next I replicated the Free Transform process for all the remaining texture layers.
5. Next I reordered the texture layers in the order I thought I would use to process them through the image, and then turned all the texture layers off except for the beginning texture layer.
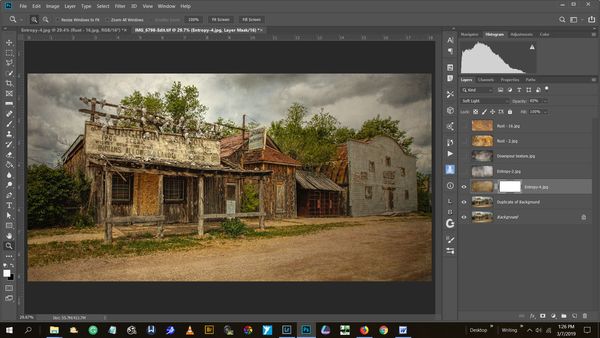
6. Next I begin working with each Texture Layer individually by: a.) Selecting a blending mode [typically Overlay, Soft Light, or Multiply.] b.) Adjusting the opacity. c.) Adding a layer mask. See Image #3
7. Next I opened my brush tool and adjusted the hardness to 0% [for a soft brush]; selected black for my brush color; adjusted the brush flow to 10%; and then began brushing out the areas of the image that I did not want to apply the texture to. See Image #4
8. Next I repeated #7 for the additional texture layers.
9. Next I added a slight vignette. See Image #5
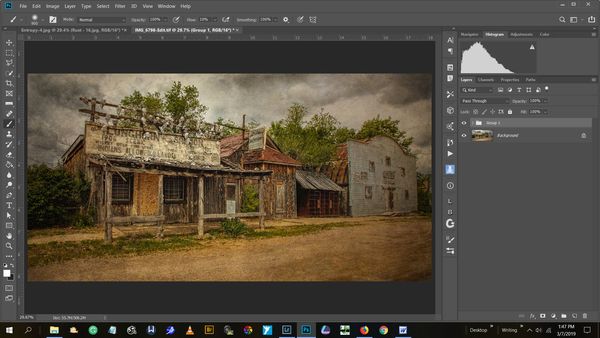
10. And finally I grouped all the layers for the final product. See Image #6
Note: Textures used in this mini tutorial are not the exact ones used in the final image as displayed. I had already finished the project, flattened the image and lost my record of the actual textures used before the creation of this mini-tutorial.
I started with an image that I had already processed through my standard workflow — crop, adjust white balance, exposure, contrast, etc, in Lightroom and then imported into Photoshop for finishing touches. (Note: Although I used Lightroom and Photoshop, Darkroom and Gimp would work as well.)
Skills needed to accomplish this task are a working knowledge of layers, masks, brushes, and the Free Transform Tool.
1. First, I began by importing the image into Photoshop, then creating a duplicate layer of the original.
2. Next I opened my texture library and select several textures and imported them as layers into Photoshop. See Image #1
3. Next I turned off all the texture layers except the first one. I selected that layer and used the Free Transform Tool (CTRL+T) to reposition the texture to fit over the base image. See Image #2
4. Next I replicated the Free Transform process for all the remaining texture layers.
5. Next I reordered the texture layers in the order I thought I would use to process them through the image, and then turned all the texture layers off except for the beginning texture layer.
6. Next I begin working with each Texture Layer individually by: a.) Selecting a blending mode [typically Overlay, Soft Light, or Multiply.] b.) Adjusting the opacity. c.) Adding a layer mask. See Image #3
7. Next I opened my brush tool and adjusted the hardness to 0% [for a soft brush]; selected black for my brush color; adjusted the brush flow to 10%; and then began brushing out the areas of the image that I did not want to apply the texture to. See Image #4
8. Next I repeated #7 for the additional texture layers.
9. Next I added a slight vignette. See Image #5
10. And finally I grouped all the layers for the final product. See Image #6
Note: Textures used in this mini tutorial are not the exact ones used in the final image as displayed. I had already finished the project, flattened the image and lost my record of the actual textures used before the creation of this mini-tutorial.
Final Image
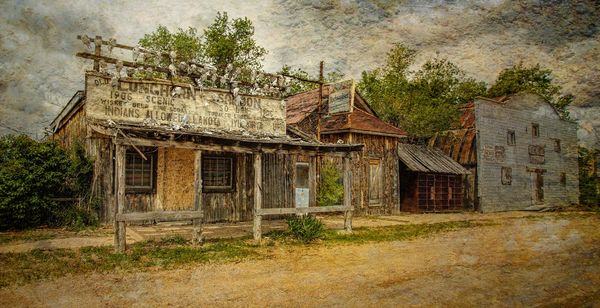
(Download)
Image #1 - Add Texture Layers
(Download)
Image #2 - Use Free Transform
(Download)
Image #3 - Adjust blending mode, opacity, & layer mask
(Download)
Image #4 - Use the Brush
(Download)
Image #5 - Add Vignette
(Download)
Image #6 - Group Layers
(Download)
Mar 7, 2019 17:11:00 #

Mar 7, 2019 17:14:48 #
kenievans
Loc: Dallas
Thank you so much for posting this. Very easy to follow. I definitely learned something new from this one.
Mar 7, 2019 17:16:37 #

Claude, thank you so much for your time. This is a well organized and valuable tutorial for working with multiple textures.
btw, I very much enjoyable browsing the stunning photos on your website!
Hope you'll visit PP Forum often. On this page are quite a few tutorial links. If you have time to browse, maybe you'll note an absence you can help fill
btw, I very much enjoyable browsing the stunning photos on your website!
Hope you'll visit PP Forum often. On this page are quite a few tutorial links. If you have time to browse, maybe you'll note an absence you can help fill
Mar 7, 2019 17:25:05 #
Mar 7, 2019 17:29:21 #
kenievans wrote:
Thank you so much for posting this. Very easy to follow. I definitely learned something new from this one.
I find post-processing a bit like cooking. Recipes work, but the best cooks add small amounts of spices by taste, with a little here and a little there.
Thanks for the encouragement!
Mar 7, 2019 17:29:44 #
Linda From Maine wrote:
Claude, thank you so much for your time. This is a well organized and valuable tutorial for working with multiple textures.
btw, I very much enjoyable browsing the stunning photos on your website!
Hope you'll visit PP Forum often. On this page are quite a few tutorial links. If you have time to browse, maybe you'll note an absence you can help fill
btw, I very much enjoyable browsing the stunning photos on your website!
Hope you'll visit PP Forum often. On this page are quite a few tutorial links. If you have time to browse, maybe you'll note an absence you can help fill
Thank you!
Mar 7, 2019 18:43:31 #

Well done! Most of the uses of texture I've seen have been rather overblown. This shows a nice subtle way to accomplish your goal. I'll bookmark this for future use.
Andy
Andy
Mar 7, 2019 18:54:07 #
AndyH wrote:
Well done! Most of the uses of texture I've seen have been rather overblown. This shows a nice subtle way to accomplish your goal. I'll bookmark this for future use.
Andy
Andy
Glad you found it useful!
Thanks!
Mar 7, 2019 20:51:59 #
Guyserman
Loc: Benton, AR
Beautiful image and well written tutorial. I enjoyed reading through it. I was a little confused when the texture in the "Final image" did not match the texture in the "Group layers" image. Then I figured that the tutorial must be a recreation and the "Final image" was from a previous work. The brushing of the textures would in all probability be some different in the two times. At any rate, job well done, both the image and the tutorial.
Mar 7, 2019 22:14:02 #
Guyserman wrote:
Beautiful image and well written tutorial. I enjoyed reading through it. I was a little confused when the texture in the "Final image" did not match the texture in the "Group layers" image. Then I figured that the tutorial must be a recreation and the "Final image" was from a previous work. The brushing of the textures would in all probability be some different in the two times. At any rate, job well done, both the image and the tutorial.
You are spot on. I did the best could to retrace my steps through the process.
Thanks for the comment!
Mar 8, 2019 06:10:09 #

Thanks for sharing the beautiful photo and providing the tutorial, it was very generous of you.
Mar 8, 2019 06:53:55 #

Mar 8, 2019 07:24:21 #

Mar 8, 2019 07:54:33 #

Thanks for the tutorial. For me the good news I can follow each of your steps on my IPad while working on an image. As opposed to having to bounce back and forth on this thread and PS.
If you want to reply, then register here. Registration is free and your account is created instantly, so you can post right away.