12,800 ISO Ilford HP5
Jan 8, 2019 10:24:20 #

selmslie wrote:
As I suggested, black point for the film edge like... (show quote)
Got it and that's what I thought. The issue is; "fixing" the negative by changing the white and black points isn't really telling the tale on how effective this development method is.
Jan 8, 2019 10:52:46 #

rpavich wrote:
Got it and that's what I thought. The issue is; "fixing" the negative by changing the white and black points isn't really telling the tale on how effective this development method is.
With darkroom printing we had a different goal - to produce a negative that would print easily on #2 or #3 contrast paper without too much dodging and burning. I suspect that these two negatives might not meet that goal.
With scanned film it's a matter of the end justifying the means. If you get a printable negative after scanning and adjusting it should be satisfactory. We try for a range that our scanner can deal with and that can mean using a different contrast than we would have used for wet printing.
But there is a problem with 35mm film. The film base+fog is denser than it is for medium and large format film except for a handful of very thin and clear film bases. That limits the useful density range. I wrote about this in A Practical Guide to Film Characteristic Curves and in B&W Tonal Distribution – 35mm vs. 120 roll.
Jan 8, 2019 10:55:45 #
selmslie wrote:
With darkroom printing we had a different goal - t... (show quote)
I fully agree.
Having said that...being able to "rescue" a negative via scanning and adjusting in LR doesn't say much about the process though which is what this thread is about. If someone is REALLY getting 12,000 ISO out of a negative then it shouldn't be a crappy negative that can only be rescued via heavy scanning/LR manipulation.
Jan 8, 2019 12:45:57 #

I don't know what y'all are trying to determine. Since closed my wet darkroom, I no longer have my transmission densitometer- that's how I would have analyzed a negative- directly from the negative, not a scan or a photograph of the negative on a light box. I don't know what you are looking for. After an hour and a half of development, the fog level has got to be up there (no?)
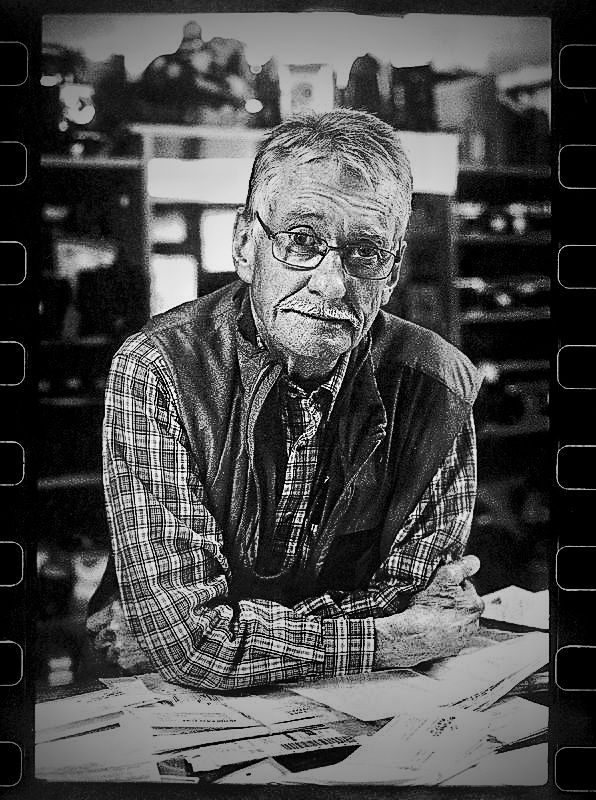
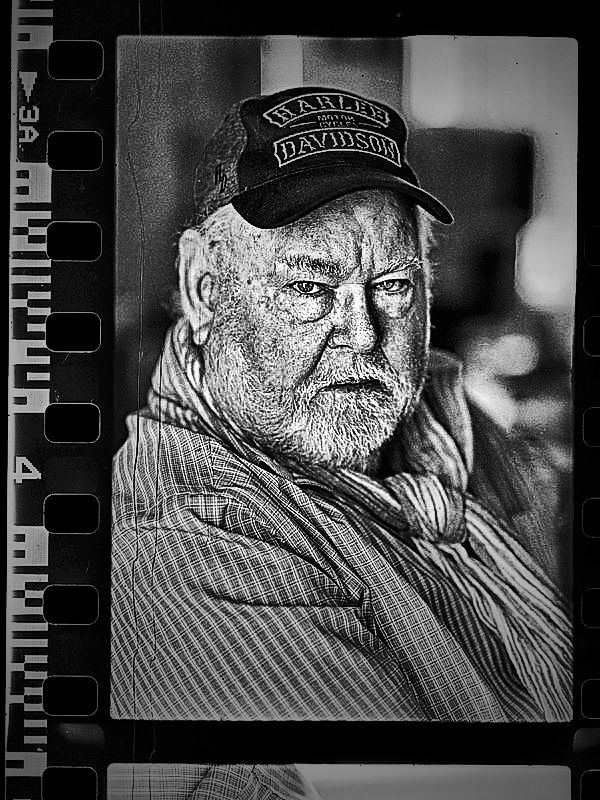
The subject is photographed by available leight and the lighting ratio on the face is fairly flat so it it is hard to visually determine the extent of the shadow detail or lac thereof- all the posted image are kinda gray. How would you print those images as a final piece or for reproduction in a publication?
Most folks would not shoot a casual portrait at 12,800- why would they do that. To get more depth of field- in the first image, the background is soft so the aperture must have been fairly wide. Handheld camera at a reasonable shutter speed- OK!
In both theses images, who know the actual light level in foot/candles or LUX? To get the exposure of f/1.8 at 1/500sec @ISO12,5000, the ambient ligh would need to be as low as about 2 foot candles- that's prettty dark.
I'm sure, I coud make a good print from either of the images- from the original negative in an enlarger- and that is what counts. The true test of the development method would be to shoot situations where that kind of ISO setting was required- a sports event in a badly lighted venue, some street photography at night, something in a dimly lit jazz club etc.
My experience is that it is not always possible to determine the print quality potential simply by looking at the negative especially when out-ot-the box processing chemicals and methods have been used. I have used Pyto developer (Pyrogalic Acid in the formula) that leaves a yellow stain in the shadows that "hold back" the shadows on certain kinds of traditional enlarging papers. One of the he worst kinds of negatives, as to printing potential, is a dense and flat one, as a result of significant overexposure and pull processing.
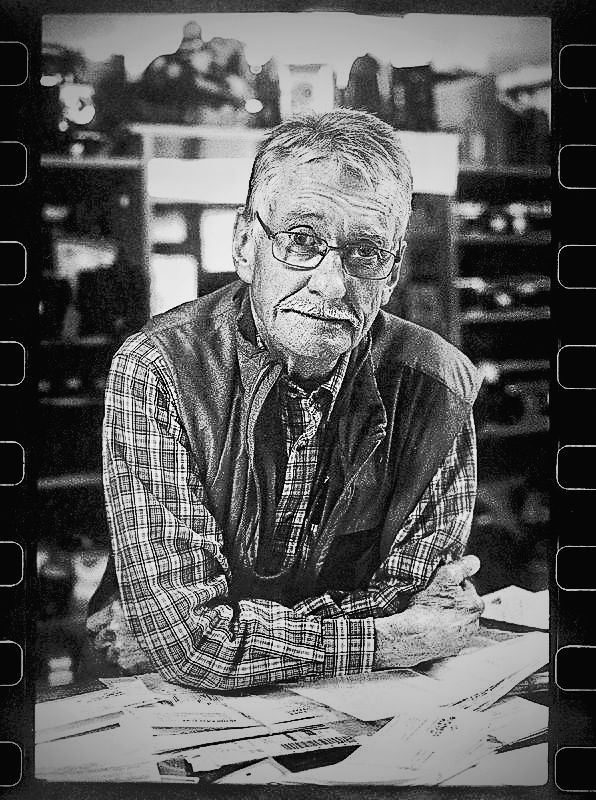
Without access to the original negative and not even a downloaded digital image, I see no difficulties with Crombie's images. When viewing a final display print, seeing a reproduction in lithographic print or viewing the image online, the viewer is no interested in how it was produced- the assess the image on it's impact, contrast and mood. In these images, I don't mind the grain- it looks good with the subjects.
As far as hazardous chemicals in a developer formula, the only thing I can guess at is a very concentrated alkaline bases such as sodium hydroxide. It's been many years since I mixed a scratch developer. I went to mostly canned or bottled pre-mixes aside from the Pyro. I used to mix my own years ago using Kodak Balanced Alkali and just stuck to the recipe. As far as I remember, it's all about acceleration and restrainment. I'll leave that up to the chemists. If I need ISO 12,000+ I'll go digital and live with the noise... I have no choice,- I packed in the darkroom a while ago. 50 some year in the darkroom- I paid my dues!
Here's my interpretation of Crombie's shots.
The subject is photographed by available leight and the lighting ratio on the face is fairly flat so it it is hard to visually determine the extent of the shadow detail or lac thereof- all the posted image are kinda gray. How would you print those images as a final piece or for reproduction in a publication?
Most folks would not shoot a casual portrait at 12,800- why would they do that. To get more depth of field- in the first image, the background is soft so the aperture must have been fairly wide. Handheld camera at a reasonable shutter speed- OK!
In both theses images, who know the actual light level in foot/candles or LUX? To get the exposure of f/1.8 at 1/500sec @ISO12,5000, the ambient ligh would need to be as low as about 2 foot candles- that's prettty dark.
I'm sure, I coud make a good print from either of the images- from the original negative in an enlarger- and that is what counts. The true test of the development method would be to shoot situations where that kind of ISO setting was required- a sports event in a badly lighted venue, some street photography at night, something in a dimly lit jazz club etc.
My experience is that it is not always possible to determine the print quality potential simply by looking at the negative especially when out-ot-the box processing chemicals and methods have been used. I have used Pyto developer (Pyrogalic Acid in the formula) that leaves a yellow stain in the shadows that "hold back" the shadows on certain kinds of traditional enlarging papers. One of the he worst kinds of negatives, as to printing potential, is a dense and flat one, as a result of significant overexposure and pull processing.
Without access to the original negative and not even a downloaded digital image, I see no difficulties with Crombie's images. When viewing a final display print, seeing a reproduction in lithographic print or viewing the image online, the viewer is no interested in how it was produced- the assess the image on it's impact, contrast and mood. In these images, I don't mind the grain- it looks good with the subjects.
As far as hazardous chemicals in a developer formula, the only thing I can guess at is a very concentrated alkaline bases such as sodium hydroxide. It's been many years since I mixed a scratch developer. I went to mostly canned or bottled pre-mixes aside from the Pyro. I used to mix my own years ago using Kodak Balanced Alkali and just stuck to the recipe. As far as I remember, it's all about acceleration and restrainment. I'll leave that up to the chemists. If I need ISO 12,000+ I'll go digital and live with the noise... I have no choice,- I packed in the darkroom a while ago. 50 some year in the darkroom- I paid my dues!
Here's my interpretation of Crombie's shots.
Jan 8, 2019 12:54:38 #

Jan 8, 2019 12:57:53 #
Jan 8, 2019 13:47:08 #
E.L.. Shapiro wrote:
I don't know what y'all are trying to determine. Since closed my wet darkroom, I no longer have my transmission densitometer- that's how I would have analyzed a negative- directly from the negative, not a scan or a photograph of the negative on a light box. I don't know what you are looking for. After an hour and a half of development, the fog level has got to be up there (no?) ....
Actually, no.
The way stand development works is that the negative develops "to completion". Additional development does not add fog. The developer in contact with the emulsion becomes exhausted and stops working on the highlights while it continues to develop in the shadows until all of the exposed grains are completely developed. Whether you let it stand for an hour or a day does not increase the fogging in the shadows or add any density to the negative. It can't make the highlight portions of the negative any darker either.
When a negative is developed to completion, a grain that has received the minimal number of photons will develop completely - turn black. If not enough photons were received they will never develop. They get washed out by the fixer. The gray scale results from the quantum nature of film - the probability that enough photons are received to expose each grain.
A similar result is obtained with a two step developer like Diafine. The first bath only serves to soak the emulsion with developer but no actual development takes place. No matter how long it soaks, the emulsion can absorb only a limited amount of developer. The second activates the developer and it is consumed to exhaustion in a relatively short time based on how much developer the emulsion was able to soak up. That's why development time is almost the same for all films at all normal temperatures.
Jan 8, 2019 14:09:00 #
larryepage
Loc: North Texas area
selmslie wrote:
Actually, no. br br The way stand development wor... (show quote)
I learned to do something similar to this with Tri-X exposed at ISO 100, then developed with Microdol & Kodalk in the development step, but for the opposite reason. The end "pull process" result was pretty much like a wet version of HDR, with additional shadow detail revealed, highlights preserved, and grain essentially unperceptible. I'll try to find one of my prints and see if I can reproduce it here. May take a while, though.
Jan 8, 2019 14:15:30 #
selmslie wrote:
... A similar result is obtained with a two step developer like Diafine. ...
You can find more information about Diafine at Diafine - A Black and White Developer and Developing with Diafine.
In my own testing of Diafine I got mixed results. Using FB+fog as the basis from which to measure film speed, I got a modest increase in film speed for both 135 and 120 FP4 and HP5 but a loss of film speed for a couple of the Rollei films. I did not test sheet film and I did not look at Tri-X.
If you want to reply, then register here. Registration is free and your account is created instantly, so you can post right away.