Combining multiple bracketed exposures
Sep 16, 2011 11:18:33 #
When dealing with situations in which the camera's (or monitor's) dynamic range isn't enough (such as bright background dark foreground), there are three ways you can proceed. (I'm not counting graduated neutral density filters since they won't help when dealing with complex shapes.)
- You can brighten up the dark area with more artificial light.
- You can darken the bright area with the use of fine nets.
- Or you can take multiple shots with different exposures and combine them to produce one image.
Since I don't have the equipment for the first two options, I resort to the last one.
In this example, the foreground is way too dark and the background is way to bright to fit them both into the range of the equipment.
I used enfuse software to "fuse" the bracketed images together.
Taken on a tripod with a 2-second delay. (You really need to make sure your model stays still for this.)
(P.S. F/16 was needed for depth of field, so that the background would show. Consequently, the shutter speed had to be low.)
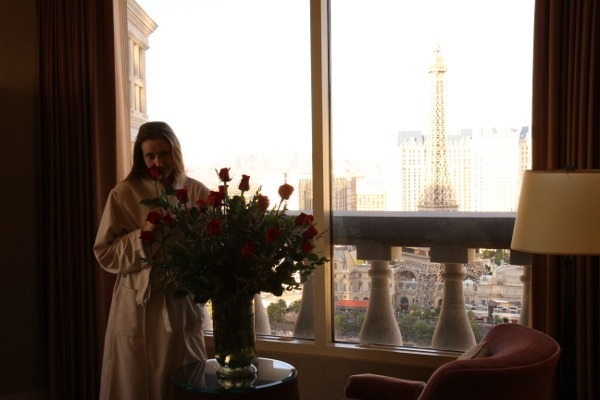
The base image. The foreground is too dark, the background is too bright. This is what you would normally get with one exposure. F/16.0, 1/4, ISO 400
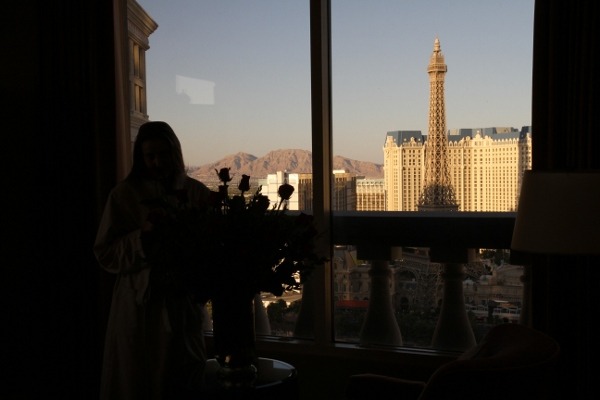
Underexposed to get the highlights. Don't care about the shadows. F/16.0, 1/30, ISO 400
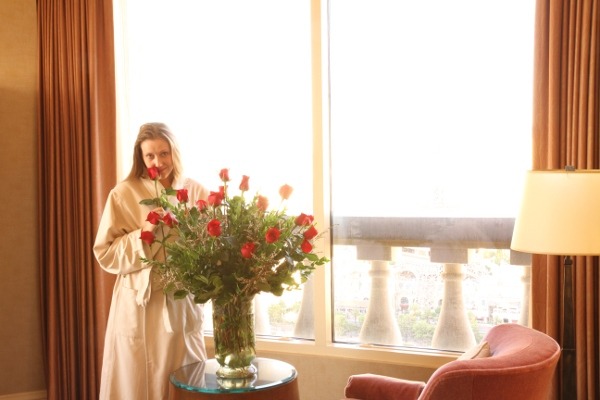
Overexposed to get the shadows. Don't care about the highlights. F/16.0, 2', ISO 400
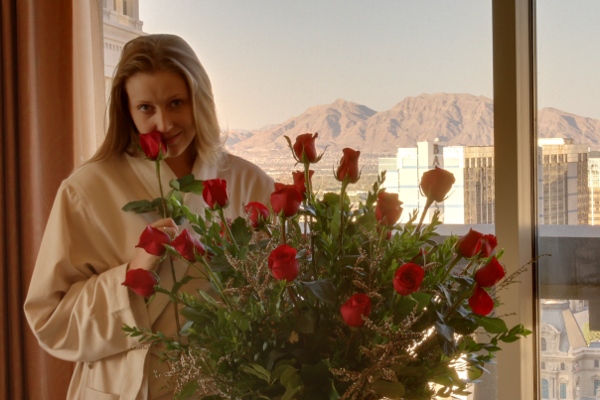
This is the result of fusing the three images above. You can see plenty of detail both in the brightest and in the darkest areas.
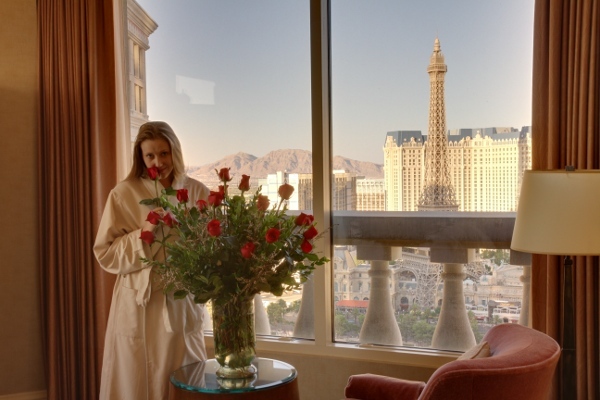
Here is a 25% crop of the pic above. The highlights are still a bit blown and the midtones are a bit soft. That's on purpose to retain a more-or-less realistic look of the photo. Pushing it any further would result in the animated HDR look.
Sep 17, 2011 07:05:13 #
jdtx
Loc: SA, Tx.
that is what HDR was intended for., very good visual explanation of how it is used
Sep 17, 2011 19:54:35 #

Sep 17, 2011 23:22:03 #
KG wrote:
When dealing with situations in which the camera's... (show quote)
Thanks for the explanation.
If you want to reply, then register here. Registration is free and your account is created instantly, so you can post right away.