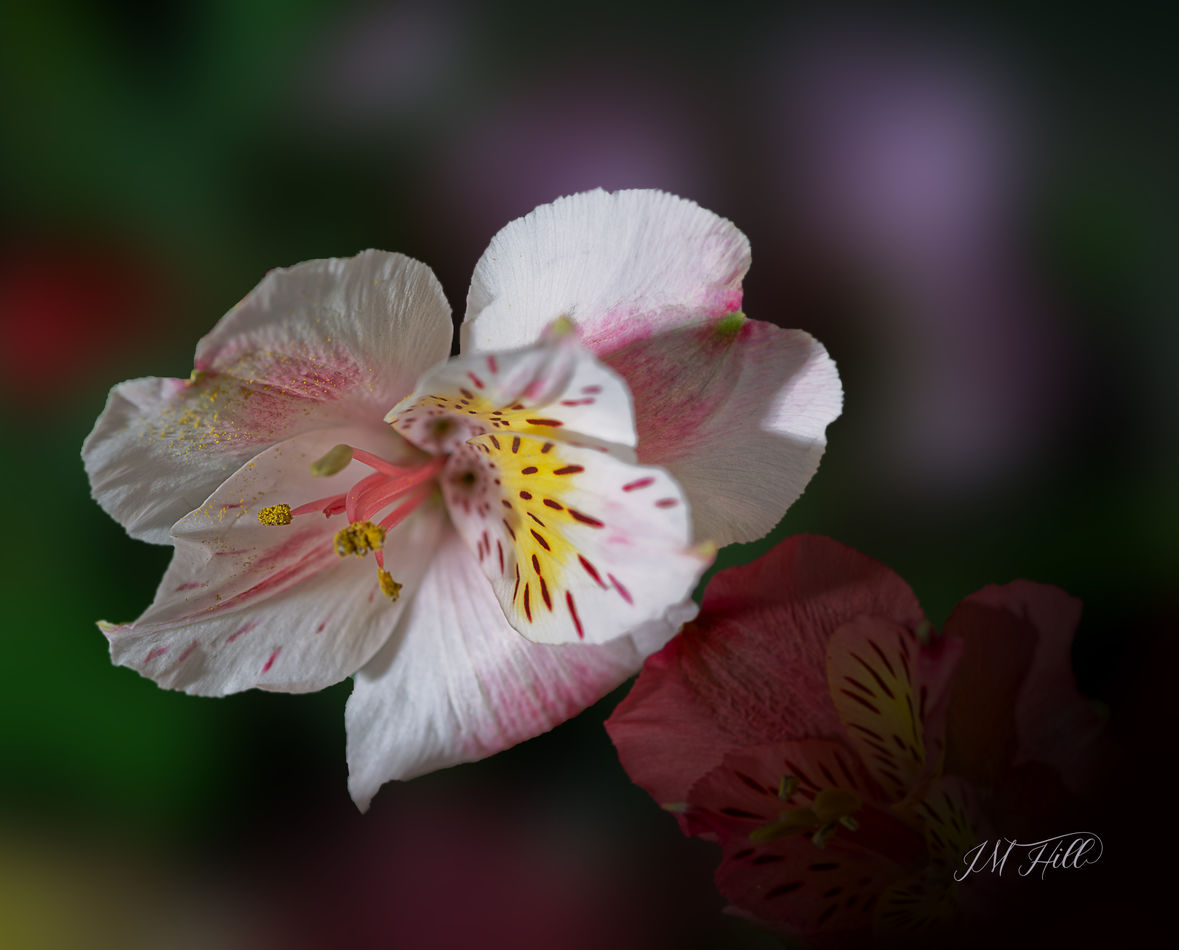
Making a colorful flower picture.
Dec 19, 2021 20:01:15 #
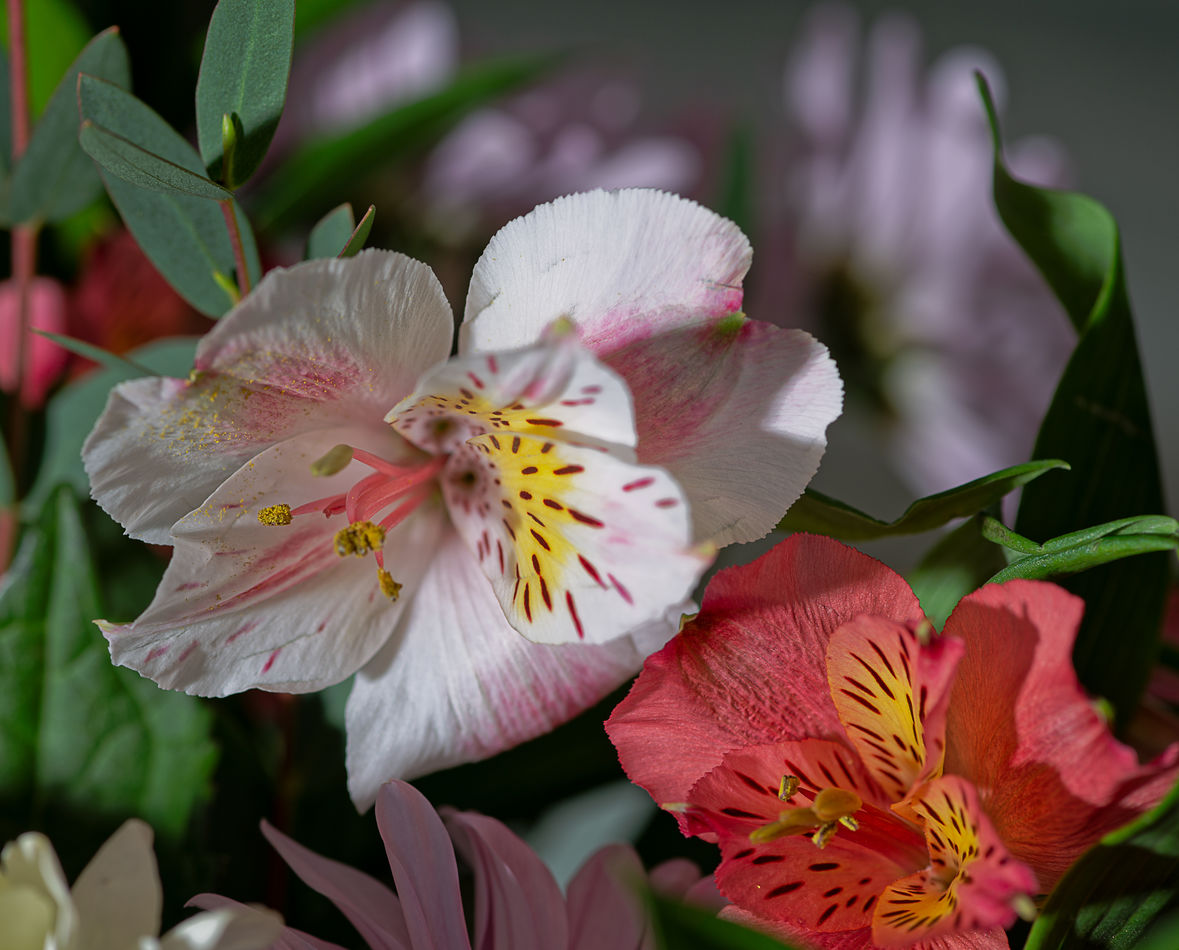
This picture started out not having a whole lot in focus. Wanted to see if I could make something out of it.
1) I started out making a duplicate layer.
2)Made a mask for the primary white and red blossom on this duplicate layer.
3)Next I copied the mask, Command V. Now marching ants were indicating the area. Went to Select>Modify>Expand>Expand by 10 pexels. Made sure my base layer was highlighted. Went to Edit>Fill>Content-Aware. Now to blur this background, Filter>Blur>Gauissian Blur> set to a high number till I was satisfied.
4) I felt the red blossom was fighting with the White one. Duplicated the second layer that has the mask. Selected the white flower with the quick selection tool. While the marching ants indicated I had all the white flower I moved over to the mask and filled the area with black on the mask.
5) I made a group layer, clicking the file folder at the bottom of the right panel. Put my red flower layer I previously made inside the group. Just Click the red flower and drag it on to of the Group 1 layer. It automatically puts it inside the group.
6) Make sure you have the red flower highlighted inside Group 1. Now add an Exposure layer. You can find it when you click the half circle at the bottom of the right panel. Move the slider to the left and marked the red flower. I wanted to make the flower fade to dark. To do this I added a white to black diagonal gradient in the white Exposure's white box. I clipped this exposure box to the red flower. Didn't want to darken the whole corner just the red flower. To do that I held my Option key Alt on a PC and dragged my curser on the separating line between the exposure layer and the red flower layer. As you do a down arrow becomes visible then click.
I did a few other minor adjustments but the above describes the main steps.
Let me know if any of this was interesting to you.
Dec 19, 2021 22:03:00 #
Wonderful Jim. I just don't have the skill or patience to do something like that
Dec 19, 2021 22:09:11 #
Curmudgeon wrote:
Wonderful Jim. I just don't have the skill or patience to do something like that
Thanks Jack.
I just sit back on my recliner with my laptop and play around. Usually I get zoned in while time just flies by. Great being retired.😊
Dec 19, 2021 22:18:30 #
Jim-Pops wrote:
Thanks Jack.
I just sit back on my recliner with my laptop and play around. Usually I get zoned in while time just flies by. Great being retired.😊
I just sit back on my recliner with my laptop and play around. Usually I get zoned in while time just flies by. Great being retired.😊
Retired: Ain't that the truth

Dec 20, 2021 08:32:04 #

Very nice results. No question on which flower to focus on. The steps you took to get your final results, was it from something you saw or read?
Dec 20, 2021 09:55:13 #
NJFrank wrote:
Very nice results. No question on which flower to focus on. The steps you took to get your final results, was it from something you saw or read?
I came up with this on my own. The steps taken are my own. I'm sure there are several ways to the same end, Photoshop is like that.😊
Dec 20, 2021 09:59:59 #

Dec 20, 2021 10:10:04 #
AzPicLady wrote:
You made a lovely image!
Thank you.
From a distance I think it's nice. Close up not to sure what I think because of the minimal focus areas. 🤔
Dec 20, 2021 10:38:21 #
Dec 20, 2021 13:35:11 #
Jim-Pops wrote:
This picture started out not having a whole lot in... (show quote)
Yes. Very interesting.
Dec 20, 2021 16:23:06 #

Jim-Pops wrote:
This picture started out not having a whole lot in... (show quote)
A fabulous result 💞❤️💛❤️💞
Dec 21, 2021 09:16:38 #
sippyjug104 wrote:
Very well done and quite educational.
Thank you Sippy. I hope it helps people understand the value of layers a little better.
Dec 21, 2021 09:18:07 #
srg wrote:
Yes. Very interesting.
I hope it gives you another way to get the results you might want.
Dec 21, 2021 09:18:25 #
If you want to reply, then register here. Registration is free and your account is created instantly, so you can post right away.