Challenge: “Straight out of Camera” January 13th - 15th, 2020
Jan 12, 2020 21:30:05 #
I want to thank Larry for his Free Sunday challenge and Lorima for hosting “In-Complete or Unfinished” and those who posted in “The No Host, Just Post” all has a lot of great post in them.
This challenge may not be what some people think. It will require 2 photos of the same shot taken. In other words the first photo posted will be Straight Out Of Camera only, no touch up.
And the second photo will be what you did to make the same shot look more interesting, enticing or just “POP”. Or even just re-cropping for better composition. And give a brief explanation of what you did in the 2nd photo.
Or if someone has a picture that they want you to process it for better results.
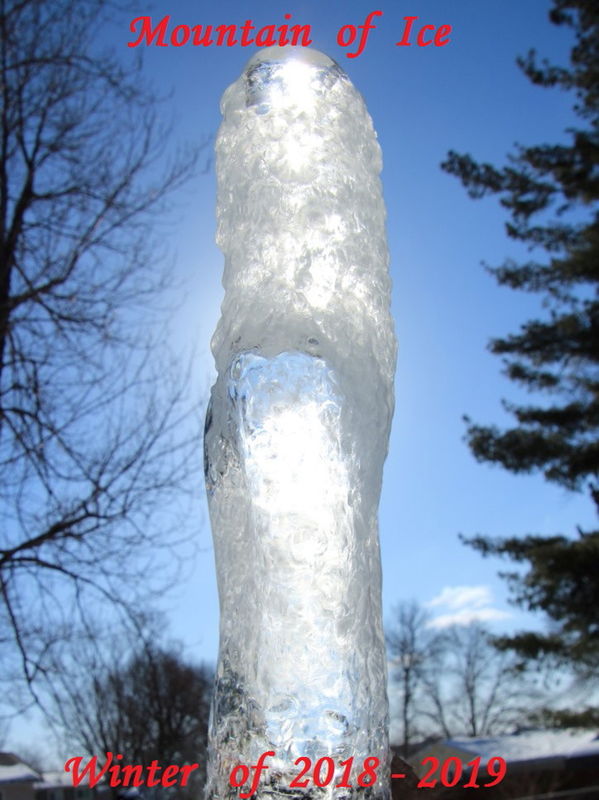
#1 Straight out of Camera.
#2 Cropped to remove the houses to better show straightness with trees, and remove hand.
Added wording to explain weather. A lot of you have seen this one previously.
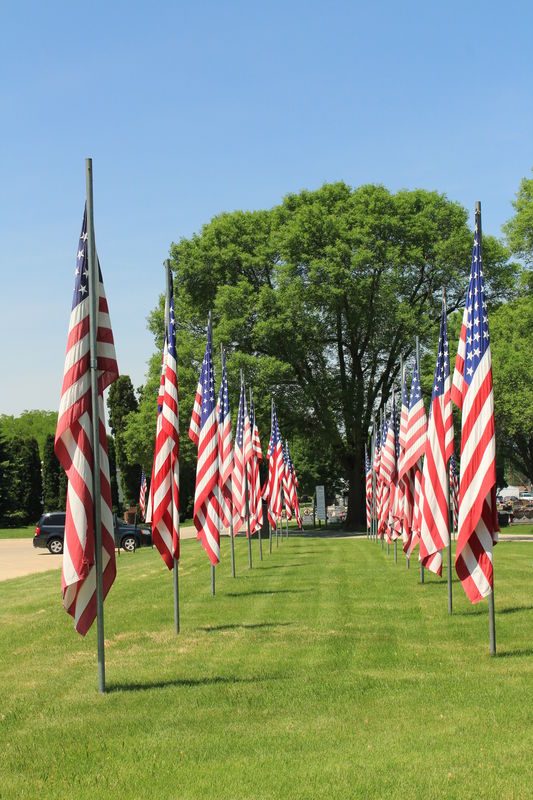
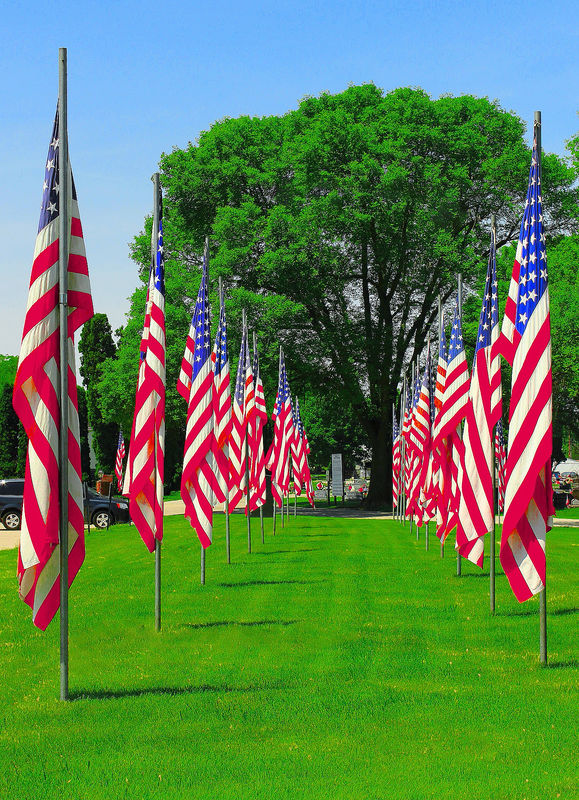
#3 Straight out of Camera
#4 Added to the HUE's and stepped up the colors, cropped to center flags a little better.
This challenge may not be what some people think. It will require 2 photos of the same shot taken. In other words the first photo posted will be Straight Out Of Camera only, no touch up.
And the second photo will be what you did to make the same shot look more interesting, enticing or just “POP”. Or even just re-cropping for better composition. And give a brief explanation of what you did in the 2nd photo.
Or if someone has a picture that they want you to process it for better results.
#1 Straight out of Camera.
#2 Cropped to remove the houses to better show straightness with trees, and remove hand.
Added wording to explain weather. A lot of you have seen this one previously.
#3 Straight out of Camera
#4 Added to the HUE's and stepped up the colors, cropped to center flags a little better.

Jan 12, 2020 21:39:57 #

Transbuff1985 wrote:
I want to thank Larry for his Free Sunday challeng... (show quote)
T'will be a fun one, Bob
Jan 12, 2020 21:50:06 #

Transbuff1985 wrote:
I want to thank Larry for his Free Sunday challeng... (show quote)
Good examples.
Jan 12, 2020 21:50:25 #
Jan 12, 2020 22:06:54 #

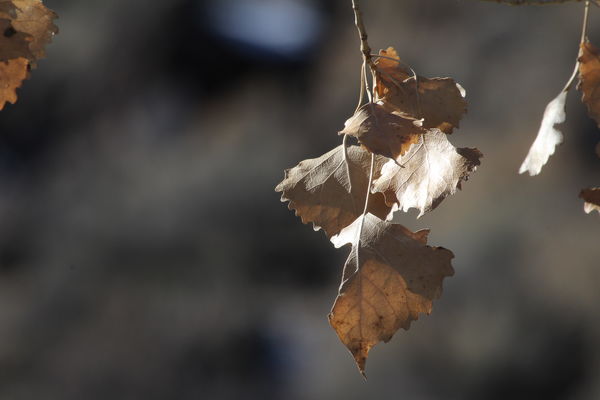
Interesting challenge. Here's my first attempt at it:
#1 original
#2: cropped to remove some background leaves, increased color saturation a bit
#1 original
#2: cropped to remove some background leaves, increased color saturation a bit

Jan 12, 2020 22:08:00 #
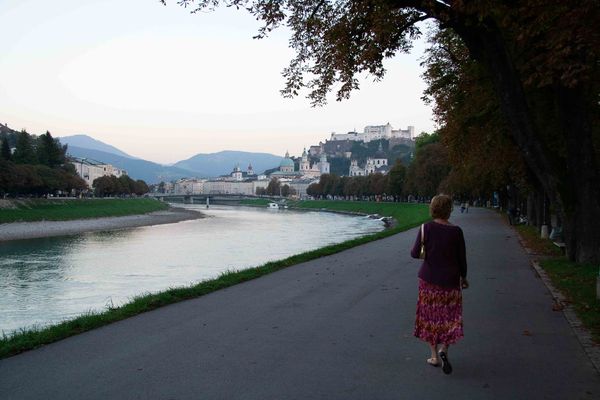
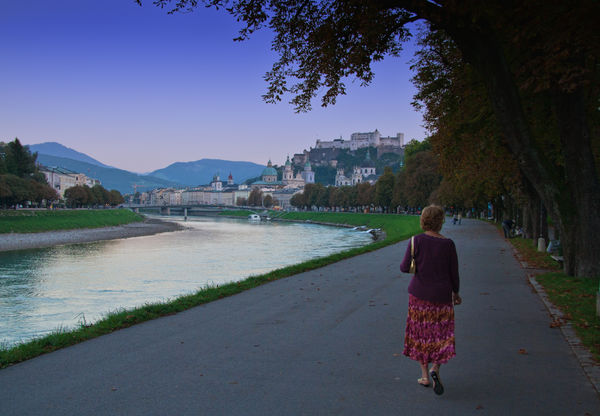
From the archives. A 2006 vacation shot.
It's been a while so this is from memory, and just looking at the second pic.
#1 is the original raw file converted to a jpg.
For #2
A slight crop.
Adjust the exposure to lift the dark areas.
Increase the saturation.
Probably added a graduated ND filter (Color Efex?) to bring the sky back to the feeling of a beautiful evening.
Sharpen.
Nowdays I could proably do it all within Lightroom (the "auto button" with a tweak of the exposure) and the graduated filter and a tweak of the Luminance for the aqua and blues.
(I just tried it)
.
Jan 12, 2020 22:13:34 #
Ysarex
Loc: St. Louis
Well, my most recent photo taken this past weekend. Probably not exactly what you had in mind because my SOOC images aren't what folks generally expect. You didn't make it clear if the 2nd image had to be a processed version of the SOOC or processed from the raw file so I'm going with the processed raw file since my SOOC JPEGs can't be fixed.
The scene is backlit. The sky was blue but because of the backlighting the DR is really high and any exposure that recorded a blue sky in the SOOC JPEG would leave very little to work with on the shadow end. I would have had to drop the exposure 1.3 stops to get the blue sky in the processed photo. So I exposed to place the sky at the sensor saturation point which caused the camera to overexpose the sky in the JPEG. My JPEGs are green because I have the camera WB set to unity. Makes for an ugly JPEG but helps me expose more precisely and it's not an issue when processing the raw file.
Joe

Jan 12, 2020 22:20:23 #
Jan 12, 2020 22:21:53 #

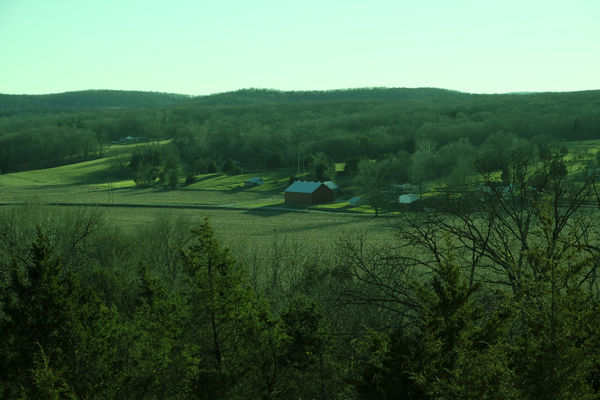
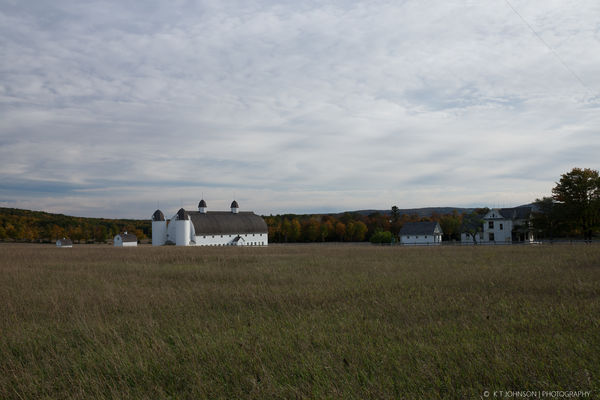
Okay, below is what arguably is the most photogenic barn in Michigan.
The first shot is the Jpeg of the raw SOOC from my Sony A77 at 24mm, taken October 19, 2016.
All Post Processing done in Lr 5.7
In the 2nd shot, I cropped it to what looks like a panorama.
Increased the exposure just a hair.
Contrast +19
Highlights -88
Black Clipping +33
Vibrance +33
Clarity +31
In the HSL Panel, played with all the sliders to taste. I go to Saturation 1st, then Luminence, then Hue.
Then I go to the Tone Curve & play with those sliders to my liking.
I usually leave it for a week or so & come back to it & see how I feel about it, maybe making small changes, or just leaving it. It looks a whole lot better on a 27 inch monitor than on a phone.

Jan 12, 2020 22:27:50 #
Jan 12, 2020 22:53:32 #
RichardTaylor wrote:
Good examples.
Thanks Richard coming from you I'm pleased.
Jan 12, 2020 22:54:57 #
katspangle wrote:
Interesting challenge. Here's my first attempt at it:
#1 original
#2: cropped to remove some background leaves, increased color saturation a bit
#1 original
#2: cropped to remove some background leaves, increased color saturation a bit
Nice ones katz.

Jan 12, 2020 22:57:09 #
RichardTaylor wrote:
From the archives. A 2006 vacation shot. br It's b... (show quote)
Nice set Richard T, definitely made it look better.
Jan 12, 2020 23:02:07 #
Ysarex wrote:
Well, my most recent photo taken this past weekend... (show quote)
Nice examples Joe, they don't have to be recent photo. What you did and explain are fine examples here. Thank you for sharing.
Jan 12, 2020 23:05:06 #
KTJohnson wrote:
Okay, below is what arguably is the most photogeni... (show quote)
Nice set KT - made a difference. Processed looks much nicer to the eye.
If you want to reply, then register here. Registration is free and your account is created instantly, so you can post right away.