Matting, Framing, Creative Displays and More
Apr 4, 2019 07:19:13 #

Table of Contents
A Traditional Presentation E. L.. Shapiro
Framing on a Budget Linda from Maine
Additional Budget Framing and Equipment Ideas E. L.. Shapiro
Non-traditional Framing: baskets and more ngrea
Technical and aesthetic framing and matting issues E. L.. Shapiro
Enhancing perceived depth via creative matting Uuglypher
The right tools for the job E. L.. Shapiro
Non-traditional displays and recycle! l-fox
Perspective: oblique-cut mats Uuglypher
Digital Mats big-guy
Digital Mats and a PS Action Fstop-12
.
Apr 4, 2019 09:23:41 #

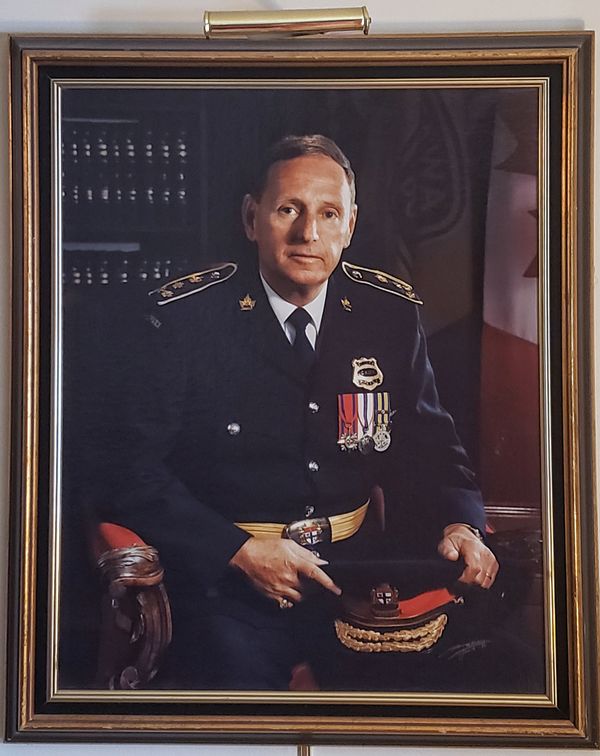
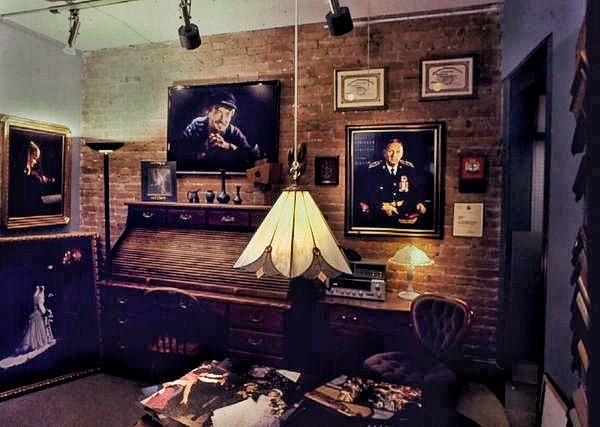
A TRADITIONAL PRESENTATION
I was a commissioned to make a portrait of our Chief of Police. Initially, upon appointment, a portrait of the Chief, during his or her tenure, is displayed in the lobby of the headquarters building and after retirement, it is placed in a gallery on the executive floor along with other ports of former chiefs.
This particular portrait was special and exceptional as to the nature of its display. Chief Thomas Flanagan was a highly respected and beloved career officer who started off as a "beat-cop" and worked his way up through the ranks to the force's highest position. He was a decorated detective, a "cop's cop", and as chief, initiated many innovations and moral building improvements in his department. Among his accomplishments was the construction of a new modern headquarters building which bears his name.
Sadly, he passed away shortly after his retirement. This portrait hangs in the main entrance to the executive floor on permanent display.
Environment: There are a few oil paintings and many photographs of former chiefs as well as a mosaic mural in the lobby depicting many of the prominent chiefs. A traditional presentation was in order.
Print finish: We decided to mount the print on canvas and protect it with lamination. The area is secure so glass in not required. Although we do not represent our photographs as paintings, the canvas finish was very compatible with other pieces in the room. The laminated finish is UV resistant and will stand up well to routine maintenance procedures. My experience is, unlike lacquers, it doesn't yellow or crack and we have had relatively little fading in long term displays under artificial lighting conditions. We can not, however, guarantee "archival" permanence with any color print even with archival framing methods and materials. Oftentimes, with portraits of mayors and other officials, we create a second print for dark storage in the municipal archives in our city.
Mounting: For photographs on display in homes we oftentimes stretch our canvas prints on wooden stretchers and then fit them to the frame. For institutional and public display we use hard material as backing- Masonite is my favorite. This material stands up better to routine maintenance like dusting and cleaning and will not easily become accidentally dented or perforated. The harder material usually enables a more pronounced canvas texture as it provides more force during pressing.
The Frame
BLACK - We decided on a tradition molding profile in black and gold. Since there is no glass and therefore no paper matting, we constructed a compound frame, that is a frame within a frame- the inner frame, in this case, is a black cloth liner. The black seemed very compatible with other furnishings in the room and since this portrait is also a memorization, the somber inner liner felt appropriate.
GOLD - in many police services, gold is the color io the badge and dress uniform trim and decorations- the signification of higher rank. The chiefs uniform features a gold shield, epaulets, belt and "scrambled eggs" on the brim of his cap. There is also some gold engraving on the law books in the background. The gold trim in the frame and liner pick up on these elements.
At one time the display area was insufficiently lighted so we temporarily added a frame light. Later on, some track lights were installed.
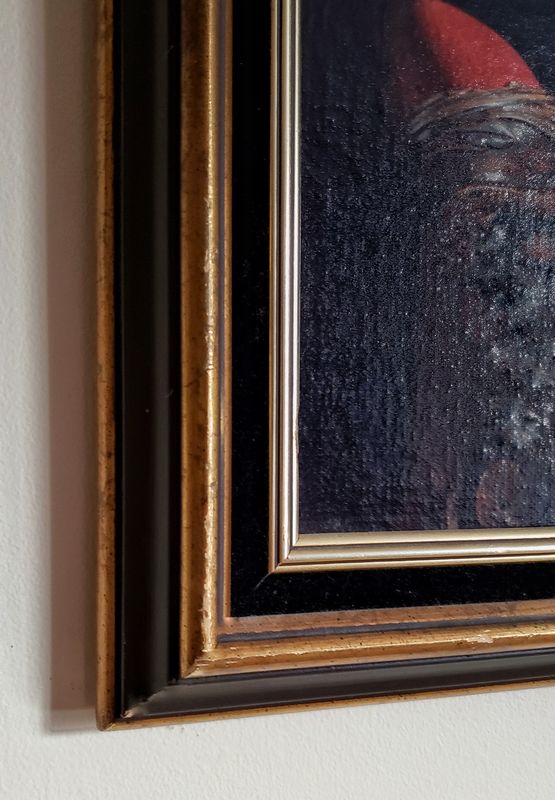
Recently, the portrait came back to us for some repairs to the frame- seems the maintenance folks got a little rough with it. I fixed some of the the miters and touched up a few scratches. I got a chance to grab a quick shot of it for this post. It's 24×30 inches.
I was a commissioned to make a portrait of our Chief of Police. Initially, upon appointment, a portrait of the Chief, during his or her tenure, is displayed in the lobby of the headquarters building and after retirement, it is placed in a gallery on the executive floor along with other ports of former chiefs.
This particular portrait was special and exceptional as to the nature of its display. Chief Thomas Flanagan was a highly respected and beloved career officer who started off as a "beat-cop" and worked his way up through the ranks to the force's highest position. He was a decorated detective, a "cop's cop", and as chief, initiated many innovations and moral building improvements in his department. Among his accomplishments was the construction of a new modern headquarters building which bears his name.
Sadly, he passed away shortly after his retirement. This portrait hangs in the main entrance to the executive floor on permanent display.
Environment: There are a few oil paintings and many photographs of former chiefs as well as a mosaic mural in the lobby depicting many of the prominent chiefs. A traditional presentation was in order.
Print finish: We decided to mount the print on canvas and protect it with lamination. The area is secure so glass in not required. Although we do not represent our photographs as paintings, the canvas finish was very compatible with other pieces in the room. The laminated finish is UV resistant and will stand up well to routine maintenance procedures. My experience is, unlike lacquers, it doesn't yellow or crack and we have had relatively little fading in long term displays under artificial lighting conditions. We can not, however, guarantee "archival" permanence with any color print even with archival framing methods and materials. Oftentimes, with portraits of mayors and other officials, we create a second print for dark storage in the municipal archives in our city.
Mounting: For photographs on display in homes we oftentimes stretch our canvas prints on wooden stretchers and then fit them to the frame. For institutional and public display we use hard material as backing- Masonite is my favorite. This material stands up better to routine maintenance like dusting and cleaning and will not easily become accidentally dented or perforated. The harder material usually enables a more pronounced canvas texture as it provides more force during pressing.
The Frame
BLACK - We decided on a tradition molding profile in black and gold. Since there is no glass and therefore no paper matting, we constructed a compound frame, that is a frame within a frame- the inner frame, in this case, is a black cloth liner. The black seemed very compatible with other furnishings in the room and since this portrait is also a memorization, the somber inner liner felt appropriate.
GOLD - in many police services, gold is the color io the badge and dress uniform trim and decorations- the signification of higher rank. The chiefs uniform features a gold shield, epaulets, belt and "scrambled eggs" on the brim of his cap. There is also some gold engraving on the law books in the background. The gold trim in the frame and liner pick up on these elements.
At one time the display area was insufficiently lighted so we temporarily added a frame light. Later on, some track lights were installed.
Recently, the portrait came back to us for some repairs to the frame- seems the maintenance folks got a little rough with it. I fixed some of the the miters and touched up a few scratches. I got a chance to grab a quick shot of it for this post. It's 24×30 inches.
Apr 4, 2019 09:33:38 #
FRAMING ON A BUDGET
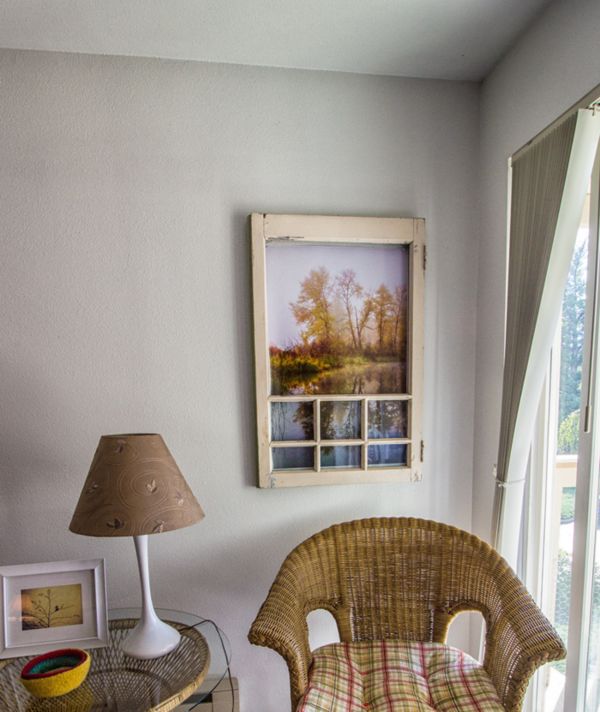
1. Check Habit for Humanity resale stores and other building supply recycling areas for old windows. This one fit a 20x30 poster nearly perfectly.
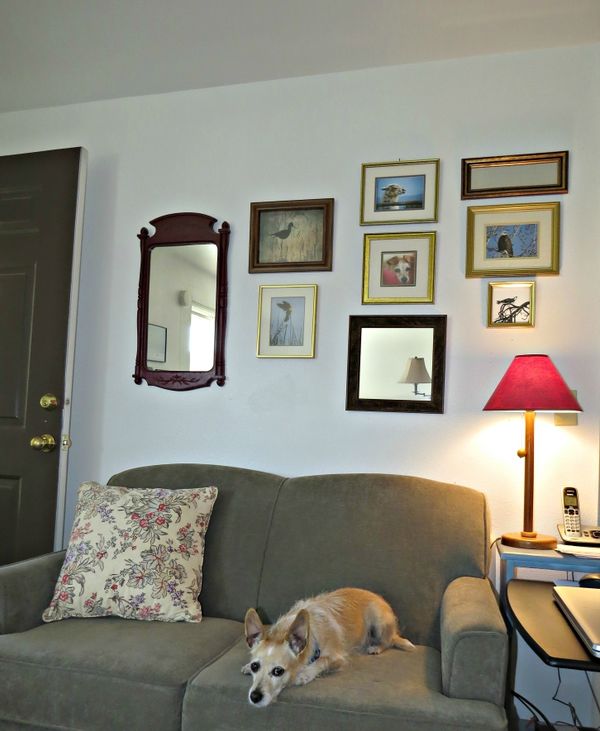
2. Goodwill, Salvation Army and thrift stores often have very nice frames, particularly in the "wall art" section. Those will often have a re-usuable mat; it just depends on how heavily glued it is to the art within. Spray painting a frame will often work out well, also.
In this small wall area of my apartment, I keep the layout as-is and just periodically replace the photos (8x10 and smaller). Including mirrors is a fun way to break up the view. Small live dogs are optional
1. Check Habit for Humanity resale stores and other building supply recycling areas for old windows. This one fit a 20x30 poster nearly perfectly.
2. Goodwill, Salvation Army and thrift stores often have very nice frames, particularly in the "wall art" section. Those will often have a re-usuable mat; it just depends on how heavily glued it is to the art within. Spray painting a frame will often work out well, also.
In this small wall area of my apartment, I keep the layout as-is and just periodically replace the photos (8x10 and smaller). Including mirrors is a fun way to break up the view. Small live dogs are optional
Apr 4, 2019 14:21:31 #
Cheapies and Oldies but Goodies.
You'll be surprised that Walmart, Costco, and Ikea have some pretty decent, even impressive ready-made frames.
Walmart offers a wide variety of sizes from 3 1/2 x 5 right up to 24x30. There are solid woods, veneers, barn wood, rustic styles, metallic painted types, ornate and modern styles, a few ovals and squares and more. Some are supplied with mattes, the glass of decent quality and of course you can replace the mattes or use your own non-glare or conservatory glass.
Also, check the framed mirrors and mass-produced painting or prints with nice big frames with very wide moldings. The prices are low enough to buy the frames, pop out the mirrors or the paintings and use the frame for photographs.
I know that some folks don't print and frame because of prohibitive costs. I saw some very nice 11x14 models for 10 bucks.
I'm a real dyed-in-the wool JUNK man. I frequent secondhand shops, thrift store, and charity shops in search of frames and props for commercial shots. The Salvation Army is always a good source of such things. If you are in Canada try the St. Vincent de Paul stores and Value-Village. The prices in these charity-run non-profit store are great and the money goes to good causes.
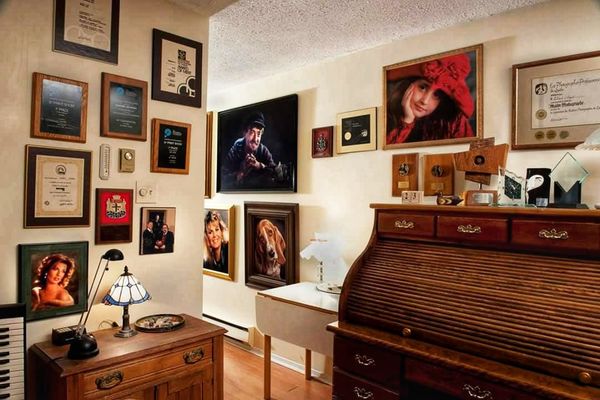
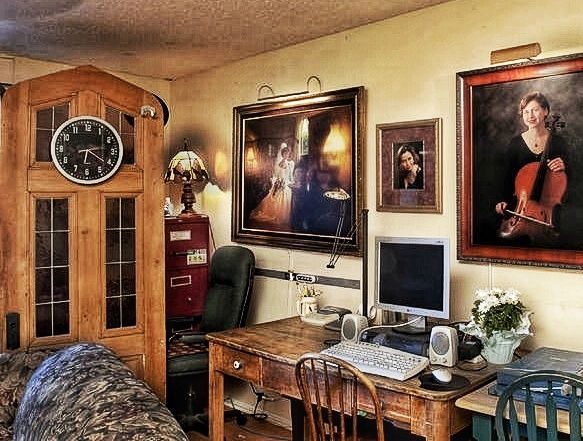
If you are putting together a studio space or a work area for processing or framing, theses kinds of shops also have great tables, chests, desks of drawers and some office stuff. The storage drawers in my camera room have long seen better days. Last week I picked up a BIRCH (real wood not chipboard) chest of drawers for 14 bucks- that included my Senior Citizen's discount. Sometimes it pays to be OLD! Surprising what some folks discard. It's a real trash and treasure situation.
The attached images are of parts of my office. Some of those frames are "finds" in second-hand shops as are the old kitchen table that I use as a computer station and the ancient church doors that serve as a room divider.
You'll be surprised that Walmart, Costco, and Ikea have some pretty decent, even impressive ready-made frames.
Walmart offers a wide variety of sizes from 3 1/2 x 5 right up to 24x30. There are solid woods, veneers, barn wood, rustic styles, metallic painted types, ornate and modern styles, a few ovals and squares and more. Some are supplied with mattes, the glass of decent quality and of course you can replace the mattes or use your own non-glare or conservatory glass.
Also, check the framed mirrors and mass-produced painting or prints with nice big frames with very wide moldings. The prices are low enough to buy the frames, pop out the mirrors or the paintings and use the frame for photographs.
I know that some folks don't print and frame because of prohibitive costs. I saw some very nice 11x14 models for 10 bucks.
I'm a real dyed-in-the wool JUNK man. I frequent secondhand shops, thrift store, and charity shops in search of frames and props for commercial shots. The Salvation Army is always a good source of such things. If you are in Canada try the St. Vincent de Paul stores and Value-Village. The prices in these charity-run non-profit store are great and the money goes to good causes.
If you are putting together a studio space or a work area for processing or framing, theses kinds of shops also have great tables, chests, desks of drawers and some office stuff. The storage drawers in my camera room have long seen better days. Last week I picked up a BIRCH (real wood not chipboard) chest of drawers for 14 bucks- that included my Senior Citizen's discount. Sometimes it pays to be OLD! Surprising what some folks discard. It's a real trash and treasure situation.
The attached images are of parts of my office. Some of those frames are "finds" in second-hand shops as are the old kitchen table that I use as a computer station and the ancient church doors that serve as a room divider.
Apr 5, 2019 08:19:12 #
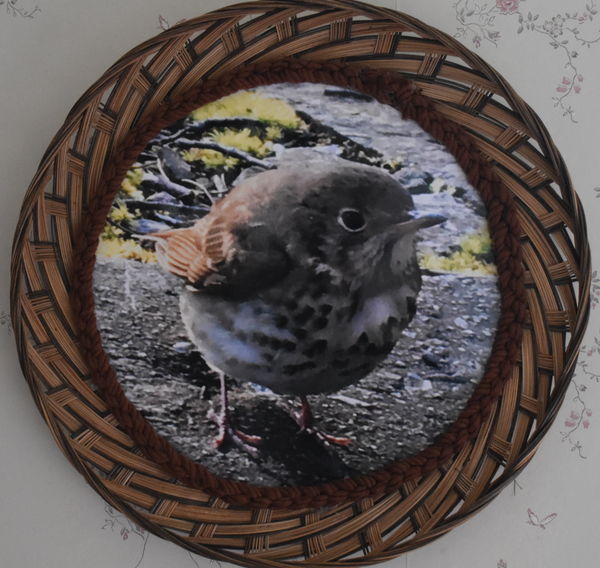
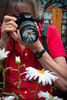
Sometimes a picture seems to call for something non-traditional. Flat baskets are one idea. I use a ribbon or a chain of macrame cord around the photo to mask the cut edge of the paper. I did one very round bird that needed a round frame and found a basket that was just right for $1 in a thrift store. (see photo)
Metal painted trays can also work well.
I have found that thrift stores supporting animal rescue groups tend to have high-end donations and they mark down artwork when there is any visible damage or when they have too many. Often the frames only need a little Old English scratch cover polish, or the damage is to the original art so they can be good for my purposes.
I buy them whenever I can and store them until I have a picture that works with the frame. If the frame doesn’t have glass I can use acrylic or plexi, but sometimes I leave it without glass. (I do several exhibits in my retirement community each year and the reflections on glass can make it hard for older folks to see the picture.) I also reuse frames with different pictures.
Apr 5, 2019 13:54:42 #
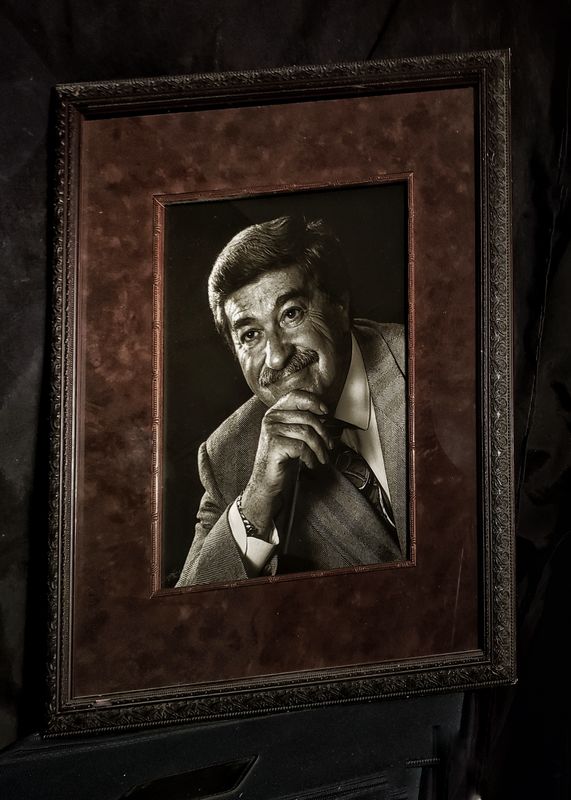
I thought this presentation project would be of interest because it entails a number of technical, aesthetic picture framing and matting issues: Framing a black and white photograph, revealing its tonality, image tone and surface texture, archival framing, creating a compound matte, and the use of glass in picture framing.
I made this "executive" portrait for display in a corporate headquarters. The subject is the founder of the company and the display is going to to be permanent and long term.
I recommended black and white photography and a traditionally and archivally processed (chemical/silver/darkroom) print in an acid-free framing concept. The decorator in charge of the office design, originally wanted a color portrait- "something in warm tones" so we settled on a warm tone monochromatic rendition and the use of warm colors in the framing concept as well. A black and white print can be archivally processed and framed with more predictability as to longevity.
I printed the image on a warm tone (chloro-bromide) a paper called Ektalure-X which has a tapestry-like surface texture which works nicely with male low key portraits. I mention this surface because it has some significance in the framing technique. I process the print in the archival method with all the appropriate double-fixing and, clearing and washing procedures. A final bath, before washing, in diluted selenium toner warms up the tone a bit more and enhances the permanence.
This material is a double weight paper. When it is air dried between blotters it won't curl or wrinkle and does not require adhesive or dry mounting which is bot archival no-nos. Special hinges are used to secure the print to an acid-free mounting board.
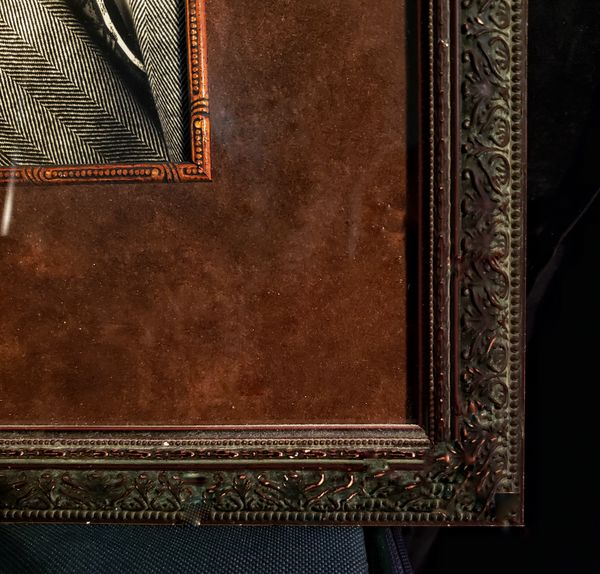
A matte was required in the decorating concept so I found a nice textured warm tone material which is acid-free. So... a matte requires glass to retain the print and matte in the frame. Glass can be problematic as to reflections. In archival framing, the print should not touch the glass - it is suspended between the backing board and the glass- spacers are used to facilitate this treatment.
There is non-glare glass, however, that is very problematic. If there is space between the print on and the glass the print seems hazy. Economy priced non-glare glass adds density to the image and tends to diminish delicate shadow detail. Low key prints do not do well, as per revealing delicate shadow detail on dead-matte papers. or when coated with matte sprays or when framed with non-glare glass. - all the brilliance is killed. This kind of glass would also diminish the effect of the surface texture.
So...What is called Conservatory Glass to the rescue. Unlike the cheaper non-glass glass, this material is sandblasted on only one side. The glossier surface is placed toward the print so there is no "diffusion". The less reflective side is on the outside of the frame. There is some glare but it is somewhat minimized.
To act as the spacer and add some decorative value, I used a fillet (not sure of the spelling)- not like the fish recipe- that is, a thin wooden liner that is applied to the edge of the matte opening. These can be coordinated with the frame style and color.
My "rule" for decorative mattes is generally NOT to use a color or shade that is brighter than the brightest highlight in the image or darker than the darkest tone in the image. Like all "rules" it is not law and can be broken but it is a starting guideline if you are in doubt. Some might say, in this case, that a colder color of frame and matte might emphasize the warmth of the image. That too is a good argument. When working with decorator and interior design concepts, sometimes compromises are arrived at. I do, however, try to discourage things that would totally distract from the image.
This is a good "case study" of planning a display print, almost for the shooting right up to hanging it on the wall. Seems like a whole lotta fussing and all of this is not always necessary for every informal or fun project. It's good to understand some of these principles if you want to do some serious picture framing or just want to maximize the qualities of you work when you display it.
We oftentimes hear that some photographers love to print on metal or other high gloss printing materials to maximize saturation, brilliance, sharpness, and dynamic range- nice to admire as photographers but you hang that thing in the wall in certain kinds of ambient lighting and it turns into a mirror. The opposite applies to matte finished papers and protective sprays. There are no reflections but some of the finishes diminish shadow detail and gray down the entire image.
PS. This print was one of the last ones I made in my black and white conventional darkroom. I held on to the films and papers by freezing them, long after they were discontinued. Even for those of us who still have functional darkrooms, I don't know of any sources of the more exotic warm-tone papers. There are, however, some fine-quality textured papers, for current ink printing, that can be used to somewhat replicate the look of the traditional portrait papers of the past. Fortunately, acid-free materials, papers with rag-content and all the special hinges, spacers, special tapes, and boards are available for archival framing and preservation of our work.
I made this "executive" portrait for display in a corporate headquarters. The subject is the founder of the company and the display is going to to be permanent and long term.
I recommended black and white photography and a traditionally and archivally processed (chemical/silver/darkroom) print in an acid-free framing concept. The decorator in charge of the office design, originally wanted a color portrait- "something in warm tones" so we settled on a warm tone monochromatic rendition and the use of warm colors in the framing concept as well. A black and white print can be archivally processed and framed with more predictability as to longevity.
I printed the image on a warm tone (chloro-bromide) a paper called Ektalure-X which has a tapestry-like surface texture which works nicely with male low key portraits. I mention this surface because it has some significance in the framing technique. I process the print in the archival method with all the appropriate double-fixing and, clearing and washing procedures. A final bath, before washing, in diluted selenium toner warms up the tone a bit more and enhances the permanence.
This material is a double weight paper. When it is air dried between blotters it won't curl or wrinkle and does not require adhesive or dry mounting which is bot archival no-nos. Special hinges are used to secure the print to an acid-free mounting board.
A matte was required in the decorating concept so I found a nice textured warm tone material which is acid-free. So... a matte requires glass to retain the print and matte in the frame. Glass can be problematic as to reflections. In archival framing, the print should not touch the glass - it is suspended between the backing board and the glass- spacers are used to facilitate this treatment.
There is non-glare glass, however, that is very problematic. If there is space between the print on and the glass the print seems hazy. Economy priced non-glare glass adds density to the image and tends to diminish delicate shadow detail. Low key prints do not do well, as per revealing delicate shadow detail on dead-matte papers. or when coated with matte sprays or when framed with non-glare glass. - all the brilliance is killed. This kind of glass would also diminish the effect of the surface texture.
So...What is called Conservatory Glass to the rescue. Unlike the cheaper non-glass glass, this material is sandblasted on only one side. The glossier surface is placed toward the print so there is no "diffusion". The less reflective side is on the outside of the frame. There is some glare but it is somewhat minimized.
To act as the spacer and add some decorative value, I used a fillet (not sure of the spelling)- not like the fish recipe- that is, a thin wooden liner that is applied to the edge of the matte opening. These can be coordinated with the frame style and color.
My "rule" for decorative mattes is generally NOT to use a color or shade that is brighter than the brightest highlight in the image or darker than the darkest tone in the image. Like all "rules" it is not law and can be broken but it is a starting guideline if you are in doubt. Some might say, in this case, that a colder color of frame and matte might emphasize the warmth of the image. That too is a good argument. When working with decorator and interior design concepts, sometimes compromises are arrived at. I do, however, try to discourage things that would totally distract from the image.
This is a good "case study" of planning a display print, almost for the shooting right up to hanging it on the wall. Seems like a whole lotta fussing and all of this is not always necessary for every informal or fun project. It's good to understand some of these principles if you want to do some serious picture framing or just want to maximize the qualities of you work when you display it.
We oftentimes hear that some photographers love to print on metal or other high gloss printing materials to maximize saturation, brilliance, sharpness, and dynamic range- nice to admire as photographers but you hang that thing in the wall in certain kinds of ambient lighting and it turns into a mirror. The opposite applies to matte finished papers and protective sprays. There are no reflections but some of the finishes diminish shadow detail and gray down the entire image.
PS. This print was one of the last ones I made in my black and white conventional darkroom. I held on to the films and papers by freezing them, long after they were discontinued. Even for those of us who still have functional darkrooms, I don't know of any sources of the more exotic warm-tone papers. There are, however, some fine-quality textured papers, for current ink printing, that can be used to somewhat replicate the look of the traditional portrait papers of the past. Fortunately, acid-free materials, papers with rag-content and all the special hinges, spacers, special tapes, and boards are available for archival framing and preservation of our work.
Apr 5, 2019 15:07:46 #

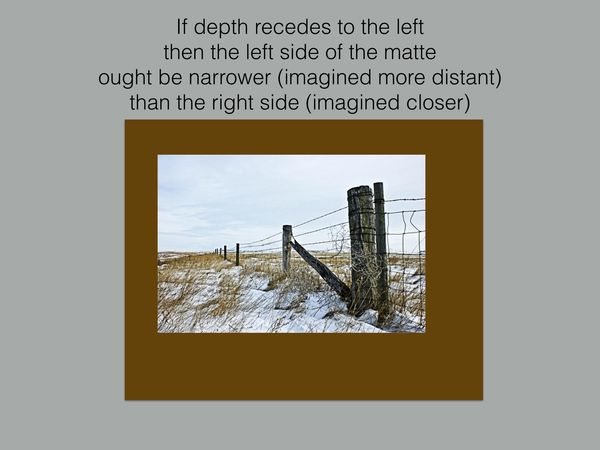
Enhancing Perceived Depth in Images via Artistic Matting
http://www.cs.northwestern.edu/~ago820/matting.pdf
IMO many may find this article by Gooch and Gooch a most informative stimulus to an often disregarded avenue to creativity. I should add that its message is fully as applicable to displaying images on-line as by matting and framing for hanging on the wall.
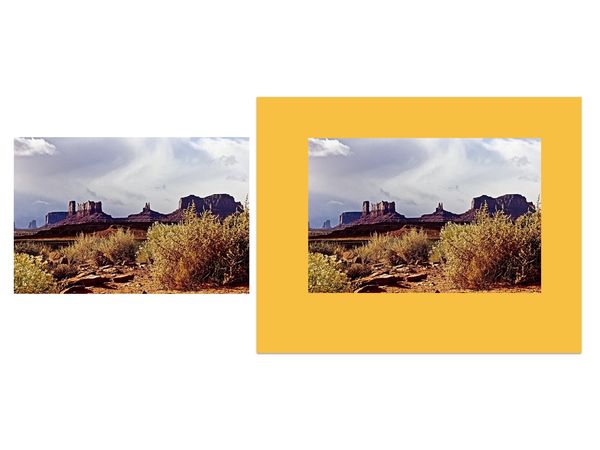
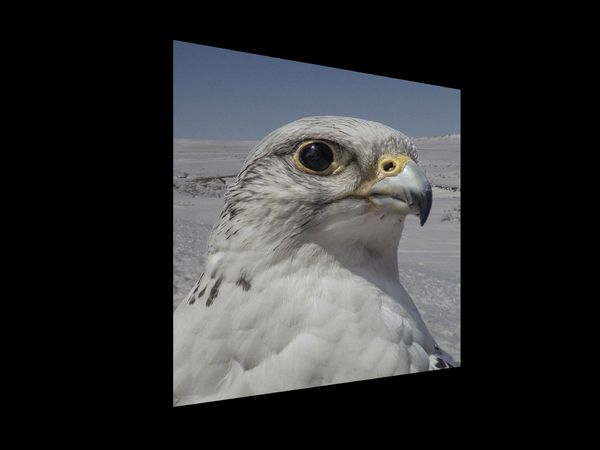
We post many images in hope that their inherent depth can be well displayed. Here are a few images demonstrating, I think, the difference between the "naked" image compared with the "matted" image.
Dave
http://www.cs.northwestern.edu/~ago820/matting.pdf
IMO many may find this article by Gooch and Gooch a most informative stimulus to an often disregarded avenue to creativity. I should add that its message is fully as applicable to displaying images on-line as by matting and framing for hanging on the wall.
We post many images in hope that their inherent depth can be well displayed. Here are a few images demonstrating, I think, the difference between the "naked" image compared with the "matted" image.
Dave

(Download)

(Download)
(Download)
Although some find favor with the expressed opinion re: width of matte sides, an additional post will offer a strong argument the other-way-round !
(Download)
Apr 5, 2019 18:19:03 #
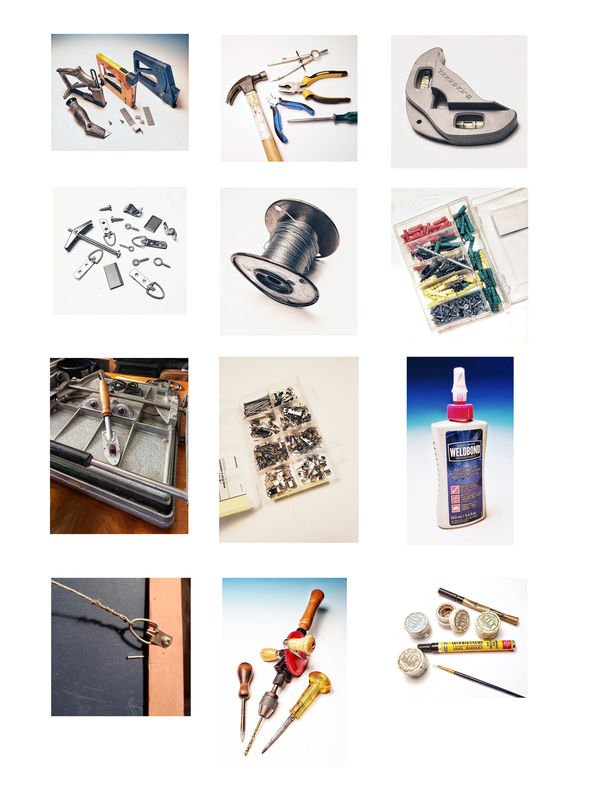
Just like in photography - shooting and processing - picture framing requires equipment and tools. If you are into the woodworking, fabrication, and furniture finishing or gilding and gold or metal leafing aspects of framing, there are specialized tools, machinery and skills required. If, however, like many of us, you are mostly concerned with hand making, restoring, or improving frames or simply assembling, and fitting and framing you photographs and mattes in pre-manufactured or custom ordered frames the tools required are inexpensive and easily obtainable. You might even have some of them around the house. It's just a matter of selecting the right ones.
This may sound comical, but many of the issues with fitting pictures to frames and preparing the frames for display have to do with KEEPING THINGS TOGETHER so the prints, mounting boards, mattes, and glass don't fall apart and fall out of the frame and making certain that you hard-earned efforts won't' fall off the wall, become damaged or hit someone.
Keeping the entire "sandwich" (the print, mounting board, matte, and glass) retained in the frame is usually accomplished with small nails, called brads, or specialized fasteners sometimes called glazer's points or framing points. The basic method is to insert these points in the RABBIT of the frame to secure the load. If you only fit the occasional frame you can insert theses fastenings into the wood by pushing them in with a pair of pliers or gentle hammering. If you do lots of framing you may want to consider a "gun" or tacker that is specially designed for the job. They make the job easier and faster. They shoot the brad or point directly forward with just the right amount of force at low velocity. Ordinary tackers and staplers can be too strong and damage the frame, split the wood, crack the glass or undo the miters at the corners. This is especially critical with thin moldings, older wood that could be brittle or antique frames. Theses guns sink in the fastener so just enough penetrates the wood and sticks out sufficiently to retain the materials. The fasteners come in strips, like staples, so it is less messy than having litte nails all over the place.
To secure canvas stretches in frames, there are Z-Brackets- they come in various sizes and depths to accommodate different thicknesses of stretcher bars and are secured with wood screws.
Another obvious, seemingly funny, but a real issue is hanging things on the wall and keeping them there and on the level. Frames going askew on the wall every time a door is slammed or a truck rolls by is annoying. Having frames with glass fall to the floor and self destruct is no fun either. There is some nice hanging-hardware that is handy, effective and easy to use. Eye-screws, D-Rings, framing wire of the proper strength, and screws that are stubby enough so the won't come thru the front of the frame should all be in your supply collection. In a future post, I will do a tutorial on hanging- pictures- that is!
I also like to keep a selection of anchoring hardware on hand- picture hanging hooks for various sizes and weights, wall plugs, and toggle bolts. I am not a big fan of those sticky pads, etc., I have seen them fail in adverse temperature and humidity conditions- too moist or too dry conditions can cause them
to un- stick. The assortments in the attached pictures were obtained at Ikea and the $1.00 store- not expensive.
SMALL TOOLS are best. Frames are relatively delicate so I like to use smaller tools which exert less torque and leverage when used to place or extract fasteners. I keep my heavy stuff off the framing table. I prefer to use screwdrivers with smaller handles and remember not to over tighten screws on hanging hardware. I have a small kinda tack hammer and smaller players for yanking out old nails and cutting framing wire. DRILLING HOLES can be a surgical procedure. Old wood and certain hardwoods can split if screws are not applied carefully. I use awls to make pilot holes for screws and screw eyes. If a drill is needed, I use an old-fashioned hand drill- less likely to split anything or go right through the molding.
Refinishing frames, re-gilding and making major restorative repairs is much more complex. If you are into that- it is an art and skill in itself. For making minor touch ups, however, there are many, fillers, waxes and special markers that work well. I use the Guild waxes. I apply them to nicks and scratches with my fingers and rub them in. They come in gold, antique gold, silver, pewter, and many colors. If they become dried up in their little jars, a few drops of benzene, mineral spirits or Varsol reactivates them. Cotton balls and small brushes are handy applicators too. The markers and stain pens are great. They come in many wood colors and preclude storing cans of messy and flammable paints and stains.
Adhesives. For repairing or rejoining frames, sticking moisture-sealing backing paper on frames and many related tasks, I like white glue. It is water based and can be diluted for light duty jobs like applying the backing paper. It is not flammable, does not emit fumes and when it is dry, it is amazingly strong.
For non-archival jobs, I like dry mounting. I still have my big ugly Seal press and tacking iron in service. I am not certain if there is actually archival dry mounting tissue. I am suspicious of spray adhesives so I don't use them in photographs.
To keep things on the level, when hanging a display, I love my two-way corner level and laser level. For cutting matte board, Foam-Cor, and Coroplast, I prefer a utility knife with an extra large and angled grip- they are easier to control. I'm working on another post on matte cutting gear and Guillotine and rotary type trimmers.
Apr 5, 2019 18:46:49 #

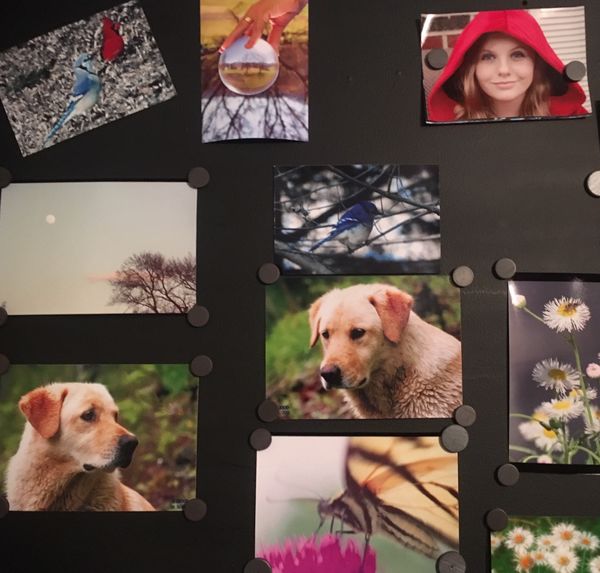
This is not really framing, but is an alternative way to display.
1. I paint old 'fridge and freezer doors and hang them. They stand out from the wall nicely, and then I put pics on them by setting disc magnets at their corners. Steel from discarded computer jackets also work well.
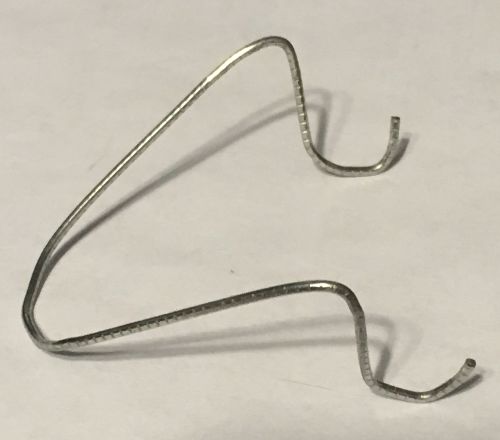
2. and 3. I read a blurb on the Kodak site 20+ years ago that was about different ways to display one's images. One of the methods was to use CD cases. The idea was to affix the cases to a wall or to a board or such to be hung on a wall. The idea also was that the pics could be easily changed out occasionally. That part I'm not so sure of; those cases are a bear to open. The stand is made from a large paperclip. It was new but I am going to hunt up my scraps of house wiring copper for that job in the future.
1. I paint old 'fridge and freezer doors and hang them. They stand out from the wall nicely, and then I put pics on them by setting disc magnets at their corners. Steel from discarded computer jackets also work well.
2. and 3. I read a blurb on the Kodak site 20+ years ago that was about different ways to display one's images. One of the methods was to use CD cases. The idea was to affix the cases to a wall or to a board or such to be hung on a wall. The idea also was that the pics could be easily changed out occasionally. That part I'm not so sure of; those cases are a bear to open. The stand is made from a large paperclip. It was new but I am going to hunt up my scraps of house wiring copper for that job in the future.
Apr 7, 2019 00:27:21 #
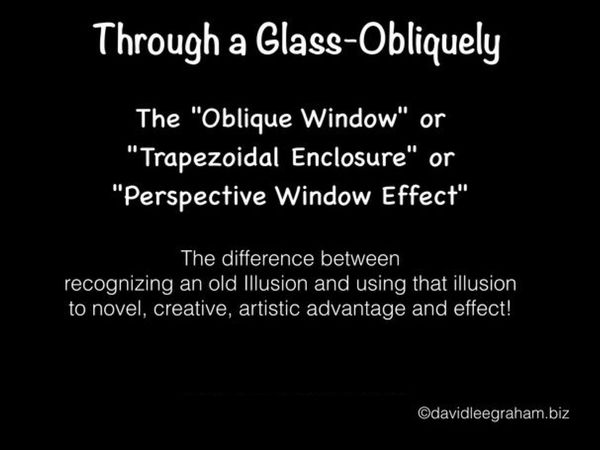
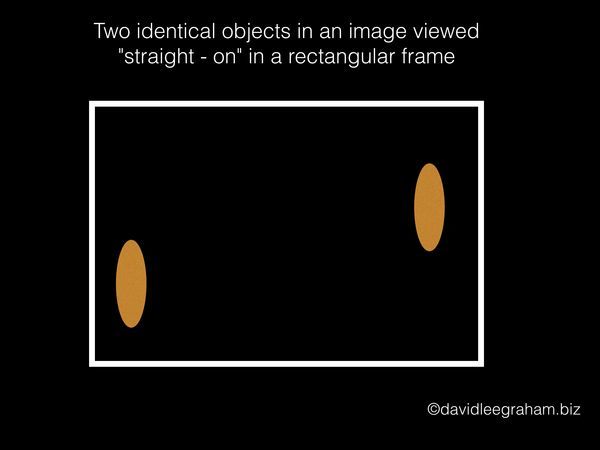
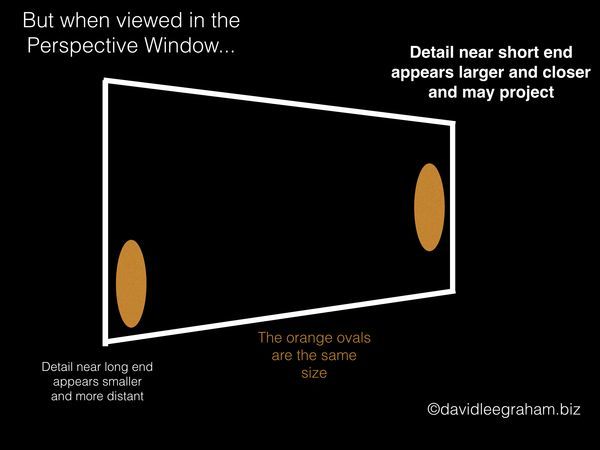
The Perspective Window - or - Through a Glass Obliquely
The following is an application of a long-recognized optical illusion
applied in a novel manner for the purpose of creative, artistic effect.
Dave Graham
The following is an application of a long-recognized optical illusion
applied in a novel manner for the purpose of creative, artistic effect.
Dave Graham
(Download)
(Download)
(Download)

(Download)
before

(Download)
after matte cut as “Perspective Window”
(Download)
May 13, 2019 16:44:24 #
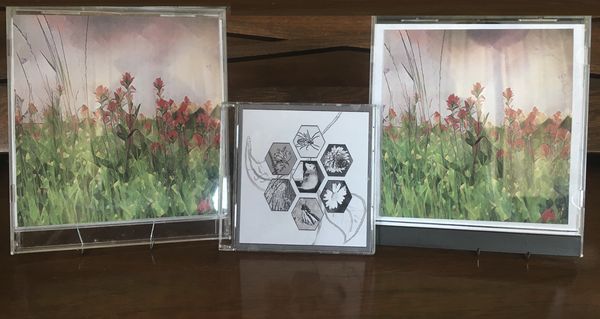
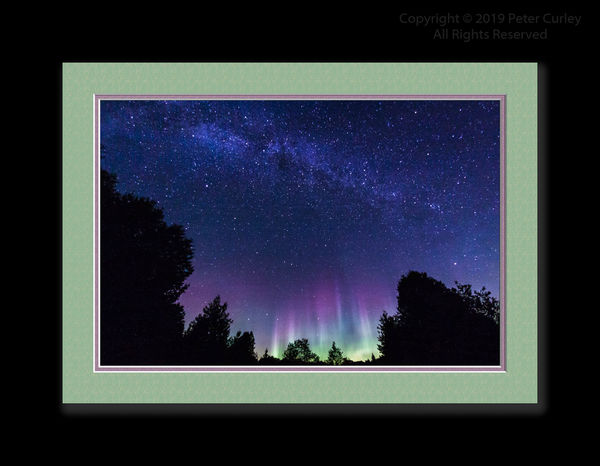
In our area we have a photo festival called Spark that is displayed all over the city and one display caught my eye. It was a simple photo with a physical mat attached to a spacer and placed on a flat black board giving it a 3D look and feel. The photo was laminated so no need for glass but the mat was still unprotected. So, putting 2 and 2 together I came up with this idea. A photo with digital matting flush mounted to a sturdy backing, cardboard, gator board, bead board what ever. Attached to some sort of spacer, small wood rectangle and that is mounted to a larger backing board covered with black felt or other black non shine material. Bottom line is no frame, no glass, no expensive cash outlay but a very attractive way to show off your work of art. See attached photo. Note that I added a digital drop shadow on the mat to simulate the spacer between photo/mat and backing board.
If you want to reply, then register here. Registration is free and your account is created instantly, so you can post right away.