I'll throw my hat in the ring.
Dec 31, 2021 23:55:39 #
First off, I would like to tell everyone that I am actually very good with Photoshop & Lightroom, but I hate post processing with a passion. I am kind of anal and I end up spending too much time on a single pic. I can end up making layer after layer and still not be happy. So, I found ways to do things in a single layer that are probably just as good as anything. The following is a good (depending on ones' point of view) example of what I am talking about.
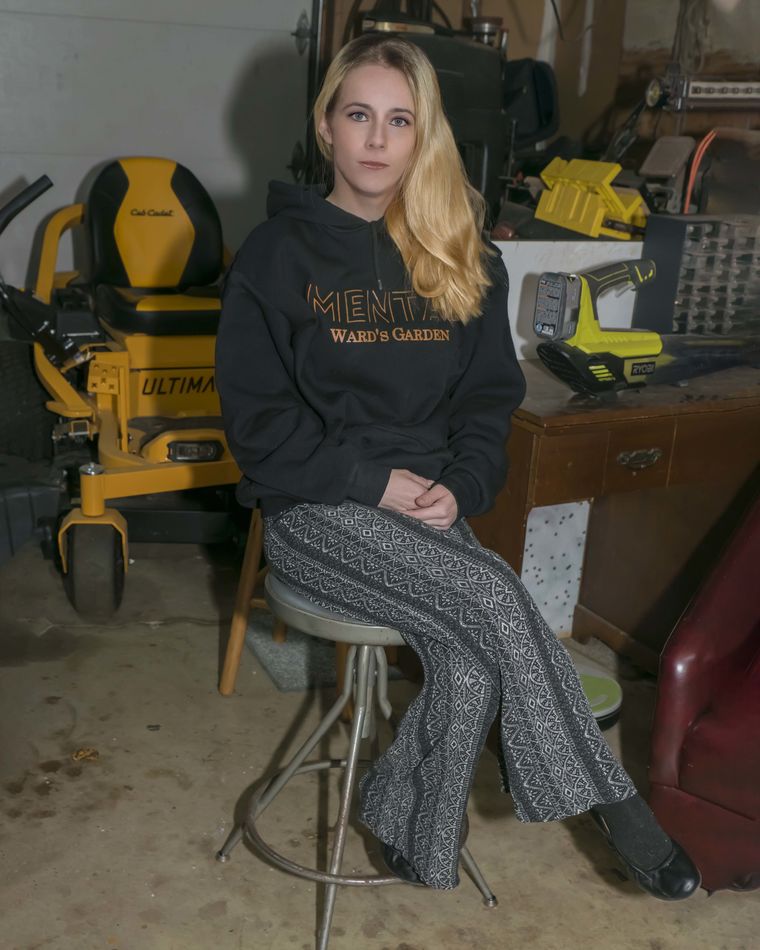
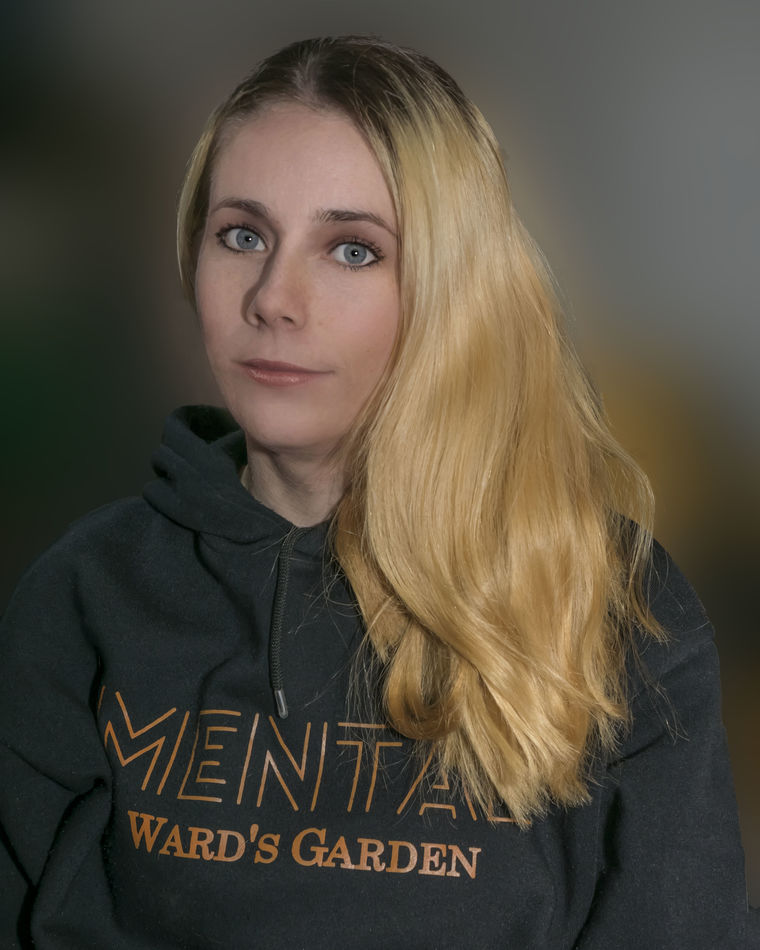
The woman shown here is a beautician who happens to be a good friend of my son and does house calls just for him. She always cuts his hair in one of my garage bays hence, the machinery and lawn mower in the background. This is basically just a snapshot taken with a Sony A77 ll using a Sigma 165-240 zoom lens. ISO 200, f4.5, at 1/200 sec. Oh, and a speed light mount on camera set at 3/4 power and capped with a diffuser.
I did not spend 10 minutes total on this. I started out in Lightroom and and took the whites and highlights down just a little bit and moved the shadows slider to the right a little bit to lighten and keeping whatever DOF I had alone I did not mess with either exposure nor contrast. That was it for lightroom. Oh, and I always start in Lightroom.
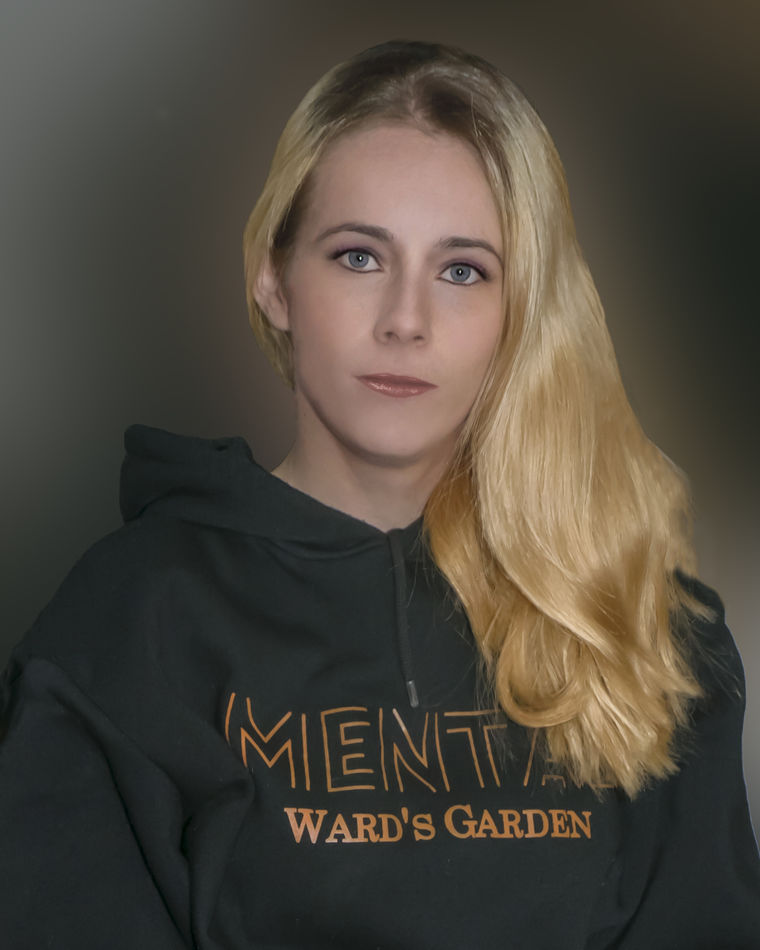
I then slammed it over to Photoshop. Here, I cropped the original to 8x10. I always shoot in 3:2 aspect ratio. It looked o.k. and I wanted to see what she would look like in a closeup. I liked what I saw and once again cropped to 8x10.
It did not look very good with all of that crap in the background, so I decided to do a quick fix that would change the background which went like this. It only took a minute. I used the quick selection tool, and selected the "select subject" tab at the top - not the "select and mask" tab. I then went to the "select" tab at the very top and clicked on "inverse" in the drop down menu. This leaves the dotted lines surrounding the subject alone and adds dots around the the perimeter of the photo. At this time one can correct irregularities in the dotted outline of the subject.
Satisfied, I then went to the "filter" tab at the very top and clicked on "blur" in the drop down menu and then the sub menu "Gaussian blur". I then adjust the amount of blur just by using the slider until I got what I wanted. Satisfied, I went back to the "select" tab at the very top and in the drop down menu, I clicked on "Deselect". All of the dots now disappear. Still liking the results, I saved the photo to a folder.
It was that simple and took only a few minutes. I strongly believe in the K.I.S.S. principle.
Tell me what you think.
The woman shown here is a beautician who happens to be a good friend of my son and does house calls just for him. She always cuts his hair in one of my garage bays hence, the machinery and lawn mower in the background. This is basically just a snapshot taken with a Sony A77 ll using a Sigma 165-240 zoom lens. ISO 200, f4.5, at 1/200 sec. Oh, and a speed light mount on camera set at 3/4 power and capped with a diffuser.
I did not spend 10 minutes total on this. I started out in Lightroom and and took the whites and highlights down just a little bit and moved the shadows slider to the right a little bit to lighten and keeping whatever DOF I had alone I did not mess with either exposure nor contrast. That was it for lightroom. Oh, and I always start in Lightroom.
I then slammed it over to Photoshop. Here, I cropped the original to 8x10. I always shoot in 3:2 aspect ratio. It looked o.k. and I wanted to see what she would look like in a closeup. I liked what I saw and once again cropped to 8x10.
It did not look very good with all of that crap in the background, so I decided to do a quick fix that would change the background which went like this. It only took a minute. I used the quick selection tool, and selected the "select subject" tab at the top - not the "select and mask" tab. I then went to the "select" tab at the very top and clicked on "inverse" in the drop down menu. This leaves the dotted lines surrounding the subject alone and adds dots around the the perimeter of the photo. At this time one can correct irregularities in the dotted outline of the subject.
Satisfied, I then went to the "filter" tab at the very top and clicked on "blur" in the drop down menu and then the sub menu "Gaussian blur". I then adjust the amount of blur just by using the slider until I got what I wanted. Satisfied, I went back to the "select" tab at the very top and in the drop down menu, I clicked on "Deselect". All of the dots now disappear. Still liking the results, I saved the photo to a folder.
It was that simple and took only a few minutes. I strongly believe in the K.I.S.S. principle.
Tell me what you think.
Jan 1, 2022 05:23:29 #

tainkc wrote:
First off, I would like to tell everyone that I am... (show quote)
I did not read all the details and all the wording but I do notice these are very good images well captured of a beautiful lady you did a good job thank you for posting.
And a blessed and happy new year for you and your family.
Bruce.
Jan 1, 2022 05:24:08 #

Jan 1, 2022 05:56:47 #
tainkc wrote:
First off, I would like to tell everyone that I am... (show quote)
There is the silent "S" in K-I-S-S-[S]. It stands for "Stop", which you did in your selection. You "Stopped" when you got to the end. Many of us often go beyond this point.
Good work with great result.

Jan 1, 2022 07:07:28 #
tainkc wrote:
First off, I would like to tell everyone that I am... (show quote)
Contrary to popular opinion expressed so far - I think your portrait shows not only the desired soft focus but a cloudiness that spoils it. I downloaded your download and then uploaded it to Affinity ( imho a far better app). Using just the filters (haze) tab it took a moment to produce the attached - I like it better - but what do you think? I guess we all have different ideas and likes and dislikes?
 Happy New Year. Del.
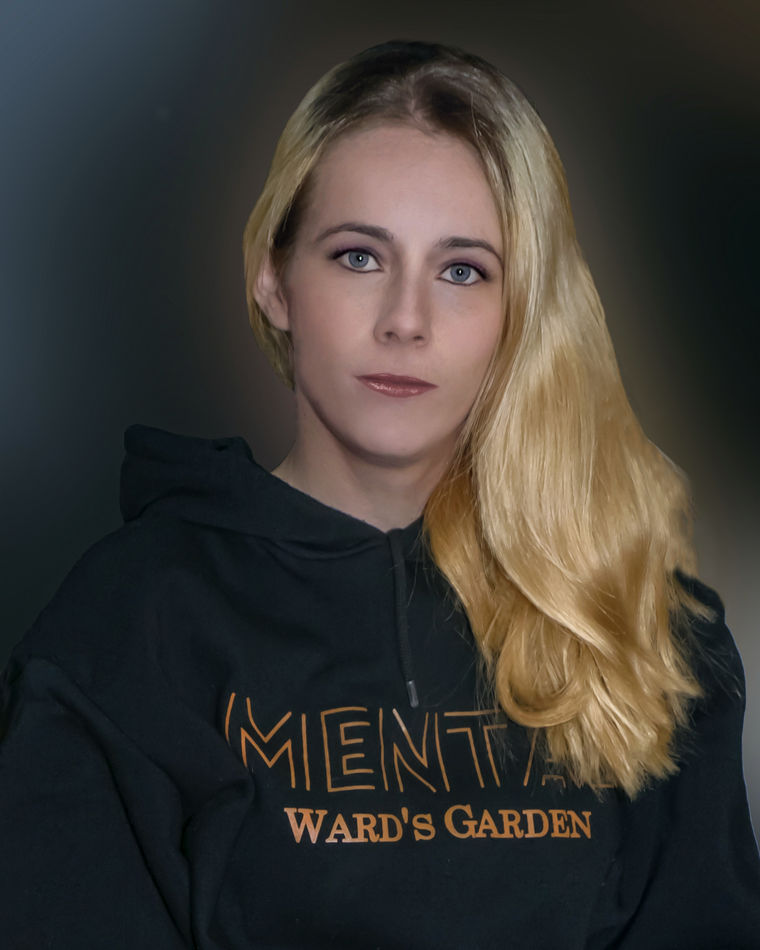
Jan 1, 2022 07:45:24 #

Jan 1, 2022 09:16:02 #
Rongnongno wrote:
A single comment: The hair is too… Neat. (What we call PS CC haircut)
Sometimes this also work for hair;
https://www.uglyhedgehog.com/t-699291-1.html
Jan 1, 2022 09:40:00 #
Jan 1, 2022 10:51:55 #
StanMac
Loc: Tennessee
Nice job isolating the lady from the background clutter. However, there seems to be little to no texture to the subject’s skin. Did you PP smooth her skin to that degree?
Stan
Stan
Jan 1, 2022 11:07:42 #

Jan 1, 2022 11:14:13 #
FreddB
Loc: PA - Delaware County
Looks like the nitpickers have decided to target you today. Her hair looks exactly the same in the finished version as the original. The skin is just as smooth in both. Why wouldn’t it, she’s a baby - relatively speaking of course. I have granddaughters older than her.
Nice work 👍👍
Nice work 👍👍
Jan 1, 2022 12:14:54 #
Rongnongno wrote:
Nope. That is how it lays. earlier, she had a pony tail. she took out the pony tail, brushed her hair and sat down. The rest is photo history. Remember what I wrote; she is a licensed beautician. But yep, you are right. The marching and thing did kind of smooth things out just a tad too much.A single comment: The hair is too… Neat. (What we call PS CC haircut)
Jan 1, 2022 12:20:52 #
Wallen wrote:
The purpose of this post is what can be done in a single layer. I use different techniques when I have frizzy or very loose hair and I do so in multiple layers. There was some of her hair that I could have messed with by adjusting the Marching ants, but I saw no reason to mess with this since the outlines were good enough as is. Oh, and thank you very much for your input. I really do appreciate it.Jan 1, 2022 12:22:41 #
Jan 1, 2022 12:46:30 #
StanMac wrote:
Thanks, Stan! Yeah, that was the cool part. I had the speed light pointing at a about a 45 degree angle toward the ceiling which is only at 8ft. Originally, the light was rather bright on her face and I even debated as to use the brush tool in Lightroom, but i decided to start with the white and highlight sliders first. I was pleasantly surprised. So, I left well enough alone.Nice job isolating the lady from the background clutter. However, there seems to be little to no texture to the subject’s skin. Did you PP smooth her skin to that degree?
Stan
Stan
Here is another photo of her that I took of her only starting as an upper body shot. Notice the little bit of black along the out edges of her hair on camera right? this is because I did not fool around with the marching ants or the healing brush. I was more concerned with matching the amount of blur as seen in the first photo. I have another photo where she is smiling and boy, she sure had the yellow teeth! It has to be from smoking and not getting any teeth cleanings. Fortunately, I have presets in Photoshop I made for just such scenarios. It completely changed her face and although still very beautiful, it does not quite look like herself.
It also could be because I did not adjust any colors.
Oh, you know what? I bet I know why. I just thought of this. Please forgive me. I should have mentioned this in the original post; I have a preset In Lightroom that I use all the time for all photos where I set the clarity, saturation and vibrancy. Even though these setting are not set very high, nonetheless. it changes things just a bit. I know that I used this preset of mine. I knew I was forgetting something. I am sorry.
If you want to reply, then register here. Registration is free and your account is created instantly, so you can post right away.