Alright ! yall with the knowledge and skills at processing
Sep 10, 2021 19:41:05 #
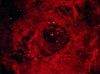
Here ya go , I can't seem to get the trick to adding this layer to my background LGB layer. Please explain to me how you did this trick or should I be laying the lgb on the Ring ?

Sep 13, 2021 13:03:44 #
Ballard
Loc: Grass Valley, California
stepping beyond wrote:
Here ya go , I can't seem to get the trick to adding this layer to my background LGB layer. Please explain to me how you did this trick or should I be laying the lgb on the Ring ?
Hi stepping beyond
For my last shot of the ring I used LRGB then added the HA to the red channel and then recombined them again using pixinsight. To capture the dim HA halo I masked of the ring while stretching the rest of the image. See the description and shots at:
https://www.uglyhedgehog.com/t-702873-1.html
Sep 13, 2021 13:05:10 #
stepping beyond wrote:
Here ya go , I can't seem to get the trick to adding this layer to my background LGB layer. Please explain to me how you did this trick or should I be laying the lgb on the Ring ?
I normally have two documents (star field & dso)
Open photoshop with star field doc.
Open dso also in photoshop.
Selecting the dso doc copy all.
Select star field doc.
Paste as new layer.
Change blend mode to lighten or lighter.
You may have to adjust opacity for a more natural blend / look.
You may also need a layer mask on the dso layer & paint in the dso (reveal all mask)
I did notice your star field is very black suggesting clipping of black level.
I tend to have my black point level above 10 giving a more natural looking background.
Obviously personal choice.
Really hope this helps
Sep 13, 2021 18:58:21 #
Thanks Marc , I'll give it a try . At this point I would try standing on my head Friend.
Sep 16, 2021 14:39:19 #
"Alright ! yall with the knowledge and skills at processing"
Well, that leaves me out...


I still struggling with these damnedable FITS files.
But I don't give up.
Well, that leaves me out...
I still struggling with these damnedable FITS files.
But I don't give up.
Sep 16, 2021 16:36:38 #
Sonny , I just finished stacking my 9-14-21 frames to my already 110 minutes of Ha that has been collected darn near Zenith and beyond. I don't think I'm any closer but, I'm still plugging away at it. I feel the FRUSTRATION in your words.
Sep 20, 2021 21:16:18 #
Marc G wrote:
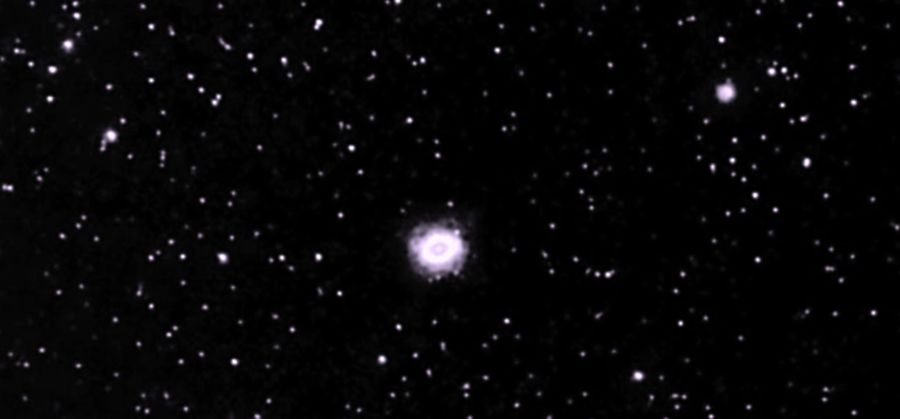
I'm on a roll now Marc , check it out still a lot of tweaking and touchin up. Eventually I'll crop it and and have the Ring and the flames . HA HA ! The colors aren't really what I wanted but, I'm working it and making baby strides on this new technique I'm trying . Thanks friendI normally have two documents (star field & ds... (show quote)
Sep 20, 2021 23:13:21 #
stepping beyond wrote:
Sonny , I just finished stacking my 9-14-21 frames to my already 110 minutes of Ha that has been collected darn near Zenith and beyond. I don't think I'm any closer but, I'm still plugging away at it. I feel the FRUSTRATION in your words.
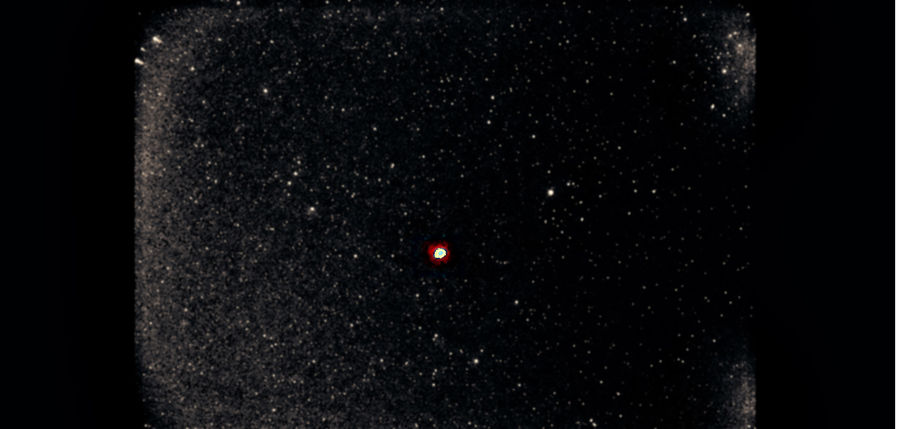
I'm getting pictures, but can't figure out how to get any LRGB, HA7nm, OIII, or SII.
Just Monochrome.
But I'm doing my best to gather files and do Stacking.
Some day.... 
Sep 21, 2021 02:15:58 #
stepping beyond wrote:
I'm on a roll now Marc , check it out still a lot of tweaking and touchin up. Eventually I'll crop it and and have the Ring and the flames . HA HA ! The colors aren't really what I wanted but, I'm working it and making baby strides on this new technique I'm trying . Thanks friend
Certainly getting there mate.
Photo shop can be a tricky piece of software with it's numerous tools of which appear to be similar but totally different if that makes sense (layers & masks especially)
like i said in our PM if you want to drop the two images to me I will take a look & make up step by step tutorial for all
Sep 21, 2021 11:41:59 #
Sonny , stack your frames for each and save the combined channels . Your color comes when you create the color image , do you follow? Ha with Red , G,B which you stack with you Olll and Slll and then add your Lum and create the color image . It really does change to color after you create . Then tweak in whatever software you're using and save as JPEG then what I do is load into PS and adjust it with curvres, levels, color adjust and ASTR TOOLS. Do you follow? I'm doing what I can , it's raining now for a couple then onto the Eagle nebula and Andromeda.
Sep 21, 2021 14:59:17 #
Ballard
Loc: Grass Valley, California
SonnyE wrote:
I'm getting pictures, but can't figure out how to ... (show quote)
Hi SonnyE
Here is a short synopsis of my steps for LRGB, HA, OII and S2.
For each separate filter type
Calibrate the frames (i.e. bias, darks, flats).
Stack the the frames for the filter type.
Some denoise of the filter type. (May include deconvolution).
Stretch each type.
For LRGB I pass the stretched version of each filter type into the LRBG process in pixinsight.
The result may need some background neutralization to get out any off color tint (usually green).
Then process the results with the curves transformation in modify color, saturation and luminance until I get it looking decent.
(I've also tried a techniques where you add the RGB colors and leave out the Luminance and add it back in at the end after getting the colors the way you want it (I did this with the 60 mega-pixel version of M31).
For adding in HA I would use pixel math to add together the stretched image of Red and HA and then process as above.
For Narrow band only images I would do the following.
For HA, OIII and SII I would use the SII as the Red channel, HA as the Green channel and OIII as the blue channel (Hubble Palette) and then combine the stretched images of each with LRGB process but not include any luminance. Then use the curves transform as above. I'm not sure if this is the best way but I have gotten it to work.
Sep 22, 2021 07:53:22 #
Another problem I have is adding the calibration frames using CCDstack , it keeps telling me that they don't match the frame library. I have them in a Dark , Flat and Dark flat library and I specify for each. Do I just need to go through and calibrate the same focus position due to my fpos changing every 3-4 days? My flats should work without any hitch but, I end up shooting more at the end of the night , flats are a real pain for me . I've never got them to work . Making a good flat is nerve racking or am I over thing ? I add my dark flats with my flats and can't tell if they're are right , Help?
If you want to reply, then register here. Registration is free and your account is created instantly, so you can post right away.