Cygnus
Aug 27, 2021 01:08:35 #
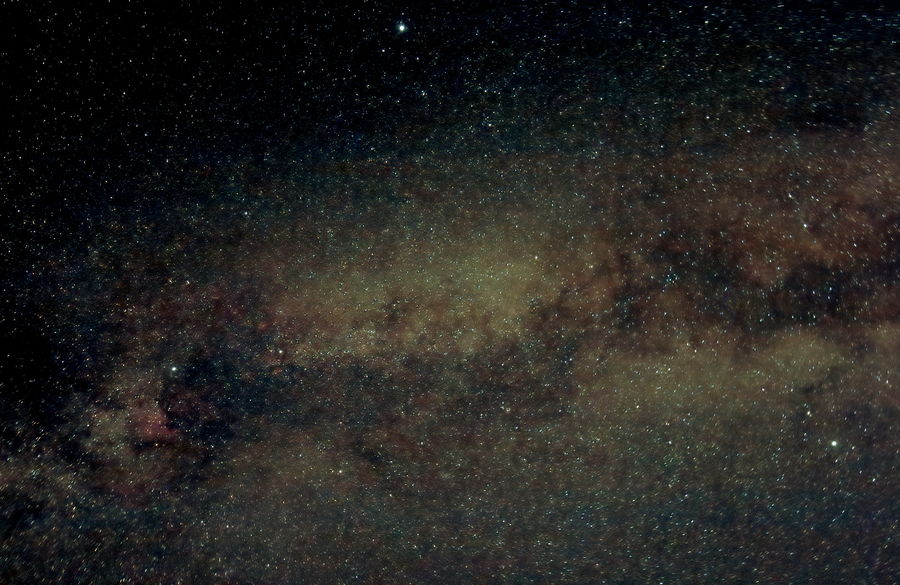
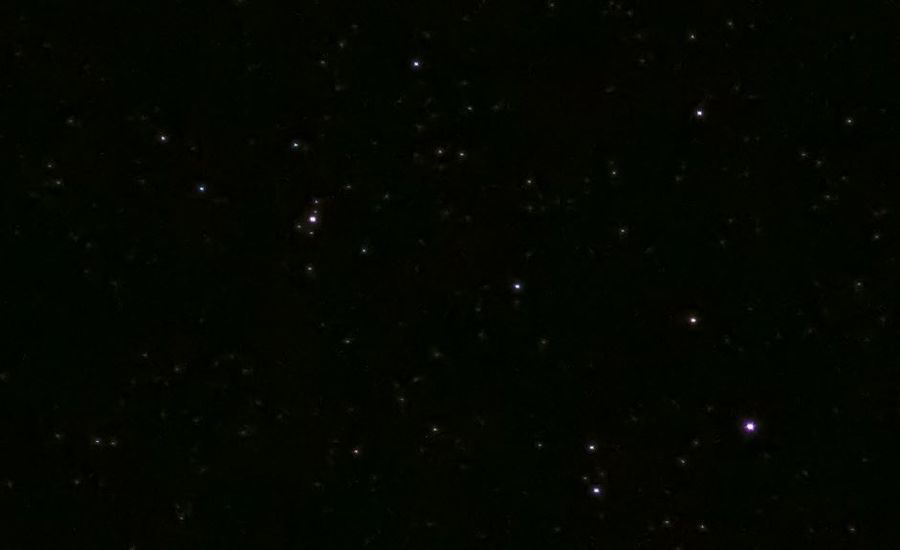
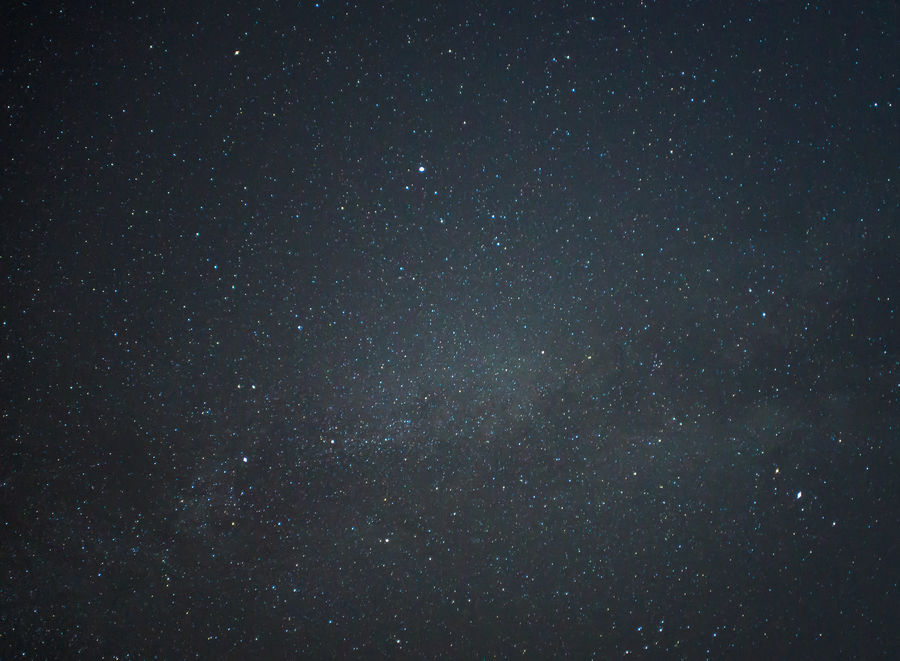
I was experimenting with my Canon 60Da on a tripod shooting the Cygnus area. This image is a stack of 15 subs at 8 sec each through a Canon 16-35mm @23mm, f4.5, ISO 6400. You can see the North America Nebula, Pelican and The Double Double, and if you squint the Ring is in there somewhere. I'm sure I over processed it, but this is the result.
Aug 27, 2021 20:36:55 #

Aug 28, 2021 01:42:01 #

alberio wrote:
I was experimenting with my Canon 60Da on a tripod shooting the Cygnus area. This image is a stack of 15 subs at 8 sec each through a Canon 16-35mm @23mm, f4.5, ISO 6400. You can see the North America Nebula, Pelican and The Double Double, and if you squint the Ring is in there somewhere. I'm sure I over processed it, but this is the result.
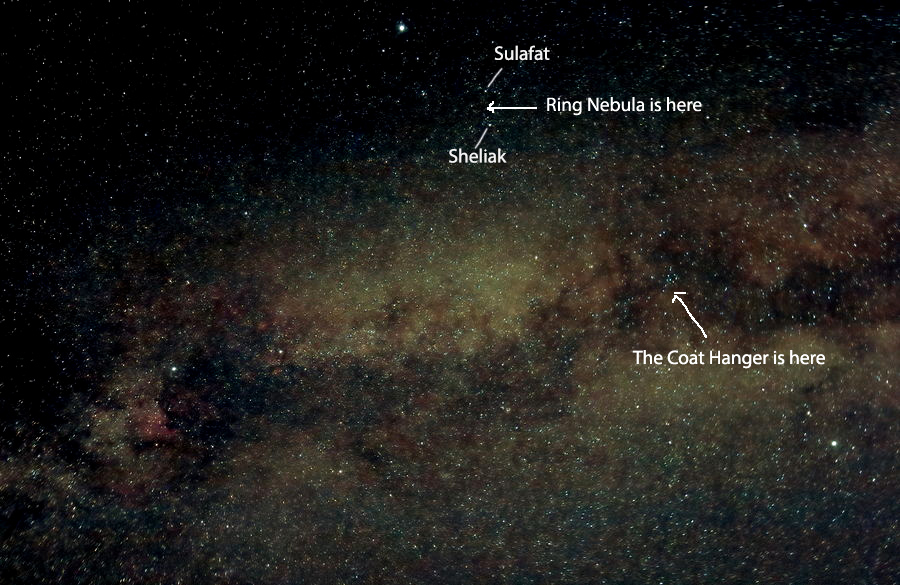
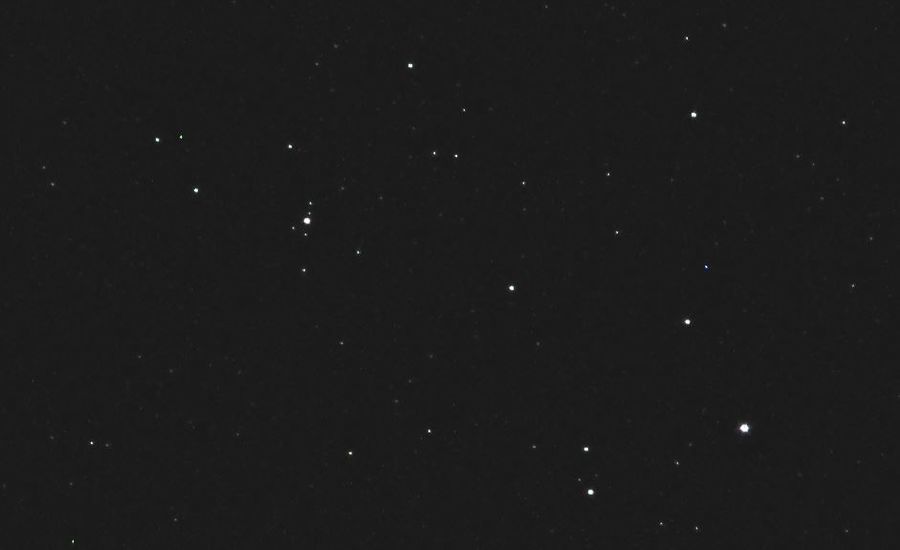
I have pointed out where the Ring Nebula is. But it is beyond squinting. It can be seen, barely, at 300mm. And also a favorite - The Coat Hanger.
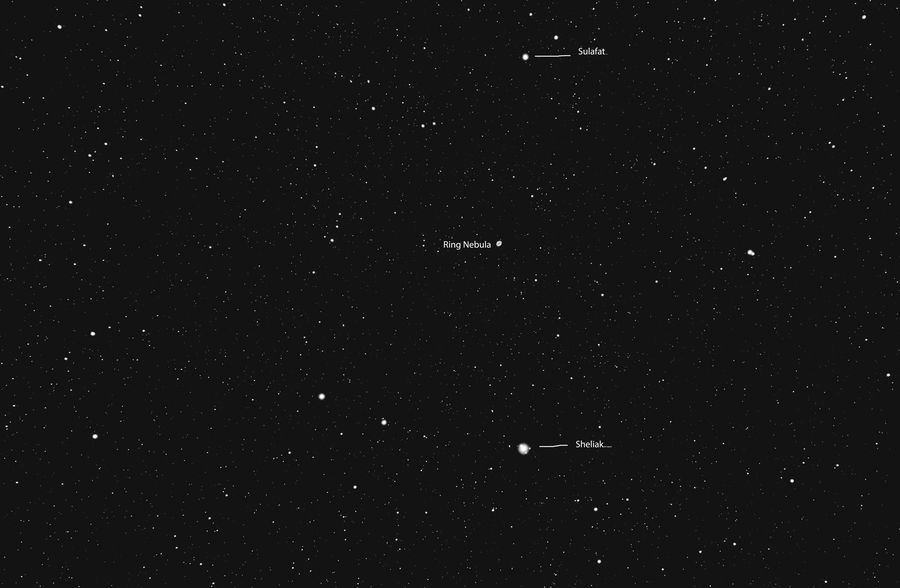
Just to show the Ring Nebula, this shot is at 360mm with an APS-C camera which makes it about 540mm effective FL. The camera is monochromatic, so there is no color. But in the center is the Ring Nebula.
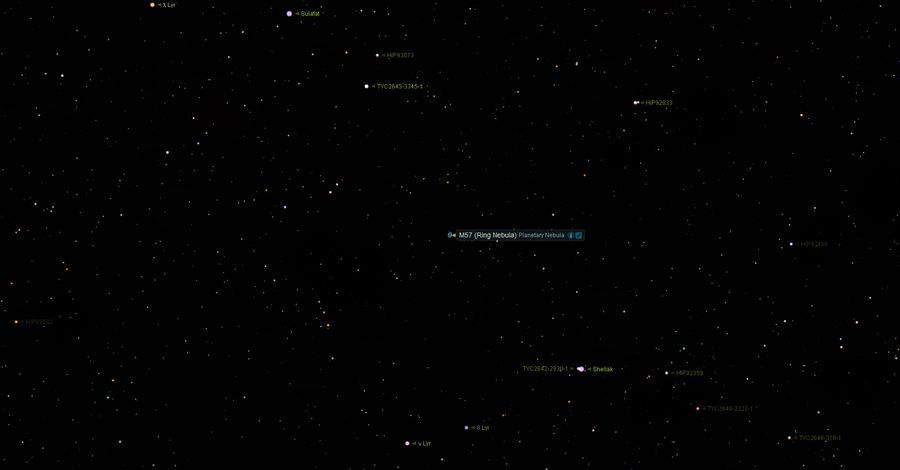
And an image generated by StarryNight with some labels.
Aug 28, 2021 08:02:18 #
JimH123 wrote:
I have pointed out where the Ring Nebula is. But it is beyond squinting. It can be seen, barely, at 300mm. And also a favorite - The Coat Hanger.
Just to show the Ring Nebula, this shot is at 360mm with an APS-C camera which makes it about 540mm effective FL. The camera is monochromatic, so there is no color. But in the center is the Ring Nebula.
And an image generated by StarryNight with some labels.
Just to show the Ring Nebula, this shot is at 360mm with an APS-C camera which makes it about 540mm effective FL. The camera is monochromatic, so there is no color. But in the center is the Ring Nebula.
And an image generated by StarryNight with some labels.
If you download the image and expand to its maximum, I believe one of the objects between the bright stars could be M57. Maybe wishful thinking on my part.
Aug 28, 2021 11:54:35 #
alberio wrote:
If you download the image and expand to its maximum, I believe one of the objects between the bright stars could be M57. Maybe wishful thinking on my part.
Probably wishful thinking.
A little math:
For my image using a 360mm scope on a APS-C camera is an effective FL of 540mm and is 6000 x 4000. I did stack and I did crop, but so did you. I will ignore the cropping for this exercise on both cameras.
If I enlarge my image of the Ring Nebula large enough to count pixels, the vertical direction covered 36 pixels.
The Canon 60Da is 5742 x 3648 pixels. If it had been using the same scope I was using, the Ring Nebula extend 39.5 pixels high. (4000/3648 x 36 = 39.5)
But your lens was a wide angle lens and was set to 23mm which when multiplied by 1.5 = 34.5mm effective FL.
If I now divide 540mm by 34.5mm, I get 15.65
Using that ratio, I need to divide 36 pixels by 15.65 to get 2.5 pixels high for how large the Ring Nebula would appear on your image with the 23mm FL. On the right are two really dim stars that are close to that 2.5 pixel dimension high.
Chances are you would not be able to tell something this small from the overall noise.
But this image also shows something about Sony's lossy RAW compression. Take a look at the two bright stars on the left side. Notice some splattering of some blacker pixels around them. What we are seeing is the effect of lossy compression. A camera without lossy compression would not show these blacker pixels such as the Sony A7ii which would have been a better camera for conversion to monochrome imaging.
In the attached image, I have enlarged my image to the point I can see individual pixels.
************************************************************
I am going to show something I found that seems to correct the splattering of unwanted darker pixels surrounding the stars. Somehow, Gigapixel AI seems to be able to correct this if I resize by at least 1.2x.
Here is an example close up of some of the stars. I deleted the original image that got darkened by Gigapixel AI as I found that it was because I ran Gigapixel AI on the 8-bit JPG file. Went back (and lightened the TIF file - just in case) and re-ran Gigapixel AI at 1.2x and found that there was no such darkening effect using the 16-bit TIF file. Attached is the new "after" shot showing that it cleaned up the splattering of darker pixels surrounding stars left over from Sony's lossy RAW in camera.
By the way, I have tried other resizing programs, and they can't do what Gigapixel AI is doing. They enhance the splattered dark pixels rather than fix them. I tried this with ON1 Resize and Adobe's Super Resolution.
Aug 28, 2021 13:20:45 #
Adding some shots taken a couple years ago which I showed on this site at that time. I had noticed that all my images of the Milky Way just didn't look too good. The follow images show what is happening. Normally, we use a conventional editor such as Photoshop to work on the images. But what I found is that the Demosaicing used by these editors is just not friendly to stars.
Understand that Demosaicing is not an exact science. Many different algorithms exist and with most applications, the emphasis is getting colors as exact as possible at the cost of overall detail. I am going to compare that with an Application by the name of Nebulosity 4. The emphasis is now to get the detail right at the cost of much poorer color accuracy. The difference is staggering.
I am adding a before/after image of the Milky Way. I started with a very poor image and tried as best I could to do something with it in Lightroom. And I admit that it didn't do much for it.
I then opened the RAW file, this time in Nebulosity 4 and let it do the Demosaicing and also did some optimization. Then went to Photoshop to finish up. Its better than the first image, but not great. And is meant to show the difference. Ignore the coma and astigmatism of this lens. Decided not to use that 20mm Minolta f2.8 lens again for the Milky Way.
Moderate closeup demosaiced in Photoshop
(Download)
Moderate closeup demosaiced in Nebulosity 4
(Download)
An even closer closeup demosaiced in Photoshop
(Download)
An even closer closeup demosaiced in Nebulosity 4

(Download)
Ugly Milky Way image processed in Lightroom
(Download)
Attempt at improving it using Nebulosity 4

(Download)
Sep 6, 2021 21:44:41 #

Sep 6, 2021 23:42:49 #
Sep 7, 2021 02:40:41 #
DickC wrote:
Is that the Milky Way??
Yes, it is part of the Milky Way. Vega near the top. Deneb to the lower left. And Atair to the lower right.
Sep 7, 2021 08:20:05 #
Sep 7, 2021 09:17:07 #
DickC wrote:
Really nice photo!! 
Thank You. I was just experimenting with the 16-35mm lens. It passed my test.
Sep 7, 2021 11:08:12 #
If you want to reply, then register here. Registration is free and your account is created instantly, so you can post right away.