Asking for Suggestions and Help
Aug 20, 2021 16:20:30 #
StanMac
Loc: Tennessee
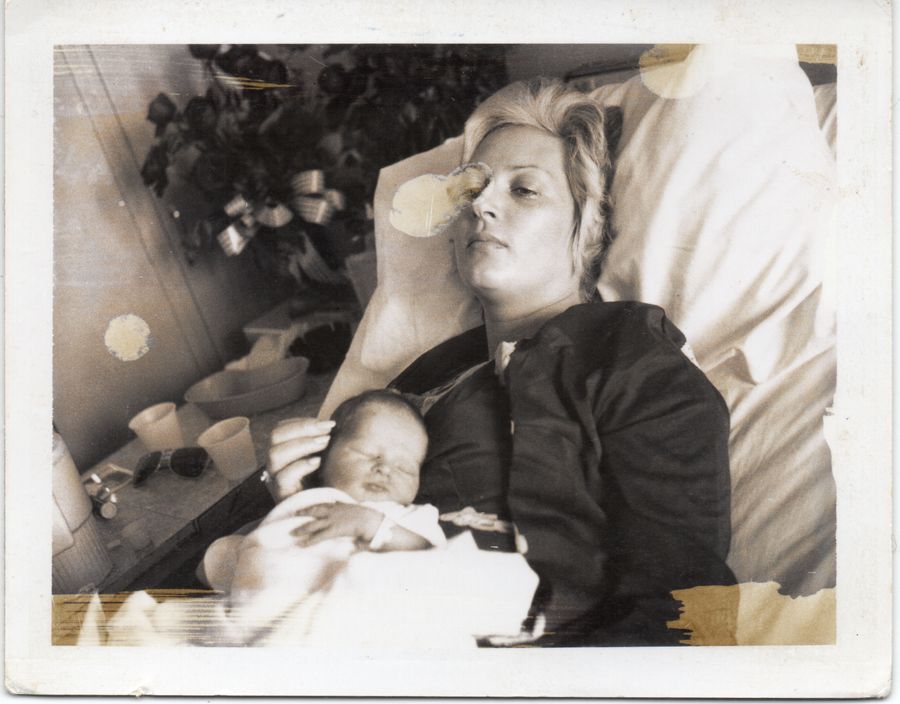
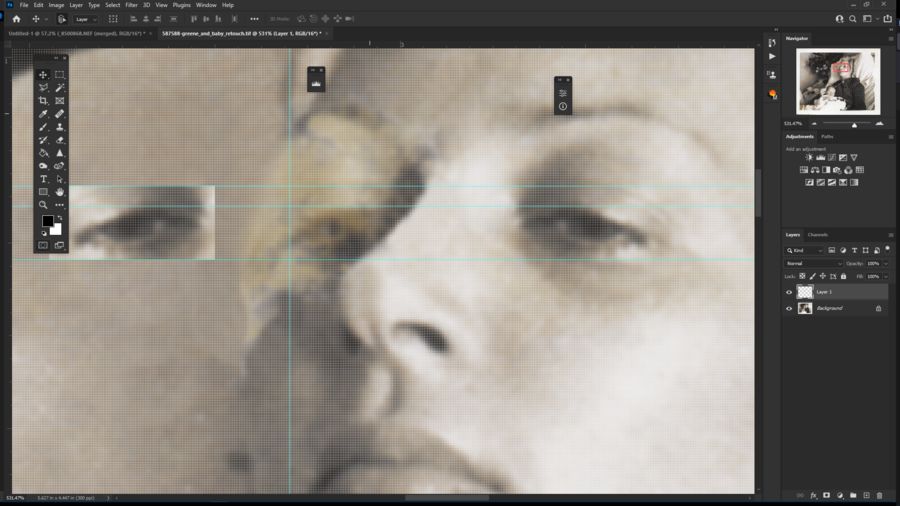
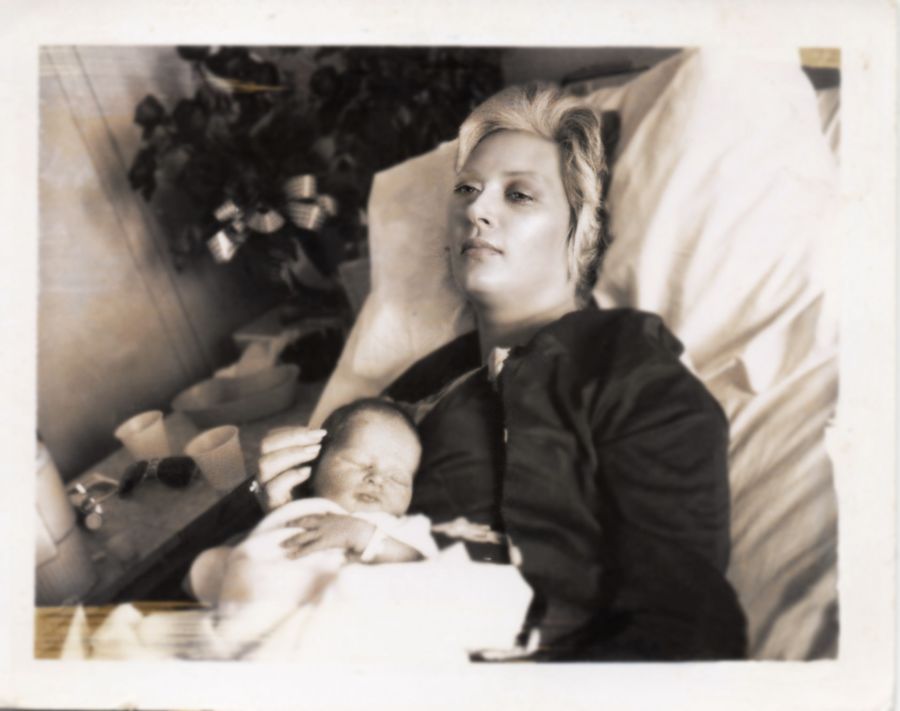
A friend asked me to clean up the damage on this old Polaroid photograph. The damage was caused by something being dripped on and/or wiped across it in the past. The original surface of the photo feels smooth and unpitted, so whatever dripped on it affected the image dye structure and not the finish somehow.
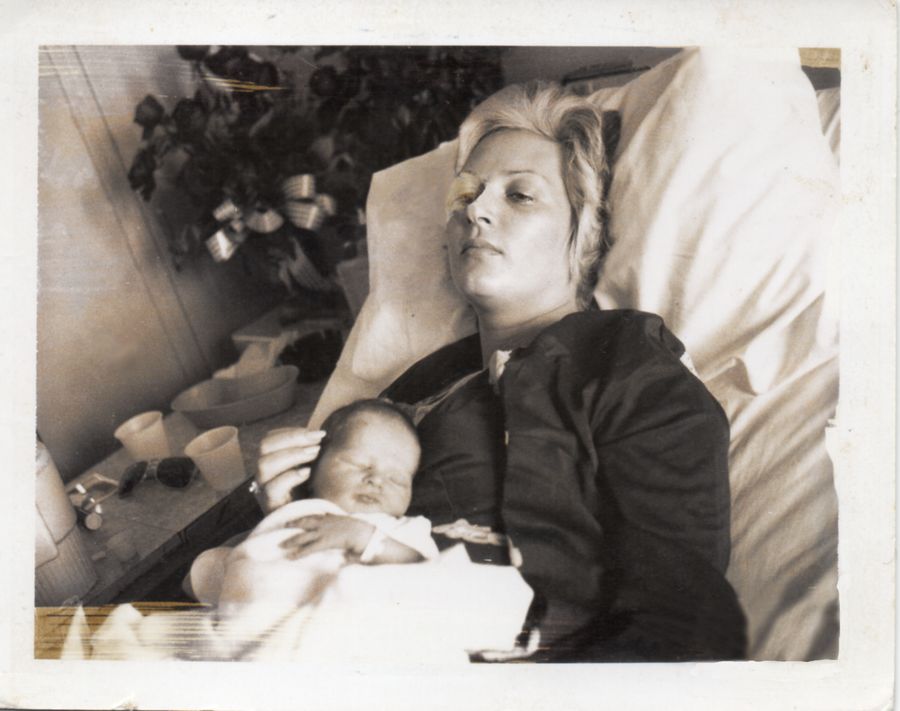
The first image is the photo as scanned without any modifications dialed in. The second image is where I am with it at the moment. I scanned it to a .tiff file at 400dpi. Opening it in Photoshop Elements 2018, I used the Quick Selection tool to select the larger spots and fill them using Content Aware fill and finished them up using the Clone tool.
The area around the left eye is the area that I can't figure out how to clean up. Curiously, you can see her left eye through the yellowish discoloration, but after trying several times to clone in areas to bring the tone closer to what it should be I ended up with just a mess. I thought I could use her right eye as a substitute, but after trying that it still looked weird (I'm still working on that exercise, though). Also, the eyes are a bookmatch shape and flipping the copied eye gives me a lighting issue.
I'm looking for ideas or pointers on how to deal with that left eye.
Stan
Aug 20, 2021 16:30:08 #

StanMac wrote:
.../...
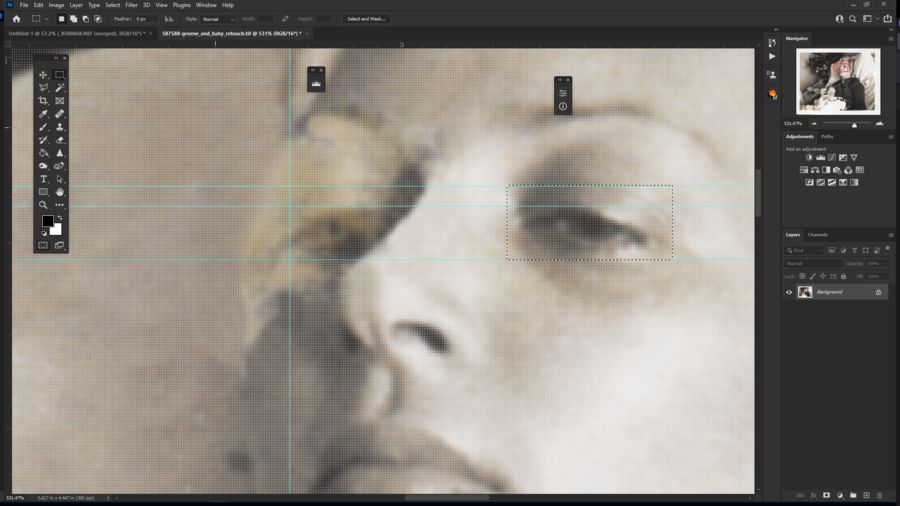
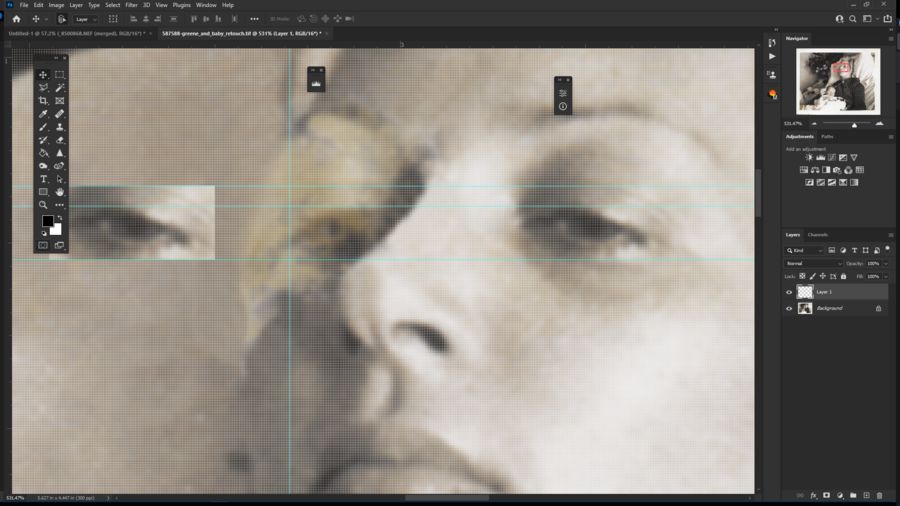
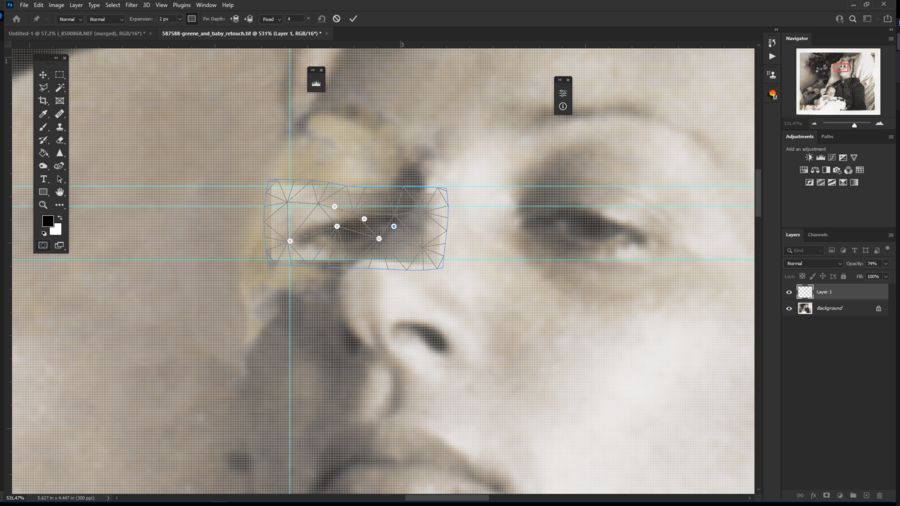
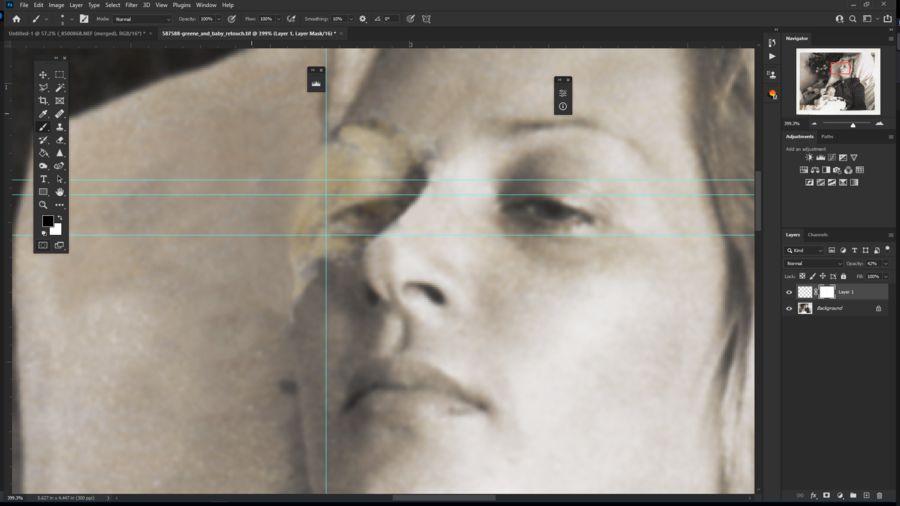
Make a selection of the right eye.
Copy and paste
Flip horizontally
Create guide for:
► Top of the left eye
► Bottom of the left eye
► Left corner of the left eye
Use move/rotate with a transparency of 60/70% to check the position.
Use warp/pupped warp to match both the size and orientation.
Mask out what is not needed from your selection.
You should have a good approximation.
Note: These are PS CC steps. If you have a different software, adapt this process.
Please understand, I am not used to do that, but this is the best method I know of. The final result depends on you (and do not count me there)... The eye right corner should be hidden behind the nose
Guides setup (Ctrl-on ruler and drag toward the image to position)

(Download)
Selection (use anything selection tool you want)
(Download)
Copy/paste move selection
(Download)
Flip horizontally
(Download)
Position and puppet warp
(Download)
Warp to requirement, mask the selection adjust transparency
(Download)
Aug 21, 2021 14:12:46 #

Rongnongno wrote:
Make a selection of the right eye. br Copy and pas... (show quote)
Ron
Thanks for sharing your technique.

Aug 21, 2021 15:33:11 #
Not an easy task! I too would use a copy of her left eye flipped horizontally and warped in the way Ron suggests. It will save a lot of time in the long run. You could make a reference layer for the face shape (which, however you do it, is going to be your best guess as there’s not much to go on), then use that selection when cloning the final shape on the pillow. Hope you’re using a new layer to clone onto with ‘CurrentLayer&Below’ selected. Just remembered you’re not in full Ps, so I’m not sure how relevant my suggestions are. Sorry about that Stan. Let’s see your final result when you get there.
Dave.
Dave.
Aug 21, 2021 17:28:48 #
Wuligal
Loc: Slippery Rock, Pa.
almost...not quite.
I copied her left eye, flipped it then blended it with the clone and smudge tool. Used Guassian (sp) blur and eraser for finishing touch.
I copied her left eye, flipped it then blended it with the clone and smudge tool. Used Guassian (sp) blur and eraser for finishing touch.
Aug 21, 2021 17:31:57 #
StanMac
Loc: Tennessee
I've have begun a multilayer process of using the lady's left eye to give the right eye some definition. But I still have to deal with getting rid of that yellow stain. It actually looks worse on the scanned image than on the original photograph - I don't know why that is. I am continuing to work on this problem when I have time and will apprise everyone on this thread of my final result. I thank Rongnongno for showing the images of his process. His is the direction that I had resigned myself to go to get a decent looking eye in there, but I'm still wrestling with the yellow stain which obscures the outline of the lady's face and the eyebrow. I will have to figure out how to get texture with my cloning so the area won't look extremely smooth. I'm learning more about my software (PSE 2018) as I go through this. Thanks everyone for your pointers!
Stan
Stan
Aug 21, 2021 17:38:25 #
StanMac
Loc: Tennessee
Wuligal wrote:
almost...not quite.
I copied her left eye, flipped it then blended it with the clone and smudge tool. Used Guassian (sp) blur and eraser for finishing touch.
I copied her left eye, flipped it then blended it with the clone and smudge tool. Used Guassian (sp) blur and eraser for finishing touch.
Now that is wonderful, Wuligal! I'd say perfection! (you posted while I was composing my last post). The lady would be more than pleased with that result! What PP software are you using? I will try to get close to that result soon as I have an afternoon to devote to it.
Stan
Aug 21, 2021 18:16:12 #
Wuligal
Loc: Slippery Rock, Pa.
Photoshop. Glad you were pleased. Use it if you like.
I took the skin from the left eye and put it on the right. I adjusted the color a bit then used Gaussian blur to make it match.
I took the skin from the left eye and put it on the right. I adjusted the color a bit then used Gaussian blur to make it match.
If you want to reply, then register here. Registration is free and your account is created instantly, so you can post right away.