Question about having prints made
Aug 1, 2021 10:20:48 #
rhudston wrote:
I am trying to have some images printed but they k... (show quote)
Be sure you turn off "color correction" when you order photos.
Aug 1, 2021 10:46:22 #
In addition to the other good suggestions, ask the print lab you use to send you some calibration jpegs (of various image situations) that have colors that look right to them. Once you get them, view them on your calibrated monitor using the software you use to make your print files. If the colors look good to you, you ought to get back prints with the same colors.
Your print lab should tell you what specific color space they need to make your prints. And some tell you what steps to use in programs like Photoshop to get the Jpeg with the color space they need.
Your print lab should tell you what specific color space they need to make your prints. And some tell you what steps to use in programs like Photoshop to get the Jpeg with the color space they need.
Aug 1, 2021 10:50:59 #

I have 2 monitors on my PC and they are calibrated. I have my prints made at Walmart. I just take my USB thumb drive to the kiosk. Order prints then wait to pick them up. Although the prints never match what I have on the monitor they are close enough that I have no complaint.
Aug 1, 2021 14:02:22 #
hjkarten
Loc: San Diego, California
I previously had my prints done at COSTCO's on-site printing facility. Results have been outstanding, and if I didn't like the resulting prints, they were glad to reprint a modified version. They no longer have photo printing locally. I have been reluctant to order large prints from them over the internet, as I worried that my 8x10 to 20x30 prints will be bent by the postal service. What has been the experience of those who continue to use COSTCO?
Aug 1, 2021 14:12:29 #
jdmiles
Loc: Texas
Take some new pictures and include a grey card in the picture. If shooting raw you can then eliminate any color cast in your editor with the white balance tool. If you are shooting jpgs then set the white balance in the camera using the grey card. You obviously have a big error as you have a very blue image you say has a yellow color cast.
Stick to one editor until you get the bugs out. I would recommend shooting raw and using capture one. Do not change to any other editor until you get good results.
You also mention using an unmanaged workflow in PSE. Your workflow should always be manged. You need to know where your calibrator stored your display calibration and make sure your editor is using it. With your equipment you should not be adjusting to get it to look like the print. You should be adjusting to get the image to look correct on the display. When calibrated and managed correctly the print will be acceptable if you proof it with the printer profile. I don't know anything about your monitor but you say it is 99% Adobe RGB so I am assuming it is a good monitor.
Aug 1, 2021 14:14:06 #

rhudston wrote:
I am trying to have some images printed but they k... (show quote)
Most devices are set up for sRGB...my images looked like crap on UHH until I switched to sRGB.
Aug 1, 2021 16:50:36 #

hjkarten wrote:
I previously had my prints done at COSTCO's on-site printing facility. Results have been outstanding, and if I didn't like the resulting prints, they were glad to reprint a modified version. They no longer have photo printing locally. I have been reluctant to order large prints from them over the internet, as I worried that my 8x10 to 20x30 prints will be bent by the postal service. What has been the experience of those who continue to use COSTCO?
I recently did a large order that included various sizes. The small ones shipped flat in a heavy envelope. Larger ones were rolled in a good-sized tube. I unrolled them and weighted them flat for several days. I'm not fond of that.
Aug 1, 2021 17:05:05 #

AzPicLady wrote:
I recently did a large order that included various sizes. The small ones shipped flat in a heavy envelope. Larger ones were rolled in a good-sized tube. I unrolled them and weighted them flat for several days. I'm not fond of that.
Alternately, you might consider an alternative such as Bay Photo. I’ve found their flat packaging to be excellent, and if you have a calibrated workflow, you can save ~40% by not specifying color correction.
Aug 1, 2021 18:00:29 #

rhudston wrote:
I am trying to have some images printed but they k... (show quote)
Ex-lab guy here... I ran the color correction department of a portrait photo lab for five years.
First of all, check your environment for adjusting images. It should be very dim. The number one reason prints are too dark is that the monitor is too bright, because the room light is too bright. Be sure that NO direct light is falling on your monitor. A single 5000K CFL or LED bulb bounced off a white ceiling in a corner behind the monitor is about right. You need very indirect, diffused, dim light.
Next, be sure your computer desktop is gray. I'm talking about the monitor desktop, not the desk the monitor sits on, but that should be gray to black, too.
When you calibrate the monitor, use these aim points:
Black Point 0.5 candelas per square meter (cd/m^2)
White Point 80 to 120 cd/m^2 (We used 105 cd/m^2 in the lab)
Gamma 2.2
Initial color temperature setting 5000K at 80 cd/m^2, 5800K at 100 cd/m^2, or 6500K at 120 cd/m^2.
Be sure the monitor profile is enabled in your operating system.
If you save JPEGs at the camera, use sRGB at the camera.
If you save raw files at the camera, the software you use must be capable of converting your specific camera model's raw files.
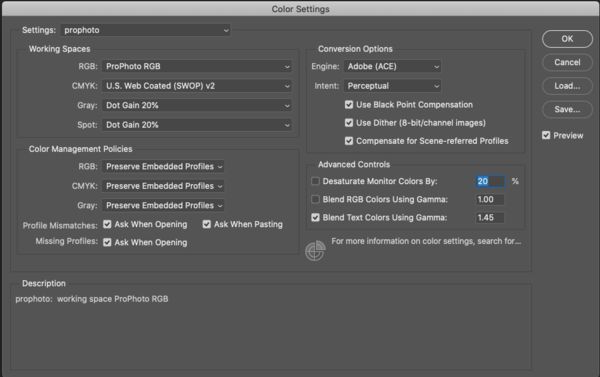
If your software has a color management control panel, set similar settings as in example one, below.
If your software has a way to set different profiles for two different monitors, be sure you choose the latest custom profile you made for each one.
When saving or exporting files, be sure the correct profile conversion takes place. If you edit in ProPhoto RGB, be sure to convert to sRGB for the Internet or conventional photo labs. Reserve other choices for companies that request them.
If you print your own work, be sure to install manufacturer profiles for all third party papers you like. Go to the paper manufacturer's website and download the generic profiles. Then install as directed.
Let your software manage color... turn off color management by the operating system or printer. The only exception to this is when the proper OEM paper profile is installed for your printer, and the printer driver can adequately handle the conversion.
If you print black-and-white, fully desaturate JPEG images. If your lab prints B&W on color paper, expect some color cast in their output, anyway.
When you open a raw file, it opens in the color space of your camera, and is converted to a bitmap in the working color space of your editor. When you edit it, you are doing so within the "bounds" of the working color space. That's why you want the widest gamut possible, i.e.; ProPhoto RGB.
The software converts the image from ProPhoto RGB to your monitor profile. You can soft proof if you have a soft proofing profile set up in your software. That puts the printer profile between ProPhoto RGB and your monitor profile, so you see a simulation that is closer to final results. It only works if the profile is current, the printer is calibrated, and the processor is in control, so expect minor variations.
Aug 1, 2021 18:15:13 #
TriX wrote:
Alternately, you might consider an alternative such as Bay Photo. I’ve found their flat packaging to be excellent, and if you have a calibrated workflow, you can save ~40% by not specifying color correction.
The last time I checked, their prices were about double those of Costco. I'll take another look.
Oh, and by the way, I usually use Adobe 1998 colour. However, a recent one I sent in for a canvas print (to Costco), I put into the "pro" colour space. It looked really weird when I uploaded it. I called the lab, and the fellow I spoke with said it looked "fine." It came out exactly as I intended.
Aug 1, 2021 18:20:32 #
tcthome
Loc: NJ
rhudston wrote:
Hello and thanks for the reply. br br 1), 1a), ... (show quote)
THESE PHOTOS LOOK GOOD ON MY IPAD & WOULD EXPECT THEY WOULD LOOK GOOD ON MY COMPUTER MONITOR ALSO. Don’t expect to much with the last photo. I would close or partially close your window blinds if any. Does your calibration device monitor & adjust for the ambient light in the room?Also , follow any instructions the print lab gives you including using their ICC Profile when soft proofing. Good luck.
Aug 1, 2021 18:37:20 #
AzPicLady wrote:
The last time I checked, their prices were about double those of Costco. I'll take another look.
Oh, and by the way, I usually use Adobe 1998 colour. However, a recent one I sent in for a canvas print (to Costco), I put into the "pro" colour space. It looked really weird when I uploaded it. I called the lab, and the fellow I spoke with said it looked "fine." It came out exactly as I intended.
Oh, and by the way, I usually use Adobe 1998 colour. However, a recent one I sent in for a canvas print (to Costco), I put into the "pro" colour space. It looked really weird when I uploaded it. I called the lab, and the fellow I spoke with said it looked "fine." It came out exactly as I intended.
Download their Bay ROES Ap which gives you the complete price list and compare prices for non color corrected prints. If you’re confident of your calibration, it will save a ton of $.
Aug 2, 2021 16:47:43 #

BebuLamar wrote:
I have 2 monitors on my PC and they are calibrated. I have my prints made at Walmart. I just take my USB thumb drive to the kiosk. Order prints then wait to pick them up. Although the prints never match what I have on the monitor they are close enough that I have no complaint.


If you want to reply, then register here. Registration is free and your account is created instantly, so you can post right away.